1. Welcome to Tacoma World!

    You are currently viewing as a guest! To get full-access, you need to register for a FREE account.

    As a registered member, you’ll be able to:
    • Participate in all Tacoma discussion topics
    • Communicate privately with other Tacoma owners from around the world
    • Post your own photos in our Members Gallery
    • Access all special features of the site

ramonortiz55 4runner build: La Venenosa - For Sale!

Discussion in '4Runner Builds' started by ramonortiz55, Apr 9, 2015.

  1. Jul 3, 2017 at 8:26 AM
    #521
    ramonortiz55

    ramonortiz55 [OP] Not A Well-Known Member

    Joined:
    Nov 28, 2012
    Member:
    #92013
    Messages:
    34,678
    Gender:
    Male
    First Name:
    Ramon
    Texas
    Vehicle:
    2015 DCSB Offroad 4x4
    stock
    excite my Mojo
     
  2. Jul 3, 2017 at 11:55 AM
    #522
    Bennett707

    Bennett707 Station707

    Joined:
    Apr 28, 2012
    Member:
    #77793
    Messages:
    33,231
    Oregon
    Vehicle:
    No more taco life for me
    I'll take those rago panels.
     
  3. Jul 3, 2017 at 11:55 AM
    #523
    ramonortiz55

    ramonortiz55 [OP] Not A Well-Known Member

    Joined:
    Nov 28, 2012
    Member:
    #92013
    Messages:
    34,678
    Gender:
    Male
    First Name:
    Ramon
    Texas
    Vehicle:
    2015 DCSB Offroad 4x4
    stock
    nah
     
  4. Jul 3, 2017 at 11:58 AM
    #524
    Bennett707

    Bennett707 Station707

    Joined:
    Apr 28, 2012
    Member:
    #77793
    Messages:
    33,231
    Oregon
    Vehicle:
    No more taco life for me
    Stupid expensive tho
     
  5. Jul 6, 2017 at 9:40 AM
    #525
    ramonortiz55

    ramonortiz55 [OP] Not A Well-Known Member

    Joined:
    Nov 28, 2012
    Member:
    #92013
    Messages:
    34,678
    Gender:
    Male
    First Name:
    Ramon
    Texas
    Vehicle:
    2015 DCSB Offroad 4x4
    stock
    I was able to obtain a 3rd gen 4runner Rago Fabrication Modular panel for my rear side windows.

    These panels will require drilling trim and removing the back cargo panels for proper installation.

    I highly recommend:

    1. Beer.

    2. A friend to help you - This is not a solo job.

    3. Time - This is not a job you want to start after work, during the week. You will need at least half a day to install both panels.

    [​IMG]

    You will need a rivnut tool, a drill, a step bit that steps up to at least 3/4" diameter, and 1/8" pilot bit, and a 25/64" drill bit.

    The 25/64" drill bit is important since the holes for the rivnuts must be EXACT. I recommend making sure the rivnuts in the packaging are all the same diameter and the drill bit is sized accordingly. There can not be room for error here.

    [​IMG]

    Make sure you have a helper. Even if it is your feline.

    [​IMG]

    First order of business is to remove the rear cargo panels. The first thing to be removed is the hatch floor trim -

    [​IMG]

    [​IMG]

    Next, remove the top panel where the hatch light is at.

    [​IMG]

    This is done by removing the light cover:

    [​IMG]

    Removing the four screws and the bulb:

    [​IMG]

    [​IMG]

    Pry the lighting bracket away from the roof trim carefully and pull out the power plug:

    [​IMG]

    at the ends of the roof trim there will be two small brass screws, remove these as well:

    [​IMG]

    Now the top trim can be removed by pulling firmly:

    [​IMG]

    [​IMG]

    Next we remove cargo cover brackets, removing the visible bolts will release them

    [​IMG]

    [​IMG]

    The shoulder panel must now be removed (picture was taken before I removed the cargo cover bracket):

    [​IMG]

    To remove the shoulder panel, the door floor trim must be removed, locate two screws and remove the door floor trim by firmly pulling away.

    [​IMG]

    The shoulder trim can now be removed by pulling firmly. No screws are located on the shoulder trim.

    [​IMG]

    The main cargo panel can now be removed. In this case, the passenger side:

    [​IMG]

    [​IMG]

    We will now locate the TWO outer holes where the trim fasteners push into. In the picture below, you will see four holes below the window. It is the two outer holes.

    [​IMG]

    Pointing at the left and right hole respectively:

    [​IMG]

    [​IMG]

    Once they have been located - drill out the hole to the size of the rivnut:

    [​IMG]

    Use the step bit to de-burr the holes. We want nice clean holes to set the rivnut:

    [​IMG]

    Test fit and set rivnut:

    [​IMG]

    [​IMG]

    [​IMG]
     
    Last edited: Jul 6, 2017
    Watt maker and boostedka like this.
  6. Jul 6, 2017 at 9:40 AM
    #526
    ramonortiz55

    ramonortiz55 [OP] Not A Well-Known Member

    Joined:
    Nov 28, 2012
    Member:
    #92013
    Messages:
    34,678
    Gender:
    Male
    First Name:
    Ramon
    Texas
    Vehicle:
    2015 DCSB Offroad 4x4
    stock
    Drink Beer. Pet Cat.

    Next:

    A pilot hole will be drilled from the BACK end of the trim panel.

    Remember where the rivnuts are?

    The trim fasteners that were in this location are now obsolete. Remove them from their seats on the back of the panel. Use the center of the fastener seat to create your pilot hole.

    [​IMG]

    Grab the step bit and drill out to 3/4" hole, stopping periodically to check the fitment of the aluminum spacer. You want a nice snug fit. Don't over drill. Be patient.

    [​IMG]

    You can barely see the rim of the fastener seat thru the hole. Use it to make sure you are centered.

    [​IMG]

    Test the spacer for a nice, snug fit.

    [​IMG]

    This is what the back end will look like:

    [​IMG]

    Once the hole in the trim is complete - it will be centered against the rivnuts:

    [​IMG]

    Drill your second hole and install the panel, yes. INSTALL it. Make sure all the fasteners clip in place. Make sure it doesn't wobble. Make sure it is set to STAY. You will see why. This is important.

    Install the top brackets on the modular panel:

    [​IMG]

    [​IMG]

    [​IMG]

    Install modular panel (top brackets not shown here):

    [​IMG]

    Side view for clarity:

    [​IMG]

    Next make sure your friend is holding the panel to where the brackets are away from the window - I have it about a 1/4" clearance.

    Use the slotted holes in the bracket to center the pilot bit, drill thru the trim and mark a location in the metal beyond the trim. This will locate where the rivnut goes.

    Next, drill out the trim hole with the step bit in the same manner as mentioned before, drill your hole for the rivnut and set rivnut.

    The finished spacer install should look like this:

    [​IMG]

    Once the second location has been drilled and set, the panel can now be installed:

    [​IMG]

    [​IMG]

    Same installation procedure for the passenger side:

    [​IMG]

    Install goods and enjoy!

    [​IMG]
     
    Last edited: Jul 6, 2017
  7. Jul 6, 2017 at 1:32 PM
    #527
    boostedka

    boostedka Well-Known Member

    Joined:
    Sep 29, 2011
    Member:
    #64367
    Messages:
    5,856
    Gender:
    Male
    First Name:
    James
    NM
    Vehicle:
    2013 DCSB 6MT, 2004 4runner
    Sweet write up!
     
  8. Jul 6, 2017 at 1:50 PM
    #528
    Bennett707

    Bennett707 Station707

    Joined:
    Apr 28, 2012
    Member:
    #77793
    Messages:
    33,231
    Oregon
    Vehicle:
    No more taco life for me
    okay write up.
     
    Gunshot-6A likes this.
  9. Jul 22, 2017 at 7:53 PM
    #529
    ramonortiz55

    ramonortiz55 [OP] Not A Well-Known Member

    Joined:
    Nov 28, 2012
    Member:
    #92013
    Messages:
    34,678
    Gender:
    Male
    First Name:
    Ramon
    Texas
    Vehicle:
    2015 DCSB Offroad 4x4
    stock
    @HTXtaco3.14 you need a build thread to document your truck
     
  10. Jul 22, 2017 at 9:27 PM
    #530
    HTXtaco3.14

    HTXtaco3.14 Well-Known Member

    Joined:
    Jul 9, 2017
    Member:
    #223607
    Messages:
    65
    Gender:
    Male
    Houston
    Vehicle:
    2019 DCSB SR5 Taco
    Nah luego me la roban
     
  11. Jul 22, 2017 at 9:40 PM
    #531
    ramonortiz55

    ramonortiz55 [OP] Not A Well-Known Member

    Joined:
    Nov 28, 2012
    Member:
    #92013
    Messages:
    34,678
    Gender:
    Male
    First Name:
    Ramon
    Texas
    Vehicle:
    2015 DCSB Offroad 4x4
    stock
    Oh.
     
    balljoint likes this.
  12. Jul 22, 2017 at 9:40 PM
    #532
    ramonortiz55

    ramonortiz55 [OP] Not A Well-Known Member

    Joined:
    Nov 28, 2012
    Member:
    #92013
    Messages:
    34,678
    Gender:
    Male
    First Name:
    Ramon
    Texas
    Vehicle:
    2015 DCSB Offroad 4x4
    stock
    my
     
    balljoint likes this.
  13. Jul 22, 2017 at 9:41 PM
    #533
    ramonortiz55

    ramonortiz55 [OP] Not A Well-Known Member

    Joined:
    Nov 28, 2012
    Member:
    #92013
    Messages:
    34,678
    Gender:
    Male
    First Name:
    Ramon
    Texas
    Vehicle:
    2015 DCSB Offroad 4x4
    stock
    gosh
     
    balljoint likes this.
  14. Aug 24, 2017 at 5:16 PM
    #534
    Fox2011PM

    Fox2011PM "The Mountains are calling"

    Joined:
    Jan 20, 2012
    Member:
    #71056
    Messages:
    1,230
    Gender:
    Male
    Vehicle:
    '13 DCSB 4X4 TRD OR
    ADS 2.5" CO's w/adj, ADS 2.5" Rears w/ piggybacks, Firestone air bags and 1.5" AAL, SCS SR8s, Tom Woods custom one piece drive shaft....more to come
  15. Aug 24, 2017 at 5:18 PM
    #535
    ramonortiz55

    ramonortiz55 [OP] Not A Well-Known Member

    Joined:
    Nov 28, 2012
    Member:
    #92013
    Messages:
    34,678
    Gender:
    Male
    First Name:
    Ramon
    Texas
    Vehicle:
    2015 DCSB Offroad 4x4
    stock
  16. Aug 24, 2017 at 5:23 PM
    #536
    Fox2011PM

    Fox2011PM "The Mountains are calling"

    Joined:
    Jan 20, 2012
    Member:
    #71056
    Messages:
    1,230
    Gender:
    Male
    Vehicle:
    '13 DCSB 4X4 TRD OR
    ADS 2.5" CO's w/adj, ADS 2.5" Rears w/ piggybacks, Firestone air bags and 1.5" AAL, SCS SR8s, Tom Woods custom one piece drive shaft....more to come
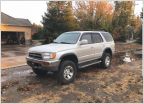
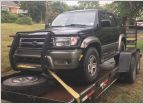
    It is a GREAT price, that's what kinda scares me. I'm gonna look it over really well and drive it. If it runs and drives well, my wife said do it. We are wanting a car she can drive for work so she isn't putting hard city miles on hers. Plus thus one will be fun to build up too. Thanks for the link and the help.
     
  17. Aug 24, 2017 at 5:33 PM
    #537
    ramonortiz55

    ramonortiz55 [OP] Not A Well-Known Member

    Joined:
    Nov 28, 2012
    Member:
    #92013
    Messages:
    34,678
    Gender:
    Male
    First Name:
    Ramon
    Texas
    Vehicle:
    2015 DCSB Offroad 4x4
    stock
    1. Check for rusty frame.
    2. Check for valve cover leak - Feel BEHIND the valve covers for any hidden oil leaks
    3. Check the radiator fluid and transmission fluid - It the color is off, DONT Get it (you will see in the link above why)

    Those are the top things to look into.
     
  18. Aug 24, 2017 at 5:36 PM
    #538
    Fox2011PM

    Fox2011PM "The Mountains are calling"

    Joined:
    Jan 20, 2012
    Member:
    #71056
    Messages:
    1,230
    Gender:
    Male
    Vehicle:
    '13 DCSB 4X4 TRD OR
    ADS 2.5" CO's w/adj, ADS 2.5" Rears w/ piggybacks, Firestone air bags and 1.5" AAL, SCS SR8s, Tom Woods custom one piece drive shaft....more to come
    Will do. It says the major gaskets were replaced, but I'll definitely check. Thanks again
     
  19. Aug 24, 2017 at 5:37 PM
    #539
    ramonortiz55

    ramonortiz55 [OP] Not A Well-Known Member

    Joined:
    Nov 28, 2012
    Member:
    #92013
    Messages:
    34,678
    Gender:
    Male
    First Name:
    Ramon
    Texas
    Vehicle:
    2015 DCSB Offroad 4x4
    stock
    Not a problem.
     
  20. Aug 24, 2017 at 10:07 PM
    #540
    Digiratus

    Digiratus Adventurer

    Joined:
    Mar 26, 2010
    Member:
    #34006
    Messages:
    22,981
    Gender:
    Male
    First Name:
    Mike
    Roaming the PNW
    Vehicle:
    The RedHead
    2002 XtraCab TRD 4x4 SCv6 AutoTrans With Lots of Mods ADS COs w/Compression Adjusters Camburg Uniball UCAs Whiteline Lower Control Arm Bushings Kartek 7" Limit Straps Plastics Guy Front Bumpstops Custom Alcan Springs +800 lbs +3" ADS 10" Stroke Triple Bypass w/Resi Rear Shocks Custom Rear Shock Relocate All-Pro U-bolt Flip w/Timbren Bumpstops 4.88 Nitro Gears ARB Front Locker ARB Twin Compressor Black 17x8 Konig Countersteer Type X 285/70r17 Falken A/T3w Gunmetal 16x8 SCS Ray10s 255/85r16 Maxxis Bighorns Limited Edition (Relentless) Elite Front Bumper Smittybilt X2O 10K Winch Diode Dynamics SS3 Sport Selective Yellow Fog Lights in the Bumper Diode Dynamics SS3 Pro 4,000 Kelvin SAE Driving Lights with Clear Lenses on the Bumper Morimoto D2S Projectors XB35 Ballasts + 4300K Bulbs Badland Sliders FrankenFab Tire Carrier Swingout bumper w/kitchen BudBuilt Front & Bellypan Skids BAMF Rear Diff Skid Dometic CFX 55im Fridge/Freezer Alpha II Hardshell RTT Badland Custom Bed Rack Denso 210-0461 105 amp alternator Dual Northstar 24F AGM batteries BlueSea 7622 ML-ACR Battery controller Peak DBI Dual Battery Voltage Monitor Magnuson MP62 Supercharger w/2.37" Pulley Haltech Elite 2000 Standalone ECU Denso 650cc Fuel Injectors Doug Thorley Headers Aeromotive Stealth 340 Fuel Pump TransGo A340F Reprogramming Shift Kit Magnaflow Hi-Flow CAT, Magnaflow 18" Muffler w/Vibrant Resonator 13WL Brake Calipers Braided Steel Brake Lines ScanGauge II OBDII Scanner Kenwood TM-71A Dual Band Ham Radio Larson 70CM/2M Antenna Uniden 520xl CB radio 3' Firestik Adjustable tip antenna Pioneer DEH-P9400BH HU Alpine Amps & Type R components (F) and coaxials (R) Wet Okole Seat Covers Weathertech Digital Liners Deck Plate Mod 1" Diff Drop Carrier Bearing Drop
    I think I would want to know why the head gaskets were changed.
     

Products Discussed in

To Top