

-
Welcome to Tacoma World!
You are currently viewing as a guest! To get full-access, you need to register for a FREE account.
As a registered member, you’ll be able to:- Participate in all Tacoma discussion topics
- Communicate privately with other Tacoma owners from around the world
- Post your own photos in our Members Gallery
- Access all special features of the site
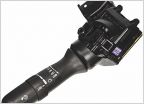 Wiper switch question
 When should I replace fluids?
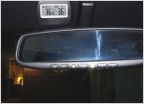 Ambient temperature gage
 Toyota PIDs Added HP Tuners
 All Pro Expos vs Standards (Or Dakars)
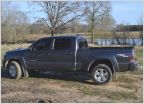 2012 NEW --> 25k Miles review- Thoughts
Crank Pulley Bolt Removal - Easy Way!
Discussion in '2nd Gen. Tacomas (2005-2015)' started by SManZ, Jun 12, 2010.
Page 3 of 4
Page 3 of 4

