1. Welcome to Tacoma World!

    You are currently viewing as a guest! To get full-access, you need to register for a FREE account.

    As a registered member, you’ll be able to:
    • Participate in all Tacoma discussion topics
    • Communicate privately with other Tacoma owners from around the world
    • Post your own photos in our Members Gallery
    • Access all special features of the site

My Silver GSU Build

Discussion in '3rd Gen. Builds (2016-2023)' started by TSki, Nov 11, 2016.

  1. Jul 11, 2017 at 7:56 AM
    #81
    Shytrex

    Shytrex Well-Known Member

    Joined:
    May 3, 2017
    Member:
    #218063
    Messages:
    160
    Gender:
    Male
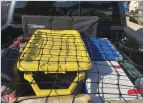
    I really like this bed extender. The challenge for me would be the loss of the Backup camera while using it.
     
  2. Jul 11, 2017 at 7:57 AM
    #82
    Shytrex

    Shytrex Well-Known Member

    Joined:
    May 3, 2017
    Member:
    #218063
    Messages:
    160
    Gender:
    Male
    Did you swap this yet? I'm looking for Inferno trim and would be willing to swap...
     
  3. Jul 11, 2017 at 8:30 AM
    #83
    TSki

    TSki [OP] Well-Known Member

    Joined:
    Sep 28, 2016
    Member:
    #198449
    Messages:
    1,236
    Gender:
    Male
    First Name:
    Tyler
    Salmon, Idaho
    Vehicle:
    2017 Silver Sky TRD Off-Road, 4x4, DCSB MT
    https://www.tacomaworld.com/threads/my-silver-gsu-build.460083/
    Mine has been covered under plastidip for months. lol it's got a protective layer on it! But I would be willing to peel it off and clean it up and trade for a gray or black. What do you have?
     
  4. Jul 11, 2017 at 8:31 AM
    #84
    TSki

    TSki [OP] Well-Known Member

    Joined:
    Sep 28, 2016
    Member:
    #198449
    Messages:
    1,236
    Gender:
    Male
    First Name:
    Tyler
    Salmon, Idaho
    Vehicle:
    2017 Silver Sky TRD Off-Road, 4x4, DCSB MT
    https://www.tacomaworld.com/threads/my-silver-gsu-build.460083/
    I haven't found it to be a huge loss. It is shocking when you go in reverse and the camera starts screaming warnings
     
  5. Jul 25, 2017 at 5:58 AM
    #85
    ShemRahBuck

    ShemRahBuck Well-Known Member

    Joined:
    Apr 11, 2017
    Member:
    #215970
    Messages:
    283
    First Name:
    Buck
    Eastern California
    Vehicle:
    2017 TRD Pro
    When are you going to do a step by step guide for soundproofing the doors? :fingerscrossed::popcorn:
     
  6. Jul 25, 2017 at 6:05 AM
    #86
    20tacoma17

    20tacoma17 Well-Known Member

    Joined:
    Nov 8, 2016
    Member:
    #201910
    Messages:
    7,095
    Gender:
    Male
    Vehicle:
    2017 DCLB Sport AT
    Kings, 275/70/17, a few custom items, lots of Meso mods.
    For all the panel removal I just went to OemAudioplus.com and followed their video on all door panel removal. Great video
     
    TSki[OP] and ShemRahBuck[QUOTED] like this.
  7. Jul 25, 2017 at 8:44 AM
    #87
    TSki

    TSki [OP] Well-Known Member

    Joined:
    Sep 28, 2016
    Member:
    #198449
    Messages:
    1,236
    Gender:
    Male
    First Name:
    Tyler
    Salmon, Idaho
    Vehicle:
    2017 Silver Sky TRD Off-Road, 4x4, DCSB MT
    https://www.tacomaworld.com/threads/my-silver-gsu-build.460083/
    It's coming! I am waiting on a box to get here with goodies from @Mr Marv before I pull the doors apart, that way I can upgrade the speakers while I am in there.
     
  8. Jul 25, 2017 at 11:20 AM
    #88
    KTJO 4x4

    KTJO 4x4 Well-Known Member

    Joined:
    Oct 10, 2016
    Member:
    #199424
    Messages:
    3,884
    Gender:
    Female
    First Name:
    Katie
    Oregon
    Vehicle:
    2017 TRD OFF-ROAD 4x4 DCSB BARCELONA RED
    Nitro 4.88 Gears OVTune 1.05 91Oct DirtyDeeds Exhaust
    I love your choice :) we seem to be on the same page for a lot of this. Great minds think alike. Which one did you go with?
     
  9. Jul 25, 2017 at 11:28 AM
    #89
    TSki

    TSki [OP] Well-Known Member

    Joined:
    Sep 28, 2016
    Member:
    #198449
    Messages:
    1,236
    Gender:
    Male
    First Name:
    Tyler
    Salmon, Idaho
    Vehicle:
    2017 Silver Sky TRD Off-Road, 4x4, DCSB MT
    https://www.tacomaworld.com/threads/my-silver-gsu-build.460083/
    I went with package 2/no sub. I figure with upgraded speakers and the amp that I should be good to go. What about you?
     
    KTJO 4x4[QUOTED] likes this.
  10. Jul 25, 2017 at 11:30 AM
    #90
    KTJO 4x4

    KTJO 4x4 Well-Known Member

    Joined:
    Oct 10, 2016
    Member:
    #199424
    Messages:
    3,884
    Gender:
    Female
    First Name:
    Katie
    Oregon
    Vehicle:
    2017 TRD OFF-ROAD 4x4 DCSB BARCELONA RED
    Nitro 4.88 Gears OVTune 1.05 91Oct DirtyDeeds Exhaust
    That's the exact one I'm looking at but haven't pulled the trigger. Just spoke with him over the phone and explained what I'm looking for and he suggested that one. Super excited for when I do pull the trigger. Have it saved as on of my pages on my phone :) can't wait to see your pics.
     
  11. Jul 25, 2017 at 11:31 AM
    #91
    TSki

    TSki [OP] Well-Known Member

    Joined:
    Sep 28, 2016
    Member:
    #198449
    Messages:
    1,236
    Gender:
    Male
    First Name:
    Tyler
    Salmon, Idaho
    Vehicle:
    2017 Silver Sky TRD Off-Road, 4x4, DCSB MT
    https://www.tacomaworld.com/threads/my-silver-gsu-build.460083/
    No time like the present! Throw it in there when you do the sound deadening.
     
    KTJO 4x4[QUOTED] likes this.
  12. Jul 25, 2017 at 11:33 AM
    #92
    KTJO 4x4

    KTJO 4x4 Well-Known Member

    Joined:
    Oct 10, 2016
    Member:
    #199424
    Messages:
    3,884
    Gender:
    Female
    First Name:
    Katie
    Oregon
    Vehicle:
    2017 TRD OFF-ROAD 4x4 DCSB BARCELONA RED
    Nitro 4.88 Gears OVTune 1.05 91Oct DirtyDeeds Exhaust
    Bingo. That's the plan. Just like you
     
  13. Sep 19, 2017 at 8:25 AM
    #93
    TSki

    TSki [OP] Well-Known Member

    Joined:
    Sep 28, 2016
    Member:
    #198449
    Messages:
    1,236
    Gender:
    Male
    First Name:
    Tyler
    Salmon, Idaho
    Vehicle:
    2017 Silver Sky TRD Off-Road, 4x4, DCSB MT
    https://www.tacomaworld.com/threads/my-silver-gsu-build.460083/
    New Skycamper from iKamper has arrived. Haven't had a chance to get it on the truck. Living room floor will have to suffice for now.


    Once opened, this provides nearly 7x7 feet of sleeping space! Largest space from a hard top tent out there. So far just me and the pup checking it out.
     
  14. Sep 24, 2017 at 10:01 AM
    #94
    TSki

    TSki [OP] Well-Known Member

    Joined:
    Sep 28, 2016
    Member:
    #198449
    Messages:
    1,236
    Gender:
    Male
    First Name:
    Tyler
    Salmon, Idaho
    Vehicle:
    2017 Silver Sky TRD Off-Road, 4x4, DCSB MT
    https://www.tacomaworld.com/threads/my-silver-gsu-build.460083/
    The stereo:

    I went with Mr. Marv's "Package 2"

    Package 2: This kit upgrades rear speakers to Stage ll for those that prefer more of a "surround type" sound where you are immersed in sound all around you (as opposed to music focused up front with ambiance from the rear) and like to listen loud. You can also upgrade the amp to the xdi600.4 if you like it really loud but be sure to deaden those doors well!)
    Front speakers:
    U69-2V2 6x9" 2 way Component set / $499.99 - 20% = $399.99
    Rear speakers:
    I61-2v2 6.5" Component/Coaxial / $319.99 - 20% = $255.99
    Amplifier:
    xdi450.4 - $349.00 - 20% = $279.20
    8 gauge wiring kit for xdi450.4 - $142.10
    Front mid 5.25"/6.5"/5x7"/6x9" + tweeter + rear 4"/5.25"/6.5" -$83.45 shipped - 20% = $66.76
    Amplifier shipping = $14.95
    Speaker shipping = $19.95
    Wiring kit will ship with adapters at no additional cost
    Total = $1178.84


    Unhook your battery.

    I started out by ripping everything out as I figured a clean slate would be easiest. Pull your colored trim piece so that you can get to your head unit. It just clips into place, direct pressure will pop it off. I took pictures of the back of my head unit to make it easier to figure things out later, but it is really hard to mess things up as everything has its own shape, size, or color. Headunit just has the four bolts:


    Pull the drivers' front seat, it just has the four bolts, and unhook the three cables underneath. Throw this thing in the house so it is out of your way. Your door panels have two screws, one little plastic doohickey, and then the clips inside. To get to the first screw, you have to take out the little section of felt:


    The second is hidden behind the door handle. Online videos recommend a trim tool to pull the piece of plastic from behind the door handle, but I was able to do it with my fingers:


    The doohickey just requires you to pop the center in, and then pull it out:


    Pop your windows/locks control panel up with a trim tool, and unhook the cables:


    You are now ready to pull your door panels off. I found it really convenient to pull starting at where the arrow on the bottom of the door is. I don't think this is why it is there, but it sure worked well for me. Direct pressure will pop the panels off on the left, right, and bottom sides, but don't go yanking on the top. The top is tucked into the window well, and can simply be lifted out. Your door panel will come off, and then you are left with cables and the handle hanging:


    Pull those sad little excuses for speakers:


    Four little bolts, that will no longer serve a useful purpose in life, as they are too short to get through the newly supplied housing:


    While you have everything open, rip out that crap excuse for lining on the inside of the door, and replace it with something better:


    You can pop the internal panels out now in order to get behind them:


    Look, Toyota through in some vibration assist. Not as much as I would like... but it's something:


    This is where I started laying in the vinyl matting, as much as I could fit, inside and out:


    This is where your only outside purchase comes into play. Recommendations from the 2nd gen build recommended M6 x30 bolts. Those don't quite work for this setup. You need two M6 x 30mm bolts and 12 M6 x 45s. The two shorter bolts will go in the front on the part of the housing that is shorter than the others. Now you can put these straight into the housing that the hold speakers came out of, but I wouldn't recommend it. They just don't seem to tighten up like I think they should. Pop the plastic housings out, use some washers, and secure this stuff down right. These things sure are nice though:


    Running your speaker wire take about 2/3rds of a bottle of whiskey for the drivers' door and about half a coke for the other three. That driver door is just an absolute pain due to space. I ran the wires in through the supplied boot in the door, and up to the area behind the pedals for rerouting. Same thing for the passenger door. The rears are even easier, I just popped the boot off and into the door panel so it was really easy to run the cables. It comes out into the trim behind the pillar and then down to the area under the driver seat:


    Once all your wires are run, you can begin mounting speakers. A word on these speakers. They are way bigger, beefier and heavier than the stock. Like by a lot. The weight of all four stock speakers:


    The weight of the smaller new rear speaker by itself:


    And the front:


    You can see why when looking at the backs of these things:


    Glad I went with these speakers:


    Back to mounting the speakers, hook up your speaker wire, and push your speaker into place. Using the supplied screws, secure it down. I pre-drilled my holes to make my life a bit easier, your mileage may vary:


    I then went and added the rest of the deadening padding:


    Time for the tweeters. Pop the covers off with your trim tool:


    Now remove the bolts. I found it easier to look down through the window to see what I was doing. Not a lot of room here, but a standard wrench works well:


    Run your wire straight down through the holes and to the floorboard. Your new tweeters in their wooden mounts (they just snap into them) can now be mounted. Hooke your wires up and use the bolts you just pulled out to remount them.

    Time for your harness. This thing made me nervous when I saw the mess of wires, but it isn't as bad as it looks:


    Everything is color coded except for the two extra red wires that go into the blue as shown here:


    The other end has your RCA connectors, and goes as follows:

    RCA pair 1.
    red - right front speaker positive wire

    black - right front speaker negative wire

    White - left front speaker positive wire

    blue - left front speaker negative wire

    RCA pair 2
    Repeat above and replace front with rear

    The leftover blue wire will go into the back of the amp between the power and ground:


    Mount your amp using the provided mounting board. I used hot glue to my sound deadening material under the carpet:


    You then lay the carpet back down and your amp can screw into place.

    I forgot to photograph it, but I used sticky velcro underneath both crossovers to secure them to the carpet. Works like a charm. I used the readily available ground under the driver's seat for my amp and then hooked my power up as well. Power came from my accessory battery, but the technique is the same. Run your power through the firewall and up to your amp. Don't forget to wire in the included fuse:


    Now that all your cables are available, you can start hooking things up:


    Run your rear speaker wires in, they go straight into the amp as labeled:


    The front and tweeters will go into your crossovers, and then the crossovers into the amp. If you look at the picture above, you will see the color pattern Black-Red-Red-Red-Black-Red-Black-Red, start off by hooking up your amp to eliminate some options, they go the black red at the end of the pattern. So you should have Black-Red-Red-Red-Black-Red-Negative Amp-Postive Amp

    The next two Black-Red (next to the amp wires) go to your 6x9s. The middle Red, and the last Black g to your tweeters. Final Pattern is like this:

    Negative Tweeter - Empty Red - Positive Tweeter - Empty Red - Negative 6x9 - Positive 6 x 9 - Negative Amp - Positive Amp

    Once you got that one done, do the other one:


    Now that all the hard stuff is done. Time to test it out. This stuff really surprised me with how loud it is. @Mr Marv has been helping me fine tune this setup for the last day and a half and it just keeps getting better and better. I'm over in Germany, so I can't as easily take advantage of just calling him to tune things, but he does offer that as part of the package. Take him up on it!

    Reinstalling your seat is the same 4 bolts as earlier. The door panels are easy but need to be done correctly. The clips and fasteners need to be on your panel, not the door. If any are left behind, you need to remove them and put them on the panel before installing it. The upper trim pieces can be taken out with your fingers:


    The door fasteners can be taken out really easily with a set of wire cutters, just grab the fastener and twist and it pops easily:


    It wasn't too hard of a project, the worst part was the driver's door wiring. I am slowly but steadily tuning this thing in, and I am already thrilled with the volume, intensity, and the improvement over stock speakers. I would recommend this to anyone who wants to improve what they have. Couple this with all the sound deadening and it truly makes a big difference. I can't even hear cars rolling by until they are even with the truck, with the music on, the sounds of the world just disappear.
     
    KTJO 4x4, ShemRahBuck and 20tacoma17 like this.
  15. Sep 24, 2017 at 12:09 PM
    #95
    20tacoma17

    20tacoma17 Well-Known Member

    Joined:
    Nov 8, 2016
    Member:
    #201910
    Messages:
    7,095
    Gender:
    Male
    Vehicle:
    2017 DCLB Sport AT
    Kings, 275/70/17, a few custom items, lots of Meso mods.
    So you finally have all the sound deadening done....looks great and another good write up. I just went with the OEM AUDIO set up. Very happy with it.
     
  16. Sep 27, 2017 at 5:14 AM
    #96
    TSki

    TSki [OP] Well-Known Member

    Joined:
    Sep 28, 2016
    Member:
    #198449
    Messages:
    1,236
    Gender:
    Male
    First Name:
    Tyler
    Salmon, Idaho
    Vehicle:
    2017 Silver Sky TRD Off-Road, 4x4, DCSB MT
    https://www.tacomaworld.com/threads/my-silver-gsu-build.460083/
    The sound deadening was well worth it. I would recommend it to anyone!
     
    KTJO 4x4 and 20tacoma17[QUOTED] like this.
  17. Sep 27, 2017 at 5:15 AM
    #97
    TSki

    TSki [OP] Well-Known Member

    Joined:
    Sep 28, 2016
    Member:
    #198449
    Messages:
    1,236
    Gender:
    Male
    First Name:
    Tyler
    Salmon, Idaho
    Vehicle:
    2017 Silver Sky TRD Off-Road, 4x4, DCSB MT
    https://www.tacomaworld.com/threads/my-silver-gsu-build.460083/
    The RTT is mounted. Now that I have it measured.. I will be planning out the solar panel system to go in front of it!


  18. Sep 27, 2017 at 7:19 AM
    #98
    jholc21

    jholc21 Well-Known Member

    Joined:
    Sep 27, 2015
    Member:
    #165286
    Messages:
    646
    Gender:
    Male
    Colorado
    Vehicle:
    2017 White Tacoma TRD OR
    Bilstein 6112/5160 w/Dakars Leafs 255/80/R17 Cooper ST MAXX Skinnies 4.88 Gears TRD Pro Fog Lights Cali Raised 5D Combo Leather Seats LED Bed Lighting ARE Overland Shell
    Great looking build - you must be an engineer. Your meticulous photos and descriptions are super helpful! Thanks!
     
    ShemRahBuck and 20tacoma17 like this.
  19. Sep 27, 2017 at 8:08 AM
    #99
    TSki

    TSki [OP] Well-Known Member

    Joined:
    Sep 28, 2016
    Member:
    #198449
    Messages:
    1,236
    Gender:
    Male
    First Name:
    Tyler
    Salmon, Idaho
    Vehicle:
    2017 Silver Sky TRD Off-Road, 4x4, DCSB MT
    https://www.tacomaworld.com/threads/my-silver-gsu-build.460083/
    Actually.. you can blame @KTJO 4x4 for that. She was the one who talked me into the first walkthrough when I dropped my headliner.. I just managed to come how to keep up the momentum.
     
    ShemRahBuck, KTJO 4x4 and 20tacoma17 like this.
  20. Sep 27, 2017 at 8:25 AM
    #100
    KTJO 4x4

    KTJO 4x4 Well-Known Member

    Joined:
    Oct 10, 2016
    Member:
    #199424
    Messages:
    3,884
    Gender:
    Female
    First Name:
    Katie
    Oregon
    Vehicle:
    2017 TRD OFF-ROAD 4x4 DCSB BARCELONA RED
    Nitro 4.88 Gears OVTune 1.05 91Oct DirtyDeeds Exhaust
    Yes. Yes you can! :) I'm currently using the Floor Demolition one as we speak to start my own Deadening and Dampening project! You are simply amazing! We all appreciate it so much!
     
    TSki[QUOTED][OP] likes this.

Products Discussed in

To Top