1. Welcome to Tacoma World!

    You are currently viewing as a guest! To get full-access, you need to register for a FREE account.

    As a registered member, you’ll be able to:
    • Participate in all Tacoma discussion topics
    • Communicate privately with other Tacoma owners from around the world
    • Post your own photos in our Members Gallery
    • Access all special features of the site

DIY Wheel Aluminum Refurb

Discussion in 'Wheels & Tires' started by Sprocket, Sep 17, 2017.

  1. Sep 17, 2017 at 8:05 AM
    #1
    Sprocket

    Sprocket [OP] Well-Known Member

    Joined:
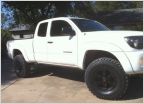
    May 12, 2017
    Member:
    #218835
    Messages:
    366
    I wanted Aluminum wheels for the truck - my steelies are rusted and flaking and basically look like crap. I found a used set with tires - the tires fell off and I gave them to my shop and asked they go to the needy (They sometimes get the "broke student" down on their luck types and sell used tires cheap - truly good Christians)

    I went and got a quote from a local refurb shop - they wouldn't touch them. WTF...OK now what.

    Research and figured a plan - then set to it.

    Time budget:
    About 24 man/hrs total - I didn't track it to the minute but over the course of 4 sessions I washed, scraped, wire wheel, sanded, cleaned, primed, backside color, color. I need about another hour or so for clearcoat. It's not a pro job so I took my time and relaxed. Figuring out what wheel and paper I needed took some time too.
    The cleaning, sanding prep before paint took the most time.

    Materials:
    small wire wheel on a die grinder - I have an air compressor
    220 wet/dry paper - get 3M brand - the HF stuff crumbles when wet, clogs when dry
    scrapers of various types - 1/2" flat was most used.
    degreaser
    soap and water
    denatured alcohol before applying any primer

    paints:
    self etch primer - 1 can, 2 coats each
    primer filler - I didn't use this but wish I had - I got a 5 foot finish without filler. 1 can
    flat black paint for the backside - 3 cans for 2 coats
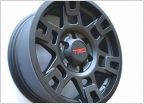
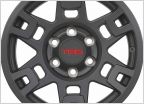
    Rustoleum High Performance Wheel Steel color - 2 cans with left overs - matches center cap exactly
    clear coat - I only plan to use 1 can worth because it's 2x coating according to can.

    pictures:
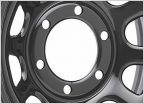
    before before.jpg
    prime primer.jpg
    backside backside black.jpg
    color color.jpg

    I may have forgot some info so ask any questions - I hope this was helpful
     
  2. Sep 21, 2017 at 5:22 AM
    #2
    Sprocket

    Sprocket [OP] Well-Known Member

    Joined:
    May 12, 2017
    Member:
    #218835
    Messages:
    366
    And after all that I tossed 'em into the back and drove to the station to get the rubber swapped - they got all banged up and scraped.

    At least I can't fault the mechanic - I'll touch them up when I get a chance.
     
    EatSleepTacos likes this.
  3. Sep 21, 2017 at 6:09 AM
    #3
    single cab

    single cab Well-Known Member

    Joined:
    Apr 10, 2014
    Member:
    #127425
    Messages:
    162
    Gender:
    Male
    upstate ny
    Vehicle:
    2012 Single cab 4x4 mt
    How long did you wait enamels have a 5 to 7 day cure
     
    gunn_runner likes this.
  4. Sep 21, 2017 at 6:13 AM
    #4
    Sprocket

    Sprocket [OP] Well-Known Member

    Joined:
    May 12, 2017
    Member:
    #218835
    Messages:
    366
    I'll go with "not long enough" - about 4 days from clear coating
     
    IronPeak and EatSleepTacos like this.
  5. Sep 21, 2017 at 12:30 PM
    #5
    Tybee Taco

    Tybee Taco Active Member

    Joined:
    Apr 4, 2015
    Member:
    #152483
    Messages:
    26
    Gender:
    Male
    First Name:
    Nick
    Atlanta, Georgia
    Vehicle:
    2006 White PreRunner DCSB Sport
    Did you do all 4 at once?
     
  6. Sep 21, 2017 at 2:45 PM
    #6
    Sprocket

    Sprocket [OP] Well-Known Member

    Joined:
    May 12, 2017
    Member:
    #218835
    Messages:
    366
    Mechanic called - turns out the lug nuts for steelies are not compatible with these wheels.

    So if you're going from steelies to alloys, don't forget the lug nuts...
     
  7. Sep 21, 2017 at 2:45 PM
    #7
    Sprocket

    Sprocket [OP] Well-Known Member

    Joined:
    May 12, 2017
    Member:
    #218835
    Messages:
    366
    I bulk batched each set - wash all 4, wire wheel all 4 etc. - doing one wheel start to finish would have been not good.
     
  8. Sep 21, 2017 at 2:49 PM
    #8
    rnish

    rnish Well-Known Member

    Joined:
    May 9, 2014
    Member:
    #129450
    Messages:
    8,321
    Gender:
    Male
    Peoples Republic of Maryland (USA)
    Vehicle:
    Tacoma 2nd gen
    King's, Camburg UCA, Dirt King LCA, armor
    Two thumbs up !!
     
  9. Sep 21, 2017 at 3:41 PM
    #9
    Harvo

    Harvo Hanging On !!!

    Joined:
    Apr 6, 2017
    Member:
    #215586
    Messages:
    957
    Gender:
    Male
    Vehicle:
    17' TRD Offroad DCSB
    SpiderTrax, RCI Sliders, Warn bumper, Smittybuilt winch, Ridge Grapplers...
    There lies the crux in painting aluminum wheels. The paint won't hold up at the bead. Powder coating is better, but id just rather dip than paint. Yours look great tho.
     
  10. Sep 21, 2017 at 5:32 PM
    #10
    Sprocket

    Sprocket [OP] Well-Known Member

    Joined:
    May 12, 2017
    Member:
    #218835
    Messages:
    366
    I did not paint below the top surface of the rim - specifically avoided the "under tire" areas so the bead should not be affected.
     
  11. Sep 21, 2017 at 6:54 PM
    #11
    Harvo

    Harvo Hanging On !!!

    Joined:
    Apr 6, 2017
    Member:
    #215586
    Messages:
    957
    Gender:
    Male
    Vehicle:
    17' TRD Offroad DCSB
    SpiderTrax, RCI Sliders, Warn bumper, Smittybuilt winch, Ridge Grapplers...
    I meant the surface the tire machine rubs across.
     
  12. Sep 21, 2017 at 8:04 PM
    #12
    Sprocket

    Sprocket [OP] Well-Known Member

    Joined:
    May 12, 2017
    Member:
    #218835
    Messages:
    366
    Ah - I see - Well the mech didn't have any issues that I know of but I'm not rolling yet so stay tuned.
     
  13. Sep 24, 2017 at 5:09 PM
    #13
    ImpulsedComa

    ImpulsedComa Well-Known Member

    Joined:
    Nov 23, 2014
    Member:
    #142965
    Messages:
    494
    Gender:
    Male
    NJ
    Vehicle:
    05 Double Cab 4x4 SR5 V6
    pics on the truck?
     
    gunn_runner likes this.
  14. Sep 26, 2017 at 5:37 AM
    #14
    Sprocket

    Sprocket [OP] Well-Known Member

    Joined:
    May 12, 2017
    Member:
    #218835
    Messages:
    366
    IMG_3348.jpg
    In the rain - I can get a dry pic later if desired

    OK - Here's the summary:
    I should have used a primer/filler for at least 1 coat and taken my time to double check the sanding process before the primer process - found a couple things I could have done better.

    I should have waited a week for the paints to cure but I rushed it and got what I deserve. Only 1 wheel was bunged up badly during the mounting process and was scraped during transport so I won't blame my mech. I'll touch it up shortly but re-work could have been avoided.

    The lug nut scramble was on me as well because I didn't think about it so learn from my other mistake. Check your nuts if you're going from steel to alloy!

    I have more time than $$ invested in this project - the powder coat guys want a much higher prep level than what I did and their cost out weighed using this wheel set for me - buying new aftermarket wheels would have been a better choice.

    Also, I'm not sure why exactly but these wheels have a lot more weight on them than my steelies - However, my vibes are gone - like not there anymore gone. It rides like it should and I'm not fighting to control at highway speeds. I suspect one of my rims was damaged and causing the vibes.

    Budget totals:
    rims = $50 each at a junk yard
    materials = $150 or less not including the die grinder I bought, tools are an investment. The paint and sand paper are the consumables for this one.

    Like all the posts say, take your time, double check and be fussy while sanding. Once the first coat goes on, check again and make adjustments as needed. The overall end product will be worth it.
     
    Last edited: Sep 26, 2017
    rnish and Keep on Truckin' like this.
  15. Sep 26, 2017 at 5:56 PM
    #15
    single cab

    single cab Well-Known Member

    Joined:
    Apr 10, 2014
    Member:
    #127425
    Messages:
    162
    Gender:
    Male
    upstate ny
    Vehicle:
    2012 Single cab 4x4 mt
    From that stand paint they look factory which is fine to me. I priced out new procomp rims 436 shipped powdercoat for 4 was 400-440. so your not in it too bad plus its half the fun of working on your own stuff learn along the way
     
  16. Sep 26, 2017 at 5:58 PM
    #16
    Dalandser

    Dalandser ¡Me Gustan Las Tacos-mas!

    Joined:
    Feb 19, 2015
    Member:
    #149090
    Messages:
    16,763
    First Name:
    Anthony
    Downey
    Vehicle:
    08 PreRunner Regular Cab / 98 4x4 Extra Cab
    Empty Wallet Mod
    Mine did just fine. Been 2.5 years. Only knicks are from dropping my ratchet on them when taking off my wheels a couple times. PC would have chipped too from what I've seen on parts I've had with PC.
     
    Last edited: Sep 26, 2017
  17. Sep 26, 2017 at 6:02 PM
    #17
    Harvo

    Harvo Hanging On !!!

    Joined:
    Apr 6, 2017
    Member:
    #215586
    Messages:
    957
    Gender:
    Male
    Vehicle:
    17' TRD Offroad DCSB
    SpiderTrax, RCI Sliders, Warn bumper, Smittybuilt winch, Ridge Grapplers...
    I picked up some alloy FJ wheels last week and dropped them off at the powder coater today. 200 for the wheels. 160 for the PC. I picked Satin black so that I have options for the center caps. I'll post up pics next week when I get them back.

    I'm all about DIY, but I don't think my DIY would have held up LOL or been worth my time.
     
  18. Sep 27, 2017 at 5:21 PM
    #18
    Sprocket

    Sprocket [OP] Well-Known Member

    Joined:
    May 12, 2017
    Member:
    #218835
    Messages:
    366
    Thanks Harvo - The durability will be a long term test...I'm hoping they stand up to at least 150K miles before another strip and paint...

    It was a Tinker Level 2 project - nothing hard and more time than $$ really - tools made it easy. I can't say enough to take your time and be thorough at each step - check it all twice before applying primer. Your results will be better than mine.

    Let each paint application cure - I rushed, got burned - Relax and let your results be better than mine.

    The pics don't really do the work justice - they look awesome and POP when you see them in natural light. When you get close you see all the imperfections so stand back 5 feet and be dazzled - I'm not winning shows by any means just enjoying making my truck look better - The real treat is in the performance - my vibes are gone and it rolls like a new truck should. At 10 years and 106K, I'm very happy.
     
    Dalandser likes this.

Products Discussed in

To Top