1. Welcome to Tacoma World!

    You are currently viewing as a guest! To get full-access, you need to register for a FREE account.

    As a registered member, you’ll be able to:
    • Participate in all Tacoma discussion topics
    • Communicate privately with other Tacoma owners from around the world
    • Post your own photos in our Members Gallery
    • Access all special features of the site

Tacoma 2017 Headlight Scratches

Discussion in 'Detailing' started by silvertacoma17, Oct 2, 2017.

  1. Oct 2, 2017 at 2:02 PM
    #1
    silvertacoma17

    silvertacoma17 [OP] New Member

    Joined:
    Oct 1, 2017
    Member:
    #231733
    Messages:
    3
    Gender:
    Male
    First Name:
    Dion
    Vehicle:
    2017 Silver Tacoma Off-Road
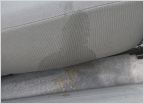
    I'm not sure if this is the right place to post this. I don't even know how this happened. I went to my local Walmart, and my wife came out and pointed the scratches out. I'm almost 100% sure that those scratches weren't there before I left. I was wondering if there is a fix to these type of scratches or if I'm going to have to replace the entire headlight.


    [​IMG] [​IMG] [​IMG]
     
  2. Oct 6, 2017 at 8:01 AM
    #2
    PackCon

    PackCon Well-Known Member

    Joined:
    Jul 14, 2015
    Member:
    #159449
    Messages:
    11,531
    Gender:
    Male
    First Name:
    Connor
    Vehicle:
    2017 Subaru Forester Limited
    This should be in the Detailing section. Maybe a Moderator can move it there.

    Its just a picture so it'll be hard to determine exactly what can be done but it LOOKS like you could use a DA polisher with sandpaper to buff out the gashing.

    If you do not own a dual action (DA) polisher you might want to take it to a detailer and ask what they would charge to repair. A polisher with accessories to do this could run $200-300 and you might not want to spend that if your not someone who gets into detailing.

    If it can be buffed out you will need to keep a UV coating on that lens to prevent oxidation because the protective coating in the outer plastic will be buffed off (you should be doing this anyways though).

    You might be able to do this with a sanding headlight restoration kit too. Like a kit you use a powerdrill with. Just make sure you buff the whole lens, don't just focus on the damaged part. You want an even finish throughout the lens.
     
  3. Oct 6, 2017 at 5:04 PM
    #3
    wilcam47

    wilcam47 Keep on keeping on!

    Joined:
    Jan 27, 2016
    Member:
    #176243
    Messages:
    50,316
    Gender:
    Male
    First Name:
    Will
    Bourbon state
    is that on both lights?? thats odd for both to be like that if thats what Im looking at.
     
  4. Oct 6, 2017 at 5:15 PM
    #4
    silvertacoma17

    silvertacoma17 [OP] New Member

    Joined:
    Oct 1, 2017
    Member:
    #231733
    Messages:
    3
    Gender:
    Male
    First Name:
    Dion
    Vehicle:
    2017 Silver Tacoma Off-Road
    Just the passenger side.
     
  5. Oct 9, 2017 at 12:25 AM
    #5
    NMTrailRider

    NMTrailRider Well-Known Member

    Joined:
    Sep 28, 2009
    Member:
    #23469
    Messages:
    5,291
    New Mexico
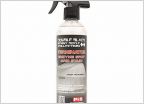
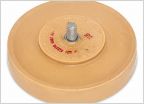
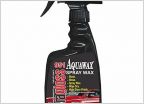
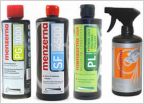
    I’d start with this (assuming you don’t have a DA polisher): Or this: Or this if you have a drill: Don’t aim for 100% correction. You’ll remove the very hard UV coating and the lens will degrade more quickly. Rather, aim for improvement. The paint transfer should come off. And you should be able to get rid of the scratchy haze left from sanding/compounding. If you can feel deep scratches with your fingernail, they can’t be removed without removing the UV coating with them. I’d attempt this by hand first. Concentrating ONLY on the area with paint transfer. Kinda like doing a little headlight surgery with a sanding pad. Then compound the same area. And finish with a polish, blending it into the surrounding plastic.

    If these weren’t such new lenses, I’d go all-in with an aggressive method. But because they’re New, I’d attack it more gently to begin with. Only go aggressive if you need to.

    As mentioned, hard to tell from photos. The paint transfer might simply come off with a medium compound/polish (ex. Meguiars ScratchX on a microfiber applicator) and you’ll be good to go.

    Keep us posted and come back with questions.
     
    PackCon likes this.
  6. Oct 9, 2017 at 6:50 AM
    #6
    ace96

    ace96 Well-Known Member

    Joined:
    Sep 1, 2010
    Member:
    #42591
    Messages:
    3,792
    Gender:
    Male
    Western KY
    Vehicle:
    '11 SWB DC TRD SPORT
    AVS bug deflector, Weathertech digital fit floor mats, TRD skid plate w/ Sockmonkey decal, SOS Cocept sliders w/ Line-x, Pioneer 3500, Hybrid Audio Technology Mirus 6X9s & 6.5s, back up cam mod, Wet Okoles-front & rear, TRD exhaust, 17X9 XD Spy w/ Falken Wildpeaks, Avid light bar
    Are those scratches or paint transfer?
     
  7. Oct 21, 2017 at 5:23 PM
    #7
    silvertacoma17

    silvertacoma17 [OP] New Member

    Joined:
    Oct 1, 2017
    Member:
    #231733
    Messages:
    3
    Gender:
    Male
    First Name:
    Dion
    Vehicle:
    2017 Silver Tacoma Off-Road
    Sorry it took me so long to reply, but here it is.

    [​IMG] [​IMG] [​IMG] [​IMG] [​IMG] [​IMG] [​IMG] [​IMG] [​IMG] [​IMG]
     

Products Discussed in

To Top