1. Welcome to Tacoma World!

    You are currently viewing as a guest! To get full-access, you need to register for a FREE account.

    As a registered member, you’ll be able to:
    • Participate in all Tacoma discussion topics
    • Communicate privately with other Tacoma owners from around the world
    • Post your own photos in our Members Gallery
    • Access all special features of the site

Install: ARB OME Dakar Leafs with D29XL AAL

Discussion in 'Suspension' started by RedForce1, Oct 3, 2017.

  1. Oct 3, 2017 at 10:32 AM
    #1
    RedForce1

    RedForce1 [OP] Anything really worth doing requires a helmet

    Joined:
    Feb 15, 2016
    Member:
    #178217
    Messages:
    22
    Gender:
    Male
    First Name:
    Ian
    Denver, CO
    Vehicle:
    2012 6-speed TRD OffRoad Tacoma
    TRD Supercharger UCON ECU controller URD LT Headers URD Comp Y-pipe Aeroturbine catback exhaust URD Stage 3+ Clutch URD Hydro clutch bearing URD short-throw shifter Drilled/slotted brake calipers Hydraulic hood BDS spindle lift Toytec Boss coilovers and rear shocks ARB EMU Dakar HD rear leafs Energy Suspension spring bushings Prothane poly-greasable swaybar bushings Pelfreybilt aluminum front bumper Smittybilt X2O 12k winch Pelfreybilt rear bumper AllPro HD sliders N-Fab spare-tire bed rack Custom fabricated bed extender for Timbersled hauling Bushwacker fender flares Softopper bed cover K54Lighting blackout HID retrofit headlights 40" roofmount LED bar 21" hidden bumper LED bar Baja Designs rear LED floods RUN-D amber LED fogs TacoTunes ReCurve EZQ equalizer JL Audio Stealth sub box JL Audio HD600 Amp JL Audio 10" Subwoofer Focal K2-Power Front and Rear component speakers Focal Elite audio crossovers Full cab sound insulation TRD shift knob Caltrend Super-Suede seat covers Weathertech floor mats Interior LED overhead lighting
    A few pics and pointers for those looking to do their own install.
    This is not necessarily a full how-to, as there are already some decent instructions out there. Just some tidbits that might help things run smoother. I dont claim to be an expert, so your'e on your own if things go ary.

    Supplies used:
    CS047R leaf pack
    4 extended U-bolts (Inspect yours first to see if they will work)
    New bushings (If desired)
    Grease (For bushings)
    WD40/PB-blast

    D29XL Add-a-leaf
    Metal Epoxy (if adding isolators to new leaf)
    Foam phone case (Whaaaa?)
    2 grade8 3/8-16 x 4" bolts (If you are using a shim)
    2 grade8 3/8-16 nuts (If you are using a shim)

    Tools:
    Floor jack
    Jack stands (x4, preferably 5)
    Wheel chucks (4x)
    Tire Iron (or impact wrench)
    C-clamps (2x)
    Socket wrench
    Breaker wrench/bar
    Torque wrench (at least 30-100 ft-lb)
    Impact wrench (If available)
    19mm socket (Spring bolts)
    19mm wrench (Spring bolts)
    22mm deep socket (U-bolt nuts)
    12mm(?) socket (brake line bolts)
    Wrench (Specific to you shock top-nut)
    Dead blow hammer (tapping out bolts)
    Flathead tool (separate leafs)
    Metal file (fit longer centering bolt)

    I'll get a better pic at some point, but here's what it looks like after all the fuss...

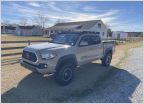
    For reference, you're looking at a 2012 OffRoad Taco riding on a BDS Spindle lift with ToyTec Boss coils in front, EMU Dakar CS047R rear leafs with additional D29XL leaf dampened with Toytec Boss shocks, & 295/70-17 (33") Nittos. Hub center to fender arch is about 26"


    PREPARATIONS:
    1) D29XL leafs don't come with isolators. I know most people do fine without, but I wanted to add a little something. Picked up some 4400lb metal rated epoxy, removed the central metal isolators from the old stock leafs, and bought a hard foam phone case from the dollar-tree. I also use a shim for proper axle angel so the centering pin on the leaf pack was too short. I picked up a pair of grade8 3/8-16 x 4" bolts and nuts to work with. The ones that come in the Dakars are basically a 3/8-24 x 3.5" with a round head.


    2) Cut four pieces from the case to epoxy to each end of both leafs. Scuff the surface with a wire wheel, then epoxy them about an inch from the ends on what will be the upward facing side. I recommend doing this first to give the epoxy time to cure.


    3) Get the rear of the truck up on stands. I lift at the rear differential, then place two jack stand at the rear and two on the frame just in front of the rear springs. Lifting just high enough to get the tires off is fine. Always a good idea to put your wheels under as a final safety catch. Leave the lift under the differential, as you'll use it to lift and lower the axle during the install.


    4) Chuck your front wheels. It helps if you can put the truck in gear in 4x4 and block both sides of the wheels. You're gonna be aggressively cranking on some bolts, so the more stable the better.


    5) Remove both rear wheels. I tried only removing the wheel on the side I was working on, but it loads the axle awkwardly and makes installing the new pack difficult. This is a good time to WD40/PB-blast the hardware you're going to be wrenching on in the near future. Definitely get the U-bolt threads and nuts, and it wouldn't hurt to hit the front and rear spring mounting bolts.
     
    Last edited: Oct 4, 2017
    MFBAMF likes this.
  2. Oct 3, 2017 at 10:53 AM
    #2
    RedForce1

    RedForce1 [OP] Anything really worth doing requires a helmet

    Joined:
    Feb 15, 2016
    Member:
    #178217
    Messages:
    22
    Gender:
    Male
    First Name:
    Ian
    Denver, CO
    Vehicle:
    2012 6-speed TRD OffRoad Tacoma
    TRD Supercharger UCON ECU controller URD LT Headers URD Comp Y-pipe Aeroturbine catback exhaust URD Stage 3+ Clutch URD Hydro clutch bearing URD short-throw shifter Drilled/slotted brake calipers Hydraulic hood BDS spindle lift Toytec Boss coilovers and rear shocks ARB EMU Dakar HD rear leafs Energy Suspension spring bushings Prothane poly-greasable swaybar bushings Pelfreybilt aluminum front bumper Smittybilt X2O 12k winch Pelfreybilt rear bumper AllPro HD sliders N-Fab spare-tire bed rack Custom fabricated bed extender for Timbersled hauling Bushwacker fender flares Softopper bed cover K54Lighting blackout HID retrofit headlights 40" roofmount LED bar 21" hidden bumper LED bar Baja Designs rear LED floods RUN-D amber LED fogs TacoTunes ReCurve EZQ equalizer JL Audio Stealth sub box JL Audio HD600 Amp JL Audio 10" Subwoofer Focal K2-Power Front and Rear component speakers Focal Elite audio crossovers Full cab sound insulation TRD shift knob Caltrend Super-Suede seat covers Weathertech floor mats Interior LED overhead lighting
    OLD LEAF PACK REMOVAL:
    Now pick a side. I start with the driver side, as it is (only slightly) more complicated for the install.

    6) Remove the top nut of the shock. On most dampeners, you can just grip the outer cylinder to keep it from rotating while wrenching the nut. You may also need to get a spanner (for you brits) on the central shaft above the nut to get it started.


    7) On the driver side, remove the two bolts indicated. One attaches the emergency brake cable to the leaf pack. The other is your hydraulic brake line bracket, which you want to allow some movement in when you lower the axle.


    8) Loosen the U-bracket nuts. I would recommend getting them good and loose, but not fully removed at first. Then release pressure on your jack under the differential to allow the axle to slowly sag. You want to let it down enough for the axle and spring seat to separate, but not so far that you put too much strain on your brake lines. We left the u-brackets on in case your jack fails, they will catch your axle to prevent some major damage.

    9) If you have an extra stand or block, it's a good idea to place it under the axle now. The shock should now be loose enough to compress by hand and rotate it down out of the way. If your replacing the shock, now's a good time to remove the lower bolt and pull your dampener.

    10) From here, finish removing the U-bracket, the front leaf spring bolt, and the rear leaf spring shackle bolt. When removing the shackle bolt, first crack the upper bolt as its harder to do off the vehicle, then remove the lower bolt so the shackle comes out with the pack.


    11) Now is when you get creative, and hopefully have a friend. Lifting the pack out is by no means impossible for you to do solo. But wrestling it out while not banging exhaust, crimping break lines and mashing fingers is always made easier with a friend if one's handy and willing.
     
    Last edited: Oct 3, 2017
  3. Oct 3, 2017 at 11:06 AM
    #3
    RedForce1

    RedForce1 [OP] Anything really worth doing requires a helmet

    Joined:
    Feb 15, 2016
    Member:
    #178217
    Messages:
    22
    Gender:
    Male
    First Name:
    Ian
    Denver, CO
    Vehicle:
    2012 6-speed TRD OffRoad Tacoma
    TRD Supercharger UCON ECU controller URD LT Headers URD Comp Y-pipe Aeroturbine catback exhaust URD Stage 3+ Clutch URD Hydro clutch bearing URD short-throw shifter Drilled/slotted brake calipers Hydraulic hood BDS spindle lift Toytec Boss coilovers and rear shocks ARB EMU Dakar HD rear leafs Energy Suspension spring bushings Prothane poly-greasable swaybar bushings Pelfreybilt aluminum front bumper Smittybilt X2O 12k winch Pelfreybilt rear bumper AllPro HD sliders N-Fab spare-tire bed rack Custom fabricated bed extender for Timbersled hauling Bushwacker fender flares Softopper bed cover K54Lighting blackout HID retrofit headlights 40" roofmount LED bar 21" hidden bumper LED bar Baja Designs rear LED floods RUN-D amber LED fogs TacoTunes ReCurve EZQ equalizer JL Audio Stealth sub box JL Audio HD600 Amp JL Audio 10" Subwoofer Focal K2-Power Front and Rear component speakers Focal Elite audio crossovers Full cab sound insulation TRD shift knob Caltrend Super-Suede seat covers Weathertech floor mats Interior LED overhead lighting
    INSTALL D29XL AAL & SHIM IN LEAF PACK:
    Steps 12-17 are only if you are inserting the extra leaf.
    Skip to 18 if you aren't modifying your leaf pack.

    12) Throw a C-clamp on either side of the spring pack bolt. This just relieves the pressure on the bolt so it is easier to unscrew. You may need a vice grip to hold the centering bolt, then remove the nut.


    13) Remove the three retaining bolts on the brackets. Then slowly release your C-clamp to allow the leafs to separate. Take note: the newer Dakars have steel separators that you don't want to lose.

    14) Place the added leaf between the second and third leaf from the top. You should notice it is the same size and shape as the 3rd (now 4th) leaf. Orient so the square end matches the other leafs, as will the tapered end.


    15) Once you have the leafs arranged, start feeding the central bolt in to the pack. Start up through the shim if you are using one, with the thick end to the rear. Don't forget to relocated the steel spacer plates. You can help to compress the pack by clamping near the two outer brackets and reinstalling the retaining bolts. If you can, assemble the larger central bracket, but it may be difficult to get until the central bolt is fully installed.


    16) For the final bolt up, I found it easiest to stand the pack up as an arch and just hold the last (longest) springs apart with a flathead so I could manipulate the steel spacer (scrapped from the old leafs) in and guide the bolt through. Install and tighten the nut as well as any bracket bolts you might not have gotten on yet.


    17) If you had to use the 3/8" long bolt, the bolt head is a micron too large for the guide hole on the axle seat. Run a file over the corners a bit and it'll fit like a glove.
     
    Last edited: Oct 4, 2017
    AZTacoDrew likes this.
  4. Oct 3, 2017 at 11:48 AM
    #4
    RedForce1

    RedForce1 [OP] Anything really worth doing requires a helmet

    Joined:
    Feb 15, 2016
    Member:
    #178217
    Messages:
    22
    Gender:
    Male
    First Name:
    Ian
    Denver, CO
    Vehicle:
    2012 6-speed TRD OffRoad Tacoma
    TRD Supercharger UCON ECU controller URD LT Headers URD Comp Y-pipe Aeroturbine catback exhaust URD Stage 3+ Clutch URD Hydro clutch bearing URD short-throw shifter Drilled/slotted brake calipers Hydraulic hood BDS spindle lift Toytec Boss coilovers and rear shocks ARB EMU Dakar HD rear leafs Energy Suspension spring bushings Prothane poly-greasable swaybar bushings Pelfreybilt aluminum front bumper Smittybilt X2O 12k winch Pelfreybilt rear bumper AllPro HD sliders N-Fab spare-tire bed rack Custom fabricated bed extender for Timbersled hauling Bushwacker fender flares Softopper bed cover K54Lighting blackout HID retrofit headlights 40" roofmount LED bar 21" hidden bumper LED bar Baja Designs rear LED floods RUN-D amber LED fogs TacoTunes ReCurve EZQ equalizer JL Audio Stealth sub box JL Audio HD600 Amp JL Audio 10" Subwoofer Focal K2-Power Front and Rear component speakers Focal Elite audio crossovers Full cab sound insulation TRD shift knob Caltrend Super-Suede seat covers Weathertech floor mats Interior LED overhead lighting
    INSTALL NEW LEAF PACKS:
    18) Remove the shackle from the old spring and install it on the new spring. The shackle installs hanging down from the leaf with the closed side facing back. Install the bolt from the inside with the nut on the outside. If you are installing new bushings or reusing poly bushings that split, now's the time to get greasy and lube 'em up.

    19) Now install in reverse. When reinstalling, dont tighten the bolts too much as you go. Get them good enough to hold things in place, but only tighten it all down once its all in.
    In short:
    A) place the pack with the centering pin in the axle seat hole. The top spring should be labeled with an arrow indicating forward.
    B) install u-brackets with bump stop
    C) install front spring bolt with assistance from ratcheting tiedown if needed. Bolt feeds through from outside, nut on the inside.

    D) install shackle bolt. Bolt feeds through from inside, nut on the outside.
    E) set shock in top mounting seat, or install new shock if desired
    F) lift axle to allow for shock top nut install
    G) reinstall brake line bolts

    Then do it all again on the other side. Passenger side only has the emergency brake line to worry about. Once the wheels are back on and the suspension is holding the trucks weight, toque all the hardware.

    Leaf spring bolt and shackle bolts: 89 ft-lb
    U-bolts: 37 ft-lb (I do 50 cause I'm a rebel)
    Shock lower: 74 ft-lb
    Shock upper: 15 ft-lb

    I threw this together after a 12hr graveyard shift, so there's likely some things
    that need polishing. Let me know if I should update anything, and thanks for looking.
     
    Last edited: Oct 4, 2017
  5. Apr 4, 2018 at 2:06 PM
    #5
    jp_flynavy

    jp_flynavy IG: @TrailLimoOverland

    Joined:
    Dec 30, 2016
    Member:
    #206065
    Messages:
    1,013
    Vehicle:
    2015 Tacoma DCLB
    Nice, I am actually about to do this too. How much additional lift did you see afterwards? I need this one, I carry a lot of extra weight.
     
  6. Mar 30, 2019 at 1:00 PM
    #6
    Gdennee315

    Gdennee315 Well-Known Member

    Joined:
    Mar 3, 2019
    Member:
    #285151
    Messages:
    75
    Gender:
    Male
    Vehicle:
    2017 MGM TRD OR 4X4
    Did you reattach you e brake line or just removed the brakes and let it hang.
     
  7. Apr 8, 2020 at 8:45 PM
    #7
    Blues0010

    Blues0010 Well-Known Member

    Joined:
    Sep 7, 2015
    Member:
    #163631
    Messages:
    548
    First Name:
    Ben
    Boise, ID
    Vehicle:
    2001 Tacoma SR5
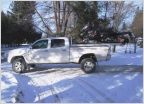
    Thanks for this write up. I did mine today and this was helpful. I got almost 3". Hoping it settles a bit.

    Before:

    After:

     
    BalutTaco likes this.
  8. Jun 9, 2020 at 7:00 PM
    #8
    bnh032

    bnh032 Active Member

    Joined:
    Jun 25, 2018
    Member:
    #257483
    Messages:
    44
    Gender:
    Male
    First Name:
    Brandon
    Vehicle:
    18' cement trd off road
    Damn! That’s motivation enough to do this.
     
  9. Dec 18, 2021 at 2:50 AM
    #9
    Bellator ursa

    Bellator ursa New Member

    Joined:
    Dec 7, 2021
    Member:
    #384085
    Messages:
    1
    First Name:
    Scott
    Vehicle:
    2010 White Tacoma
    Modified for Overlanding, Interior Mods, Custom Bluesea wiring, Sleep platform build in bed, Total Chaos UCA, 2.5 ICON C/O w/ Res., OME Dakar Mid. Leaf pack w/ Add A Leaf, OME shocks (rebuilding for 2.5 ICON in rear) In progress rebuild of total suspension set up . . . And many others.
    Redforce1, I'm in the process of refreshing my 12yr old Dakar Leaf pack; when taking it apart I did not see any shims like you show, would it be advisable to make some and put some in ?
    2. The cross spacers you speak of, on mine were worn through in spots, so I decided to go to my local Ace hardware store (in BF rural Montana) and make my own out of the same spec tubing (made look prettier, lol).
    Thanks for any responce and the write up.
     
  10. Feb 27, 2024 at 7:08 PM
    #10
    Tacoma SS

    Tacoma SS Well-Known Member

    Joined:
    Sep 3, 2015
    Member:
    #163341
    Messages:
    5,094
    Gender:
    Male
    First Name:
    John
    Denver
    Vehicle:
    Supercharged 09 on 35s
    Boost and flex and 35s

Products Discussed in

To Top