1. Welcome to Tacoma World!

    You are currently viewing as a guest! To get full-access, you need to register for a FREE account.

    As a registered member, you’ll be able to:
    • Participate in all Tacoma discussion topics
    • Communicate privately with other Tacoma owners from around the world
    • Post your own photos in our Members Gallery
    • Access all special features of the site

Measuring / marking holes for spacers

Discussion in 'PrInSu Design Studio' started by bshammer0, Mar 3, 2017.

  1. Mar 3, 2017 at 7:10 AM
    #1
    bshammer0

    bshammer0 [OP] Well-Known Member

    Joined:
    Nov 6, 2016
    Member:
    #201655
    Messages:
    3,363
    Gender:
    Male
    First Name:
    Brandon
    Nashville, TN
    Vehicle:
    2017 DCSB TRD OR 4x4
    Prinsu, TruckCovers USA, Coverking, OVTuned
    Hi Folks -

    Prinsu arrives today and would really prefer to self-install and would like to do the cleaner looking "hole method" for the weather-stripping. I always seem to fumble with getting the measurement right on flexible materials and don't want to mess it up. So, all you master DIY'ers out there. As simple as this question seems - what would be the most accurate method for measuring and ensuring the 5 holes on each weather strip are dead on?

    Thinking I may just measure distance from the front end of the strip to each hole and punch as such, but again due to the flexibility of the strip I'm still not convinced I won't end up with an odd fit. Pro tip seeked

    Thanks
     
  2. Mar 9, 2017 at 12:38 PM
    #2
    vicali

    vicali Touch my camera through the fence

    Joined:
    May 20, 2010
    Member:
    #37503
    Messages:
    2,664
    Gender:
    Male
    First Name:
    mike
    Kam,BC
    Vehicle:
    2017 TRD Sport 1D6
    Here's my method;

    Take off the strips, uncover the bolt holes, put masking tape across with the tape edge at the center of the hole.
    Put the strips back on, trace line across at the edge of the tape, mark the center, then take it all off again.

    [​IMG]

    Cut off the metal and trim the bottom with a dremel, and then punch it.

    [​IMG]
     
  3. Mar 13, 2017 at 1:59 PM
    #3
    bshammer0

    bshammer0 [OP] Well-Known Member

    Joined:
    Nov 6, 2016
    Member:
    #201655
    Messages:
    3,363
    Gender:
    Male
    First Name:
    Brandon
    Nashville, TN
    Vehicle:
    2017 DCSB TRD OR 4x4
    Prinsu, TruckCovers USA, Coverking, OVTuned
    Really smart method - I posted this thread before receiving my rack and, since I needed it for an event where I needed to carry gear, I spent the evening installing it. Definitely not as clean on the weatherstripping as I had hoped for. Debating spending another ~$100 to buy replacement weatherstrips and recut with a bit more patience this time and reset the rack for good. I with I had the right tools to just cleanly cut through the weatherstrip, metal and all. Hard to keep it as clean as I'd like when having to dremel out all that rubber to access the strip.

    Looks like you still used the rotary tool to get to the metal spine and remove. Excuse my ignorance, but how did you punch the holes with that pipe? Just used a dremel or sharpener on the right size pipe and put a hammer to it for a clean cut?

    Likely redo my install in the next few weeks to clean it up and leave it for the next several years.
     
  4. Mar 13, 2017 at 2:24 PM
    #4
    vicali

    vicali Touch my camera through the fence

    Joined:
    May 20, 2010
    Member:
    #37503
    Messages:
    2,664
    Gender:
    Male
    First Name:
    mike
    Kam,BC
    Vehicle:
    2017 TRD Sport 1D6
    I used the dremel to take out the metal under the weatherstripping. It's a T shape on the underside, with the cutting disc I went along and took out the section where I wanted to punch it..

    Pipe just got sharpened with a grinder until it was nice and sharp. Set the weatherstrip on that 2x4 and hit the pipe with a hammer. It worked slick.
    I've debated buying another set because when we replace this truck with another Tacoma I'm taking the rack with me.
     
    bshammer0[OP] likes this.
  5. Mar 13, 2017 at 3:39 PM
    #5
    bshammer0

    bshammer0 [OP] Well-Known Member

    Joined:
    Nov 6, 2016
    Member:
    #201655
    Messages:
    3,363
    Gender:
    Male
    First Name:
    Brandon
    Nashville, TN
    Vehicle:
    2017 DCSB TRD OR 4x4
    Prinsu, TruckCovers USA, Coverking, OVTuned
    Yeah, I used the dremel on mine as well and got the strip cut out, but hedged my bets and went wider than I should have and my 3/4" hole saw drill bit worked really well in some spots and on others for the life of me couldn't keep it from trying to stretch the rubber. It's not the end of the world, but I will need to take my rack off and do some adjustments anyhow soon so may as well get it up to my standards in the process. Hopefully the replacement weatherstrips I buy fit as snug as the factory ones
     
  6. Oct 25, 2017 at 9:41 AM
    #6
    dtc1nick

    dtc1nick Well-Known Member

    Joined:
    Nov 1, 2016
    Member:
    #201268
    Messages:
    66
    Gender:
    Male
    First Name:
    Nick
    Alta Loma, CA
    Vehicle:
    2016 Toyota Tacoma TRD Sport 4x4
    Falken Wildpeak 285/70R17 Wheels XD Series XD800 Pro Comp Nitro 3/1
    I'm installing mine this weekend and I heard you can just use a punch and not cut the bottom side with a dremel. Is that true?
    Also when you remove the striping there's some kind of stripping/film covering the holes do you have to remove that or just poke a hole with a screwdriver?
     
  7. Oct 25, 2017 at 10:29 AM
    #7
    Marex

    Marex Casual Observer

    Joined:
    Apr 12, 2013
    Member:
    #101959
    Messages:
    45
    Gender:
    Male
    Tampa Bay
    Vehicle:
    12 MGM TRD Sport 4x4
    Toytec 3", SPC UCA, Stealth 6 & ST Maxx, Prinsu Cabrac, etc.

    I used only a punch to go all the way through, no dremel. Just punch the holes with the molding laying on a piece of wood (to keep from dulling the punch) and give the punch a pretty good hit with the hammer. Here's what I used and it worked great.

    https://www.amazon.com/General-Tools-1271I-Punch-4-Inches/dp/B00004T7WD
    As for the film, is just a bit of tape- just pull it off and discard.
     
    MadDaddy likes this.
  8. Oct 25, 2017 at 12:01 PM
    #8
    bshammer0

    bshammer0 [OP] Well-Known Member

    Joined:
    Nov 6, 2016
    Member:
    #201655
    Messages:
    3,363
    Gender:
    Male
    First Name:
    Brandon
    Nashville, TN
    Vehicle:
    2017 DCSB TRD OR 4x4
    Prinsu, TruckCovers USA, Coverking, OVTuned
    I ended up, in the end, just cutting the stripping to fit after I screwed up the holes and adhered to the cab with silicone (and added a little extra silicone in the holes in the roof for good measure). 8 months later still no leaking and you CAN NOT see the stripping anyway so for my time and money I ultimately saw little benefit to doing the holes. Sure it looks more OEM and clean I suppose, if you actually ever saw it :)
     
  9. Oct 25, 2017 at 3:01 PM
    #9
    dtc1nick

    dtc1nick Well-Known Member

    Joined:
    Nov 1, 2016
    Member:
    #201268
    Messages:
    66
    Gender:
    Male
    First Name:
    Nick
    Alta Loma, CA
    Vehicle:
    2016 Toyota Tacoma TRD Sport 4x4
    Falken Wildpeak 285/70R17 Wheels XD Series XD800 Pro Comp Nitro 3/1
    Thanks guys for the good info!
     
  10. Oct 25, 2017 at 3:05 PM
    #10
    DrFunker

    DrFunker Well-Known Member

    Joined:
    Feb 3, 2014
    Member:
    #122158
    Messages:
    42,967
    Leather punches FTW. I have the handy "screw pins" that BajaRack makes to mark the underside of the strip, if you need them. :thumbsup:

    edit: I do not have the screws. Just checked. :(
    They were little pungi stick screws. Kinda cool.
     
    Last edited: Oct 25, 2017
  11. Dec 19, 2017 at 2:29 PM
    #11
    Jay-n-Bwood

    Jay-n-Bwood Member

    Joined:
    Oct 18, 2016
    Member:
    #200123
    Messages:
    23
    Gender:
    Male
    First Name:
    Jay
    Vehicle:
    2015 TRD Off-road
    3" Procomp lift
    So i cut the holes with a holesaw (big mistake!) and got the measurements/location perfect. My issue is that after i placed the spacers and weather stripping back on, the spacers moved vertically during installation because the watherstripping flex alittle. The bolts lined up perfectly and i know silicone got into the holes while securing the rack. I know the spacers are sitting solid in the silicone after installation, but im just worried water might get in. Also, the weather stripping didnt seem to be that tight after the install. Should i have used 3m tape to reinstall it?
    I put a herseys size amount of silicone on the bolt hole like the instructons said, but im worried that water might get in since the spacers moved a little.
     
  12. Jan 24, 2018 at 4:03 PM
    #12
    Korndog1284

    Korndog1284 Well-Known Member

    Joined:
    Sep 12, 2016
    Member:
    #197125
    Messages:
    295
    Gender:
    Male
    First Name:
    J03l
    Washington
    Vehicle:
    2016 Off Road DCLB MGM
    All-Pro Raack Pack, Tepui Tent and Awning, ARB BP-51, K02 275/65/17, 4Runner Pro Wheels
    I helped my buddy install his rack, it went ok but not perfect. When I went to install my rack I just removed the weather stripping and left it in the garage. Mostly because we were going out on the trail the next morning and it was already 11pm. I have considered going back and installing it but I have been too lazy... maybe oneday when I'm bored and have nothing else to bolt on. Until then I gots lots of other shitts to do!
     
  13. Jul 17, 2018 at 9:35 AM
    #13
    MadDaddy

    MadDaddy Pork Rind Extraordinaire

    Joined:
    Jan 1, 2015
    Member:
    #145405
    Messages:
    6,635
    Gender:
    Male
    53 Miles West of Venus
    Many & varied
    I’m doing the 3/4” center punch method tonight. I plan to cut the T-shaped backing off in the areas I plan to punch through.
     
  14. May 25, 2019 at 4:19 PM
    #14
    willstuff

    willstuff Well-Known Member

    Joined:
    Jan 18, 2018
    Member:
    #241616
    Messages:
    58
    Gender:
    Male
    First Name:
    Will
    Portland, OR
    Vehicle:
    2017 Super White TRD Sport DCSB
    3" lift, TRD Pro wheels, 285/70-17 BFG KO2s, Rough Country Steps, KB Voodoo Bed Bars.
    Thanks for the help, guys. My front runner will be arriving soon so I'll be hole punching myself silly in the next few days.
     
  15. May 28, 2019 at 9:22 PM
    #15
    Estephe21

    Estephe21 Well-Known Member

    Joined:
    Jun 2, 2018
    Member:
    #255223
    Messages:
    327
    Gender:
    Male
    First Name:
    Stephen
    Seattle, WA
    Vehicle:
    2008 DCLB, 2023 DCLB
    Sadly, not much.
    Good luck! Put some pictures up!
    I have rack assembled, but am not sure if I am going to:
    1) punch or drill the holes
    2) cut the 3 inches out for each foot pad and glue remaining strip sections to channel; or
    3) skip the stripping altogether and just install rack ( save strip for resale)

    I need to just make a decision!
     
  16. Jun 1, 2019 at 11:14 PM
    #16
    Desert Dog

    Desert Dog Well-Known Member

    Joined:
    Dec 25, 2018
    Member:
    #276881
    Messages:
    652
    Gender:
    Male
    Los Gatos
    Vehicle:
    2007 DCSB
    Work in progress
    IMG_E2709_SM.jpg IMG_E2716_SM.jpg IMG_E2717_SM.jpg

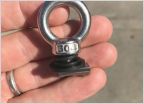
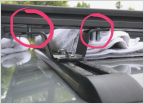
    No one asked, but in case anyone wondered, the metal strip in the weather strip is less than 1 mm thick and 2.5 mm wide, which may be why some people report they punch though it with leather punch.
     
    mrbperboss, Pyrotech and Estephe21 like this.

Products Discussed in

To Top