1. Welcome to Tacoma World!

    You are currently viewing as a guest! To get full-access, you need to register for a FREE account.

    As a registered member, you’ll be able to:
    • Participate in all Tacoma discussion topics
    • Communicate privately with other Tacoma owners from around the world
    • Post your own photos in our Members Gallery
    • Access all special features of the site

Lordetaco's build thread

Discussion in '2nd Gen. Builds (2005-2015)' started by lordetaco, Oct 26, 2017.

  1. Oct 26, 2017 at 9:53 PM
    #1
    lordetaco

    lordetaco [OP] Well-Known Member

    Joined:
    May 9, 2016
    Member:
    #186463
    Messages:
    949
    Gender:
    Male
    First Name:
    Tristan
    Lawton,OK
    Vehicle:
    2005 Toyota Tacoma
    Welcome to the Lordetaco's Build and BS Thread!

    C0DB8AB1-44EF-4278-AAB9-097269999D0A.jpg


    Front End:

    • King Extended Travel 2.5” with Remote Reservoir with 700lb coils- Installed 01/27/17
    • Total Chaos uniball UCA- Installed 01/27/17
    • IF CMC- Installed 02/15/17
    • EBC Green Stuff Brake Pads - Installed 09/27/17
    • EBC Premium Rotors - Installed 09/27/17
    • Sway Bar Delete - Removed 10/22/17
    • King bumpstops or some sort of bumpstops - In the works
    • 4.88 Gears by ESGC- Installed 08/10/18
    • ARB Airlocker in the rear :wink: - In the works
    • Total Chaos race series stock length chromoly boxed lowers - In the works
    • Dual shock hoops- In the works
    • King Shocks 2.5 Performance Race Series 2 Tube Bypass 8 inch Travel with Remote Reservoir - In the works
    • Weld-On Spindle Gussets- In the works
    • Total Chaos long travel- If I don't do the beefy MT build

    Rear End:
    • All Pro expedition leaf pack- Installed 01/27/17 (probably going to switch to standard or something else :()
    • Bilstein 5125 Series Rear shock - Installed 01/27/17
    • U-Bolt Flip Kit- Installed 01/27/17
    • Steel braided 24" extended rear brake lines - Sitting on the garage shelf
    • Timbren rear bumpstops- Sitting on the garage shelf
    • 4.88 Gears - Installed 08/12/18
    • ARB AirLocker - Installed 08/12/18
    • Archive Garage Shackle flip kit- In the works
    • Archive Garage mid/long travel Shock Relocation Tower kit- In the works
    • King Shocks 2.5 Performance Race Series 2 Tube Bypass 14 inch Travel with Remote Reservoir- In the works
    • Total Chaos bolt on 2.0" rear bump stop kit with King - In the works
    Wheels and Tires:
    • 17-inch TRD sport wheels - In the garage
    • Hutchinson Beadlocks in matte black - Installed 05/09/19
    • 265/70/17 Nitto Terra Grappler G2 - SOLD
    • 285/70/17 Toyo Open Country R/Ts - In the Garage
    • 315/70/17 Cooper STT Pros - Installed 05/09/19
    • Dynabeads in the current wheel setup
    Armor:
    • Pelfreybilt steel front bumper w/ center hoop - Installed 10/08/16
    • Pelfreybilt steel standard rear bumper w/ tire gate and high lift mounts (it was a rescue)- Installed 07/25/17
    • BAMF IFS, mid, and transfer case skid (exhaust reroute) - Installed 02/15/18
    • BAMF LCA skids- In the works
    • Undecided on the company I want to use for a gas tank skid - Pondering
    • Mobtown Offroad bolt-on sliders w/ kick out and fill plates - Installed 04/26/18
    • Will be looking to go to a high clearance swing out - Searching
    Drivetrain:
    • Tom Woods Single Piece Driveshaft - Installed 08/30/17
    • ECGS 4.88 Gears front and rear w/ rear ARB Locker - Installed 10/12/18
    • Crawl Box - Pondering
    • Supercharger :rofl::rofl:- maybe one day
    Exterior:
    • Removed steps and bug guard the day after I got it - Removed 05/24/15
    • Leer 100XL Camper Shell ( currently off because I am in between what I want to do) - Installed 01/18/16 - Removed 05/16/17
    • Someone decided to ram into the back of my truck at a gas station and drove off so my rear tailgate got debadged - Fixed 06/23/16
    • 5% window tint all the way around and 45% on the windshield - Installed 06/29/16
    • All Out Industries color-matched Headlights - Installed 09/27/16
    • C&W Custom color-matched taillights - Installed 11/05/16
    • Prinsu Cab Rack and Campershell Rack - In the works
    Interior:
    • Kenwood DDX9601HDD Head Unit - Installed 07/06/15
    • JL Audio Stealthbox w/ two 10" JL Audio shallow mount woofers- Installed 07/06/15
    • Viper Color OLED 2-way Security/Remote Start/SmartStart System- Installed 07/06/15
    • Weather Tech Floor Mats Front and Rear - Installed 05/06/16
    • Custom One Off Wood Shifter Knob - Installed 12/23/17
    • Red Map Lights - In the works
    • Door Speakers and Amp (undecided on brand or type) - In the works
    Electrical:
    • Bussmann RTMR Relay/ Fuse Block- pre assembled by @Roo1041 - Installed on a Tacoma Pros mounting plate w/ Bussmann 80 amp Circuit Breaker 10/25/16
    • Three OTRATTW switches for Halos, Light Bar, and Cubes - Installed in overhead 10/25/16
    • IGGY 20" single row light bar - Installed in front bumper 11/18/16
    • IGGY flood light cubes - Installed in front bumper 11/18/16
    • Blue torch battery cage for Optima group 34 - Sitting in garage
    • Yellow Top Optima group 34 battery- Sitting in Garage
    • Dual Battery setup- In the Works
    • Ditch lights - In the Works
    • Big Three Upgrade - I have a stock wiring harness to make the upgrade so I don't have to chop up mine I just need to get some misc. parts to do so Inspired by @tacozord - In the Works
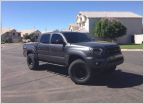
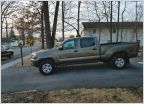
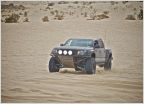
    I don’t really have a picture of when I first got it but I have a picture of my old rig with my truck in the background
    CAC6EC68-B7A6-4E9D-A67D-3ACF06FDE906.jpg
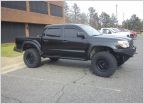
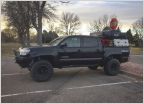
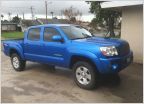
    As it currently sits
    8840B986-D820-4979-9E5D-EE7F142D8B6E.jpg
     
    Last edited: May 12, 2019
  2. Oct 27, 2017 at 8:48 AM
    #2
    Scottm2010

    Scottm2010 Well-Known Member

    Joined:
    Dec 28, 2013
    Member:
    #119383
    Messages:
    315
    Gender:
    Male
    First Name:
    Scott
    Missouri
    Vehicle:
    2019 Cement TRD Off Road
    The shackle flip kit from Archive is awesome.
     
    ARCHIVE likes this.
  3. Oct 27, 2017 at 12:31 PM
    #3
    lordetaco

    lordetaco [OP] Well-Known Member

    Joined:
    May 9, 2016
    Member:
    #186463
    Messages:
    949
    Gender:
    Male
    First Name:
    Tristan
    Lawton,OK
    Vehicle:
    2005 Toyota Tacoma
    I have heard. I actually don’t think I have heard anyone dislike it. But I got to get some sliders then that will probably be next or lockers not sure.
     
    ARCHIVE likes this.
  4. Oct 30, 2017 at 8:15 AM
    #4
    ARCHIVE

    ARCHIVE Well-Known Member Vendor

    Joined:
    Oct 29, 2015
    Member:
    #168099
    Messages:
    2,162
    Gender:
    Male
    First Name:
    Eric
    Orchard Park, NY (Buffalo)
    Vehicle:
    '05 Taco, '22 Tundra, '91 Cummins
    2.5" Fox relocation * Hammer hanger * Archive MD springs
    Thanks for including Archive on your build. I would stay with the AP Expo pack because the AP STD pack is not good
     
    fatfurious2 likes this.
  5. Oct 30, 2017 at 8:16 AM
    #5
    fatfurious2

    fatfurious2 IG: great_white_taco

    Joined:
    Jun 28, 2014
    Member:
    #132884
    Messages:
    48,534
    Gender:
    Male
    First Name:
    David
    Ashburn, VA
    Vehicle:
    2010 TRD OR Access Cab
    Welcome! we need pics!
     
  6. Oct 30, 2017 at 8:22 AM
    #6
    marcp3

    marcp3 Well-Known Member

    Joined:
    Jul 21, 2017
    Member:
    #224634
    Messages:
    46
    Gender:
    Male
    First Name:
    marc
    Vehicle:
    2015 tacoma dclb trd sport
    Why do you want to switch the leaf packs?
     
  7. Oct 30, 2017 at 11:50 AM
    #7
    lordetaco

    lordetaco [OP] Well-Known Member

    Joined:
    May 9, 2016
    Member:
    #186463
    Messages:
    949
    Gender:
    Male
    First Name:
    Tristan
    Lawton,OK
    Vehicle:
    2005 Toyota Tacoma
    During the summer I take the camper shell off, causing the ride quality to be really rough terrible and stiff. When I hit a bump it hopes all over the road. I do really like them when I have to pull a trailer because you can’t tell it’s back there.
    what pack would recommend?
     
  8. Oct 30, 2017 at 12:20 PM
    #8
    ARCHIVE

    ARCHIVE Well-Known Member Vendor

    Joined:
    Oct 29, 2015
    Member:
    #168099
    Messages:
    2,162
    Gender:
    Male
    First Name:
    Eric
    Orchard Park, NY (Buffalo)
    Vehicle:
    '05 Taco, '22 Tundra, '91 Cummins
    2.5" Fox relocation * Hammer hanger * Archive MD springs
    That hopping all over the road unloaded can happen if your shocks are too short, I recommend checking that out 5125's are pretty short. The Expo's have been decent for most of my customers
     
    marcp3 likes this.
  9. Oct 30, 2017 at 12:57 PM
    #9
    marcp3

    marcp3 Well-Known Member

    Joined:
    Jul 21, 2017
    Member:
    #224634
    Messages:
    46
    Gender:
    Male
    First Name:
    marc
    Vehicle:
    2015 tacoma dclb trd sport
    I bought a set of archive premium shackle flip kit a while ago with the intention of installing standard All Pro, could it be used with deavers or AP expo instead?
    (didn't install yet)
     
  10. Oct 30, 2017 at 1:12 PM
    #10
    ARCHIVE

    ARCHIVE Well-Known Member Vendor

    Joined:
    Oct 29, 2015
    Member:
    #168099
    Messages:
    2,162
    Gender:
    Male
    First Name:
    Eric
    Orchard Park, NY (Buffalo)
    Vehicle:
    '05 Taco, '22 Tundra, '91 Cummins
    2.5" Fox relocation * Hammer hanger * Archive MD springs
    Yeah it can be used with any leaf pack. The Deaver Expo u402's are preferred because the quality is there, 5160 American made steel.
    I've found customers who bought the AP STD packs got little to no lift from springs even with stock hanger, then they buy shackle flip to fix the problem with the springs. Anyone reading, please go back to All Pro with the issue on STD's so they can address it.
     
    lordetaco[OP] likes this.
  11. Oct 30, 2017 at 2:55 PM
    #11
    marcp3

    marcp3 Well-Known Member

    Joined:
    Jul 21, 2017
    Member:
    #224634
    Messages:
    46
    Gender:
    Male
    First Name:
    marc
    Vehicle:
    2015 tacoma dclb trd sport
    Gotcha! thanks for the info!
     
    ARCHIVE[QUOTED] likes this.
  12. Jan 7, 2018 at 11:39 PM
    #12
    lordetaco

    lordetaco [OP] Well-Known Member

    Joined:
    May 9, 2016
    Member:
    #186463
    Messages:
    949
    Gender:
    Male
    First Name:
    Tristan
    Lawton,OK
    Vehicle:
    2005 Toyota Tacoma
    The day after I put the camper shell on. I added some things to this camper such as the pet screens, new lock so I had a key, and new light.
    09313760-000B-497C-900F-C47638038821.jpg
     
  13. Jan 7, 2018 at 11:45 PM
    #13
    lordetaco

    lordetaco [OP] Well-Known Member

    Joined:
    May 9, 2016
    Member:
    #186463
    Messages:
    949
    Gender:
    Male
    First Name:
    Tristan
    Lawton,OK
    Vehicle:
    2005 Toyota Tacoma
    I found some color matched headlights on the BST thread after receiving them finally they were damaged, but we decided the shipping company damaged them and I didn’t want to fight with them to get it fixed. They didn’t leak so I wasn’t really worried about it. After installing them whoever built them mixed up the wiring for the demon eyes and it would need two controllers to work properly or to be opened up and fixed. So one day I will open them up and fix them and the cracked lense. Till then halos only. The have 6k bulbs in them.
    BFD189D1-F524-4055-BC1B-2A053E25DB2E.jpg F65748C8-A498-42D1-AB5E-C63CD84F326D.jpg BED226D8-1357-4DD1-8FEF-2D9AC5EC2B08.jpg 49FE3CF6-6E30-4D7A-BC36-780AE5F76EEB.jpg
     
    Last edited: Jan 7, 2018
  14. Jan 7, 2018 at 11:58 PM
    #14
    lordetaco

    lordetaco [OP] Well-Known Member

    Joined:
    May 9, 2016
    Member:
    #186463
    Messages:
    949
    Gender:
    Male
    First Name:
    Tristan
    Lawton,OK
    Vehicle:
    2005 Toyota Tacoma
    I came across a brand new Pelfreybilt Steel middle loop bumper on the ole BST thread. It was in Florida and I thought that would kill the deal, but thanks to Uship it didn’t. 50 dollars and three weeks later it was at my shop waiting to be powdercoated. The install when smoothly other than some holes not lining up. The mill helped with that. It was a while before I got lights in it and it still doesn’t have a winch in it to this day.
    840688A3-E5EA-4BF6-BF31-9AF358E9F0F2.jpg 4C7AED09-E83B-4EA8-897E-86F6E84DDC5E.jpg
    Cutting the notches for the lights.
    0AF7632D-034A-449B-B8B4-19D66BC5E670.jpg D21766B9-7F82-45C5-BBE4-B4C728C4DD90.jpg B14E28CF-65DC-4EE9-A0C5-66075B28A8F3.jpg
    Getting the reenforment brackets to line up.
    EC6A2D61-4290-49D8-A5DD-78A7AF89BFE6.jpg C7EDE4AC-55DA-475F-9A74-A3E790ADC67F.jpg ADEEF820-D4BC-41F5-AE95-3785EDF02F77.jpg 9E98D3C4-C7EE-4DD1-AC72-4C7E9BDD9202.jpg
     
    Last edited: Jan 8, 2018
  15. Sep 7, 2018 at 7:28 AM
    #15
    Timbren-Industries

    Timbren-Industries Well-Known Member

    Joined:
    Jul 10, 2018
    Member:
    #258913
    Messages:
    91
    Gender:
    Male
    Get those rear Bump Stops on and post some pictures!
     
    lordetaco[OP] likes this.
  16. Sep 7, 2018 at 3:37 PM
    #16
    lordetaco

    lordetaco [OP] Well-Known Member

    Joined:
    May 9, 2016
    Member:
    #186463
    Messages:
    949
    Gender:
    Male
    First Name:
    Tristan
    Lawton,OK
    Vehicle:
    2005 Toyota Tacoma
    Still just sitting in a box. Maybe one day.
     
  17. May 12, 2019 at 1:46 PM
    #17
    lordetaco

    lordetaco [OP] Well-Known Member

    Joined:
    May 9, 2016
    Member:
    #186463
    Messages:
    949
    Gender:
    Male
    First Name:
    Tristan
    Lawton,OK
    Vehicle:
    2005 Toyota Tacoma
    Well Figured it was time to do a update in here of some progress I have made on the truck. So prepared for massive photo dump. I toke a bunch of pictures with the intentions to make a how to thread on install BAMF trilogy skids, but its been a minute since I installed these so I don’t remember some details. So I’ll attempt a half-ass write up in here. That been said If you damage yourself or your truck using these I take no responsibility.

    upload_2019-5-12_15-2-14.jpg
    You'll have to get a exhaust re-route to be able to run these skids. I got mine done for $80 bucks down at the local chop and weld place.
    upload_2019-5-12_15-3-52.jpg
    The skids themselves. These things are beefy af and well-built. These things are heavy, but perfect for some that actually wheels their truck or thinks they are going to.
    upload_2019-5-12_16-11-10.jpg
    So I called @JLee to ask if the transfer case skid had missed getting these holes cut out (that are circled) he said I had got a mid skid that was in between making the switch from not cutting out the middle holes because they were not needed anymore with proof of testing. I went ahead and drilled them put so I could run the bolts in the middle as you can see thru the install pictures. UPDATE: So after running these skids for about a year now, the middle bolts are pain in the ass to remove when you have to remove the skid to work on stuff, and I believe Jerry is right they don’t add any extra integrity to the skids.
    upload_2019-5-12_15-12-9.jpg
    So above are all the tools you will need if you are doing the full trilogy install. You may not need the allen wrench anymore as I believe the new set is using the factory bolts instead. I also changed my front diff oil while I was at it, so I didn't have to remove it in 10,000 miles.
    Tools:
    Safety glasses
    Gloves
    Jack (Daniels)
    Impact ( not required but dam does it make it easier)
    Drill with a 1/2" chuck
    Hammer
    8mm Allen Wrench or socket (socket is easier)
    Dead blow hammer
    Two 9/16" wrenches ( a ratcheting one will help you wonders with putting the transfer case skid on)
    One 14mm wrench
    One 3/4" wrench ( a stubby would help with the tight space for the mid skid bolts)
    Ratchet
    3" extension
    3/4" socket
    17mm socket
    9/16" deep and shallow socket
    14mm socket
    various drill bits to step up to 1/2" hole needed
    1/2" drill bit
    center punch
    sharpie
    can of paint
    a friend or someone you tricked in to thinking this would only take an hour I promise.
    upload_2019-5-12_15-44-1.jpg
    Above is the picture of tools if you are just installing the IFS Skid. Once again I believe the new design doesn't require a allen wrench because it uses the stock bolts.
    Tools:
    Jack
    Impact
    8mm Allen Wrench or socket
    Ratchet
    3" extension
    3/4" socket
    17mm socket
    3/4" wrench
    upload_2019-5-12_15-45-5.jpg
    First you're going to want to drop the stock skid.
    upload_2019-5-12_15-14-52.jpg
    Then your going to need a 17mm socket you remove these support brackets 3 bolts per side. You'll need two of these bolts to install the new skid, so don't throw them to far. upload_2019-5-12_15-15-1.jpg
    upload_2019-5-12_15-15-49.jpg
    Heres what you will be removing.
    upload_2019-5-12_15-16-39.jpg
    Heres what you will need to install the IFS skid
    upload_2019-5-12_15-16-51.jpg
    There is a bunch of 3/8" bolts included in the packaging use the two shorter ones for this.
    upload_2019-5-12_15-17-35.jpg
    This is the easiest way I found to put it up and take it down for maintenance, and yes I used a blanket to keep the jack from scratching the skid. :rofl:
    upload_2019-5-12_15-17-48.jpg
    upload_2019-5-12_15-18-12.jpg
    Use the stock bolts here to secure it with the jack still supporting it, then put the allen bolts in using the 8mm allen wrench so that way the skid will support itself and you can remove the jack to get to the rear bolts.
    upload_2019-5-12_15-18-52.jpg
    upload_2019-5-12_15-19-12.jpg
    The flat strap piece goes on top of the cross member then feed the bolts thru. Use a 9/16" wrench and socket to tighten the nuts. Torque spec 3 ugga duggas.
    upload_2019-5-12_15-21-16.jpg
    upload_2019-5-12_15-21-0.jpg

    Where the allen bolts go, a socket here would have been easier than a wrench. upload_2019-5-12_15-21-43.jpg
    Okay so now for the mid-skid, if you only bought the IFS skid go back on BAMF website and order the rest of the skids so you can continue follow along! So the mid skid gave me the most trouble, mostly because of my jack placement, and I had to switch the bolts out after realizing there was not enough thread showing on the bolts to properly tighten. upload_2019-5-12_15-22-19.jpg
    So here is the important part about jack placement so you don't have to reinsert the bolts to move jack later. DON'T put the jack directly on the crossmember like I did, put it on the transfer case because the mid skid wraps around this crossmember. Use a 14mm wrench and socket and remove the 4 stock bolts and discard.
    upload_2019-5-12_15-22-49.jpg
    Here is what you will need to install the mid skid.
    upload_2019-5-12_15-23-11.jpg
    Heres where it pays to either have a friend or another jack to lift this heavy sob in place. My friend that I convinced this wouldn't take that long.

    So the easiest way to put this up is the rest the lip of the mid skid on the IFS Skid then lift up in place and each person feed one bolt thru the crossmember so it supports itself. Here you can also see I had to move the jack to a different place.
    upload_2019-5-12_15-24-14.jpgupload_2019-5-12_15-24-40.jpg
    upload_2019-5-12_15-25-11.jpgupload_2019-5-12_15-30-37.jpg
    Put the three 1/2" bolts in the front of the mid skid. The mid skid should be on top of the IFS Skid and they bolt together. Use a 3/4" wrench and socket to tighten.
    upload_2019-5-12_15-31-14.jpg
    Here you can see the problem I was having about not there not being enough thread showing. Yes, I put the transfer skid on to see if it added enough metal so I could tighten and it didn't. No biggie a quick trip to Fastenal, and we were back in action.
    upload_2019-5-12_15-36-21.jpg
    Now we are ready to install the transfer skid. Go ahead and install the transfer case crossmember so you can test fit it and mark holes for drilling.
    upload_2019-5-12_15-33-3.jpg
    Using a jack get it up there and somewhat in place to mark holes
    upload_2019-5-12_15-33-24.jpg
    upload_2019-5-12_15-34-44.jpg
    Using a center punch give it a good ole whack to give your drill bit somewhere to start
    upload_2019-5-12_15-35-17.jpg
    I also outlined it with a sharpie, still to this day don't know why
    upload_2019-5-12_15-35-35.jpg
    Time to break out the poor man magnetic drill press. Be very careful doing this and take it slow. Wear some safety glasses and gloves here. The drill will kickback if you add to much pressure to fast. Start with a smaller drill bit and work your way up to 1/2"
    upload_2019-5-12_15-37-37.jpg
    So I marked this side then realized I was on the frame rail on the other side, so I had to readjust but just punched this side and didn't remark. Here is the final 1/2" hole. Don't forget to spray paint the holes to ensure no rust occurs.
    upload_2019-5-12_15-38-44.jpg
    You can see the difference in exposed thread here after switching the bolts.
    upload_2019-5-12_15-38-1.jpg
    upload_2019-5-12_15-39-53.jpg
    Go ahead and jack up the transfer skid. Insert the front of the transfer skid in the bolts going thru the transmission crossmember, but don't put any nuts on. Go back to the transfer case crossmember and put the 1/2" bolts and nuts in and tighten that. It will hold itself now.

    Now for the fun part of tighten these bolts down on the transmission crossmember. These are a beach, I found having a ratcheting wrench saves a bunch of time. I understood right here why Jerry Said I didn't need to have the middle bolts. I gave them all the ugga duggas I could.
    upload_2019-5-12_15-41-10.jpg
    upload_2019-5-12_15-41-3.jpg
    upload_2019-5-12_15-42-52.jpg
    Boom you done! Congrats, now go slam on some rocks worry free.
    upload_2019-5-12_15-43-10.jpg
    This is all the bolts and nuts I had left over. He gives all kinds of extras just in case.
     

    Attached Files:

    Last edited: May 12, 2019

Products Discussed in

To Top