1. Welcome to Tacoma World!

    You are currently viewing as a guest! To get full-access, you need to register for a FREE account.

    As a registered member, you’ll be able to:
    • Participate in all Tacoma discussion topics
    • Communicate privately with other Tacoma owners from around the world
    • Post your own photos in our Members Gallery
    • Access all special features of the site

PBFAB’s S-tocke-R Build

Discussion in '3rd Gen. Builds (2016-2023)' started by PB FAB, Nov 19, 2017.

  1. Nov 19, 2017 at 4:01 PM
    #1
    PB FAB

    PB FAB [OP] Well-Known Member

    Joined:
    Apr 11, 2017
    Member:
    #215942
    Messages:
    794
    Gender:
    Male
    Vehicle:
    2017 SR DCSB 4x4 v6
    I purchased my 2017 SR 4x4 v6 in March after last work truck burnt a couple of valves and and had cracks around all of the spark plug holes. 380,000 miles on the 2001 4 banger standard cab. Truck had two of everything. 2 motors, 2 trans, 2rear ends etc.... It was time to go. Out with old in with the new. Sold her to a friend and after a new head was put on its still driving around town today.


    I plan on owning my new truck for at least a couple hundred thousand, I just don’t know if these 3rd gens are up to the task with all the drivability problems they have. Time will tell.

    This will be a work truck primarily with weekend expedition trips, and I’ll tow and advertise my off road trailers with it. My intent on the vehicle is to try and keep a low profile on the build with high performance. I work in a lot of neighborhoods where a plain vehicle can blend in better than something more flashy.


    Just bought the cheapest 4x4 dcsb v6 within 400 miles. The truck had 1.5 miles on it and I had to help the sales guy pull all the plastic and paper out of it befor the test drive. The truck drove horrible for the first 5 miles, almost walked on the sale. It was also the only truck on the lot without privacy glass. It looks really weird next to 30 other trucks with tinted windows. I plan on building the truck and have no need for crawl control. An ARB and my right foot will handle the traction control.


    I sold the standard cab and bought a Snugtop Rebel with side windows. I ordered the shell from Eddie at Camper Center in Ventura, CA. 2 weeks later it was installed.

    Now it’s time for ceramic tint.


    Here is a temperature difference with the tint.


  2. Nov 19, 2017 at 4:53 PM
    #2
    PB FAB

    PB FAB [OP] Well-Known Member

    Joined:
    Apr 11, 2017
    Member:
    #215942
    Messages:
    794
    Gender:
    Male
    Vehicle:
    2017 SR DCSB 4x4 v6
    After 4000 miles I had killed the rear leaf springs. I estimate about 450 pound in truck daily, shell, work gear etc... As a temporary fix I installed ride right air bags. The day star mounts lasted about a week before I removed them. I estimate that with installation of the bags you loose 1.750 inches of compression, the day star mounts almost add another inch to that number. With 40psi the truck would bottom out in the rear hard. I removed the daystars and the truck would only bottom out on really large bumps. The stock hitachi shocks could not handle the rebound at all. It was a fun ride for a few months.


    Cover craft ballistic seat covers were installed also. The clazzio look better but these are super tough and water proff. They are also easy to slide on and make ingress and egress easier.


    I helped a friend close up his dealership after a off road show. I teased the wife and said this was coming home.


    I started to collect parts to lift the truck around this time. I had all the parts in hand when this happened to my tow rig and camper.:mad:


    The car had expired out of state tags and my survalance camera cought the woman stumbling off walking away. My 3 inch 3/16th thick c channel extension hitch took the brunt of the hit. The 13000 pound truck and camper were moved over 2 feet from the hit. There was not a straight panel left on the car before it was towed to the impound yard.

    The Tacoma build had to be put on hold and the camper put into the shop to be rebuilt. Sorry S-tocke-R you’ll have to wait.

    The whole rebuild of the camper hinged on if I could find replacement grey and black tanks. Thankfully Inca plastic ,who made the original tanks 30 years ago, is still in business, located in California, and had the molds for my tanks. Time to tear it apart, upgrade, and rebuild it.
     
  3. Nov 19, 2017 at 6:21 PM
    #3
    PB FAB

    PB FAB [OP] Well-Known Member

    Joined:
    Apr 11, 2017
    Member:
    #215942
    Messages:
    794
    Gender:
    Male
    Vehicle:
    2017 SR DCSB 4x4 v6
    Thankfully the tanks were empty! After tearing down the camper a lot of dry rot and water damaged was exposed. Now is the time to fix it right. The 2.5 FOX shocks will have to wait...


    Marine grade plywood and a mix of white oak and douglas fir and the camper was better than new.


    Painted and wrapped in heavy plastic.


    I fabbed up a new rear bumper, sorry Tacoma, just a few more weeks.


    Over the next two weeks the camper and truck were clay barred and polished. The camper felt like rubbing two pieces of 80 grit sand paper together on the first couple of passes. I used a synthetic clay bar mitt from chemical guys, took two of them to finish the camper.

    https://www.chemicalguys.com/Surface_Cleansing_Mitt_Med_Grade_Clay_System_p/cly_302y.htm


    Before

    After


    At this point my arms, chest, and back were toast. Way too much wax on wax off! At least 50 hours to do the camper. I used Jetseal and Butter wax to finish it.

    And finished. New tanks, toilet, plumbing, external shower, roof fans, led lights, bumper, dump valves, and 12 wiring mods inside.


    Now back to the S-tock-R build.
     
    c jackson likes this.
  4. Nov 19, 2017 at 8:47 PM
    #4
    PB FAB

    PB FAB [OP] Well-Known Member

    Joined:
    Apr 11, 2017
    Member:
    #215942
    Messages:
    794
    Gender:
    Male
    Vehicle:
    2017 SR DCSB 4x4 v6
    Alright it’s taco time.
    I have over 30,000 miles on the truck. I’m averaging 225 miles a day m-f. :annoyed:
    Overall the truck is averaging 19.5 mpg. Not to bad. My old truck only did 20 mpg loaded down.

    I installed a Shift Sence pro at around 5000 miles, it made the truck driveable, prior to that I was shifting it myself with the s mode.

    Upgrades to the truck will include the following.

    -2.5 FOX shocks with DCS
    -Camburg uniball upper arms
    -wheeler super bumps
    -ECGS Bushing
    -rear springs will be changed at a later date, either Wheeler off roads or deavers, with super bumps, I cannot stand driving this truck without bumpstops.
    -train horn for scaring kids and old people, JUST KIDDING, King Kong spun brass made in Tennessee. I don’t know where it’s going to fit.
    -arb compressor
    -arb fridge
    -Solar panel
    -an assortment of led lights
    -custom wiring for 12 circuits and a small inverter
    -two removable awnings
    -dash cameras
    -vhf/uhf radio
    -custom rock sliders, I’ve been doing a lot of stainless welding lately.............

    I plan on running the steel rims and tires for work and swapping to some 33’s for camping and off roading.

    Before and after pic’s, looks stockish from a distance.

    The most plain looking build ever, perfect!


    I’m contemplating covering the resi’s with black felt. But for now you can still see them. I almost painted the Camburg arms flat black but they just look too nice to do that to them.

    The ECGS bushing install was simple. I didn’t evan change the seal. No leaks after 3000 miles. The new seal is in the part cabinet.

    I picked up the fox’s from transamerica months ago. All other suspensions parts were sourced from Wheelers Off Road. @Wheelers Off Road, Inc. Thanks for the help and parts.

    I had a small problem with one of my Camburg uniballs. It looked like it was possibly an assembly unit or old one that was shipped out by accident, the ball had physical play and was pitted. After I emailed and called Wheelers, they called Camburg and Camburg overnighted, I received next day, a new 1 1/4 uniball. Excellent service from both of them:cheers: thanks guys.


    Here’s some install pictures.


    I had to clearance part of the skid plate subframe for due to contact with the sway bar. It was in full contact and making a horrible groaning sound. Nothing fancy just a simple notch.


    I am waiting to add more items to the truck befor I pull the trigger on rear springs. I had to do some minor grinding to the air bag mounts to make room for the 2.5’s.


    I have left the bags unbolted on the bottom for 25,000 plus miles and have had zero problems. Here’s a flex shot, the stock springs are not so flexy.


    The ride improvement is striking compared to stock. The ride is now firm but not uncomfortable. The steering is precise. The cornering has improved. Bumps and driveway entrances and exits are now fun, the truck floats through them.

    I measured an extra 1.5 inches of droop on the front end with the extended travel fox’s. The rear has the potential for more droop. I using the tundra rear fox’s for more travel, but better rear springs are needed.

    Ride height measurements are below and taken from center of hub to fender. The front shocks out of the box lifted the truck a little more than one inch. They will be adjusted later once rear springs are installed.

    Before After
    Front. Front
    D - 21 P - 21.250 D - 22.25 P - 22.5

    Rear
    No Air
    D - 20.875. P - 21.250.
    Air stock Air 2.5 shocks
    D - 22.125. P - 22.125. D - 23.5. P - 23.5


    That’s it for now. Next I’ll update with the first trail run.
     
    cohiker and Oreo Cat like this.
  5. Nov 19, 2017 at 8:56 PM
    #5
    Oreo Cat

    Oreo Cat Worst Member

    Joined:
    Sep 19, 2016
    Member:
    #197755
    Messages:
    5,042
    Dealer woundnt take care of the sway bar problem?
     
  6. Nov 20, 2017 at 5:08 PM
    #6
    Greenbean

    Greenbean B.S. Goodwrench

    Joined:
    Aug 8, 2012
    Member:
    #84332
    Messages:
    3,253
    Gender:
    Male
    First Name:
    Zack
    Western NC
    Vehicle:
    2015 AC 2.7L 5-spd 4x4 Utility Package
    SUB'D for sure!!!

    It's an SR build!!!! Heck to the YES!

    Love the SR trucks...


    Sorry about the camper crash man.

    I want to order up an SR DCSB so stinkin bad!!!

    I also have a set of those CoverKing style ballistic seat covers and yes they aren't as wrinkle free as others but I love the kind of slippery feel they have and they suit my needs just fine. At 6'4" @205 I don't need more padding, just a great tough cover.
     
    PB FAB[OP] likes this.
  7. Nov 21, 2017 at 10:16 AM
    #7
    PB FAB

    PB FAB [OP] Well-Known Member

    Joined:
    Apr 11, 2017
    Member:
    #215942
    Messages:
    794
    Gender:
    Male
    Vehicle:
    2017 SR DCSB 4x4 v6

    Normal operating characteristic. :)
     
  8. Feb 2, 2018 at 9:48 AM
    #8
    PB FAB

    PB FAB [OP] Well-Known Member

    Joined:
    Apr 11, 2017
    Member:
    #215942
    Messages:
    794
    Gender:
    Male
    Vehicle:
    2017 SR DCSB 4x4 v6
    The first real off-roading I did in the SR was at the gambler500 in Lucern, CA. Unfortunately didn’t get many shots of the taco but I took a bunch of all the gambler cars. The taco did great on Camp Rock rd. 60 mph was nice and controlled on street tires at 40 psi. Lower tire psi would have been a little smoother, way, way better than stock. I saw a pro and another white trd out there running support for one of the gamblers.


    The first real challenge was driving a sandy wash/canyon in between Lucern and upper apple valley. This sand wash took almost half the cars out and took hours to get though. Broken shocks, exhausts systems were ripped off, and dented rims were some of the carnage.

    My buddy in the super duty wound up pulling a Toyota mini van with a welded rear diff up the last mile of the canyon.


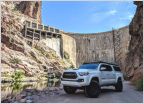
    The only pic of the taco.


    Here is the location of the canyon, it was a fun drive, if you need to take a short cut to Barstow I deffinetly recommend it!


  9. Feb 2, 2018 at 10:08 AM
    #9
    PB FAB

    PB FAB [OP] Well-Known Member

    Joined:
    Apr 11, 2017
    Member:
    #215942
    Messages:
    794
    Gender:
    Male
    Vehicle:
    2017 SR DCSB 4x4 v6
    The next mods for the taco are....

    SSO front bumper and smittybuilt winch
    Rear arb locker
    Arb twin compressor
    KING KONG TRAIN HORN
    Inverter
    Arb fridge
    Squadron Pro fog lights with a dimmer switch
    30 light bar
    Rear flood lights
    Heavy gauge welding cable to truck bed to power inverter and compressor
    Solar on roof
    2 ARB awnings with detachable mounts
    CH4x4 switches

    And a bunch of custom wiring.

    SSO bumper with 30 inch led cut out


    Switches


    Fridge and 10000 lb winch


    Spools and spools of wire and arb comp...


    And I put a china TRD Pro grill on.


    Now all I need is a couple weeks, :rofl:, to get it all done!
     
  10. Feb 3, 2018 at 8:14 PM
    #10
    Buckoma

    Buckoma Well-Known Member

    Joined:
    Jan 26, 2013
    Member:
    #96125
    Messages:
    1,060
    Gender:
    Male
    First Name:
    Chris
    Buckeye, AZ
    Vehicle:
    2016 TRD Sport 4x4
    I keep looking at that big truck with the sexy camper. Nice job dude.
     
  11. Feb 3, 2018 at 9:10 PM
    #11
    PB FAB

    PB FAB [OP] Well-Known Member

    Joined:
    Apr 11, 2017
    Member:
    #215942
    Messages:
    794
    Gender:
    Male
    Vehicle:
    2017 SR DCSB 4x4 v6
    Thanks, I never want to clay bar it again lol. Looking forward to doing Yellowstone, grand Tetons, and Washington State this summer with the family and Tacoma in tow.
     
  12. Feb 4, 2018 at 1:28 PM
    #12
    PB FAB

    PB FAB [OP] Well-Known Member

    Joined:
    Apr 11, 2017
    Member:
    #215942
    Messages:
    794
    Gender:
    Male
    Vehicle:
    2017 SR DCSB 4x4 v6
    My Southern Style Off-road bumper came in. Too bad fedex dropped it. Time to bust out the tools.


    I test fit the 30 led bar and the winch.


    The bumper looks like it has a small bow in it around the light opening, 1/8 inch. A little massaging with the hammer and a block of wood and it looks a lot better.


    I will be adding in gussets around the winch fairlead and the tow hook d rings. I plan on flat towing so a little reinforcement can’t hurt. I think I’m going to add a receiver hitch to the front also.
     
  13. Mar 12, 2018 at 9:20 AM
    #13
    PB FAB

    PB FAB [OP] Well-Known Member

    Joined:
    Apr 11, 2017
    Member:
    #215942
    Messages:
    794
    Gender:
    Male
    Vehicle:
    2017 SR DCSB 4x4 v6
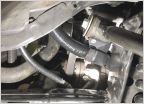
    This weekend I was able to finish the install of my SSO slimline bumper. I plan on flat towing the Tacoma off of the bumper drings. I boxed the drings in after observing the 1/8 inch wide 2 inch long weld attaching the dring to the thick 3/16 inch steel. I forgot to get a picture of the plates fully boxed in to prevent water and mud from ponding inside. I added gussets to the winch fairlead and installed a 2 inch reciever hitch. The hitch made contact with the power steering cooler. I bent the cooler by hand back towards the ac condenser to provide about a 1/4 of clearance.

    The hoop was cut off on the passenger side, grinded, leveled, and rewelded.

    I mounted Baja designs squadron pros in the factory fog light location. I drilled the bolt hole out to a 1/4 inch and used a stainless 1/4 20 bolt.

    A smittybuilt 10000 pound winch with synthetic line was bolted into the bumper.

    Up next is wiring the truck and installing the arb compressor, fridge, and awnings.


    Stock welds.


    Boxing in drings to the thick 3/16 plate.


    Winch fairlead gussets and 2 inch reciever hitch.


    Fairlead grinded for hitch clearance.


    Hoop cut off and rewelded level.


    Primer, paint, and raptor u poll.


    Baja squadron


    Finished install.


    Power steering angled back for clearance.

     
  14. Mar 12, 2018 at 9:51 AM
    #14
    PB FAB

    PB FAB [OP] Well-Known Member

    Joined:
    Apr 11, 2017
    Member:
    #215942
    Messages:
    794
    Gender:
    Male
    Vehicle:
    2017 SR DCSB 4x4 v6
    At 48,000 miles it is time for tires. I put 265-75-16 BFG AT KO2s on the stock steel rims. The tires contacted the 90 degree bends on the dcs resi’s. I rotated the bend in the hose up vertically and the tires clear fine at full lock. I took the family up to big bear to go play in the snow with my daughter and the tires did good in the snow, ice, and rain.


  15. Mar 13, 2018 at 11:32 PM
    #15
    L3TT3RS

    L3TT3RS Well-Known Member

    Joined:
    Jun 2, 2017
    Member:
    #220549
    Messages:
    159
    Gender:
    Male
    First Name:
    Taylor
    Longview, Texas
    Vehicle:
    2019 Tundra-> Fox/Total Chaos/Coachbuilder
    Man I love this build!
     
  16. Mar 14, 2018 at 8:09 AM
    #16
    PB FAB

    PB FAB [OP] Well-Known Member

    Joined:
    Apr 11, 2017
    Member:
    #215942
    Messages:
    794
    Gender:
    Male
    Vehicle:
    2017 SR DCSB 4x4 v6

    Thanks man.
     
    L3TT3RS[QUOTED] likes this.
  17. Mar 15, 2018 at 5:02 AM
    #17
    PB FAB

    PB FAB [OP] Well-Known Member

    Joined:
    Apr 11, 2017
    Member:
    #215942
    Messages:
    794
    Gender:
    Male
    Vehicle:
    2017 SR DCSB 4x4 v6
    I started wiring the SR today. I bolted a new fuse panel to the factory fuse panel lid. I will leave a loop of wire for every connection, about a foot, so I can remove panel and get to factory fuses without disconnecting wires. 1/4 20 bolts were used to mount the aluminum panel to the factory fuse box lid. The aluminum was spaced up to provide room for 8/32 nutserts and bolts.

    I pulled the main run up to the overhead consul. This will power my dimmer switch for the Baja designs squadron pros, 30 inch heise bumper light bar, Baja designs S2 rear facing bumper lights, and some rock lights yet to be purchased.

    Wires were passed through the cab using the factory wiring grommet. All wires were placed in loom or shrink tubing for protection.

    The cnl fuse is for the 2 gauge welding cable that I will be running to the truck bed to power an inverter, arb twin compressor, and arb fridge.

    I was only able to power up the squadrons pro’s. They draw about 6.7 amps at full power and a little over 3 at mid power. Dimmer switch works great mounted in the sunglasses holder which I never used.

    Finished squadron pro’s

    Initial layout


    Cnl fuse for 2 gauge welding cable


    Pulling wire

    Harness up A pillar


    Overhead switch layout

    Medium power

    High power
     
  18. Mar 24, 2018 at 6:11 AM
    #18
    PB FAB

    PB FAB [OP] Well-Known Member

    Joined:
    Apr 11, 2017
    Member:
    #215942
    Messages:
    794
    Gender:
    Male
    Vehicle:
    2017 SR DCSB 4x4 v6
  19. Mar 24, 2018 at 6:12 AM
    #19
    PB FAB

    PB FAB [OP] Well-Known Member

    Joined:
    Apr 11, 2017
    Member:
    #215942
    Messages:
    794
    Gender:
    Male
    Vehicle:
    2017 SR DCSB 4x4 v6
    Started construction of the air, inverter, 12 volt power box for the truck bed.

    Lots more wiring to come.

     
    Last edited: Mar 25, 2018
  20. Mar 26, 2018 at 6:07 PM
    #20
    PB FAB

    PB FAB [OP] Well-Known Member

    Joined:
    Apr 11, 2017
    Member:
    #215942
    Messages:
    794
    Gender:
    Male
    Vehicle:
    2017 SR DCSB 4x4 v6
    Three days later.....I finished the wiring in my truck. I ran 2 gauge welding cable back to the truck bed to power the compressor and morning star sure sine 300 inverter. The cables were wrapped in shrink tubing, corrugated wire loom then more heat shrink tubing, overkill but I can safely say it will never rub though. I wrapped about 5 feet of the loom with high heat reflective tape and fiberglass header tape where the lines pass by the pre cat and main catalytic converters. I did the same for the trigger wires to the arb compressor, locker solinoid, inverter relay, and train horn.

    I ran the 2 gauge cables and trigger wires across the engine bay and down the passenger side of the truck. I did this for two reasons. The first is because the drivers side has the fuel and brake lines in the way. The second was because the factory fuel inlet is by the corner of the bed. The passenger was wide open the safer route to take.

    All wires connected to the fuse panel and battery were left long so I can install a Bussman fuse panel later on and clean it up.

    The cab was wired with 5 ch4x4 switches along with a usb outlet and a push button for the horn.

    The arb cmk12 dual compressor draws 44 amps running and took a little over a minute and a half to fill the 5 gallon tank.

    The compressor went up to 170 psi before kicking off. It cycles back on around 140 psi.

    The trigger wires have a metro link plug outside of the box.

    I can remove the power/air box in in under two minutes by disconnecting the trigger wire plug, removing the 2 gauge wires, and pulling out the push connector to the locker.

    I now have a truck that I can use the locker any time I want, 2H, 4H, 4L and an inverter that is silent that can power movies or laptop for the kid on road trips or charge 18 volt battery packs for hand tools.

    I might have to wire up the 2 low switch next!

    After 6 days straight I’m ready to go back to work, or go exploring, just no more work on the S-tock-R truck....for a week or two :burnrubber:.


Products Discussed in

To Top