1. Welcome to Tacoma World!

    You are currently viewing as a guest! To get full-access, you need to register for a FREE account.

    As a registered member, you’ll be able to:
    • Participate in all Tacoma discussion topics
    • Communicate privately with other Tacoma owners from around the world
    • Post your own photos in our Members Gallery
    • Access all special features of the site

AdventureTaco - turbodb's build and adventures

Discussion in '1st Gen. Builds (1995-2004)' started by turbodb, Apr 4, 2017.

  1. Dec 4, 2017 at 10:18 PM
    #321
    Digiratus

    Digiratus Adventurer

    Joined:
    Mar 26, 2010
    Member:
    #34006
    Messages:
    23,046
    Gender:
    Male
    First Name:
    Mike
    Roaming the PNW
    Vehicle:
    The RedHead
    2002 XtraCab TRD 4x4 SCv6 AutoTrans With Lots of Mods ADS COs w/Compression Adjusters Camburg Uniball UCAs Whiteline Lower Control Arm Bushings Kartek 7" Limit Straps Plastics Guy Front Bumpstops Custom Alcan Springs +800 lbs +3" ADS 10" Stroke Triple Bypass w/Resi Rear Shocks Custom Rear Shock Relocate All-Pro U-bolt Flip w/Timbren Bumpstops 4.88 Nitro Gears ARB Front Locker ARB Twin Compressor Black 17x8 Konig Countersteer Type X 285/70r17 Falken A/T3w Gunmetal 16x8 SCS Ray10s 255/85r16 Maxxis Bighorns Limited Edition (Relentless) Elite Front Bumper Smittybilt X2O 10K Winch Diode Dynamics SS3 Sport Selective Yellow Fog Lights in the Bumper Diode Dynamics SS3 Pro 4,000 Kelvin SAE Driving Lights with Clear Lenses on the Bumper Morimoto D2S Projectors XB35 Ballasts + 4300K Bulbs Badland Sliders FrankenFab Tire Carrier Swingout bumper w/kitchen BudBuilt Front & Bellypan Skids BAMF Rear Diff Skid Dometic CFX 55im Fridge/Freezer Alpha II Hardshell RTT Badland Custom Bed Rack Denso 210-0461 105 amp alternator Dual Northstar 24F AGM batteries BlueSea 7622 ML-ACR Battery controller Peak DBI Dual Battery Voltage Monitor Magnuson MP62 Supercharger w/2.37" Pulley Haltech Elite 2000 Standalone ECU Denso 650cc Fuel Injectors Doug Thorley Headers Aeromotive Stealth 340 Fuel Pump TransGo A340F Reprogramming Shift Kit Magnaflow Hi-Flow CAT, Magnaflow 18" Muffler w/Vibrant Resonator 13WL Brake Calipers Braided Steel Brake Lines ScanGauge II OBDII Scanner Kenwood TM-71A Dual Band Ham Radio Larson 70CM/2M Antenna Uniden 520xl CB radio 3' Firestik Adjustable tip antenna Pioneer DEH-P9400BH HU Alpine Amps & Type R components (F) and coaxials (R) Wet Okole Seat Covers Weathertech Digital Liners Deck Plate Mod 1" Diff Drop Carrier Bearing Drop
    lol. The coopers will be a 1/2" wider and the outer edge will be right about where the current ones are. :)
     
    turbodb[QUOTED][OP] likes this.
  2. Dec 10, 2017 at 10:06 PM
    #322
    Digiratus

    Digiratus Adventurer

    Joined:
    Mar 26, 2010
    Member:
    #34006
    Messages:
    23,046
    Gender:
    Male
    First Name:
    Mike
    Roaming the PNW
    Vehicle:
    The RedHead
    2002 XtraCab TRD 4x4 SCv6 AutoTrans With Lots of Mods ADS COs w/Compression Adjusters Camburg Uniball UCAs Whiteline Lower Control Arm Bushings Kartek 7" Limit Straps Plastics Guy Front Bumpstops Custom Alcan Springs +800 lbs +3" ADS 10" Stroke Triple Bypass w/Resi Rear Shocks Custom Rear Shock Relocate All-Pro U-bolt Flip w/Timbren Bumpstops 4.88 Nitro Gears ARB Front Locker ARB Twin Compressor Black 17x8 Konig Countersteer Type X 285/70r17 Falken A/T3w Gunmetal 16x8 SCS Ray10s 255/85r16 Maxxis Bighorns Limited Edition (Relentless) Elite Front Bumper Smittybilt X2O 10K Winch Diode Dynamics SS3 Sport Selective Yellow Fog Lights in the Bumper Diode Dynamics SS3 Pro 4,000 Kelvin SAE Driving Lights with Clear Lenses on the Bumper Morimoto D2S Projectors XB35 Ballasts + 4300K Bulbs Badland Sliders FrankenFab Tire Carrier Swingout bumper w/kitchen BudBuilt Front & Bellypan Skids BAMF Rear Diff Skid Dometic CFX 55im Fridge/Freezer Alpha II Hardshell RTT Badland Custom Bed Rack Denso 210-0461 105 amp alternator Dual Northstar 24F AGM batteries BlueSea 7622 ML-ACR Battery controller Peak DBI Dual Battery Voltage Monitor Magnuson MP62 Supercharger w/2.37" Pulley Haltech Elite 2000 Standalone ECU Denso 650cc Fuel Injectors Doug Thorley Headers Aeromotive Stealth 340 Fuel Pump TransGo A340F Reprogramming Shift Kit Magnaflow Hi-Flow CAT, Magnaflow 18" Muffler w/Vibrant Resonator 13WL Brake Calipers Braided Steel Brake Lines ScanGauge II OBDII Scanner Kenwood TM-71A Dual Band Ham Radio Larson 70CM/2M Antenna Uniden 520xl CB radio 3' Firestik Adjustable tip antenna Pioneer DEH-P9400BH HU Alpine Amps & Type R components (F) and coaxials (R) Wet Okole Seat Covers Weathertech Digital Liners Deck Plate Mod 1" Diff Drop Carrier Bearing Drop
    So how'd the whole regear process go?
     
    turbodb[OP] likes this.
  3. Dec 10, 2017 at 10:12 PM
    #323
    turbodb

    turbodb [OP] AdventureTaco

    Joined:
    Feb 9, 2016
    Member:
    #177696
    Messages:
    7,807
    Gender:
    Male
    First Name:
    Dan
    PNW
    Vehicle:
    2000 Tacoma Xcab 4x4 SR5 V6 TRD
    AdventureTaco
    Patience wise jedi! I plan to have the write-up and pics on Friday. Perhaps around the time we'll start seeing you're De-Tour photos! ;-)


    OK, I can't wait either. I LOVE the new gears. It's like having my stock-weight-and-tires truck back. And JT's Parts & Accessories was great - thank you for the reco. The rest must wait till Friday (when I have a block of time set aside to write it up; the photos are all Lightroom-ed already).
     
    m3bassman likes this.
  4. Dec 10, 2017 at 10:16 PM
    #324
    Digiratus

    Digiratus Adventurer

    Joined:
    Mar 26, 2010
    Member:
    #34006
    Messages:
    23,046
    Gender:
    Male
    First Name:
    Mike
    Roaming the PNW
    Vehicle:
    The RedHead
    2002 XtraCab TRD 4x4 SCv6 AutoTrans With Lots of Mods ADS COs w/Compression Adjusters Camburg Uniball UCAs Whiteline Lower Control Arm Bushings Kartek 7" Limit Straps Plastics Guy Front Bumpstops Custom Alcan Springs +800 lbs +3" ADS 10" Stroke Triple Bypass w/Resi Rear Shocks Custom Rear Shock Relocate All-Pro U-bolt Flip w/Timbren Bumpstops 4.88 Nitro Gears ARB Front Locker ARB Twin Compressor Black 17x8 Konig Countersteer Type X 285/70r17 Falken A/T3w Gunmetal 16x8 SCS Ray10s 255/85r16 Maxxis Bighorns Limited Edition (Relentless) Elite Front Bumper Smittybilt X2O 10K Winch Diode Dynamics SS3 Sport Selective Yellow Fog Lights in the Bumper Diode Dynamics SS3 Pro 4,000 Kelvin SAE Driving Lights with Clear Lenses on the Bumper Morimoto D2S Projectors XB35 Ballasts + 4300K Bulbs Badland Sliders FrankenFab Tire Carrier Swingout bumper w/kitchen BudBuilt Front & Bellypan Skids BAMF Rear Diff Skid Dometic CFX 55im Fridge/Freezer Alpha II Hardshell RTT Badland Custom Bed Rack Denso 210-0461 105 amp alternator Dual Northstar 24F AGM batteries BlueSea 7622 ML-ACR Battery controller Peak DBI Dual Battery Voltage Monitor Magnuson MP62 Supercharger w/2.37" Pulley Haltech Elite 2000 Standalone ECU Denso 650cc Fuel Injectors Doug Thorley Headers Aeromotive Stealth 340 Fuel Pump TransGo A340F Reprogramming Shift Kit Magnaflow Hi-Flow CAT, Magnaflow 18" Muffler w/Vibrant Resonator 13WL Brake Calipers Braided Steel Brake Lines ScanGauge II OBDII Scanner Kenwood TM-71A Dual Band Ham Radio Larson 70CM/2M Antenna Uniden 520xl CB radio 3' Firestik Adjustable tip antenna Pioneer DEH-P9400BH HU Alpine Amps & Type R components (F) and coaxials (R) Wet Okole Seat Covers Weathertech Digital Liners Deck Plate Mod 1" Diff Drop Carrier Bearing Drop
    Still the best mod I've done.

    :popcorn:
     
  5. Dec 14, 2017 at 10:03 PM
    #325
    turbodb

    turbodb [OP] AdventureTaco

    Joined:
    Feb 9, 2016
    Member:
    #177696
    Messages:
    7,807
    Gender:
    Male
    First Name:
    Dan
    PNW
    Vehicle:
    2000 Tacoma Xcab 4x4 SR5 V6 TRD
    AdventureTaco
    No More Lugging - Re-Gear to 4.88's and Front ARB Locker
    December 6, 2017.

    Over the last 17 years, the truck has been amazing. Truly a joy every time I get in it, work on it, or even just get all googly-eyed looking at it.

    But, as we've started bigger and longer adventures, and turned it into an adventure truck as much as an around-town-mobile, the truck has slowly gotten to a point where it was time to do something about the drive train.

    Big Tires = Big Problem
    …and by slowly, I mean it was about like this:

    [​IMG]

    And that cliff, right there at the edge, was the installation of bigger tires. See, before that, even with all the extra weight from bumpers and sliders and bed racks and CVTs, the gearing was OK - so I could get rolling easily in first gear, climb up a rocky road without going into 4L, and my gas mileage was still pretty reasonable.

    But those tires screwed all that up. I was lugging as I'd start from a stop light, and simple hills would require downshifting to third gear, from fifth. And my gas mileage dropped from ~19 to 14 mpg.

    Such is the slippery slope of vehicle modifications, I guess. To more easily go on the adventures, you need the bigger tires, so those weren't going away. Instead, the discussion of what gears to get, and how to get them began.

    There were really two choices I had to make:
    1. What gear ratio to go to?
    2. How to get those new gears installed on the truck.
    Choice 1: Gear Ratio
    From the factory, the truck came with a 4.10 gear ratio. Of course putting on larger tires meant that the gears were pushing the truck further down the road (since one rotation of the wheel is now a larger circumference), and so at any given speed, my RPMs were lower by about 6-7%.

    To bring those RPMs back up into the power zone (between 2500-3000 RPM on a 1st Gen, V6 Tacoma), I'd need to change the gearing. My choices: 4.56, 4.88, or 5.29 ratios.

    5.29's were out - that would be too much gearing for my 33" tires, especially since the truck is still my primary vehicle. Driving around in town would feel like being in 4L, and I didn't want that.

    4.56 vs. 4.88 was a tougher decision. For "around-town," 4.56 might be better - it'd get me back to (essentially) stock gearing, but when the truck was loaded for adventure, it might still require downshifting into 4th on hill climbs, and there might be places where I'd have to go into 4L that I may not otherwise. For adventuring, 4.88's would provide that lower gearing and power, at the expense of some "around-town" efficiency of 4.56's. In the end, I decided that the direction the truck is going is towards adventure - and so 4.88's would be the best fit.

    Along with that decision, everyone I talked to recommended that I get a front locker as well. I already had the OEM rear locker, and putting an ARB air locker in the front at the same time would be the obvious, economical choice. And of course, it wasn't their money! Lucky for me, I already have an ARB compressor, so much of the work was already done.

    Choice 2: How to Install?
    In the early days of the truck, the only real work it needed was "regular maintenance" - which for me meant an annual oil change since I drove it so infrequently. With a coupon from the dealer, it made little sense to do any of this myself. But now, I try to do most of the modifications and maintenance myself - both so I can learn more about the truck and so that should something break on the trail, I have a better sense of how to fix it or what it "should" look like.

    So, I initially thought I'd partially install the new gears and locker myself. Really, I had several options:
    1. Order some gears (perhaps through a group buy) and install them myself.
    2. Order some new, assembled differentials with the gears already installed, and replace the diffs myself.
    3. Pay a shop to install new gears in my existing differentials.
    As I researched thought about it more however, I very quickly realized that #1 was way out of my league. Being one of the more finicky items on the truck, I knew that I didn't have the tools or the know-how to do the actual gear install myself. I also talked to some guys who did have the know-how and did install their own gears, only to hear them say that they wouldn't do it again - they'd pay someone.

    Well, hearing that also made me question #2. There are really two reputable places to get gears - ECGS (East Coast Gear Supply) and Zuk in Arizona (Toyota Gear Installs). I liked the Zuk was using Nitro gears, and a quick email exchange with him netted a lot that I liked hearing - he was happy to do both the gears and the locker, and he'd do it for a totally reasonable price. But, there was a problem - he didn't do the actual install on the truck, so I couldn't drive it down for a couple days and "be done." Instead, I'd have to take out my diffs, ship them down, get them rebuilt, and then wait for them to get shipped back so I could reinstall them.

    That would mean two weeks of "truck on jack stands" - longer than I wanted (or could really pull off given the lack of a shop). I was also unsure that the front diff removal/install was in my wheelhouse - at least alone.

    So that left option #3. It was the most expensive option, but it was also the one with the highest success rate, and the shortest timeframe. I had a great recommendation from Mike (@Digiratus) for a semi-local shop - JT's Parts and Accessories - and so I gave them a call.

    Communication was great with Carl and we worked out a mutually agreeable time and price - I'd bring my truck in when the shop opened on December 6, and I'd drive it home when they were done the evening of December 7. Not too bad, especially since it meant a night in Leavenworth with @mrs.turbodb while we waited. Win win.

    Install Day
    I was up early on install day, leaving Seattle by 4:15 am. With a fuel stop, that got me to JT's Parts & Accessories just before they opened at 7:00am - perfect timing. I headed in to say hello.

    [​IMG]

    A couple guys were there and let me know that Jared and Chris, who would be doing the work would get started around 8:00 am or so. They suggested I take the short walk into town and grab some breakfast, and then that I was welcome to hang out and take pictures of the work once it got started. Sweet.

    At 8:00 sharp, Chris and Jared arrived, and it was time to get started. Into the shop we went, and as they got the truck up onto the lift, I was immediately jealous. I need a shop like this.

    [​IMG]

    Not losing any time, the wheels came off first, and then the truck went higher.

    [​IMG]

    [​IMG]

    [​IMG]

    Next, out came the rear diff oil (apparently "weird" on my truck because the drain plug is on the wrong side), as well as the rear axles. Watching Jared work, it was clear to me within the first 15 minutes that I'd made the right call - while I could have wrestled these things myself (though much harder without a lift), it was great watching an expert do it the first time.

    [​IMG]

    [​IMG]

    It's not every day you see your drive shaft up between the gas tank and exhaust…

    [​IMG]

    As the rear diff was disassembled and drained, Chris got to work opening the new parts to be installed, and doing the final machining on a solid spacer for the rear diff. Even though these guys do this all the time, it was nice to see Chris excited to open everything in the same way I'd have been - "Oooo, a new ARB!"

    [​IMG]

    [​IMG]

    [​IMG]

    [​IMG]

    [​IMG]

    [​IMG]

    In the end, the newly installed parts were a Nitro 4.88 front and rear gear package (with Nitro rear ring & pinion, Nitro front Master Install Kit, Nitro rear ring & pinion, Nitro rear Master Install Kit, Front pinion pre-load solid spacer, Rear pinion pre-load solid spacer, and Front Yoke) and an ARB 7.5" RD90 air locker for the front diff.

    Within 20 minutes of the truck heading up on the lift, Jared had separated the clamshell of the rear diff and was ready to take it off. There was a bit of wrestling and help from Chris at that point - something in the diff had gotten hung up - but Jared remarked that they were still on record pace, as he masterfully disassembled the stock diff on the bench.

    [​IMG]

    [​IMG]

    [​IMG]

    [​IMG]

    [​IMG]

    [​IMG]

    I was impressed by the fact that after each step, he'd lift up whatever part he'd been working on, and essentially clean up the entire bench surface. Through the entire procedure he kept the entire area very clean. Definitely something I liked seeing - that attention to detail indicated great things in my mind.

    Everything disassembled, it was only mid-morning when they got to work on the final cleaning of the old parts - suffering most with the paper seal around the diff clamshell (which I'm sure had been in place for 17 years)!

    [​IMG]

    [​IMG]

    [​IMG]

    And then, it was time for assembly of the new rear diff. Boy, how I wish I'd been able to ask questions every few minutes of this process - because there were so many bearings that were pressed on, tolerances that were checked, and bolts that were torqued down to specific specs that I was once again glad that I hadn't tackled this myself (though, I'd never really considered assembling the internals) - it was clear that Jared and Chris were doing a better job than I'd have been able to do, and much faster since they had all the right tools!

    [​IMG]

    [​IMG]

    [​IMG]

    [​IMG]

    By 11 am, the new 4.88 rear gears were installed, and it was time to see if everything had gone together "just so," so out came the yellow paint and Jared cycled the gears a few times to see the wear pattern. After a couple minor adjustments, he was happy.

    [​IMG]

    [​IMG]

    Chris had been getting the rear diff and axle housing cleaned up during this time, and had just laid down a bead of silicone as the new clamshell was read to be reinstalled. It went on without a hitch, and then they quickly got the rear end buttoned back up - except for throwing the wheels back on.

    [​IMG]

    [​IMG]

    So, at 11:15am, they started on the front. There was a bit of armor to remove first - the @RelentlessFab skids were a hit, getting a few complements about beefiness - and then draining, hoses, clamps, and other miscellaneous bits to disconnect from the front diff before pulling it out.

    [​IMG]

    [​IMG]

    Oh, and there were lower ball joints to remove. Pulling these made me think of all the lower ball joint issues I've heard of in the last few months. Definitely a part I'll be keeping a close eye on, especially now that they have been "mucked with."

    [​IMG]

    Everything disconnected and out of the way, it was time to remove the diff, which can be a pain when the truck isn't up on the lift and there are two guys who do this for a living. For them, and in that situation, it pops right out, leaving a nice big "OMG something seems to be missing" hole under the truck.

    [​IMG]

    [​IMG]

    The front diff was apart just as quickly as the rear had been, and by 11:45 am, I was cringing as Jared nonchalantly chucked up a step bit and drilled a hold in the diff cover. This of course was for the ARB air locker, but that didn't make it any less traumatic.

    [​IMG]

    [​IMG]

    [​IMG]

    Working in tandem as they had all morning, Chris had been pressing bearings onto the new front diff/locker assembly as Jared disassembled the stock components. He then stepped in to tap the hole for the locker with the "nice new sharp tap" that they'd broken out of the box just a few days earlier.

    [​IMG]

    [​IMG]

    [​IMG]

    And then it was time to assemble and test the front - both for tolerances and wear pattern, as well as ensuring that it held pressure.

    The pressure test went fine…

    [​IMG]

    [​IMG]

    But the yellow paint and wear pattern wasn't perfect, and it was 12:15 pm - time to break for lunch! We all split up at that point to grab a bite to eat, and Jared made an off-the-cuff remark that he'd been hoping to finish by lunch…

    Of course, I'd been prepared for two days, and I'm sure he could see the surprise on my face - because he said, "it'll probably be 3:00 pm now." When I mentioned the two-day estimate to him, Chris piped in to give me the low down - it seems that most "normal" customers don't show up on time, and usually there's a bunch of "extra" stuff that takes time - like installing the air compressor for the front locker, which often requires fabrication of a custom mounting bracket.

    Well that rang true for me, having spent several hours fabbing up my own bracket for my Bussmann, and a day figuring out how to mount my ARB CKMA12 air compressor to the firewall. Plus all the time it takes to run wiring cleanly (which they also weren't going to need to do, since I was going to wire up the solenoid for the locker).

    Of course, I was happy to get the truck back early. Unfortunately, the cost was still the same! :)

    After lunch the final tolerances and contact patterns were quickly achieved, and the front diff was reassembled, hoisted back into place, and secured. Finally, the air lines were run up to the compressor using some "new, less flexible but probably better" hose supplied by ARB.

    [​IMG]

    [​IMG]

    [​IMG]

    With that, and the reinstallation of the wheels, it was time for a test drive.

    [​IMG]

    Now, normally the test drive is something that Jared or Chris would do, but given that I was there and obviously interested in the process, Jared offered to ride shotgun while I took it out on a 10-mile maiden voyage. Naturally, I was game, so we opened up the shop doors and headed out!

    Not really knowing what to listen or feel for, I left analysis of the work to Jared. And he was happy - there was no significant whine to either differential (that we could hear), and while there was a little bit of drive-line shake, he assured me that it was well within the normal range, especially after increasing the gear ratio (thus making everything spin faster at a given speed). He didn't think I needed to do anything about it unless it bothered me - at which point I could start by getting my drive shaft balanced.

    Right now, my tires being out of balance is much more annoying, so once I get that resolved I'll decide whether I can even notice the driveline vibration.

    With that, instructions on break-in, a lightening of my wallet, and many thanks, we were done. It was 3:17pm.

    Dang, those guys were good!

    I was a happy camper - though I hadn't even really driven the new gears all that much to get a feel for them, I knew that the work done was quality work, and that made me feel great.

    Little did I know just how happy I'd be once I had a chance to drive the truck a bit more and experience the awesomeness of the new gears…
     
    Last edited: Feb 7, 2018
  6. Dec 15, 2017 at 6:35 AM
    #326
    Squeaky Penguin

    Squeaky Penguin Nothing Ventured, Nothing Gained

    Joined:
    Apr 5, 2012
    Member:
    #76340
    Messages:
    9,780
    Gender:
    Male
    First Name:
    Brett
    Steamboat Springs, Colorado
    Vehicle:
    '01 4WD, SR5, TRD & '13 TRDOR AC
    Lots of dust and custom dents, Check Build
    All 1st gen elockers have the drain plug on that side. It's opposite for 2nd gens.
     
    Yetimetchkangmi and m3bassman like this.
  7. Dec 15, 2017 at 8:49 AM
    #327
    turbodb

    turbodb [OP] AdventureTaco

    Joined:
    Feb 9, 2016
    Member:
    #177696
    Messages:
    7,807
    Gender:
    Male
    First Name:
    Dan
    PNW
    Vehicle:
    2000 Tacoma Xcab 4x4 SR5 V6 TRD
    AdventureTaco
    Interesting!
     
  8. Dec 15, 2017 at 9:03 AM
    #328
    Digiratus

    Digiratus Adventurer

    Joined:
    Mar 26, 2010
    Member:
    #34006
    Messages:
    23,046
    Gender:
    Male
    First Name:
    Mike
    Roaming the PNW
    Vehicle:
    The RedHead
    2002 XtraCab TRD 4x4 SCv6 AutoTrans With Lots of Mods ADS COs w/Compression Adjusters Camburg Uniball UCAs Whiteline Lower Control Arm Bushings Kartek 7" Limit Straps Plastics Guy Front Bumpstops Custom Alcan Springs +800 lbs +3" ADS 10" Stroke Triple Bypass w/Resi Rear Shocks Custom Rear Shock Relocate All-Pro U-bolt Flip w/Timbren Bumpstops 4.88 Nitro Gears ARB Front Locker ARB Twin Compressor Black 17x8 Konig Countersteer Type X 285/70r17 Falken A/T3w Gunmetal 16x8 SCS Ray10s 255/85r16 Maxxis Bighorns Limited Edition (Relentless) Elite Front Bumper Smittybilt X2O 10K Winch Diode Dynamics SS3 Sport Selective Yellow Fog Lights in the Bumper Diode Dynamics SS3 Pro 4,000 Kelvin SAE Driving Lights with Clear Lenses on the Bumper Morimoto D2S Projectors XB35 Ballasts + 4300K Bulbs Badland Sliders FrankenFab Tire Carrier Swingout bumper w/kitchen BudBuilt Front & Bellypan Skids BAMF Rear Diff Skid Dometic CFX 55im Fridge/Freezer Alpha II Hardshell RTT Badland Custom Bed Rack Denso 210-0461 105 amp alternator Dual Northstar 24F AGM batteries BlueSea 7622 ML-ACR Battery controller Peak DBI Dual Battery Voltage Monitor Magnuson MP62 Supercharger w/2.37" Pulley Haltech Elite 2000 Standalone ECU Denso 650cc Fuel Injectors Doug Thorley Headers Aeromotive Stealth 340 Fuel Pump TransGo A340F Reprogramming Shift Kit Magnaflow Hi-Flow CAT, Magnaflow 18" Muffler w/Vibrant Resonator 13WL Brake Calipers Braided Steel Brake Lines ScanGauge II OBDII Scanner Kenwood TM-71A Dual Band Ham Radio Larson 70CM/2M Antenna Uniden 520xl CB radio 3' Firestik Adjustable tip antenna Pioneer DEH-P9400BH HU Alpine Amps & Type R components (F) and coaxials (R) Wet Okole Seat Covers Weathertech Digital Liners Deck Plate Mod 1" Diff Drop Carrier Bearing Drop
    Great write-up Dan. Glad to see it worked out well for you.

    The side the rear diff drains from is an easy way to tell if there is an elocker present. The 8.0 diffs drain from the driver side and the 8.4 diffs drain from the passenger side. Easy to spot from behind.
     
    unstpible and Yetimetchkangmi like this.
  9. Dec 15, 2017 at 9:19 AM
    #329
    turbodb

    turbodb [OP] AdventureTaco

    Joined:
    Feb 9, 2016
    Member:
    #177696
    Messages:
    7,807
    Gender:
    Male
    First Name:
    Dan
    PNW
    Vehicle:
    2000 Tacoma Xcab 4x4 SR5 V6 TRD
    AdventureTaco
    This then is probably why they were surprised. Maybe they do more regearing of non-locked diffs.

    And thanks for the recommendation! :thumbsup:
     
    unstpible likes this.
  10. Dec 15, 2017 at 9:27 AM
    #330
    Digiratus

    Digiratus Adventurer

    Joined:
    Mar 26, 2010
    Member:
    #34006
    Messages:
    23,046
    Gender:
    Male
    First Name:
    Mike
    Roaming the PNW
    Vehicle:
    The RedHead
    2002 XtraCab TRD 4x4 SCv6 AutoTrans With Lots of Mods ADS COs w/Compression Adjusters Camburg Uniball UCAs Whiteline Lower Control Arm Bushings Kartek 7" Limit Straps Plastics Guy Front Bumpstops Custom Alcan Springs +800 lbs +3" ADS 10" Stroke Triple Bypass w/Resi Rear Shocks Custom Rear Shock Relocate All-Pro U-bolt Flip w/Timbren Bumpstops 4.88 Nitro Gears ARB Front Locker ARB Twin Compressor Black 17x8 Konig Countersteer Type X 285/70r17 Falken A/T3w Gunmetal 16x8 SCS Ray10s 255/85r16 Maxxis Bighorns Limited Edition (Relentless) Elite Front Bumper Smittybilt X2O 10K Winch Diode Dynamics SS3 Sport Selective Yellow Fog Lights in the Bumper Diode Dynamics SS3 Pro 4,000 Kelvin SAE Driving Lights with Clear Lenses on the Bumper Morimoto D2S Projectors XB35 Ballasts + 4300K Bulbs Badland Sliders FrankenFab Tire Carrier Swingout bumper w/kitchen BudBuilt Front & Bellypan Skids BAMF Rear Diff Skid Dometic CFX 55im Fridge/Freezer Alpha II Hardshell RTT Badland Custom Bed Rack Denso 210-0461 105 amp alternator Dual Northstar 24F AGM batteries BlueSea 7622 ML-ACR Battery controller Peak DBI Dual Battery Voltage Monitor Magnuson MP62 Supercharger w/2.37" Pulley Haltech Elite 2000 Standalone ECU Denso 650cc Fuel Injectors Doug Thorley Headers Aeromotive Stealth 340 Fuel Pump TransGo A340F Reprogramming Shift Kit Magnaflow Hi-Flow CAT, Magnaflow 18" Muffler w/Vibrant Resonator 13WL Brake Calipers Braided Steel Brake Lines ScanGauge II OBDII Scanner Kenwood TM-71A Dual Band Ham Radio Larson 70CM/2M Antenna Uniden 520xl CB radio 3' Firestik Adjustable tip antenna Pioneer DEH-P9400BH HU Alpine Amps & Type R components (F) and coaxials (R) Wet Okole Seat Covers Weathertech Digital Liners Deck Plate Mod 1" Diff Drop Carrier Bearing Drop
    YW.

    Have you tried engaging your rear locker since the regear?
     
    unstpible likes this.
  11. Dec 15, 2017 at 9:48 AM
    #331
    Dan8906

    Dan8906 Well-Known Member

    Joined:
    Jul 26, 2016
    Member:
    #192977
    Messages:
    5,138
    Gender:
    Male
    First Name:
    Daniel
    Concord, California
    Vehicle:
    2004 Tacoma ext cab TRD 4x4
    CBI sliders, ADS extend travel with compression adjuster coil overs, 9” Bilstein 5125 rear shocks, Icon Tubular UCA, Alcan custom leafs, All Pro Apex bumper and skids, NWTI rear diy bumper, 295/70/17 Cooper St Maxxs and nitro 4.88s.
    Man, your write ups are awesome. Always informative and interesting to read! lol I wish I had cash to upgrade gears. I dont see that happening anytime soon for me.
     
  12. Dec 15, 2017 at 11:02 AM
    #332
    MartinDWhite

    MartinDWhite Well-Known Member

    Joined:
    May 13, 2016
    Member:
    #186853
    Messages:
    389
    Gender:
    Male
    First Name:
    Martin
    Greenville, SC
    Vehicle:
    2004 4-dr 4x4 Tacoma TRD
    Relentless front and rear bumpers, Warn M-8000S Winch, Relentless RockSliders, bigger tires, bed cover RTT ... and more big changes in the works.
    What is your mileage after the gearing change? Because you have driven so many miles since the change....
     
  13. Dec 15, 2017 at 8:27 PM
    #333
    turbodb

    turbodb [OP] AdventureTaco

    Joined:
    Feb 9, 2016
    Member:
    #177696
    Messages:
    7,807
    Gender:
    Male
    First Name:
    Dan
    PNW
    Vehicle:
    2000 Tacoma Xcab 4x4 SR5 V6 TRD
    AdventureTaco
    Nope, not yet. I was just thinking about this myself yesterday as well though! Of course, all wheeling is supposed to be "light/easy" so I haven't been anywhere that requires a locker, but I do want to try it just to be sure it's still working! Will have to give it a try soon.

    Thanks, glad you enjoy them; I have fun putting them together. I hear you on the cost of the gears but let me tell you - they are worth it. I hope to convince you of that in the next installation of the story - maybe tonight, but by tomorrow for sure. :typing:

    Stay tuned. I've got that in the next update as well.
     
  14. Dec 16, 2017 at 9:33 PM
    #334
    Crom

    Crom Super-Deluxe Member

    Joined:
    Jun 22, 2009
    Member:
    #18782
    Messages:
    9,618
    Gender:
    Male
    First Name:
    Nick
    San Diego, CA
    Vehicle:
    2009 4x4 DCSB Camp Supreme
    Millions
    Outstanding post and pics on the gear swap! :)
     
  15. Dec 16, 2017 at 10:41 PM
    #335
    turbodb

    turbodb [OP] AdventureTaco

    Joined:
    Feb 9, 2016
    Member:
    #177696
    Messages:
    7,807
    Gender:
    Male
    First Name:
    Dan
    PNW
    Vehicle:
    2000 Tacoma Xcab 4x4 SR5 V6 TRD
    AdventureTaco
    Breaking in the new gears
    December 7-12, 2017.

    Before leaving JT's Parts & Accessories, I'd gotten the rundown from Jared and Chris on how to best break in the gears they'd just installed. Essentially, it boiled down to what gear manufacturers recommended as well...

    Break in Procedure
    New gear sets MUST be broken in correctly to prevent damage. Not following proper break-in procedures will lead to overloading and overheating the ring and pinion as well as breaking down and ruining the gear oil. Not following proper break-in procedures can be determined during inspection and will void the warranty.

    Please follow the below guidelines to ensure a proper break-in and long life of your gears.
    • On initial run, drive lightly for 15 to 20 minutes then stop to allow differential to cool completely for 20 to 25 minutes.
    • Avoid towing and heavy acceleration, as well as vary speeds every 5 to 10 minutes while driving on highways.
    • Drive conservatively and do not drive more than 50 miles at a time without allowing a cool cycle during the first 500 miles following installation.
    • After completing initial break-in, change gear oil at 500 miles. Small metal particles are normal and gear oil will typically be black. Excessive metal in gear oil should be reviewed by a competent differential mechanic to ensure safety of internal parts.
    /end

    The one tweak to those recommendations that they had was that it would be good to do three "initial run" cycles, letting the differentials get up to temperature and cool down completely. We’d already done the first cycle on the test drive, and the second cycle would get us to Leavenworth - perfect because that's where we'd arranged to stay at Sleeping Lady for the night anyway - you know, because this whole thing was supposed to take two days, not one!

    Suffer we wouldn't.

    It turned out that we were one of two couples staying that night, and so it was bottomless filet and desserts at the Kingfisher restaurant, and we had the hot tub on the mountain all to ourselves!

    [​IMG]

    [​IMG]

    In the morning, I headed back towards Seattle on US-2, with a plan to do three more break-in cycles (two more than called for) as well as make a few stops to keep the initial runtime of the gears to less than 50 miles between cooldowns.

    I made stops at the entrance to Tumwater campground, at the turn off to Merritt Lake trailhead, and then again at Steven's Pass, where the sun finally came out and I was able to get some photos. Each time I stopped, the rear diff was hot to the touch - in the 180°F range, I'd say - but cooled off quickly in the 29°F-and-windy weather

    I spent the time editing pics from the day before, and was back on my way within 25 minutes.

    [​IMG]

    [​IMG]

    From Steven's, the next stop was longer - 35 miles to Sultan - with varied speeds and some curvy roads to break in the gears - at least in the rear. And from there, 35 more miles on WA-522 into Seattle rather than taking I-5 or I-405 - it took a bit longer, but I was able to get more varied speeds - a good thing for the break in.

    The next few days I drove it around town, and also decided to head the Snoqualmie Pass direction to get a few 4WD break-in cycles for the front diff. There's no way I'd get it to the 500-mile-first-oil-change, but I knew that I could at least do 3 break-in cycles on some easy trails.

    FS-9020, 9021, 9030, and 9031 were good candidates, and I got 4, 15 minute cycles on those roads, even exploring some offshoots I'd never been on in the past.

    [​IMG]

    [​IMG]

    [​IMG]

    [​IMG]

    It was especially interesting to see how much less water was flowing down Mine Creek than just three weeks before when we'd crossed it to get our Christmas Tree. Now there was only a trickle, all flowing through the culvert.

    [​IMG]

    [​IMG]

    [​IMG]

    [​IMG]

    I also got to test a bit of the rear flex a bit - still trying better understand if I've got an issue with wheel positioning in the rear wheel wells. I was able to get one rear up off the ground and the other was still relatively OK - definitely set back in the wheel well, but not contacting anything. Anyway, just another data point.

    [​IMG]

    [​IMG]

    When it was all said and done, I got my 500 miles and am ready for the first oil change. That'll be interesting, but will have to wait a week given other holiday plans that involve sunny weather!

    So how are the new gears? They are so amazingly awesome that it's almost impossible to describe. It's like having my old, stock truck back - the one with no extra weight and stock tires - except that I've still got a bunch of extra weight and big tires! Starting from a stop is now "normal" again. First gear (even in 2WD/4H) is once again slow. And on the freeway, not only can I maintain speed on hills but I can even accelerate in 5th gear!

    As if all that isn't enough, my gas mileage is much improved - right back into my "pre-big-tires" range. The last two tanks have averaged a bit over 19mpg - only two data points, but very promising, especially given there was both around-town and some light 4WD involved.

    So. Fricking. Cool.

    So remember that chart that started all of this? Well switching out the gears from 4.10's to 4.88's was totally worth it. Driving is again super fun. You could even say that it's the double-rainbow-all-the-way mod for our trucks.

    The CVT Tent and ARB fridge are the only other mods that have been anywhere close, but I'll experience the gears every time I drive - putting this mod at the very top of my list.

    [​IMG]
     
    Last edited: Feb 7, 2018
  16. Dec 16, 2017 at 10:59 PM
    #336
    IronPeak

    IronPeak PermaLurker

    Joined:
    Mar 9, 2016
    Member:
    #180799
    Messages:
    3,232
    Gender:
    Male
    First Name:
    AuggieX
    Back to Back
    Vehicle:
    2007 sr5 4x4 DCLB/2015 TRD sport 4x4 DCLB sold
    Bigger Taller Slower
    With the great trip reports, Best Build Thread of 2017 candidate forsure
     
    Dalandser likes this.
  17. Dec 16, 2017 at 11:06 PM
    #337
    turbodb

    turbodb [OP] AdventureTaco

    Joined:
    Feb 9, 2016
    Member:
    #177696
    Messages:
    7,807
    Gender:
    Male
    First Name:
    Dan
    PNW
    Vehicle:
    2000 Tacoma Xcab 4x4 SR5 V6 TRD
    AdventureTaco
    Thanks! I don't know if they generally let folks in to take pictures, but I figured it didn't hurt to ask. Seemed to work out great to me :)

    Wow, thanks.
    :anonymous:
     
  18. Dec 24, 2017 at 9:25 PM
    #338
    turbodb

    turbodb [OP] AdventureTaco

    Joined:
    Feb 9, 2016
    Member:
    #177696
    Messages:
    7,807
    Gender:
    Male
    First Name:
    Dan
    PNW
    Vehicle:
    2000 Tacoma Xcab 4x4 SR5 V6 TRD
    AdventureTaco
    You Have Entered the Tacoma-Zone
    December 15-22, 2017.

    This is a whole different kind of trip report. In fact, it doesn't involve my truck at all, and is yet perhaps the most Tacoma-heavy trip report I'll ever make (and that has perhaps been made to date) on TW!

    You see, we have somewhat of a tradition each winter - as the weather gets cold and gloomy in the Pacific Northwest, we escape for a week to Kauai. We always try to stay in the same cottage; we eat lunch every day at our favorite café on the island. We walk the beach, we snorkel, and we relax.

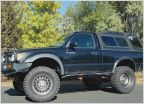
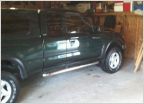
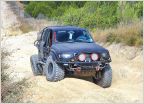
    We also love the plethora of Tacoma's. There are so many of them. And, of all generations. This year, I tried to take a picture of as many as I could. And we also kept count daily of each one we saw. We had entered the...

    [​IMG]


    Day 1 - 74 Tacoma's


    Unfortunately, I only got pictures of a few of these because I didn't have my camera handy as we were on the road… lesson learned, hahahahaha!

    [​IMG]

    Day 2 - 125 Tacoma's

    So many Tacoma's. We've decided that only "driving" trucks count towards our daily number, but we won't discriminate when taking pictures!

    [​IMG]

    [​IMG]

    [​IMG]

    [​IMG]

    Day 3 - 125 Tacoma's

    We hung out mostly on the beach and in town, which I suspect is how most of the rest of our days will go. With 28 miles of driving, we still scored the same number of trucks as yesterday!

    [​IMG]

    [​IMG]

    [​IMG]

    [​IMG]

    [​IMG]

    Day 4 - 136 Tacoma's

    Today was much like yesterday, and probably like tomorrow. We ventured away from the beach only for lunch at our usual spot. We did start to recognize a few Tacoma's from previous days!

    [​IMG]

    [​IMG]

    [​IMG]

    [​IMG]

    [​IMG]

    [​IMG]

    Day 5 - 111 Tacoma's

    Not as many trucks today, and I even took a picture of an FJ, just because it had a Tepui on it!

    [​IMG]

    [​IMG]

    [​IMG]

    [​IMG]

    Day 6 - 137 Tacoma's

    Back up past our daily goal of 125 Tacoma's. A couple of the guys noticed me taking pictures and gave us the Hawaiian wave! Sure would be nice to have my Tacoma here - it'd fit right in, even though it's a bit more decked out than a lot of these guys.

    [​IMG]

    [​IMG]

    [​IMG]

    [​IMG]

    [​IMG]

    [​IMG]

    [​IMG]

    [​IMG]

    Day 7 - 182 Tacoma's

    So. Many. Tacoma's.

    [​IMG]

    [​IMG]

    [​IMG]

    [​IMG]

    [​IMG]

    [​IMG]

    Day 8 - 192 Tacoma's

    Ended the last day on the island with a bang - the most Tacoma's we'd seen all trip, and we mostly just hung out at home all day (or at least, at the beach across the street). Pretty amazing to see so many Tacoma's when the road ends less than 10 miles ahead, and there are no towns in those 10 miles! We also saw our first (an only) "Tacoma trailer" - just the bed on rear wheels!

    Still counts :)

    [​IMG]

    [​IMG]

    [​IMG]

    [​IMG]

    [​IMG]

    [​IMG]

    [​IMG]

    And with that, we wrap up the Tacoma Zone of Kauai's west side. For the week, we saw well over 1000 Tacoma's, though only 957 of them were driving. I imagine that the Tacoma density here is higher than just about anywhere in the world, and it was clear from the used car and Toyota dealership that we passed that there's a high demand, regardless of age or condition!

    :cheers:

     
    Last edited: Feb 7, 2018
    Stocklocker, tcBob, rngr and 7 others like this.
  19. Dec 28, 2017 at 6:15 AM
    #339
    Woodrow F Call

    Woodrow F Call Kindling crackles and the smoke curls up...

    Joined:
    Feb 23, 2016
    Member:
    #179160
    Messages:
    3,890
    Gender:
    Male
    Colorful Colorado
    Vehicle:
    16 DCSB SR5 4X4 "ikea furniture haulers" edition.
  20. Dec 31, 2017 at 9:56 PM
    #340
    vonellis

    vonellis Well-Known Member

    Joined:
    Mar 19, 2016
    Member:
    #181748
    Messages:
    1,233
    Gender:
    Male
    Vehicle:
    04 DLBC x4 S/C 97 2X 04 DBLC 4X S/C
    Some and some more
    I was in Kauai last December I couldn’t believe how many Tacoma there where ther my family was getting pist because every time I saw one I said Tacoma it never ended!! Nice right up :thumbsup:
     
    Dalandser likes this.

Products Discussed in

To Top