

-
Welcome to Tacoma World!
You are currently viewing as a guest! To get full-access, you need to register for a FREE account.
As a registered member, you’ll be able to:- Participate in all Tacoma discussion topics
- Communicate privately with other Tacoma owners from around the world
- Post your own photos in our Members Gallery
- Access all special features of the site
 Fan Bracket Free Fix!!! Must Read!!!
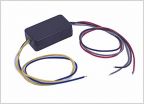 Adding turn signal functionality to front side marker lights
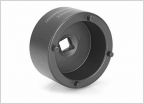 Tool Recommendations for Wheel bearing Replacement
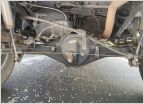 So what’s leaking??
 New Lighting and Bed-Lined Rocker Panels Write Up
 White Smoke on Start Up from Exhaust?
How-To: Dash Trim Removal (1st gen)
Discussion in '1st Gen. Tacomas (1995-2004)' started by turbodb, Jan 11, 2018.
Page 1 of 2
Page 1 of 2

