

-
Welcome to Tacoma World!
You are currently viewing as a guest! To get full-access, you need to register for a FREE account.
As a registered member, you’ll be able to:- Participate in all Tacoma discussion topics
- Communicate privately with other Tacoma owners from around the world
- Post your own photos in our Members Gallery
- Access all special features of the site
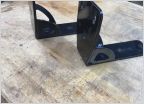 ***SOLD*****2x ARB Awning Brackets
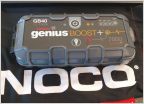 Noco gb40 lithium jump starter
 2017 Inferno Tacoma for Sale
 Assortment of 3rd Gen maintenance items (oil filters, wrench, wiper blades, etc.)
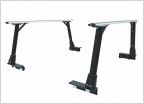 Gone: Rola 59799 bed rack, New opened box.
Custom Switch Panels
Discussion in '3rd Gen Tacoma Parts Marketplace (2016-2023)' started by MESO, Feb 12, 2018.
Page 16 of 103
Page 16 of 103
Products Discussed in


