1. Welcome to Tacoma World!

    You are currently viewing as a guest! To get full-access, you need to register for a FREE account.

    As a registered member, you’ll be able to:
    • Participate in all Tacoma discussion topics
    • Communicate privately with other Tacoma owners from around the world
    • Post your own photos in our Members Gallery
    • Access all special features of the site

Chenbro's Second Silver Taco Build

Discussion in '2nd Gen. Builds (2005-2015)' started by chenbro, Nov 13, 2013.

  1. Jul 26, 2017 at 1:41 PM
    #141
    chenbro

    chenbro [OP] ¯\_(ツ)_/¯

    Joined:
    May 27, 2009
    Member:
    #17697
    Messages:
    3,308
    Gender:
    Male
    Broomfield, CO
    Vehicle:
    2009 Silver DCSB TRD OR
    What haven’t I changed?
    A couple weekends ago I went camping with a buddy on Half Moon Creek trail just outside of Leadville, CO. This was excuse enough for me to get a Trasharoo.


    Parked at the campsite:


    The area had gotten 3" of rain the night before, and the forecast predicted more rain in the evening. We got lucky with the weather staying clear and allowing us to get some great views of the sky. I wish I had brought my other camera with me.

    At the end of the north fork of the trail is an old structure called the Champion Mill that was used at the turn of the 20th century in conjunction with a nearby mine.

    The 4x4 trail ends just short of that, with a posted sign prohibiting motor vehicles and a locked gate, half of which fell down and needs to be repaired. Obviously these measures aren't enough as people have made their own trail around the gate, and when I was up there I saw a 4runner, older Lexus SUV, ATV, and Dodge Ram ignore all of that and drive right up to the mill. The Lexus got caught up on something and damaged a passenger running board. It was hard for me to drum up sympathy for the driver, who got out and looked helplessly at it.

    Rant over, we parked outside the gate and hiked up to the mill.


    At the bottom of the mill, an old truck and outhouse:


    Pretty cool that you can see where the truck came from:


    Not much privacy:


    An old boiler?


    Champion Mill in all its glory:


    Inside the mill on the bottom level:


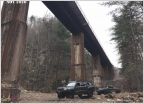
    Dat structural engineering:


    Looking from the top down into the valley:


    Also at the top, some people decided to get their pew pew on but declined to take their brass and other trash with them. One more thing to go in the Trasharoo.


    I didn't get any wheeling pics, but I did get a video of one of the water crossings on the trail:

     
  2. Sep 18, 2017 at 11:03 AM
    #142
    chenbro

    chenbro [OP] ¯\_(ツ)_/¯

    Joined:
    May 27, 2009
    Member:
    #17697
    Messages:
    3,308
    Gender:
    Male
    Broomfield, CO
    Vehicle:
    2009 Silver DCSB TRD OR
    What haven’t I changed?
    Had a busy Saturday with @3378jakesr5 installing the brand new @ARCHIVE shock relocate and shackle flip kits. Overall the process went faster than expected, with the bulk of the time taken up removing the stock shackle hanger rivets and grinding the stock shock towers and axle mounts off. The instructions for the shock relocate and shackle flip were pretty clear on what needed to be done and we didn't have any issues fitting everything up.

    @3378jakesr5 torching off a stock shackle hanger:


    @ARCHIVE garage shock tower freshly burned in:


    @ARCHIVE garage shackle flip mounted for a test fit:


    I didn't realize the King smoothies didn't come with reservoir mounts, so for now the reservoir is zip-tied to the frame :rofl:

     
    Last edited: Sep 18, 2017
    V5ioV, greeneggsnspam and 3378jakesr5 like this.
  3. Sep 18, 2017 at 11:27 AM
    #143
    NYCO

    NYCO go explore...

    Joined:
    Jul 27, 2010
    Member:
    #40842
    Messages:
    19,120
    Gender:
    Male
    First Name:
    bOb
    Colorado
    Vehicle:
    Blue Betty - '06 TRD OR
    dents & scratches
    looking good!

    now go flex that shit!
     
  4. Sep 18, 2017 at 11:27 AM
    #144
    greeneggsnspam

    greeneggsnspam ಠ_ಠ

    Joined:
    Oct 30, 2013
    Member:
    #115524
    Messages:
    42,620
    Gender:
    Male
    Houston, TX
    Vehicle:
    .gif
    Too poor to list anything interesting.
    :facepalm:
     
  5. Sep 18, 2017 at 11:32 AM
    #145
    chenbro

    chenbro [OP] ¯\_(ツ)_/¯

    Joined:
    May 27, 2009
    Member:
    #17697
    Messages:
    3,308
    Gender:
    Male
    Broomfield, CO
    Vehicle:
    2009 Silver DCSB TRD OR
    What haven’t I changed?
    I've been so busy this summer that I haven't time to hit any trails really :(

    Going to be running a trail with some buddies next Friday. I'll try to remember to take pics :oops:
     
    greeneggsnspam likes this.
  6. Sep 18, 2017 at 3:58 PM
    #146
    V5ioV

    V5ioV My drinking team has a wheeling problem

    Joined:
    Sep 22, 2012
    Member:
    #87502
    Messages:
    8,242
    Gender:
    Male
    First Name:
    V5ioV
    Out n 'bout
    Vehicle:
    '13 Pewp Water Slut
    King 2.5 Rem Resi Ext Travel w/comp adj w/700# springs, TC Uni-Ball UCAs, ARB/OME Dakar Leaf Springs w/ King 2.5 Rem Resi w/comp adj and custm eyelets, Stealth Custom Series F-5 Wheels wrapped on: 285/75/16 Fierce Attitudes, BORA 2.25 wheel spacers, GOODRIDGE extended Brake lines, Triple-6" Double Row LED Light Bars behind lower grill, ATFL MOD, TRD Ball Type Shift Knob, Husky WeatherBeater Floor Liners, 60'' HiLift Xtreme, 4xInnovations Bolt-On Sliders w/Kickout, Spring Hanger Skid, Custom BlackPipe Fabs CMC and custom FYL Bed Rack, CVT Mt. Shasta RTT, Trasharoo, 4xInnovations HiLift Bedside Mounts, 4xInnovations Front Skid Plate, TOYWERX Ghost Raptor thin-lip Satoshi Grill, RedLine Hood Struts, 4xInnovations Transmission Skid and T-Case Skid Plates, Wheelers Rear SuperBumps Bump Stops, All-Pro Off Road U-Bolt Flip Kit, UltraGauge, ARB OBA, Pelfreybilt HC rear Bumper, Rotopax system (Single Mounting Plate and Bed Rail Mounting Plate both with LOX handles.
    Did you get your front dialed in?
     
  7. Sep 18, 2017 at 4:21 PM
    #147
    chenbro

    chenbro [OP] ¯\_(ツ)_/¯

    Joined:
    May 27, 2009
    Member:
    #17697
    Messages:
    3,308
    Gender:
    Male
    Broomfield, CO
    Vehicle:
    2009 Silver DCSB TRD OR
    What haven’t I changed?
    Yeah, but after this weekend I have quite a bit of rake. I don't want to add more preload to the front until I get new boots for my CVs. The inner boots look like they're going to tear any time now.
     
  8. Sep 26, 2017 at 4:25 PM
    #148
    chenbro

    chenbro [OP] ¯\_(ツ)_/¯

    Joined:
    May 27, 2009
    Member:
    #17697
    Messages:
    3,308
    Gender:
    Male
    Broomfield, CO
    Vehicle:
    2009 Silver DCSB TRD OR
    What haven’t I changed?
    Didn't you read the handbook on safety shorts?
     
  9. Oct 3, 2017 at 4:41 PM
    #149
    chenbro

    chenbro [OP] ¯\_(ツ)_/¯

    Joined:
    May 27, 2009
    Member:
    #17697
    Messages:
    3,308
    Gender:
    Male
    Broomfield, CO
    Vehicle:
    2009 Silver DCSB TRD OR
    What haven’t I changed?
    I got tired of the zip ties a couple of weekends ago and got some weld-on tabs for 2.5" reservoirs.


    I also had some holes cut out in the rear bumper for new Rigid SR-Q2 backup lights. I've removed them in this pic to paint the exposed metal.


    Even though it wasn't a problem with the old lights, I was a little concerned that the breather on the back of the pods would be susceptible to debris kicked up by the rear tires. Since the lights are flush mount but retain the mount from the non-flush-mount housing, I added a 1/2" spacer to make it a little more difficult for small rocks to hit that breather.

    Before:


    After:


    Right now the lights come on when I put the truck in reverse, but I may need to rethink that decision. At 3000+ lumens, the new lights are much brighter than the old ones.
     
  10. Oct 4, 2017 at 9:18 PM
    #150
    PerfectTekniq

    PerfectTekniq I'm undefeated in the UFC.

    Joined:
    Feb 22, 2011
    Member:
    #51683
    Messages:
    9,942
    Gender:
    Male
    First Name:
    Pepe Silvia
    Claremont, CA
    Vehicle:
    2009 Super White 4x4 DC SB Sport
    AllPro Front, AllPro Rear w/ wraps, AllPro IFS Skid, 5100 w/ 885's upfront, Duratracs, Front Superbumps, BuiltRight UCAs, Dakar Leaf Pack, Extended 5100's, AllPro Flip Kit, Rear Superbumps, Extended SS brake lines WeatherTech Floormats, TRD Intake, ScanGaugeII, TRD SoCal, Grillcraft, Wet Okoles, Cobra 75 w/ 4' whip
  11. Apr 25, 2018 at 11:51 AM
    #151
    chenbro

    chenbro [OP] ¯\_(ツ)_/¯

    Joined:
    May 27, 2009
    Member:
    #17697
    Messages:
    3,308
    Gender:
    Male
    Broomfield, CO
    Vehicle:
    2009 Silver DCSB TRD OR
    What haven’t I changed?
    I recently (about 7 months ago :anonymous:) got some Rigid Chase lights in amber that I thought would make for a good trail and utility light at the rear of the truck. Each pod has a low-power trail/dust light, high-power brake light, high-power strobe, backup light, and a cargo light (pointing down). The plan is to be able to control some of the lights manually, but also have some of them controlled automatically using existing truck wiring. For example, I want the high-power brake light to come on ONLY IF the dust light is also on, the strobe should turn on if my hazard lights are on, and the backup light should turn on if I throw the truck in reverse (there is another switch to control this automatic function as well to avoid blinding people at night).

    All of this functionality means that the lights don't come with a wiring harness so it is a completely custom install. I used 6-pin Deutsch style plugs at the end of the pigtails.


    My swingout had the perfect spot for these pods above the Rotopax.


    For now, I only have the automatic functions wired up until I get my SwitchPro installed. The backup light comes on when the truck is in reverse, and the strobe turns on with my hazard lights (including when I lock/unlock the truck). The cargo light on the bottom of the pods will be pretty useless where they're installed now, but in the future if I decide to add a bedrack then I can relocate these pods to the upper corners of the rack and have the cargo lights illuminate the bed.
     
    RockiesTaco likes this.
  12. Apr 25, 2018 at 11:53 AM
    #152
    chenbro

    chenbro [OP] ¯\_(ツ)_/¯

    Joined:
    May 27, 2009
    Member:
    #17697
    Messages:
    3,308
    Gender:
    Male
    Broomfield, CO
    Vehicle:
    2009 Silver DCSB TRD OR
    What haven’t I changed?
    Teaser shot of the SwitchPro. The 4 buttons on the left side are the Rigid Chase pods. I have the rock lights waiting to be installed, and the remaining buttons are for some Baja Designs LP9's that I picked up recently.


    Teaser of the BD LP9

     
    Last edited: Apr 25, 2018
    RockiesTaco and odomandr like this.
  13. Apr 25, 2018 at 2:35 PM
    #153
    chenbro

    chenbro [OP] ¯\_(ツ)_/¯

    Joined:
    May 27, 2009
    Member:
    #17697
    Messages:
    3,308
    Gender:
    Male
    Broomfield, CO
    Vehicle:
    2009 Silver DCSB TRD OR
    What haven’t I changed?
    Installed my SwitchPro button panel into the overhead sunglass holder.


    The goal of this was to be able to continue using the sunglass holder because I usually have an extra pair of sunglasses in there. My SwitchPro 8100 is an older model with the "ears" so I didn't want to mount it to the outside surface of the door. The plastic is also a bit too thin to secure it with screws without them showing, so I designed and 3D-printed a bezel that will sandwich the sunglass holder and hide some of the slop from my work.


    Test fitting the two together:


    First I cut a SwitchPro-shaped hole into the sunglass door. This would serve as a reference for everything else.


    This next photo is the inside of the sunglass holder. I've carved out some of the foam so the ears and wires can sit flush against the plastic. You can also see the extra cuts needed to accomodate the bezel's grips.


    I cut some craft foam to go over everything to make it look nice. The mask is there so the spray adhesive doesn't get onto the SwitchPro or the wiring.


    Test fit of the foam:


    SwitchPro with bezel installed:


    I drilled a 7/16" hole and fed the wires through

     
    V5ioV, JLink, teamhypoxia and 4 others like this.
  14. Apr 25, 2018 at 3:08 PM
    #154
    Baja Designs

    Baja Designs The Scientist of Lighting Vendor

    Joined:
    Jan 8, 2015
    Member:
    #145889
    Messages:
    2,863
    Gender:
    Male
    San Marcos, CA
    Can't wait to see the LP9s mounted! Let us know what you think once you use them at night :)
     
    Titus94 likes this.
  15. Apr 26, 2018 at 9:36 PM
    #155
    JLink

    JLink Well-Known Member

    Joined:
    May 9, 2010
    Member:
    #36795
    Messages:
    12,578
    Gender:
    Male
    First Name:
    Josh
    Ocean, NJ
    Lifted, Locked, Armored. Ready To Wheel.
    Bad ass! Nice job Davis!
     
  16. Apr 27, 2018 at 4:59 AM
    #156
    odomandr

    odomandr Well-Known Member

    Joined:
    May 14, 2011
    Member:
    #56643
    Messages:
    5,503
    Gender:
    Male
    First Name:
    Andy
    Fort Collins, CO
    Vehicle:
    2010 DCSBTRDOR silver streak mica
    Icon, AllPro, Total Chaos, ARB, BAMF, Relentless, SCS, Cooper, Leer,
    When you install the slee arb fog lights let me know I'll come do mine at the same time......
     
  17. Apr 30, 2018 at 8:14 PM
    #157
    chenbro

    chenbro [OP] ¯\_(ツ)_/¯

    Joined:
    May 27, 2009
    Member:
    #17697
    Messages:
    3,308
    Gender:
    Male
    Broomfield, CO
    Vehicle:
    2009 Silver DCSB TRD OR
    What haven’t I changed?
    I can't wait to see them at night either. Really pleased with the tight beam when I bench tested them, so I'm looking forward to seeing how much distance I can get out of these.

    Thanks!

    I just finished them up this afternoon, but I'm more than happy to offer moral support when you're ready to install yours!

     
    odomandr[QUOTED] and Titus94 like this.
  18. May 1, 2018 at 12:43 AM
    #158
    odomandr

    odomandr Well-Known Member

    Joined:
    May 14, 2011
    Member:
    #56643
    Messages:
    5,503
    Gender:
    Male
    First Name:
    Andy
    Fort Collins, CO
    Vehicle:
    2010 DCSBTRDOR silver streak mica
    Icon, AllPro, Total Chaos, ARB, BAMF, Relentless, SCS, Cooper, Leer,
    How was drilling though the bumper? Seems like it could be easy to mess up
     
  19. May 1, 2018 at 6:19 AM
    #159
    chenbro

    chenbro [OP] ¯\_(ツ)_/¯

    Joined:
    May 27, 2009
    Member:
    #17697
    Messages:
    3,308
    Gender:
    Male
    Broomfield, CO
    Vehicle:
    2009 Silver DCSB TRD OR
    What haven’t I changed?
    It’s not too bad but it will really mess up your day if you get it wrong. After taping the template to the bumper, double check the figment with the front metal pieces and use a punch to center the drill bit in the hole. The flare nuts can be hard to install in spots. I would recommend getting the top ones started, then sliding the insert in and tightening them down. For other holes you might find the edge of the flare nut sits right up against the insert. For these, have the nut against the insert and start the bolt at a slight angle and then straighten once the nut is threaded on.
     
  20. May 1, 2018 at 7:13 AM
    #160
    V5ioV

    V5ioV My drinking team has a wheeling problem

    Joined:
    Sep 22, 2012
    Member:
    #87502
    Messages:
    8,242
    Gender:
    Male
    First Name:
    V5ioV
    Out n 'bout
    Vehicle:
    '13 Pewp Water Slut
    King 2.5 Rem Resi Ext Travel w/comp adj w/700# springs, TC Uni-Ball UCAs, ARB/OME Dakar Leaf Springs w/ King 2.5 Rem Resi w/comp adj and custm eyelets, Stealth Custom Series F-5 Wheels wrapped on: 285/75/16 Fierce Attitudes, BORA 2.25 wheel spacers, GOODRIDGE extended Brake lines, Triple-6" Double Row LED Light Bars behind lower grill, ATFL MOD, TRD Ball Type Shift Knob, Husky WeatherBeater Floor Liners, 60'' HiLift Xtreme, 4xInnovations Bolt-On Sliders w/Kickout, Spring Hanger Skid, Custom BlackPipe Fabs CMC and custom FYL Bed Rack, CVT Mt. Shasta RTT, Trasharoo, 4xInnovations HiLift Bedside Mounts, 4xInnovations Front Skid Plate, TOYWERX Ghost Raptor thin-lip Satoshi Grill, RedLine Hood Struts, 4xInnovations Transmission Skid and T-Case Skid Plates, Wheelers Rear SuperBumps Bump Stops, All-Pro Off Road U-Bolt Flip Kit, UltraGauge, ARB OBA, Pelfreybilt HC rear Bumper, Rotopax system (Single Mounting Plate and Bed Rail Mounting Plate both with LOX handles.
    So awesome you 3d printed your own bezel
     
To Top