1. Welcome to Tacoma World!

    You are currently viewing as a guest! To get full-access, you need to register for a FREE account.

    As a registered member, you’ll be able to:
    • Participate in all Tacoma discussion topics
    • Communicate privately with other Tacoma owners from around the world
    • Post your own photos in our Members Gallery
    • Access all special features of the site

Qbaums 2017 Taco Bomb Adventure Build

Discussion in '3rd Gen. Builds (2016-2023)' started by Quadabaum, Feb 1, 2017.

  1. Oct 5, 2017 at 4:34 AM
    #21
    boogie3478

    boogie3478 Well-Known Member

    Joined:
    Oct 12, 2014
    Member:
    #140179
    Messages:
    26,370
    Gender:
    Male
    Vehicle:
    14 TRD Off-Road V6
    All the mods
    Excellent choice! Welcome!
     
  2. Nov 12, 2017 at 2:23 PM
    #22
    Quadabaum

    Quadabaum [OP] Well-Known Member

    Joined:
    Feb 1, 2017
    Member:
    #209349
    Messages:
    783
    Gender:
    Male
    Vehicle:
    2017 Tacoma TRD OR 4x4 DCSB
    265/75R16 Falkens, ADS 2.5" Stage 3 Suspension, Go Fast Camper
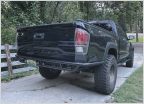
    Replaced my damaged chrome bumper end caps with some black end caps thanks to @Firefighter764 for helping me out.

    20171112_170431.jpg
    20171101_234505.jpg
     
  3. Nov 13, 2017 at 2:45 PM
    #23
    BassAckwards

    BassAckwards Well-Known Member

    Joined:
    May 3, 2016
    Member:
    #186002
    Messages:
    27,640
    Vehicle:
    AWD Turbo 2TR-FE
    Welcome from Texas!:D
     
    Quadabaum[OP] likes this.
  4. Jan 30, 2018 at 11:13 PM
    #24
    Quadabaum

    Quadabaum [OP] Well-Known Member

    Joined:
    Feb 1, 2017
    Member:
    #209349
    Messages:
    783
    Gender:
    Male
    Vehicle:
    2017 Tacoma TRD OR 4x4 DCSB
    265/75R16 Falkens, ADS 2.5" Stage 3 Suspension, Go Fast Camper
    Going to add my trailer to this build thread since I decided to stick with it. It is a 1967 Stevens M416 AKA Burrito that I "restored". I am currently having a friend build a lid and drop tailgate since I did not feel comfortable with that part of the build. Just bought a Dometic CFX50W fridge on Amazon for $490+tax on an amazon warehouse deal to put into the trailer, I will let you know how it looks and if it needs to be returned or not. Since an update is worthless without pics, here is my trailer and truck.

    20180131_021603.jpg
    20180131_021646.jpg
    20171231_085630.jpg
     
    Last edited: Jan 30, 2018
    Dctaconny likes this.
  5. Feb 2, 2018 at 5:58 PM
    #25
    Quadabaum

    Quadabaum [OP] Well-Known Member

    Joined:
    Feb 1, 2017
    Member:
    #209349
    Messages:
    783
    Gender:
    Male
    Vehicle:
    2017 Tacoma TRD OR 4x4 DCSB
    265/75R16 Falkens, ADS 2.5" Stage 3 Suspension, Go Fast Camper
    Dometic CFX50W fridge from Amazon is in, it isnt going to fit in the trailer so looks like it has to go into the truck bed. This might change things a bit, we will see.
     
  6. Feb 27, 2018 at 10:33 PM
    #26
    Quadabaum

    Quadabaum [OP] Well-Known Member

    Joined:
    Feb 1, 2017
    Member:
    #209349
    Messages:
    783
    Gender:
    Male
    Vehicle:
    2017 Tacoma TRD OR 4x4 DCSB
    265/75R16 Falkens, ADS 2.5" Stage 3 Suspension, Go Fast Camper
    Update: Seasoned my cast iron with flax seed oil, worked out great. On our trip to the Apalachicola we tore one of the stock tires up and had to drive home on the soare. It was decided that it was time for new tires so bought some 265/75r16 falken wildpeak at3w for under $500 shipped. Based on reviews, numerous articles, and threads I decided this would be the best fit for my build. I'll be riding on them until they're good and worn.
     
  7. Feb 28, 2018 at 4:29 PM
    #27
    Quadabaum

    Quadabaum [OP] Well-Known Member

    Joined:
    Feb 1, 2017
    Member:
    #209349
    Messages:
    783
    Gender:
    Male
    Vehicle:
    2017 Tacoma TRD OR 4x4 DCSB
    265/75R16 Falkens, ADS 2.5" Stage 3 Suspension, Go Fast Camper
    Tires look good, much more aggressive in person than they look online so that's a plus (several reviews had mentioned that). I am excited to get them mounted now.

    20180228_163554.jpg
     
  8. Mar 2, 2018 at 8:16 PM
    #28
    Quadabaum

    Quadabaum [OP] Well-Known Member

    Joined:
    Feb 1, 2017
    Member:
    #209349
    Messages:
    783
    Gender:
    Male
    Vehicle:
    2017 Tacoma TRD OR 4x4 DCSB
    265/75R16 Falkens, ADS 2.5" Stage 3 Suspension, Go Fast Camper
    Got the tires installed today, ride very good and they aren't any louder than the stock set that came with the truck. Hopefully I can test them off-road sometime. Total investment is $575.

    20180302_222553.jpg
    20180302_222602.jpg
     
  9. Apr 21, 2018 at 2:55 PM
    #29
    Quadabaum

    Quadabaum [OP] Well-Known Member

    Joined:
    Feb 1, 2017
    Member:
    #209349
    Messages:
    783
    Gender:
    Male
    Vehicle:
    2017 Tacoma TRD OR 4x4 DCSB
    265/75R16 Falkens, ADS 2.5" Stage 3 Suspension, Go Fast Camper
    Big changes coming, I decided that I dont want to pull a trailer on the trails. Therefore, I will be selling the M416 and RTT and upgrading to the GoFastCamper top for my Taco. This seemed like the best all around option for me, added security to the bed and it allows the dog to sleep with us. I will be driving to Montana in the fall and picking the camper up in person, at which time I will also be going to yellowstone, moab, and the grand canyon while I am nearby. It will be a 10 day trip and really help me determine where to go next with my Taco.
     
  10. Apr 26, 2018 at 8:07 AM
    #30
    Quadabaum

    Quadabaum [OP] Well-Known Member

    Joined:
    Feb 1, 2017
    Member:
    #209349
    Messages:
    783
    Gender:
    Male
    Vehicle:
    2017 Tacoma TRD OR 4x4 DCSB
    265/75R16 Falkens, ADS 2.5" Stage 3 Suspension, Go Fast Camper
    Got a killer deal on a chainsaw ive been watching for about 4 months. The stihl MS170 will handle home and trail duty. Also designed and 3d printed a lens cap and mount for my wifes old fujifilm S2940 that she passed down to me now that she has given up her photography hobby.

    DSCF0004.jpg

    IMG_20180426_110334_665.jpg
     
  11. Apr 30, 2018 at 11:14 AM
    #31
    Quadabaum

    Quadabaum [OP] Well-Known Member

    Joined:
    Feb 1, 2017
    Member:
    #209349
    Messages:
    783
    Gender:
    Male
    Vehicle:
    2017 Tacoma TRD OR 4x4 DCSB
    265/75R16 Falkens, ADS 2.5" Stage 3 Suspension, Go Fast Camper
    Putting my electrical together.

    -Blue seas 12 circuit fuse box
    -Bussman 100 amp circuit breaker hooked up using 6 gauge cable
    -Paranoid Fabrications mount for 3rd Gen TRDOR model to mount the fuse box and circuit breaker to
    -Blue seas 12v socket and usb port being installed in the bed, wired up with 12 gauge wire

    IMG_20180430_141035_100.jpg
     
    Last edited: Apr 30, 2018
    ChadsPride likes this.
  12. May 5, 2018 at 4:33 AM
    #32
    Quadabaum

    Quadabaum [OP] Well-Known Member

    Joined:
    Feb 1, 2017
    Member:
    #209349
    Messages:
    783
    Gender:
    Male
    Vehicle:
    2017 Tacoma TRD OR 4x4 DCSB
    265/75R16 Falkens, ADS 2.5" Stage 3 Suspension, Go Fast Camper
    Finally got the electrical installed, learned a lot through the process but I took my time to do it right.

    6awg wire from the battery to a 100 amp bussman circuit breaker. Blue seas 12 circuit fuse block with 6awg positive wired to the 100 amp bussman circuit breaker and 6awg negative grounded to the body/battery. I then wired a blue seas 12v and usb circuit to the bed storage box using 12awg pos/neg and installed a 10amp fuse to run my dometic. Ran the 12awg along the factory body harness with zip ties every ~8 inches.

    Before installing the wires I checked for continuity with a multimeter. The 6awg wires are crimped and soldered. Everything is loomed with braided wire loom and marine grade heat shrink with adhesive. I used insulated terminal connectors .

    IMG_20180504_161312_102.jpg
    IMG_20180504_161312_097.jpg
    IMG_20180504_161312_096.jpg
     
  13. May 29, 2018 at 3:52 PM
    #33
    Quadabaum

    Quadabaum [OP] Well-Known Member

    Joined:
    Feb 1, 2017
    Member:
    #209349
    Messages:
    783
    Gender:
    Male
    Vehicle:
    2017 Tacoma TRD OR 4x4 DCSB
    265/75R16 Falkens, ADS 2.5" Stage 3 Suspension, Go Fast Camper
    After the last trip I realized I desperately needed something to hold my phone and tablet for mapping. Ordered the T.P.A.M. from ExE and expect it to be shipped soon, I went ahead and got the 4.8 amp blue sea fast charger usb port preinstalled by ExE.
     
  14. Jun 16, 2018 at 8:46 PM
    #34
    Quadabaum

    Quadabaum [OP] Well-Known Member

    Joined:
    Feb 1, 2017
    Member:
    #209349
    Messages:
    783
    Gender:
    Male
    Vehicle:
    2017 Tacoma TRD OR 4x4 DCSB
    265/75R16 Falkens, ADS 2.5" Stage 3 Suspension, Go Fast Camper
    I just finished installing the ExE T.P.A.M in my 2017 Tacoma TRDOR so I figured I would do a write up since there are not that many out there for this mod. I missed some of the pictures but I tried to get the impartant ones (aka wiring taps, etc). Excuse the poor lighting, I started mid afternoon but it took much longer than expected and I had to run to the auto store to get taps because I dropped the ones that ExE supplied and couldnt retrieve them.

    1. Check the packaging, UPS beat my box up pretty good but ExE made sure everything inside was wrapped in foam and well taken care of. A+ on the packaging, + a free sticker :bananadance:
    20180615_201023.jpg 20180615_201132.jpg
    2. Begin the install. You start by pulling firmly on the radio bezel, it feels like youre going to break something but it comes off with pressure. You will be installing and pulling the bezel off several times so you will get used to it.

    3. Undo the 4 10mm bolts holding the radio in. You can leave the radio hanging but I chose to unplug it because I wanted to get it out of the way and make it easier to connect the wiring.
    20180616_174914.jpg

    4. Pull the A/C bezel off (took this idea from @Hodakaguy build thread). This is an extra step but this made it easier for me to connect the wire taps and its easier to see what youre doing, I also took the time to check my wire taps with a voltmeter to make sure all was well. The trick to removing the A/C bezel if on the left side (close to the steering wheel) you will have to unclip a small section of the lower dash panel for the steering wheel. Youll have to pry it beck a little to get the A/C panel from behind it, it has a small U that ties the two together.
    DSCF0009.jpg
    5. Find your 12V accessory plug and disconnect it. Pull the plug up towards the A/C panel area so you can see the wiring. Use the supplied t-taps to tie the red (positive) and purple (positive) wire and the black (negative) and white/black (negative) striped wire together. Try not the drop the taps, they are hard to dig out (ask me how I know).
    DSCF0011.jpg

    6. Run the T.P.A.M. harness up the upward left hand corner of the radio and push the radio back into place. Start by installing the Lower 10mm radio bolts first. Then pull your supplied T.P.A.M. mounts and install them with the upper 10mm radio mount bolts. The shorter mount goes on the left/drive side and the longer mount goes on the right/passenger side.

    7. Grab the radio bezel you removed and your T.P.A.M. and tape or clamp the T.P.A.M. to it. Be sure to slide the T.P.A.M. as far left/driver as it will go and get the rear side flush with the radio bezel. You will want to clamp/tape it to this spot then use a punch (+ screw driver in my case) to mark the 2nd and 6th mounting holes. You will then use a 1/4" bit ( I used a step bit) to drill the holes out.
    DSCF0013.jpg DSCF0014.jpg DSCF0015.jpg
    8. Reinstall the radio bezel and look into your newly drilled holes (perv :rofl:) and check that you can see the mounting bracket, You will want to line the mounting bracket up with the holes so that you can use 2 of the longer supplied screws to mount the T.P.A.M.. Check the fit by mounting the T.P.A.M. to the bezel and bolting 2 of the longer screws to the mounts. Once you have the brackets adjusted remove the bezel and repeat step 7 to mark the remaining 4 mounting holes.
    DSCF0016.jpg DSCF0017.jpg DSCF0018.jpg
    9. Be sure to make clearance for the wiring as well in the back of the bezel towards the left/driver side. Once you are done drilling mount 1 of the longer screws into the 1st (driver) mounting point. Then install the remaining shorter screws, nuts, and washers in the other 3 holes. Now reinstall the bezel with the T.P.A.M. mounted (plug your wiring connectors into the usb port before pressing the bezel into place) and install your last 2 longer screws to the mounting brackets and you are complete.
    DSCF0019.jpg
     
    Last edited: Jun 17, 2018
    Toynado and Simia_4 like this.
  15. Jul 2, 2018 at 2:32 PM
    #35
    NateWest

    NateWest Well-Known Member

    Joined:
    Apr 26, 2017
    Member:
    #217427
    Messages:
    247
    Gender:
    Male
    First Name:
    Nate
    Maple Valley WA
    Vehicle:
    2017 Super white DCSB TRDOR
    Great install! Do you mind me asking where you found your research for this? I'm trying to talk my self into doing this
     
  16. Jul 2, 2018 at 2:46 PM
    #36
    Quadabaum

    Quadabaum [OP] Well-Known Member

    Joined:
    Feb 1, 2017
    Member:
    #209349
    Messages:
    783
    Gender:
    Male
    Vehicle:
    2017 Tacoma TRD OR 4x4 DCSB
    265/75R16 Falkens, ADS 2.5" Stage 3 Suspension, Go Fast Camper
    Thanks!

    Mostly these threads and some searching. Bought most of the stuff from Amazon and sites listed in the threads, it didnt require much. I already had the blue seas fuse holder so went that route. I wanted it to look clean and close to stock.

    Mount: https://www.tacomaworld.com/threads/relay-fuse-panel-for-3rd-gen-tacomas-with-crawl-control.524828/ Great mount and definitely recommend, cool company, nice service, fast shipping, all Al mount.

    Pictures and others who have done a similar mod: https://www.tacomaworld.com/threads/show-off-your-aux-fuse-panels.308677/

    Bussman thread for tons of technical info and if you want to go that route, I referenced this thread heavily: https://www.tacomaworld.com/threads/diy-build-and-install-a-bussmann-rtmr-fuse-relay-block.399454/
     
  17. Jul 2, 2018 at 3:52 PM
    #37
    NateWest

    NateWest Well-Known Member

    Joined:
    Apr 26, 2017
    Member:
    #217427
    Messages:
    247
    Gender:
    Male
    First Name:
    Nate
    Maple Valley WA
    Vehicle:
    2017 Super white DCSB TRDOR
    THANKYOU!!!
     
    Quadabaum[QUOTED][OP] likes this.
  18. Jul 13, 2018 at 7:13 PM
    #38
    JoeCOVA

    JoeCOVA Well-Known Member

    Joined:
    Nov 15, 2016
    Member:
    #202463
    Messages:
    9,653
    First Name:
    Joe
    Colorado Springs
    Vehicle:
    Ford F350, Lexus RX450h, FZJ80, Jeep YJ
    Awesome write up. Any other wire I can tap into besides the assessors plug. I replaced mine with USB ports so I can splice into it. Any wires on the HEad unit?
     
  19. Jul 13, 2018 at 7:56 PM
    #39
    Quadabaum

    Quadabaum [OP] Well-Known Member

    Joined:
    Feb 1, 2017
    Member:
    #209349
    Messages:
    783
    Gender:
    Male
    Vehicle:
    2017 Tacoma TRD OR 4x4 DCSB
    265/75R16 Falkens, ADS 2.5" Stage 3 Suspension, Go Fast Camper
    I am not sure I would tap into the radio harness due to potential interference and messing with quality of the stereo. I would try to find another +/- source with a similar gauge, maybe a switch youve installed, the Qi switch, or maybe the aux/usb cord port next to the 12v plug. You could probably tap into your other usb wires that you installed.

    P.s. I am not trained in electrical so I cant verify that these sources are adequate or guarantee that it would work. If it was me, I would try to run separate power or use the wiring for the usb ports you installed in place of the stock 12v source.
     
  20. Jul 13, 2018 at 8:06 PM
    #40
    JoeCOVA

    JoeCOVA Well-Known Member

    Joined:
    Nov 15, 2016
    Member:
    #202463
    Messages:
    9,653
    First Name:
    Joe
    Colorado Springs
    Vehicle:
    Ford F350, Lexus RX450h, FZJ80, Jeep YJ
    Ok thanks! I don’t have any room to splice into the new USBs. I could possibly extend the wires and then tap into those extensions.
     

Products Discussed in

To Top