

-
Welcome to Tacoma World!
You are currently viewing as a guest! To get full-access, you need to register for a FREE account.
As a registered member, you’ll be able to:- Participate in all Tacoma discussion topics
- Communicate privately with other Tacoma owners from around the world
- Post your own photos in our Members Gallery
- Access all special features of the site
 Bilstein 5100 vs 5125 Different valving question
 Adding more USB charging ports - factory looking parts?
 Dash switch
 New to pick ups and lifts. Please help
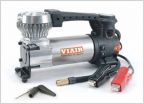 Portable air compressors in extreme cold weather
 What are these on 2017 Tacoma?
Tim1o9's Build Thread
Discussion in '3rd Gen. Tacomas (2016-2023)' started by Tim1o9, May 6, 2018.


