1. Welcome to Tacoma World!

    You are currently viewing as a guest! To get full-access, you need to register for a FREE account.

    As a registered member, you’ll be able to:
    • Participate in all Tacoma discussion topics
    • Communicate privately with other Tacoma owners from around the world
    • Post your own photos in our Members Gallery
    • Access all special features of the site

Savings? What savings? I got a truck to mod.

Discussion in '3rd Gen. Builds (2016-2023)' started by Ensemble88, Aug 2, 2018.

  1. Aug 2, 2018 at 6:45 AM
    #1
    Ensemble88

    Ensemble88 [OP] Well-Known Member

    Joined:
    Jun 17, 2018
    Member:
    #256661
    Messages:
    1,218
    Gender:
    Male
    Augusta, GA
    Vehicle:
    2017 Black OR DCLB
    Big ones are King suspension, SSO bumper w/winch, Pelfreybuilt sliders.
    Needed a thread to keep track of mods/things I've done to the truck so far. I'm going to update this as I go back and grab product info / pricing for what I got and put why I chose those in another post. I've also totaled the costs for my own benefit, some things I got deals on, your prices may vary a bit.

    Also, I plan to do as much work as possible to the truck myself. I always wanted to know more about how to work on cars/trucks so I'm learning as I go. Short story about the truck, my dad bought it before he passed away, knowing that he wouldn't be around very long to enjoy it, he purposefully bought my dream truck with the intent of passing it on to me. So I'll never, ever sell it. And it's purpose is to become completely and utterly mine. I am doing all the maintenance and upgrades myself at an auto hobby shop. Mistakes and all.

    I should mention this isn't an epic build thread (slowly becoming one though...). Most of the upgrades you'll find here will be small in nature. It's my daily driver and as such a fair amount of practicality is going to be considered throughout the build. (Yeah that didn't happen...)

    To do list:
    Connect front facing camera
    Dobinson leaf springs ($665)
    Rhinoline fenders ($??)
    Front skid plate ($285)
    MESO stage 1 tail lights ($115)
    Clazzios Seat covers ($350)
    MESO Puddle Pod in-cab switch ($40)
    Relentless Fab HC Rear bumper ($1500ish)


    Total cost of upgrades so far ($8983)


    THINGS DONE (not bought)
    Console tray etching for grip
    Antiseize on wheel lug nut threads
    Debadged V6 emblem
    Debadged weather tech emblem on hood deflector
    AC drain mod + plus rust touch up
    Custom start up image
    https://www.tacomaworld.com/threads/how-to-custom-startup-and-screen-off.301061/


    INTERIOR ($751)
    Glove box vinyl lettering ($9)

    https://tvdvinyldecals.com/


    Tacoweide radio knobs ($29)
    https://www.tacomaworld.com/threads/replacement-radio-knobs-knurled-black-anodized-aluminum.556567/


    Carista customized ECU settings ($20)
    https://www.amazon.com/Carista-Blue...8&qid=1533221567&sr=8-3&keywords=carista+obd2


    Meso fuse box cover ($20)
    https://www.tacomaworld.com/threads/custom-fuse-cover-extended-height.519448/


    Center console tray ($7)
    https://www.amazon.com/dp/B0758775MS/ref=cm_sw_r_cp_apa_v7BzBb70DC454


    OCD center console organizer ($13)
    https://www.amazon.com/gp/product/B016ZB4VZC/ref=oh_aui_detailpage_o09_s00?ie=UTF8&psc=1


    Neoprene center console cover ($18)
    https://www.amazon.com/gp/product/B0779SNXGW/ref=oh_aui_detailpage_o04_s00?ie=UTF8&psc=1


    Seat fillers between ctr console and seats ($20)
    https://www.amazon.com/Drop-Stop-Or...fkmr1&keywords=seatbelt+gap+filler+shark+tank


    Clazzio seat covers ($350)

    SOE visor ($75 ea.)
    https://www.originalsoegear.com/products/vehicle-visor-cover


    Steering Wheel cover ($15)
    https://www.amazon.com/gp/product/B074PTG1M7/ref=oh_aui_detailpage_o04_s00?ie=UTF8&psc=1


    CD slot cellphone holder ($10)
    https://www.amazon.com/Mpow-Holder-...id=1533232421&sr=8-10&keywords=ipow+car+mount

    Dash Multi-Mount (DMM) ($65) Subaru Tweeters to replace factory set ($100)
    https://www.amazon.com/dp/B00PV6F8I2/ref=cm_sw_r_cp_apa_S0jFBb62E65N8


    EXTERIOR ($3490)
    Ceramic Window tint ($500)

    OEM Tonneau cover (free. came with truck)


    Pelfreybuilt weld-on sliders $400

    Bought from TW member


    SSO slimline bumper (used) $400+225 powder coat

    Bought from TW member


    Superwinch Tigershark 9500SR ($350)
    Found killer deal online, last one available. Half price.


    OEM Roof rack (used) $100

    Bought from TW member

    Hood Bug Deflector ($75)

    https://www.amazon.com/gp/product/B01J4RA2OI/ref=oh_aui_detailpage_o05_s00?ie=UTF8&psc=1


    Window Vent Shades ($60)
    https://www.amazon.com/Auto-Ventsha...223952&sr=1-3&keywords=avs+vent+shades+tacoma


    Tacoma Pro grill ($110)
    https://www.tacomaworld.com/threads...now-shipping-too.554247/page-16#post-18367579


    Passenger door touch lock/unlock ($250)
    https://www.tacomaworld.com/threads/passenger-door-smart-key-system.545524/


    Bed Molle Panels full sides, no front ($350)
    https://caliraisedled.com/collectio...ucts/2005-2020-toyota-tacoma-bed-molle-system


    Total Chaos Bed Stiffeners ($170)
    https://www.chaosfab.com/accessorie...QsKyjcUr5IJrfiyOx7CiAzCpbkx8rdBAaAvNOEALw_wcB

    TRD Pro 2016 SEMA wheel replicas ($500)
    Bought from TW member, got some free 17" Lt tires from a jeep buddy, it was cheaper to upgrade the wheels than buy 16" tires myself. Probably will go back down to 16" or even 15" wheels at some point.

    LIGHTING ($450)
    Halogen 4k Kelvin bulbs (Hi beams) ($70)

    https://www.amazon.com/gp/product/B004FXIUSM/ref=oh_aui_detailpage_o05_s00?ie=UTF8&psc=1


    HID low beams ($55)
    https://www.amazon.com/gp/product/B0073G2N40/ref=oh_aui_detailpage_o06_s00?ie=UTF8&psc=1


    Morimoto Amber fogs ($150)
    https://www.tacomaworld.com/threads/morimoto-led-amber-fog-lights-in-stock.583151/


    MESO puddle lights ($75)
    https://mesocustoms.com/products/puddle-pods?_pos=5&_sid=1cd1c62f0&_ss=r


    MESO mirror turn signals ($100)
    https://mesocustoms.com/collections/exterior-lights/products/ultimate-turn-signals


    SUSPENSION ($3165)
    OEM King shocks front/rear non-adjustable w/ 700lbs springs (<$2500)
    group buy. Actual price not disclosed.

    Dobinson Leaf kit 500-800lb kit $770 total
    Leaf Springs ($550)
    https://exitoffroad.com/product/dob...air-for-toyota-tacoma-2005-to-2019-l59-111-r/
    Bushings ($70)
    https://exitoffroad.com/product/dob...-2020-rear-polyurethane-leaf-spring-bush-kit/
    U-Bolts ($60)
    https://exitoffroad.com/product/dobinsons-rear-u-bolts-for-toyota-tacoma-2005-to-2020-u-bolt-kit/
    Greasable Pins ($30 per pair) x3 for full replacement
    https://exitoffroad.com/product/dob...it-for-toyota-tacoma-and-tundra-2005-to-2020/


    MISC ($781)
    Tailgate lock ($6)

    https://www.amazon.com/gp/product/B003VAXCWO/ref=oh_aui_detailpage_o02_s00?ie=UTF8&psc=1


    Gasshole fuel cap holder ($22)
    https://www.tacomaworld.com/threads/the-gasshole™-fuel-cap-holder.534459/


    Tacomaworld sticker! ($8)


    AJT Fob + vinyl lettering for TRD ($35+5)

    https://www.ajtdesign-llc.com/online-store/Injection-Fob-2016-Tacoma-p90168539
    https://tvdvinyldecals.com/


    MESO Minimalist Fob ($45)
    https://mesocustoms.com/products/minimalist-key-fob-3rd-gen-keyless?_pos=2&_sid=076553437&_ss=r


    Dashcam+wiring kit ($75+10)
    https://www.amazon.com/dp/B01L17EMP4/ref=cm_sw_r_cp_apa_fabt1_NCOQFbCQWGZ41
    https://www.amazon.com/gp/product/B074PBPPPN/ref=oh_aui_detailpage_o09_s00?ie=UTF8&psc=1


    Cellink dashcam battery backup ($330)
    https://www.amazon.com/dp/B06ZZ4W66R/ref=cm_sw_r_cp_apa_fabt1_N3OQFbVNNM6YJ?_encoding=UTF8&psc=1


    Pop n lock ($100)
    https://www.amazon.com/dp/B00LST3022/ref=cm_sw_r_cp_apa_fabt1_dePQFb0V0NDGP


    Front Camera kit+camera($110+$35=$145)

    https://www.amazon.com/dp/B07DKH6J4W/ref=cm_sw_r_cp_apa_fabt1_BpPQFb060ZPMA
    https://www.amazon.com/dp/B07HNRYHZ6/ref=cm_sw_r_cp_apa_fabt1_nBPQFbAYSQKRZ?_encoding=UTF8&psc=1

    Equipment ($741)


    ---Recovery Equipment ($720)
    ARB Snatch strap ($60)
    https://www.amazon.com/dp/B01H5M6BM6?ref=ppx_pop_mob_ap_share

    Snatch Block ($45)
    https://www.amazon.com/dp/B07YWL8GGB/ref=cm_sw_r_cp_apa_fabt1_PSqUFb5WD4XE4?_encoding=UTF8&psc=1


    Smittybuilt Shackles ($12+9 for isolators)
    https://www.amazon.com/dp/B00MQY9GNU?ref=ppx_pop_mob_ap_share

    https://www.amazon.com/dp/B07FRFBPFN/ref=cm_sw_r_cp_apa_fabt1_sWrUFb2Y1G2ZT

    Viair 450P air compressor ($225 used)
    https://www.amazon.com/dp/B000X9EGFS/ref=cm_sw_r_cp_apa_fabt1_aTqUFbECF537V?_encoding=UTF8&psc=1

    ARB E-Z Tire Deflator
    https://www.amazon.com/dp/B004LQCDOA?ref=ppx_pop_mob_ap_share

    Cobra Walkie Talkies ($50)
    https://www.amazon.com/dp/B019RIOZRY/ref=cm_sw_r_cp_apa_fabt1_dUqUFb0JQ5RG9?_encoding=UTF8&psc=1

    Safe Jack Bottle Jack Kit ($300)
    https://safejacks.com/products/safe-jack-bottle-jack-recovery-kit-with-bottle-jack


    Detailing Equipment ($???)
    Will add this up later, it'll be kind of extensive.

    PXL_20201115_212502800.jpg
     
    Last edited: Feb 7, 2021
  2. Aug 2, 2018 at 8:02 PM
    #2
    Grossomotto

    Grossomotto Complete 3rd Member

    Joined:
    Mar 13, 2018
    Member:
    #247175
    Messages:
    8,431
    39.9526° N, 75.1652° W
    Vehicle:
    2017 4WDV6LB6MT
    You’re well on your way, need some pics as you mod
     
  3. Aug 2, 2018 at 8:16 PM
    #3
    Ensemble88

    Ensemble88 [OP] Well-Known Member

    Joined:
    Jun 17, 2018
    Member:
    #256661
    Messages:
    1,218
    Gender:
    Male
    Augusta, GA
    Vehicle:
    2017 Black OR DCLB
    Big ones are King suspension, SSO bumper w/winch, Pelfreybuilt sliders.
    Yeah, trying to play catch up since these are all already done. But will have some pics later of the new grill
     
  4. Aug 4, 2018 at 7:07 AM
    #4
    Ensemble88

    Ensemble88 [OP] Well-Known Member

    Joined:
    Jun 17, 2018
    Member:
    #256661
    Messages:
    1,218
    Gender:
    Male
    Augusta, GA
    Vehicle:
    2017 Black OR DCLB
    Big ones are King suspension, SSO bumper w/winch, Pelfreybuilt sliders.
    Last edited: Aug 4, 2018
  5. Aug 20, 2018 at 10:49 AM
    #5
    Dirtbag4Life

    Dirtbag4Life Well-Known Member

    Joined:
    Jul 9, 2018
    Member:
    #258798
    Messages:
    65
    Gender:
    Male
    Bozezman, MT
    Vehicle:
    2000 Taco 3.4L SR5 V6
    Custom camping platform w/sliding drawers Added camper shell Added hitch for towing and bike racks Installed roof racks on shell Added shade awning off of roof racks Upgraded to 2003 center console Upgraded to Anzo black headlights Upgraded to 1440 Lumen LED reverse lights Previous truck was a 2005 Tacoma TRD
    Looks sharp!
     
    Ensemble88[OP] likes this.
  6. Aug 21, 2018 at 4:27 PM
    #6
    Ensemble88

    Ensemble88 [OP] Well-Known Member

    Joined:
    Jun 17, 2018
    Member:
    #256661
    Messages:
    1,218
    Gender:
    Male
    Augusta, GA
    Vehicle:
    2017 Black OR DCLB
    Big ones are King suspension, SSO bumper w/winch, Pelfreybuilt sliders.
    Saw most people only showing the drivers side in their how to vids of this. So here's the passenger side. It's the same except one small difference. You have a sensor that you have to disconnect from the speaker panel before you can remove it.

    You can't fit a ratchet in there to get the bolt closes to the windshield so I used some needle nose vice grips to loosen them until I could do the rest by twisting the socket with my fingers.

    Putting them back on, I only hand tightened the bolts holding the tweeters since I couldn't get the socket in there and didn't want to strip the bolts with my vice grips. Then tightened down the a pillar panels good n proper. All done. Short and sweet explanation since there's lots of vids on this already on YouTube. The one I used to help me with my install is here.

    Oh and the sound quality is noticably better! Glad I did this one.

    https://youtu.be/YXRE7fuk36o

    IMG_20180821_143424.jpg
    IMG_20180821_143805.jpg
    IMG_20180821_143849.jpg
    IMG_20180821_144112.jpg
    IMG_20180821_142626.jpg
     
  7. Nov 15, 2020 at 2:04 PM
    #7
    Ensemble88

    Ensemble88 [OP] Well-Known Member

    Joined:
    Jun 17, 2018
    Member:
    #256661
    Messages:
    1,218
    Gender:
    Male
    Augusta, GA
    Vehicle:
    2017 Black OR DCLB
    Big ones are King suspension, SSO bumper w/winch, Pelfreybuilt sliders.
    Decided against the piping. Those seat covers are wearing out and I'll be replacing them with katzkins probably next year. A LOT has happened to the truck in the last year. So I'm updating as best I can. I've gotten a ton of detailing equipment for it as well that I store in the bed. I used the Sonax perfect finish, with Jescar sealant and Collinite wax, but will be switching to a ceramic coating to save space and reduce my detailing equipment once I settle on one with longevity.

    The leafs are giving out as a result of the constant loaf and need replacement. The next few posts are going to be explanations for why I got what I did vs. the alternatives commonly discussed.
     
  8. Nov 15, 2020 at 2:05 PM
    #8
    Ensemble88

    Ensemble88 [OP] Well-Known Member

    Joined:
    Jun 17, 2018
    Member:
    #256661
    Messages:
    1,218
    Gender:
    Male
    Augusta, GA
    Vehicle:
    2017 Black OR DCLB
    Big ones are King suspension, SSO bumper w/winch, Pelfreybuilt sliders.
    Interior
    Most of the time I spend around the truck will be inside driving it. So setting up a comfortable cockpit was essential to me.

    Here's a couple pics of the interior with the DMM installed with my phone mount, I like the rubber grip of this phone mount and it expands/contracts on the sides so you don't have to worry about the phone being too big. My pixel 4 inside it's otterbox case didn't fit in the one that I got with the DMM.

    The molle visor is pretty handy as you can see. I have a UV penlight and a regular white penlight, along with a serrated knife, seatbelt cutter/glass breaker, detachable antennas for the baofeng, and garage opener all neatly stored in there. And it still has room for my sunglasses and a pen.

    PXL_20201119_123902171.jpg
    PXL_20201115_212629394.jpg

    I used a converter inside the center console to give me a standard a/c plug and a couple more USB ports. It fits nicely inside the center console organizer with a little velcro.

    PXL_20201119_123102700.jpg


    The steering wheel cover and center console covers are sacrificial layers imo, and so I didn't spend a lot on a fancy one or stitching one on. They're meant to take a lot of wear and tear and be replaced.

    Drop stop seat fillers have saved my ass a quite a few times. I hate dropping pens, and my keys, etc. And having them fall under my seat. I'm convinced this is an essential item lol.

    PXL_20201119_123559029.jpg

    Tacoweide knobs are the best offered imo. The aluminum notches have just the right amount of bite and feel good in my fingers, others offered are rubber/plastic and don't feel quite as solid.

    PXL_20201119_123543122.jpg
     
    Last edited: Nov 19, 2020
  9. Nov 15, 2020 at 2:05 PM
    #9
    Ensemble88

    Ensemble88 [OP] Well-Known Member

    Joined:
    Jun 17, 2018
    Member:
    #256661
    Messages:
    1,218
    Gender:
    Male
    Augusta, GA
    Vehicle:
    2017 Black OR DCLB
    Big ones are King suspension, SSO bumper w/winch, Pelfreybuilt sliders.
    Exterior

    High quality tint is worth every penny. Not only will it keep you and your interior cool, but because it blocks UV, it also protects your interior plastic and leather from fading/cracking over time.

    I went with a slimline bumper for a smoother look, and the stage 2 offering might be nice later, however I am thinking I should have gotten a beefier bumper just for protection from idiot drivers...after the relentless fab HC rear I would have full 360 steel protection.

    PXL_20201109_151608758.jpg

    The winch (not installed yet. Bumper being powder coated) I paired it with is a Superwinch with synthetic line, the company went out of business about a year or two ago and were baught out by Westin. Their winches were made in china but the quality of the tigershark and talon product lines were solid and affordable compared to the competition. Unfortunately they tried to come out with the next latest and greatest tech filled winch and the quality control was so bad I think they bankrupted themselves...too bad, they were a good company just goofed on their new product and had too much riding on it.

    The Pelfreybuilt sliders are my favorite style, the kickout at the back actually starts 1/2 way up the slider. So it is very gradual, and gives it a smooth look.

    PXL_20201115_212502800.jpg

    The roof rack is minimal, I don't like carrying stuff on the roof, so this gave me options but didn't take up space, add weight or drag. The OEM model has two aluminum arms that I can put out parallel crossways or front to back.

    The OEM tonneau is the best for what I used it for. It lets me lock stuff up, and the way it folds back and secures gives me access to my toolbox which fits under it with whatever else I'm carrying. A tonneau plus pop n lock is awesome for security.

    Issues with other tonneau styles/options
    The diamondbacks don't allow access to a toolbox unless it's right at the tailgate, which makes loading additional stuff in the bed annoying and the hinge across the middle makes things in the middle of the bed a PITA to access, the roll up styles aren't sturdy enough to stand on, and the permanently attached tool boxes reduce your available bed space because you can't remove them. The OEM tonneau gives the best of all these. Sturdy enough to walk on and rolls back to put tall stuff in the bed without removing it and access pretty much the whole bed.

    PXL_20201114_181230434.jpg

    I purposely did NOT get a bed mat. I didn't want my bed to be grippy because being able to slide things forward and back in the bed without picking them up and replacing them is way easier. To prevent things from rocking I just use bungies. They're cheap and adjustable for whatever I'm securing, and they clip nicely onto the molle panels when not in use.

    The total chaos bed stiffeners are the best. Period. And when it comes to leverage being a factor when preventing twists, warps, and metal tears in the truck body it's worth the extra $50 or so. They go all the way up the side of the bed, and TC patented that, so all other companies have to stop short. All will provide some protection, but TC will provide the most.

    PXL_20201114_181205100.jpg

    PXL_20201114_181158182.jpg

    Installing the touch handle on the passenger side was a no brainer. You don't realize just how handy it is until you have it. It's SO nice, but fishing the cable into the door is always a PITA. Worth the trouble though 1000%.

    Aesthetically, I got a mock pro grill and the vent shades, because they look cool and that's it. I don't know if the bug screen works, but I haven't had any chips since installing it, though one or two rocks have hit my windshield.
     
    Last edited: Nov 21, 2020
  10. Nov 15, 2020 at 2:06 PM
    #10
    Ensemble88

    Ensemble88 [OP] Well-Known Member

    Joined:
    Jun 17, 2018
    Member:
    #256661
    Messages:
    1,218
    Gender:
    Male
    Augusta, GA
    Vehicle:
    2017 Black OR DCLB
    Big ones are King suspension, SSO bumper w/winch, Pelfreybuilt sliders.
    Lighting

    Ok, so there IS an ideal set up with your stock headlight housing changing out bulbs only, but it's not what you'd think. Since I didn't come with LED headlights, this is what I did.

    LED light doesn't throw correctly in the wrong housing. You'll only have near vision at night. HID's are a good upgrade for the projector housing of our low beams. Our high beams are built for Halogens so stick with that if you want the light to throw correctly. Halogens actually have the ideal color temperature for your eyes (warmer tones, lower kelvin) blue white and clear white kelvin levels kill your night vision and actually make the dark areas darker to your eyes. In the extreme, this is why red lights won't ruin your night vision, but white light will. The closer to red (yellow) you are the easier on your eyes and the better your night vision will be. Oncoming traffic could still jack that up for you of course. But at least you're doing your part lol.

    So, use LEDs for fogs, which are near vision only anyhow, upgrade to HIDs for low beams for max brightness, and use halogens for your hi beams. I matched color temps for aesthetics only, not function.

    Ditch lights are a waste I think. I don't think anyone does serious crawling in the dark where their fogs or a flashlight can't show them what they need to see, I feel like they're easily stolen, and some states make you cover them anyway when you're on the road, meaning you can't even show off your bling.

    Light bars are only good imo if they are able to hit from a different angle than your headlights. Otherwise you're just going to make the same areas brighter without reducing shadow. By hitting the area from multiple angles, you can reduce the amount of shadow in front of you. This is why light bars in your grill near the same plane as your headlights aren't as effective as one on the roof.

    That being said it's expensive to get a long one for your roof and mount it. It's more practical and actually cheaper, to upgrade your headlight housing with glass projectors instead of standard plastic, and high quality LEDs that are built for the new housing. I feel like this will benefit me much more than off road only lights and I won't have to mount any additional equipment on my truck.

    The puddle pods and side markers Meso makes are nice to have if you can get them too. An always on function for the puddle lights might be a cool feature to look into, like a ditch light.
     
    Last edited: Nov 15, 2020
  11. Nov 15, 2020 at 2:07 PM
    #11
    Ensemble88

    Ensemble88 [OP] Well-Known Member

    Joined:
    Jun 17, 2018
    Member:
    #256661
    Messages:
    1,218
    Gender:
    Male
    Augusta, GA
    Vehicle:
    2017 Black OR DCLB
    Big ones are King suspension, SSO bumper w/winch, Pelfreybuilt sliders.
    Suspension

    Kings with 700lbs springs, which was nice once they settled. I feel like switching from P to LT tires made a much stuffer ride than switching my shocks.

    I chose not to get adjusters because they only offer levels of increased firmness. I don't see a reason to run them any more firm than they already are.
     
    Last edited: Feb 7, 2021
  12. Nov 15, 2020 at 2:13 PM
    #12
    Gearheadesw

    Gearheadesw must modify

    Joined:
    Apr 2, 2012
    Member:
    #76139
    Messages:
    5,090
    Gender:
    Male
    Davenport Fl
    Vehicle:
    1 truck 1 car 1 motorcycle
  13. Nov 21, 2020 at 5:44 AM
    #13
    Ensemble88

    Ensemble88 [OP] Well-Known Member

    Joined:
    Jun 17, 2018
    Member:
    #256661
    Messages:
    1,218
    Gender:
    Male
    Augusta, GA
    Vehicle:
    2017 Black OR DCLB
    Big ones are King suspension, SSO bumper w/winch, Pelfreybuilt sliders.
    My SSO bumper's paint was coming off and rust was starting to form. I had let it sit outside while on my year long deployment. I think it wasn't primed prior to painting when I got it, so I took it to get sand blasted / powder coated. I also had them powder coat the fairlead and hook to match the Superwinch colors (and my kings coincidentally).

    I played with the idea of doing the sand blasting and a prime/paint coat myself but I couldn't find a place where I could sand blast without fear of getting into trouble. Also, renting the equipment and buying all the supplies & blasting media was only about $50 cheaper. It would have been worth it if I was also going to paint a rear bumper in the future, but I don't have the funds to buy it since they had to go towards my frowny face leaf packs...

    PXL_20201120_212406391.jpg PXL_20201120_212530489.jpg
    Installed the winch when I got it back. I was running out of daylight and didn't have a place in the engine bay to mount the fuses. I think I'll look into getting a fuse relay, maybe blue sea? I'll need to research to see if I can incorporate the supplied fuse block or just get something new. For now I hooked it straight up to the batt so I could wind up the cable, but I'll definitely need to change this prior to off roading. I'll never be able to get a winch this cheap again.

    Only regret, I didn't check the motor compartment prior to install. I should've taken a look to see if it needs greasing. Auto hobby shop is closed now though due to covid, so it'll be a while until I can take it down unless I can get a second set of hands or a garage. @AugustaTaco *cough cough nudge nudge* maybe you can hook me up some day? Beers for ya if you can! :burp:
     
  14. Nov 21, 2020 at 6:17 AM
    #14
    Ensemble88

    Ensemble88 [OP] Well-Known Member

    Joined:
    Jun 17, 2018
    Member:
    #256661
    Messages:
    1,218
    Gender:
    Male
    Augusta, GA
    Vehicle:
    2017 Black OR DCLB
    Big ones are King suspension, SSO bumper w/winch, Pelfreybuilt sliders.
    I got a metal housing to replace the plastic one ask I could have it drilled out for a fumoto valve and put some high temp thread locker on it for peace of mind. This, plus a fumoto on the oil pan will be installed at the next oil change. Being able to put a tube on this or just control the initial spurt of oil coming out of the filter housing is great for keeping things neat and tidy.

    For anyone else looking to go with the metal filter housing, it's very tempting to tighten it down hard, these things only need to be hand tight. The truck will tighten it down on its own through suction just by running and you have a rubber gasket in there that is doing all the work. Over tightening it won't do anything other than compress the gasket too much, increase the chance of gasket failure, and make it a huge PITA to get off when it's even tighter than when you put it on at your next oil change.

    PXL_20201114_181311881.jpg
     
  15. Feb 7, 2021 at 3:39 PM
    #15
    Ensemble88

    Ensemble88 [OP] Well-Known Member

    Joined:
    Jun 17, 2018
    Member:
    #256661
    Messages:
    1,218
    Gender:
    Male
    Augusta, GA
    Vehicle:
    2017 Black OR DCLB
    Big ones are King suspension, SSO bumper w/winch, Pelfreybuilt sliders.
    Installed my Dobinson leafs springs! My stock ones were pretty bust and sagging a lot practically using my bump stops for everything... I got the 500-800lb set to lift up the rear 2" and get my rear suspension back.

    Here's my lessons learned.

    1. Buy a set of new OEM shackles so you don't have to bother removing the old bushings. It's $20 for a pair. Well worth it.

    2. The bolts for the leaf spring shackles are not all the same length. I've made a nice scratch by the rear leaf spring mount because I used the wrong set of bolts.
    PXL_20210207_210009564.jpg

    3. Get a friend. Tried doing this myself and they were too heavy and awkward to put in without a second set of hands.

    4. Use 2 floor jacks to maneuver your second leaf spring in. The 1st jack to hold up your diff and keep pressure off the hoses, and the second one to push up one of side of the axle, which pushes the other side down. It let's you get a lot of room to maneuver the leafs.

    5. The drivers side was much harder to get in. I don't know if it was because it was the first one we were doing, but the passenger side just popped in so smoothly I wish we had done that one first.

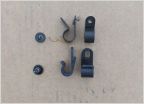
    6. These little clips (the one I'm holding) aren't able to get screwed into their new location on the leafs. It's zip tied to keep it out of the way, but I may just end up cutting them off altogether.
    PXL_20210207_210000584.jpg


    I'm a little concerned I should've gotten a heavier spring weight. My truck is sitting higher for sure, but the springs look flat with my current weight and I still don't have my steel rear bumper...
    PXL_20210207_210330820.MP.jpg
    PXL_20210207_210256578.jpg
     
  16. Feb 25, 2021 at 11:32 AM
    #16
    Ensemble88

    Ensemble88 [OP] Well-Known Member

    Joined:
    Jun 17, 2018
    Member:
    #256661
    Messages:
    1,218
    Gender:
    Male
    Augusta, GA
    Vehicle:
    2017 Black OR DCLB
    Big ones are King suspension, SSO bumper w/winch, Pelfreybuilt sliders.
    Pretty productive day!

    Installed the MESO stage 1 tail lights, used Velcro to tuck away the little control box.

    Attempted install of MESO puddle light switch. But apparently it doesn't work for the 3rd gen. Bummer because it's a great idea, and let's you use them as ditch lights on the fly.

    Installed a set of greasable pins for my Dobinson leafs. They made these bolts shorter to prevent rubbing and still give you access to the zerk fitting. But for some reason it's still making contact on the passenger side...I didn't have time to file/cut off the tip of it or figure out why it's different. Strange to me that they wouldn't match...manufacturing variance maybe?

    Also felt very big brain with my idea of using a C clamp to keep the springs in place while replacing the bolts.

    PXL_20210225_154501434.jpg
    PXL_20210225_154405095.jpg
    PXL_20210225_164513816.jpg
    PXL_20210225_164522004.jpg
    PXL_20210225_180621073.jpg
    PXL_20210225_183831724.jpg
     

Products Discussed in

To Top