1. Welcome to Tacoma World!

    You are currently viewing as a guest! To get full-access, you need to register for a FREE account.

    As a registered member, you’ll be able to:
    • Participate in all Tacoma discussion topics
    • Communicate privately with other Tacoma owners from around the world
    • Post your own photos in our Members Gallery
    • Access all special features of the site

Active System w/complete soundproofing (JBL tear out).

Discussion in 'Audio & Video' started by mctechhweng, Sep 11, 2018.

  1. Sep 11, 2018 at 12:27 AM
    #1
    mctechhweng

    mctechhweng [OP] Well-Known Member

    Joined:
    Jul 24, 2018
    Member:
    #260429
    Messages:
    359
    First Name:
    Matthew
    Vehicle:
    2015 TRD Sport V6.
    Audio: Focal PC165, Focal KX2, JL VX800/8i, Pioneer AVIC-8200.
    I just finished doing an audio system in my 2015 TRD Sport. It came with the factory JBL audio, but honestly I didn't like the way it sounded and I felt like the EQ controls were insufficient. I spent a lot of time and money on this build trying to get it just right so I hope my experience can benefit someone interested in aspects of my build. Next I'm working on cleanup up my big-3 upgrade & installing HAM radio.

    My setup:
    Pioneer AVIC 8400-NEX (Head Unit)
    Pioneer AVIC 8200-NEX (Removed, replaced & trashed)
    JL Audio VXI 800/8i (8 channel amp w/DSP)
    Focal ES165 KX2 (Front Doors)
    Focal PC165 (Rear Doors)
    JL XD600/1v2 (Mono-Amp)
    JL TW3 10" (Subwoofer)
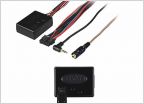
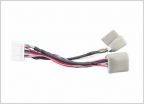
    Maestro RR (Steering controls, idatalink, factory aux)
    PAC RP4.2-TY11 (Removed, replaced & trashed)
    Sound Skins deadening material. (6 rolls in the doors)
    Second Skin audio materials (Floor, roof)
    Blood & sweat. (Literally b/c these materials are sharp & hard to cut!)

    I wired the factory sub into the VXI by bridging one of the VXI outputs. The sub is a dual voice coil with 2ohm coils, I'm running the coils in series for a serial impedance of 4ohms. I ran a 1/0 power wire under the passenger side of the pickup pulling it into the storage bin under the rear seat where I have a distribution block so I can power future projects and the VXI amp.

    I replaced the factory backup camera with the camera-source 12v drop in camera. It required running a new harness to the tailgate from behind the head unit, but it made integrating the backup camera behind the dash 10x easier since space is very limited & has a better picture.

    My only regret is not having used the idatalink interface (Already put an order for one so will be swapping out the PAC).

    Here's the head unit going into the dash. There isn't much space for all this crap so you have to plan ahead and be extremely patient & clever to get it all in without squishing all the wires.

    IMG_1946 (1).jpg

    This is the harness I had to stuff behind the head unit. It has the steering integration module, and all the other stuff. This picture has the oem camera integration harness included, but I decided to go another route by purchasing a 12v aftermarket camera from camera-source.
    IMG_1906 (1).jpg

    Here's the aftermarket backup camera picture. I think it was an improvement from the stock camera, but quality does depend on lighting conditions.
    IMG_1961 (1).jpg

    Apple Car Play works great. The AVIC is a little bit laggy/slow, but once you figure out how to work around it's quirks I think it's a much better environment. Hopefully they will continue to get better with time.
    IMG_1960.jpg

    I pulled out the OEM JBL subwoofer, series the coils, and ran it as a 4 ohm off my vxi on a 200W channel. It sounds pretty good, but we'll see if it holds up.IMG_1897.jpg

    I covered the factory sub in dynamat as well as the back wall. I will probably come back with some closed cell foam. (The JBL amp is now removed since I'm using the JL VXI).IMG_1902.jpg

    Here's the VXI800/8i. I'm literally running it on the back of the rear seat right now. I haven't had time to mount it. Hopefully nobody breaks into the pickup and steals it.
    IMG_1940.jpg

    I will have to come back later and put the mat over this large service hole. The door panel needs to be modified in order to put deadening material over the larger service hole. I put quite a bit of sound skins in the doors. I started from the back of the cab with dynamat, then soundskins on the back doors and finally soundskins on the front doors. I noticed a huge road nose reduction when I did the front doors and a lot less vibration from the door panels. I work 50+ hours a week so I did the rear right door one weekend, the rear left door the next weekend, and the front two doors on labor day weekend.
    IMG_1951.jpg

    I bought the ********* heavy duty speaker adapters and used the sound skins foam rings around the woofer/tweeters.IMG_1954.jpg

    The tweeter fits nice and snug.
    IMG_1952.jpg

    These are the JBL front door tweeters/woofers. I think they had way too much mid-bass and the tweeter quality was extremely poor.
    IMG_1932.jpg

    Here's the back door totally finished up. Lots of soundskins on all the sheet metal and the coax speaker snug in foam rings from stinger.
    IMG_1882.jpg

    The JBL speaker from Toyota was basically just a tweeter. I picked up a lot of mid-bass from the rear of the cab which is nice.IMG_1843.jpg
     

    Attached Files:

    Last edited: Jan 9, 2019
    TacoTuesday!! and henryp like this.
  2. Sep 11, 2018 at 4:43 AM
    #2
    Do58

    Do58 Well-Known Member

    Joined:
    Oct 11, 2015
    Member:
    #166373
    Messages:
    594
    Gender:
    Male
    Vehicle:
    2015 white tacoma limited
    nice install.... 2 questions
    1. what brand camera are you running since you replaced? assuming it went into the handle?
    2. what is along the sides of the silver dash bezel in the pic with the radio out? is that tesa tape?
     
  3. Sep 11, 2018 at 9:18 AM
    #3
    mctechhweng

    mctechhweng [OP] Well-Known Member

    Joined:
    Jul 24, 2018
    Member:
    #260429
    Messages:
    359
    First Name:
    Matthew
    Vehicle:
    2015 TRD Sport V6.
    Audio: Focal PC165, Focal KX2, JL VX800/8i, Pioneer AVIC-8200.
    1. I bought this camera. (it's a little expensive, but the packaging is nice because it's basically ready to go) https://camera-source.com/toyota-tacoma-backup-camera-for-aftermarket-monitors.html.
    2. Yes I put tesa tape on the dash bezel to protect it while I'm inserting the new head unit. The bezels are easily scratched.
     
  4. Sep 18, 2018 at 4:35 PM
    #4
    mctechhweng

    mctechhweng [OP] Well-Known Member

    Joined:
    Jul 24, 2018
    Member:
    #260429
    Messages:
    359
    First Name:
    Matthew
    Vehicle:
    2015 TRD Sport V6.
    Audio: Focal PC165, Focal KX2, JL VX800/8i, Pioneer AVIC-8200.
    I just ordered a new Sub Box from Mr Marv for a 10" TW3 JL audio. I'll post updates to the project when I have something worth looking at.
     
  5. Sep 19, 2018 at 5:17 AM
    #5
    badhabit2break

    badhabit2break Well-Known Member

    Joined:
    May 29, 2018
    Member:
    #254833
    Messages:
    230
    Gender:
    Male
    First Name:
    Stephen
    Houston, TX
    Vehicle:
    2018 Red Tacoma TRD Off-Road
    Stock
    Since you have the OEM speakers removed, can you list the ohm of each speaker please. Looking to upgrade my speakers, but want to make sure I get the correct ohms for the new ones.
     
  6. Sep 19, 2018 at 10:42 AM
    #6
    mctechhweng

    mctechhweng [OP] Well-Known Member

    Joined:
    Jul 24, 2018
    Member:
    #260429
    Messages:
    359
    First Name:
    Matthew
    Vehicle:
    2015 TRD Sport V6.
    Audio: Focal PC165, Focal KX2, JL VX800/8i, Pioneer AVIC-8200.
    I can stick an ohm meter on the coils, but it's not going to give me a single steady resistance so I'll give you a median value.

    You won't be able to get any mid bass out of the JBL amp in the rear doors. There's a high pass filter somewhere in the JBL audio system (Either in the AMP or the head unit). If you look at the JBL speakers that come out of the rear doors they're just a large tweeter so it makes sense that they filter out all the low band waves. I tried running a 6.5" coax speaker in the rear doors off the JBL amp and it basically only drove the tweeter.
     
  7. Sep 20, 2018 at 6:59 AM
    #7
    badhabit2break

    badhabit2break Well-Known Member

    Joined:
    May 29, 2018
    Member:
    #254833
    Messages:
    230
    Gender:
    Male
    First Name:
    Stephen
    Houston, TX
    Vehicle:
    2018 Red Tacoma TRD Off-Road
    Stock
    That value would be great.

    The amp does all the process for the speakers. Some have said that the rear speakers play full and others say it does not. If I get to the point of replacing the JBL amp with something alot better, I will run a DSP to fix all that.
     
  8. Sep 20, 2018 at 2:24 PM
    #8
    mctechhweng

    mctechhweng [OP] Well-Known Member

    Joined:
    Jul 24, 2018
    Member:
    #260429
    Messages:
    359
    First Name:
    Matthew
    Vehicle:
    2015 TRD Sport V6.
    Audio: Focal PC165, Focal KX2, JL VX800/8i, Pioneer AVIC-8200.
    I didn't try running new speakers in the front doors off the JBL amp so idk how it would sound, but in my opinion it wasn't worth doing in the rear doors b/c of how the JBL amp filters the bands.
     
  9. Oct 7, 2018 at 11:00 PM
    #9
    mctechhweng

    mctechhweng [OP] Well-Known Member

    Joined:
    Jul 24, 2018
    Member:
    #260429
    Messages:
    359
    First Name:
    Matthew
    Vehicle:
    2015 TRD Sport V6.
    Audio: Focal PC165, Focal KX2, JL VX800/8i, Pioneer AVIC-8200.
    Ok. Here's an update to my build.
    1. I installed clazzio leather seat covers.
    2. I bought a JL TW3 Subwoofer and had MR Marv cut, glue and screw a nice hardwood.
    3. I bought a Maestro RR because I wanted idatalink and I was also having problems with the AVIC-8200 NEX crashing/locking up from what seemed like a problem with the accessory wire that comes from the PAC module.

    I went with black on the outside, dark perforated grey in the middle with dark grey stitching.
    IMG_2003.jpg


    Still haven't gotten the bottoms cinched up how I want them.
    IMG_2009.jpg


    The back seats look really good.
    IMG_2010.jpg


    Here's what I've got in the backlog. 10" enclosure with shelf and amp rack from @Mrmarv. I hope one sub is enough, I think I'm going to need to deaden the roof....
    IMG_2011.jpg


    Just need to do a few adjustments before I put carpet on it.
    IMG_2017.jpg


    I started with this PAC RP4.2-TY11 to integrate the factory steering controls, but to be honest I think the Maestro RR is much better for a number of reasons.
    • PAC harness is garbage and makes it very difficult to have enough space behind the radio.
    • PAC module loses its configuration every time you disconnect the battery. That means you might not get the steering controls the way you like them and you'll need to open the dash every time you disconnect the source. I found out from trial that the Maestro does not have this problem!
    • I wanted idatalink.
    IMG_2023.jpg


    I took the T01 Maestro RR harness and I de-pinned all the wires/connectors that I don't need. Since I'm using my own amp and an aftermarket backup camera I was able to remove quite a lot from the Maestro RR harness. It made installing the radio very easy compared to the PAC module. No squished wires, plenty of space for the Pioneer AVIC NEX Exhaust fan, and minimal patience required to stuff the dash.

    Wires with red tags are Accessory, Wires with blue tags are Remote, and wires with green tags are Ground. I use bullet connectors for the stuff that isn't part of the factory harness so I can remove this cluster and I always leave a few extra hooks to ground, accessory, remote, and 12. Everything in the harness that I wire is soldered or crimped first and then soldered. I also use clear shrink tube and do two layers on each and every joint.

    My backup camera is wired off Accessory and my amp is wired off remote. Later I can choose to rewire these if I want to thanks to the bullet connectors (They're not the best connectors tbh). I stuck the Maestro RR module to the bottom side of the dash top using Velcro.
    IMG_2026.jpg


    I got the tire pressures, gauges, and such.
    IMG_2029.jpg


    Here's the gauges. All of the stuff Toyota figured you didn't need to see.
    IMG_2030.jpg


    Why can't I enable "Accessory During Crank"? I have a pending question open on the Maestro technical forums about this feature.
    IMG_2027.jpg


    Here are all the wires I was able to exclude from the Maestro RR T01 harness. For me this was a very simple wiring job because by the time I had de-pinned all the wires/connectors my install wouldn't use I had extra accessory, ground, and 12v wires hanging off the harness that I was able to use for my install. I had to solder far less joints on this harness than I did on the PAC harness.
    IMG_1982.jpg

    Still need to do some work here on my big 3 upgrade. For now it looks like this under the hood.
    IMG_1986.jpg
     
    Last edited: Jan 4, 2019
    badhabit2break likes this.
  10. Oct 7, 2018 at 11:01 PM
    #10
    mctechhweng

    mctechhweng [OP] Well-Known Member

    Joined:
    Jul 24, 2018
    Member:
    #260429
    Messages:
    359
    First Name:
    Matthew
    Vehicle:
    2015 TRD Sport V6.
    Audio: Focal PC165, Focal KX2, JL VX800/8i, Pioneer AVIC-8200.
    I measure 2 ohms on all the coils. Front midbass, front tweeter, rear, sub coils all 2 ohm. The tweeter has 4 wires on the connector though so I'm not sure what to think about that and the sub is a dual voice coil.
     
  11. Oct 7, 2018 at 11:49 PM
    #11
    ALI3N_123

    ALI3N_123 ( -_・)ᡕᠵ᠊ᡃ່࡚ࠢ࠘⸝່ࠡࠣ᠊߯᠆ࠣ࠘ᡁࠣ࠘᠊᠊ࠢ࠘

    Joined:
    Dec 10, 2017
    Member:
    #238195
    Messages:
    26,791
    Gender:
    Male
    First Name:
    Eric
    McAllen, Texas
    Vehicle:
    2021 Silver TuRD Squirt DCSB 4x4 // 2008 Black Rusty Shitbox DCSB PreRunner
  12. Nov 24, 2018 at 12:47 AM
    #12
    mctechhweng

    mctechhweng [OP] Well-Known Member

    Joined:
    Jul 24, 2018
    Member:
    #260429
    Messages:
    359
    First Name:
    Matthew
    Vehicle:
    2015 TRD Sport V6.
    Audio: Focal PC165, Focal KX2, JL VX800/8i, Pioneer AVIC-8200.
    Ok I did something during turkey break.

    All of this work did reduce the road noise by quite a lot. I didn't actually take any measurements, but I can tell based on how much lower the stereo listening volume needs to be. The outside sounds are much less intense.

    This is the sound skin damper pro on the roof. It went from tin can to m1a1 abrams. Very easy to apply to the roof given the shape.
    1_roof.jpg


    Now its time to pay some attention to the floors. I already used dynamite on the back wall as you can kind of see.
    2_floor.jpg


    Gut it out.
    3_front_floor.jpg


    Putting up the Melamine foam on the roof for some thermal insulation and maybe reduce some of the busy noise.
    4_roof.jpg


    I put a lot of detail work in the plastic thing on the back of the roof because mine was rattling from the sub. Put foam in it and use butyl rope
    to make it vibrate against the roof a lot less.
    5_roof.jpg


    Finished stuffing the Melamine on the roof.
    6_roof.jpg


    I dropped the headliner alone, but I had two helpers to re-install. It made the process very simple and we didn't damage a thing. (I did break one of the visor hooks getting the headliner down).
    7_roof.jpg


    I forgot to take pictures of the damper pro I applied to the floors... I just stuck it on top of the factory deadener. Here's the luxury liner pro layer.
    8_floor.jpg


    More views of the luxury liner pro layer.
    9_floor.jpg


    Leave enough room around the seat bolts so the plastic bolt covers can go back on.
    10_floor.jpg


    Center console fit just fine. The carpet fit a little different, but it was fine. Most of the fitment issues are minor and under the front seats.
    11_console.jpg


    I made a MLV liner for the center console. I put it under the factory console liner.
    12_console.jpg


    Driver seat goes in first.
    13_seat.jpg


    Looking pretty good!
    14_seat.jpg


    I can't believe the floor mats fit so good.
    15_seat.jpg


    Same thing on the passenger side.
    16_seat.jpg


    Gonna take it for a test drive before I finish the back floor/wall. My amp wiring is a total mess right now... Will clean that up next.
    17_seat.jpg

    Testing out the sound. Still a little too much nose from the cabin vent. I'm going to try to come up with a solution for the vent noise.
    18_test.jpg
     
    Last edited: Nov 26, 2018
    SLCYota and boostedka like this.
  13. Dec 2, 2018 at 8:12 PM
    #13
    mctechhweng

    mctechhweng [OP] Well-Known Member

    Joined:
    Jul 24, 2018
    Member:
    #260429
    Messages:
    359
    First Name:
    Matthew
    Vehicle:
    2015 TRD Sport V6.
    Audio: Focal PC165, Focal KX2, JL VX800/8i, Pioneer AVIC-8200.
    I started playing with the iMM-6 Dayton Audio Mic and Audio Tools from on an ipad to try and tune the audio system. I think I have the timing alignment about right, but I have yet to try and do anything with the eq.

    Does anyone know if you can use the "Delay Finder" app to fine tune the timing alignment?
     
  14. Dec 3, 2018 at 1:57 PM
    #14
    WhiteNemesis

    WhiteNemesis Well-Known Member

    Joined:
    Apr 2, 2013
    Member:
    #101165
    Messages:
    1,445
    Gender:
    Male
    First Name:
    Mr PattyCakes
    T-Town, AZ
    Vehicle:
    Cant get enough
    Blow it through the roof
    Damn man! Some serious patience right here!
    I sound deadened my back wall and under rear seats, so far that all, and with the seats removed/folded its a quiet as it is with them installed before deadened! I want to do door like you did, but man it was exhausting doing the back wall, I can only imagine the amount of hours you are into this! Nice job! Once its done you will be grateful and you never have to do it again!

    On my list is to over haul the stereo, hopefully in the next year!
     
  15. Dec 3, 2018 at 3:37 PM
    #15
    mctechhweng

    mctechhweng [OP] Well-Known Member

    Joined:
    Jul 24, 2018
    Member:
    #260429
    Messages:
    359
    First Name:
    Matthew
    Vehicle:
    2015 TRD Sport V6.
    Audio: Focal PC165, Focal KX2, JL VX800/8i, Pioneer AVIC-8200.
    Thanks! Everything is taking a bit longer to get done than I thought it would, but I'm still having fun.
    Deadening the doors was the hardest part in my opinion, but so far I'm very happy with the results. I'm glad I decided to go through with all of the insulation/deadening.

    I can't do everything all at once b/c work etc, but I'm still trying to optimize around taking the truck apart as few times as possible.
     
    Last edited: Dec 3, 2018
    TacoTuesday!! likes this.
  16. Dec 3, 2018 at 3:43 PM
    #16
    rob feature

    rob feature Tacos!

    Joined:
    Aug 10, 2011
    Member:
    #61468
    Messages:
    1,699
    Gender:
    Male
    Colorado
    Vehicle:
    2003 4x4 V6 X-Cab SR5
    Shocks. Pegs. Lucky.
    Not sure about any app, but T/A with a tape measure is pretty straight forward. Your head will be moving around while driving so absolute precision isn't going to count for much. I've had to tinker a bit with off-axis subs, but always just sit there and dial in more or less delay 'till it sounds right.

    Great looking build so far! You're definitely the patient type...should pay off in spades.

    Subbed up & looking forward to the rest!
     
  17. Dec 4, 2018 at 12:36 PM
    #17
    WhiteNemesis

    WhiteNemesis Well-Known Member

    Joined:
    Apr 2, 2013
    Member:
    #101165
    Messages:
    1,445
    Gender:
    Male
    First Name:
    Mr PattyCakes
    T-Town, AZ
    Vehicle:
    Cant get enough
    Blow it through the roof
    If you had to estimate, how long per door (Time) and how much sqft (Material)? I want to do my doors
     
    TacoTuesday!! likes this.
  18. Dec 4, 2018 at 2:49 PM
    #18
    mctechhweng

    mctechhweng [OP] Well-Known Member

    Joined:
    Jul 24, 2018
    Member:
    #260429
    Messages:
    359
    First Name:
    Matthew
    Vehicle:
    2015 TRD Sport V6.
    Audio: Focal PC165, Focal KX2, JL VX800/8i, Pioneer AVIC-8200.
    I spent way more time than you really need to. If there was one thing I would change about the install it would be how much time I spent deadening each door.

    I used 6.5 rolls of soundskins pro across all four doors. A lot of deadener. There's deadener on all three sheet surfaces in each door. Outer shell, inner-inside, inner. I wasted a lot of time trying to figure out what I wanted to do with the materials etc. I would say I spent about 8 hours per door average & I got better/faster as I went along.

    Do the front doors first for cost/benefit.

    I did the rear doors first because I wanted to practice on the doors least frequently used.
     
  19. Dec 9, 2018 at 5:58 PM
    #19
    mctechhweng

    mctechhweng [OP] Well-Known Member

    Joined:
    Jul 24, 2018
    Member:
    #260429
    Messages:
    359
    First Name:
    Matthew
    Vehicle:
    2015 TRD Sport V6.
    Audio: Focal PC165, Focal KX2, JL VX800/8i, Pioneer AVIC-8200.
    In a fully active sytem would you say you have to apply kind of extreme eq? I was in the car with a mic for a while today and I get some harsh peaks on RTA. 250hz, 1khz +6dB.
     
  20. Dec 10, 2018 at 10:25 AM
    #20
    rob feature

    rob feature Tacos!

    Joined:
    Aug 10, 2011
    Member:
    #61468
    Messages:
    1,699
    Gender:
    Male
    Colorado
    Vehicle:
    2003 4x4 V6 X-Cab SR5
    Shocks. Pegs. Lucky.
    It all depends on the car & drivers. Each setup will be different. Generally speaking vehicles are terrible environments for acoustics & that's why DSP is so valuable. My truck has a couple modes - one really bad dip around 500 Hz and another around 200. So yeah, I have to make reasonably extreme adjustments to try and tame them. Luckily we have the tools.
     
    stevelknievel1 likes this.

Products Discussed in

To Top