1. Welcome to Tacoma World!

    You are currently viewing as a guest! To get full-access, you need to register for a FREE account.

    As a registered member, you’ll be able to:
    • Participate in all Tacoma discussion topics
    • Communicate privately with other Tacoma owners from around the world
    • Post your own photos in our Members Gallery
    • Access all special features of the site

Land Pirate's Side Chick SR5 DCSB 4x4 screed

Discussion in '3rd Gen. Builds (2016-2023)' started by Landpirate, Oct 14, 2018.

  1. Oct 14, 2018 at 8:02 AM
    #1
    Landpirate

    Landpirate [OP] Strong like horse, smart like tractor

    Joined:
    Jul 17, 2018
    Member:
    #259719
    Messages:
    951
    Gender:
    Male
    North Texas
    Vehicle:
    2018 Tacoma BBP SR5 4x4 DCSB
    OME HD leafs, 5100s, CaliRaised skids, UpTop Overland Bravo, KB Voodoo rack, Overlander RTT/awning, DECKED
    Why I’m making this thread:
    1.Because I can.
    2.Working out the details on the build, organizing the process.
    3.Looking to get some feedback on options, better ways, or avoid making stupid mistakes.
    4.I’ve already changed directions/major components as this has gone on over the last few months and I think doing this thread might help me stay centered on my goal.
    5.Track the progress of the build as it goes along.

    Purpose of build:
    Previously I owned jeeps. My clinic team at my old job would refer to the jeep I had at that time as my girlfriend, and told people that I was in a relationship with that jeep. Being a jeep, repairs were not uncommon and I usually got a rental when it was in the shop. The joke was that the jeep was pissed that I was driving other vehicles and would act up to get back at me. At the end of the summer I changed jobs, and I started looking at upgrading my vehicle. When I got the Taco, my clinic referred to it as “Side Chick” because of my jeep.

    I wanted to get something that was going to be better on gas, a more comfortable ride (my daily commute is from one side of DFW to the other, and my job duties cover 6 counties), the ability to get to where I need to go regardless of weather (I’m in the medical field and I have to be able to get to work even in bad weather), the ability to get in and out of places after a major disaster (tornado, hurricane, flood, etc), while still letting me go camping with my kids or by myself. I want offroad capability without a dedicated rock-crawler. I want to be able to head out into the woods or up into the mountains while still being able to get in and out of hospital and jail parking garages.

    My daughter is not a hugely outdoorsy type, so camping needs to have at least some creature comforts, so an RTT is part of the build. I also need the ability to bring along an annex and/or cabana type structure for a chemical toilet and shower. And a water heater. Small camp stove will be brought along. A couple of camp chairs, probably a small kitchen set-up centered on a wash basin, box pantry, and the previously mentioned stove. So a bed rack that will lift the RTT up high enough to allow stowage of this stuff is needed, along with a pull-out cargo rack. I have a Coleman generator, not sure if that will make the camping trips or not. Not looking to haul the entire house, and when my daughter isn’t going along the load will be a lot lighter.

    I plan on having some recovery gear on the truck. Traction mats, tow strap, recovery strap, and probably some tools. Part of my drive is through some rural areas where downed trees are not uncommon. I have a winch on my jeep, but I rarely ever used it. I haven’t decided if I want to include that on my build or not; that may end up getting mounted to a cradle with receiver hitch mount and some 12v quick connects fore and aft. Plan on mounting a 4 gallon Rotopax fuel can along with a couple of water cans.

    I also want to get a little more ground clearance and better suspension for offroad/crappy road conditions. Not looking for going nuts on this aspect. Expectations are moderate. Since there will be an increase in weight with the rack and RTT (and gear) I plan on doing an AAL and 5100s all the way around, lowest setting up front. Not wanting a ton of lift, not ready to jump to 17” wheels yet, don’t want to have to have to mess with new control arms and if I can get away with not having to do any other work resulting from the 5100s and AAL I would be estatic.

    I’d like to retain a comfortable commuter drive while still maintaining good offroad capability, and the ability to get home from the office early in the afternoon on Friday, throw some gear in the truck, pick up the kids after school, and be on the road quickly. With the RTT we can have camp set up in a few minutes. Reversing the process also hopefully will take very little time. I don’t get a lot of PL opportunities so making efficient and effective use of time is a contributing factor.

    Build base:
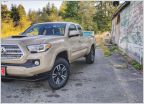
    The Side Chick is a 2018 SR5 DCSB 4x4 in BBP. I originally went in looking for a used 3rdgen, but the price differential was like 3K between new and used, so I went with the new 2018. The TRDs and similar looked to be more than what I was wanting/needing, while the SR5 gave me pretty much all that I needed in a base package for a DD that could quickly switch over to a good offroad/camping rig.

    The base truck, day after I bought it with 23 miles on the odo.

    Added a locking cubby because I frequently have PHI, laptop and iPad with work info, and an SBR in the vehicle.


    Frequently work/respond to calls at night, and I really don't like being lit up inside a vehicle in some parts of town. Switched out interior white lights with red LEDs.

    The factory tires had to go. Swapped them out for Falken Wildpeak AT3s.

    Also installed a second USB charging port in the center console for the kids since Toyota didn't put anywhere near enough USB chargers in the truck.

    Added the DMM to mount an iPhone and eventually the head unit for a Yaesu.

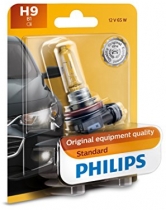
    Changed out the low/hi beams with Auxbeam LEDs, and also the fogs with yellow LEDs. Can't remember the brand, it was in one of the LED conversion threads. All these are significant improvements over the stock lights.
     
    Last edited: Oct 14, 2018
  2. Oct 14, 2018 at 8:51 AM
    #2
    Landpirate

    Landpirate [OP] Strong like horse, smart like tractor

    Joined:
    Jul 17, 2018
    Member:
    #259719
    Messages:
    951
    Gender:
    Male
    North Texas
    Vehicle:
    2018 Tacoma BBP SR5 4x4 DCSB
    OME HD leafs, 5100s, CaliRaised skids, UpTop Overland Bravo, KB Voodoo rack, Overlander RTT/awning, DECKED
    Waiting for the last shipment of parts for my KB Voodoo MAX rack to come in. Should be here Tuesday and hopefully I'll have enough of a break in the rain before this weekend to get it on there. There's a Taco meet in Galveston that I'm trying to make it to while I'm in Houston for work. Hoping to have an RTT, annex, and awning here before then as well.
     
  3. Oct 14, 2018 at 9:42 AM
    #3
    Landpirate

    Landpirate [OP] Strong like horse, smart like tractor

    Joined:
    Jul 17, 2018
    Member:
    #259719
    Messages:
    951
    Gender:
    Male
    North Texas
    Vehicle:
    2018 Tacoma BBP SR5 4x4 DCSB
    OME HD leafs, 5100s, CaliRaised skids, UpTop Overland Bravo, KB Voodoo rack, Overlander RTT/awning, DECKED
    Bumper/recovery mods:
    Fab4 rear bumper- I would like to have rear recovery points
    Mobtown recovery bar- like the low pro appearance, like they receiver hitch for the winch sled
    White Knuckle Off Road rock rails- bolt on rails I like
    OEM TRD skid plate- not doing a lot of serious offroading or crawling, but I would like to have some lightweight protection for all the crap I see and evade on 635 and Central
    Possibly winch sled with fore and aft 12v quick connects- I don't think I want to permanently mount a winch but I may down the road

    Camping:
    2" gel foam mattress topper- seems to be a good addition
    Smittybilt Overlander RTT- looking at this as an entry level RTT, want to try out the concept and possibly improve this down the road
    Smittybilt Overlander annex- I think the daughter would like this as a privy close in to the camp site
    Smittybilt 6' Overlander awning- want this for tailgating, working on stuff, and to cover the camp kitchen
    Waterport with bedrail mount- like the idea of having a ready source of water to clean crap off

    Rack gear:
    @KBVoodoo MAX rack- like the modularity and options of this rack, 18" height will work well with having room to stow gear including possibly a generator
    XRXS crossbars- not sure if I need bars this heavy for the cargo tray, but depending on the actual load in the basket this may be the way to go
    Cargo tray with slider option- really like this as a way to keep some stuff organized above the bed that is easy to access under the rack
    Traction board brackets
    Rotopax fuel and water cans
    Recovery tools and mounts

    Cargo/bed:
    OEM bed mat- OEM bed surface is a guaranteed trip to an ER
    OEM cargo divider (may change this)- considering the possibility of wanting to keep cargo in the bed divided/restrained, or just groceries
    Pop & Lock- would like the ability to lock/unlock with the remote
    Possibly tailgate skin- don't care for the OEM surface; would like something that isn't sensitive to heat, more comfortable to sit on, doesn't require balancing for drinks, and a better work surface

    Interior:
    Husky liner floor mats- like these that I've owned previously
    Locking console insert- would like to have space for the Glock/other small items that I don't want to put in the cubby
    Cubby lock box- great for MacBook, iPad, SBR, and some other items
    Yaesu mobile unit mounting under pax seat, head unit on DMM- comms are nice

    Exterior lighting/electronics:
    Caliraised ditch light mounts- looks like a good mount
    Rigid ditch light pods- ditch lights are very handy in the rural areas, camping/trail runs, or when power is out, or when I'm looking for hard-to-see address in crappy parts of town, or when I just want to light up the entire block
    Cargo bed LED strips or possibly OEM corner bed lights- would like to have some cargo space/work lights in the bed/under the rack
    Engine bay LED strip- can't believe Toyota didn't put some work lights under the hood, unless the idea is that they are so reliable you'll never need to work on anything in the dark
    12v quick connect for power converter in the bed for RTT- want the ability to use a heavier power inverter in the bed for work or to run up into the RTT; this is really the only regret I have on going with the SR5
    VIAIR compressor and bed cubby mount/seals/gaskets and hose kit- want to be able to air down and then back up, and having a compressor for the SO's car has been helpful in the past as she seems to seek out nails and other objects to drive over
    Antenna mounted to bed corner, not sure which location yet, possibly on no-drill mount at hood- need to try to find something that will let me reach out and the rack/RTT are going to have something to say about positioning

    Suspension:
    Bilstein 5100s- planning on the lowest setting, don't want much of a lift at all
    TAC-AL Toytec spring leaf- the rack and RTT are going to mean a lot more weight and I don't want the bed sitting on the tires
    Possibly OME coils, may reuse the factory coils- not sure how feasible this is (the OEMs) but if it is workable I'll do that; I don't want a lot of lift, and my concern is that with heavier springs I'm going to end up with more lift than I want
    Possibly the 1/2" bro lean spacer- PRN

    That's the major assemblies. I had a sequence that I had been considering (bumper and rails had been first) however timing of a work trip and a run to the beach have changed that.
     
    ChadsPride and eddyizm like this.
  4. Oct 20, 2018 at 6:09 PM
    #4
    Landpirate

    Landpirate [OP] Strong like horse, smart like tractor

    Joined:
    Jul 17, 2018
    Member:
    #259719
    Messages:
    951
    Gender:
    Male
    North Texas
    Vehicle:
    2018 Tacoma BBP SR5 4x4 DCSB
    OME HD leafs, 5100s, CaliRaised skids, UpTop Overland Bravo, KB Voodoo rack, Overlander RTT/awning, DECKED
  5. Nov 20, 2018 at 8:31 PM
    #5
    Landpirate

    Landpirate [OP] Strong like horse, smart like tractor

    Joined:
    Jul 17, 2018
    Member:
    #259719
    Messages:
    951
    Gender:
    Male
    North Texas
    Vehicle:
    2018 Tacoma BBP SR5 4x4 DCSB
    OME HD leafs, 5100s, CaliRaised skids, UpTop Overland Bravo, KB Voodoo rack, Overlander RTT/awning, DECKED
    Picked up the Smittybilt Overlander tent along with the annex and the awning.

    Assembly was fairly simple, although the instruction manual had some steps that I assume were for previous versions and are no longer being used.

    Mounted it fore and aft with the overhang over the tailgate. Makes for a nice covered area for cooking.

    The tent was very easy to deploy and the placement on the rack relative to the cab didn't cause any clearance issues with the rain fly or spreaders.

    The LED light strip is a nice touch. It doesn't work with my portable charger, so I'm working on setting up a power station in the bed through one of the cubbies.

    Side window opens up much of the side of the tent.

    Plenty of room through the doorway.

    Tent stows easily.

    Profile of the packed tent.

    Also got an old iPad Mini set up on my OBD Fusion gauges. Will pick up a GLONASS/GPS receiver for navigation as well with the iPad.

    I haven't gotten the annex set up yet, hope to have time to do that in the next few days with some time off from work finally. My awning mounts won't clear the side of the tent, so I'm going to have to figure out some kind of stand-off for them to mount up. That will be a little more involved.
     
    ChadsPride likes this.
  6. Dec 2, 2018 at 5:50 AM
    #6
    Landpirate

    Landpirate [OP] Strong like horse, smart like tractor

    Joined:
    Jul 17, 2018
    Member:
    #259719
    Messages:
    951
    Gender:
    Male
    North Texas
    Vehicle:
    2018 Tacoma BBP SR5 4x4 DCSB
    OME HD leafs, 5100s, CaliRaised skids, UpTop Overland Bravo, KB Voodoo rack, Overlander RTT/awning, DECKED
    I had an in store credit for Best Buy, so I finally got a dash cam. Went with the Rexing V1P. Also got the Rexing hardwire kit, a Shapeways GoPro/Rexing mount, and I'm thinking about the GPS module.

    The view appears cluttered in this shot, however this is taken from about shoulder/chest height. My FOV is actually above this, and the rearview mirror assembly obstructs my view way more than anything else. The iPhone and iPad Mini are actually completely out of the FOV for anything beyond the profile of the vehicle itself. The top right corner of the iPad barely touches the right (passenger) side of the hoodline from my point of view.
    I chose to drop the overhead console as a way to route the wiring around the rearview assembly and stow the excess wire.

    The views of the Rexing cameras. You can cycle through front, rear, PIP with front or rear primary, and swap with front or rear primary. With the bed rack, I’m pretty much going to have a limited FOV out of the rear.

    I was really happy with the install and routing of the wires. I was a little concerned about being able to pull this off but it worked out great. I’m not sure where or how I’m going to install the GPS receiver if I do go that route.

    The rear camera location. Kind of the best of several bad options. My rack and stowage cuts into the FOV.

    Profile of the DMM. Love this thing.

    The Shapeways mount. This works very well.

    The Shapeways mount:
    https://www.shapeways.com/product/PJSDBHAWB/gopro-clip-to-rexing-dashcam-mount-best-way
     
    Last edited: Dec 2, 2018
    ChadsPride likes this.
  7. Dec 10, 2018 at 4:46 PM
    #7
    FlavorChef7

    FlavorChef7 Well-Known Member

    Joined:
    Oct 14, 2018
    Member:
    #269371
    Messages:
    203
    Gender:
    Male
    First Name:
    Austin
    Livermore,CA
    Vehicle:
    2017 Toyota Tacoma SR5
    Nice start! Really like the bedrack!
     
    ChadsPride and Landpirate[OP] like this.
  8. Dec 10, 2018 at 6:00 PM
    #8
    Landpirate

    Landpirate [OP] Strong like horse, smart like tractor

    Joined:
    Jul 17, 2018
    Member:
    #259719
    Messages:
    951
    Gender:
    Male
    North Texas
    Vehicle:
    2018 Tacoma BBP SR5 4x4 DCSB
    OME HD leafs, 5100s, CaliRaised skids, UpTop Overland Bravo, KB Voodoo rack, Overlander RTT/awning, DECKED
    Thank you sir.
     
    ChadsPride likes this.
  9. Dec 23, 2018 at 7:26 AM
    #9
    Landpirate

    Landpirate [OP] Strong like horse, smart like tractor

    Joined:
    Jul 17, 2018
    Member:
    #259719
    Messages:
    951
    Gender:
    Male
    North Texas
    Vehicle:
    2018 Tacoma BBP SR5 4x4 DCSB
    OME HD leafs, 5100s, CaliRaised skids, UpTop Overland Bravo, KB Voodoo rack, Overlander RTT/awning, DECKED
    A few details of the Overland tent.


    Put a Teton 0* bag in. So far comfortable into the 30s with just the original foam mattress underneath. With a gel foam topper I'm sure it would go lower without any problem.

    Having three zippers on the bag is an interesting approach. Either side can be zipped down, or all three detached.

    Teton folded with a woobie inside and compression bungees attached so the tent can be stowed. This is much more of a struggle than just folding the tent up with the factory mattress pad, and I'm not sure that I am going to put the foam mattress topper in after trying this. It would add 1.5" flat (so 3") before compressing, and I'm not sure I want to go through that much of a fight to stow the tent. I'll see if the bag gets easier to stow with some time/compression, and the pad may end up working, but that may be something that I just use when it is really cold.
     
    DavesTaco68 and ChadsPride like this.
  10. Jan 23, 2019 at 6:51 PM
    #10
    Landpirate

    Landpirate [OP] Strong like horse, smart like tractor

    Joined:
    Jul 17, 2018
    Member:
    #259719
    Messages:
    951
    Gender:
    Male
    North Texas
    Vehicle:
    2018 Tacoma BBP SR5 4x4 DCSB
    OME HD leafs, 5100s, CaliRaised skids, UpTop Overland Bravo, KB Voodoo rack, Overlander RTT/awning, DECKED
    I ordered the Smittybilt Overlander RTT, awning, and annex as a package deal. However my awning mounts from KB Voodoo for their MAX Modular rack didn't have the clearance with the RTT side. I finally got around to having a friend cut the mounts and add a 6" horizontal bridge. Then he bedlinered them, and today I finally got around to mounting them all up.


    The original KB Voodoo awning mounts.


    The mounts with the bridge added in.


    And now bedliner applied.

    This is why the mounts wouldn't work as purchased. With the 6" bridge there is enough standoff for the mount to clear the side of the tent and the Rotopax, and still get to the cover for the tent.


    Front of the awning looking back.

    6' Smitty Overlander awning mounted up. I had to drive to Austin today, so I only had time to get it mounted up. Haven't even been able to get the awning out and set up yet.
     
    Last edited: Apr 7, 2019
    ChadsPride likes this.
  11. Jan 23, 2019 at 7:00 PM
    #11
    Landpirate

    Landpirate [OP] Strong like horse, smart like tractor

    Joined:
    Jul 17, 2018
    Member:
    #259719
    Messages:
    951
    Gender:
    Male
    North Texas
    Vehicle:
    2018 Tacoma BBP SR5 4x4 DCSB
    OME HD leafs, 5100s, CaliRaised skids, UpTop Overland Bravo, KB Voodoo rack, Overlander RTT/awning, DECKED
    Ordered a DECKED system for the side chick.
    The shipping box was too long to shut the tailgate, so I took everything out of the box and put it in the bed and back seat. Left work early and then started putting it together when I got home.

    This is a pretty solid mod. I've already freed up my interior stowage from the cab, and put in some tools that I didn't have room for. It's very securely attached and I'm not disappointed in the equipment at all.

    Found the perfect space filler. This keeps my traction mats secure, and also prevents anybody from being able to mess with the drawers. I have the lock kits installed, but there isn't any room to reach down in the bed with the mats carried in this position. I planned on running a security cable along the rear tie-downs but I didn't have it installed at this point. I wanted to have the cable so that I can secure the mats for complete security, but with the tailgate closed they are in there rather tightly.


    Here is a view of how the mats fit into that dead space between the tailgate and the rear of the deck.

    With the mats oriented this way, the teeth on the traction surface basically interlock with the rear of the drawer overhang. They are in there tight, and with the cable I don't think they will be very easy to rip out.

    The safety cable installed with two small shackles to the tie down points.

    Security cable threaded through the traction mats.


    Installed Core Trax.


    Install was easy. I used some Gorilla tape to hold the Trax down on each end as I started the pilot holes on the ends of each. Had no problems until the very last hole. The drill bit broke off when I was drilling the pilot hole. With a bit that small I was concerned about that happening, so I was glad I made it to the very last hole to do that. Getting the shard out was not a lot of fun, but I was able to get it out. And like the instructions state, make sure you use a #3. Even with that you might need to watch how you run the screws in to keep from stripping the head.


    Load Locks installed on Core Trax rails.

    Base rotated 90*, click, tabs drop right in.


    Installing a switched power port.

    Thoughts on install:
    When you unload the parts, it is a little daunting as there are a ton of parts/hardware. The instruction manual is very clear, and very-well illustrated. Probably one of the best install guides I've ever used.
    The short bed version is slightly different than the Youtube install video. There are two brackets that bolt together between the studs and the wheel well. Got a little nervous that the assembly would shift while we were putting it in and drilling the holes for the brackets in the wheel well. I departed slightly from the install guide and went ahead and loosely attached the bracket and assembly on the driver side and then did the same on the passenger side, made sure the index line was still on the notch, and then tightened everything down. After that was done, assembly really picked up.
    Make sure that you put the black rubber washers in the deck screws where indicated in the O ring bag, the install guide does not have that part (the install video does) and there is a small card in the O ring bag with the instructions.
    The brace in the drawers was fairly easy on the wide drawer, but more difficult on the narrow drawer. It seemed like one of the nuts welded to the end of the brace was just slightly off. It finally went together, but I had to leave one end unseated while I screwed the first end to the side of the drawer and then jimmy the other end into place.
    I found the ammo can lid helpful in installing the wheels on the underside of the drawers, however I did it differently than what was shown in the video. I found it easier to have the lid under the drawer, with my son lifting up on the lid to lever the drawer up. Getting the axle screwed in was a little awkward due to angles affecting clearance for the hex wrench; it was tedious, but not really difficult.
    Highly impressed with the quality of manufacturing, clarity of printed instructions, and the components. Having a list of the tools needed is something that isn't always included, but it makes prep go much easier. The modularity of the system is genius, and I really appreciate being able to buy only what I want, and potentially extras of things that I need (boxes, cargo locks).

    I will say that installing the lock set is not fun, and if you have somebody with tiny little fingers they would be of much benefit. Also, chase the threads on the lock cylinder body with the lock nut a few times before you actually install the parts. It makes that step go much easier, and it is still meticulous and challenging with big pasty Mick fingers.

    I'll probably add the Cali Raised bed brackets. Still working on adding a power inverter, so that may go inside one of the ammo boxes.

    Very happy with the product.
     
    Last edited: Jan 23, 2019
    Bigdaddy4760 and ChadsPride like this.
  12. Feb 3, 2019 at 8:42 AM
    #12
    ChadsPride

    ChadsPride Tacoma Owner & Enthusiast

    Joined:
    Nov 26, 2014
    Member:
    #143119
    Messages:
    127,315
    Vehicle:
    Sponsored by TacomaWorld.com
    Good looking build! Very well documented and cool mods!
     
    Landpirate[OP] likes this.
  13. Feb 3, 2019 at 8:44 AM
    #13
    Landpirate

    Landpirate [OP] Strong like horse, smart like tractor

    Joined:
    Jul 17, 2018
    Member:
    #259719
    Messages:
    951
    Gender:
    Male
    North Texas
    Vehicle:
    2018 Tacoma BBP SR5 4x4 DCSB
    OME HD leafs, 5100s, CaliRaised skids, UpTop Overland Bravo, KB Voodoo rack, Overlander RTT/awning, DECKED
    Thanks! Got a few more in the works, and I need to look at doing some pics for the power tailgate mod I put in yesterday.
     
    ChadsPride[QUOTED] likes this.
  14. Feb 3, 2019 at 8:44 AM
    #14
    ChadsPride

    ChadsPride Tacoma Owner & Enthusiast

    Joined:
    Nov 26, 2014
    Member:
    #143119
    Messages:
    127,315
    Vehicle:
    Sponsored by TacomaWorld.com
    :woot: :taco: :cheers:
     
  15. Feb 3, 2019 at 9:56 AM
    #15
    Landpirate

    Landpirate [OP] Strong like horse, smart like tractor

    Joined:
    Jul 17, 2018
    Member:
    #259719
    Messages:
    951
    Gender:
    Male
    North Texas
    Vehicle:
    2018 Tacoma BBP SR5 4x4 DCSB
    OME HD leafs, 5100s, CaliRaised skids, UpTop Overland Bravo, KB Voodoo rack, Overlander RTT/awning, DECKED
    Install of the Amazon actuator for power tailgate lock.


    After removing the cladding on the inside of the tailgate, two holes were drilled for the actuator. The plastic body of the actuator has two small holes for screws to be used to mount it.


    Top view of the push rod that was included in the actuator kit. The bar comes a straight piece and has to be bent. I did the 130* bend first so that there would be some flex and to more easily line up the push rod with the hole drilled in the plastic locking arm throw lever below after the additional bends were made.


    Several views of the bends on the push rod. I wanted to have a 90* bend resting on the top of the plastic locking arm throw lever. This bend would hold the metal push rod at approximately the same height through its range of movement. I added two more 90* bends below, forming a U shape (laying on its side in this orientation) that would hold the push rod in place when the tailgate was vertical and again to keep the push rod held in place on the locking arm. I eyeballed the bends for the most part, and then removed the actuator so I could feed the terminal end through the locking lever freely without putting everything in a bind or breaking anything while installing. Once I had the push bar in the locking arm, I remounted the actuator body.


    View from underneath the tailgate top skin, inside the cavity. This is from the driver's side looking towards the passenger side. The actuator is the black plastic mechanism showing the blue and green wires that came on the actuator and the red and black primary wires that I used to power the actuator from the wiring harness under the passenger kick panel. Some extra wire is visible on the far side. I fed enough wire to allow me to use weatherproof butt connecters and heat shrink with the actuator outside of the tailgate body. I looped up the extra wire after installation with a zip tie.


    View of the actuator looking from the passenger side towards the driver side.


    The wire was routed out of the tailgate using the plastic clamshell grommet for the backup camera. I drilled a small hole to feed the wires through, then used woven nylon wiring loom and zip ties to secure the wires. Repeated the grommet hole process on the truck bed side. Once inside the truck body, the nylon braided wire loom covers the wire forward along the inside of the passenger side frame rail, going up to a point even with the soft rubber grommet/body plug under the front passenger seat. The grommet was slit and the wire loom was routed into the cab.


    View of the wire coming through the body plug, passing under the carpet and into the wiring tray.


    The wires were routed inside the OEM wire tray and secured with zip ties.


    The red and black primary wire are brought up into the kick panel area. The insulation around the OEM door wiring harness was slit so that I could add two T taps to the power lock wires.

    Very happy with how this install has turned out. Very clean thanks to several threads on here and some Youtube videos. If you want to save $100 on the "official" kit, going the $10 Amazon plus maybe another $10 in material route is very much worth it.
     
    ChadsPride likes this.
  16. Feb 23, 2019 at 7:12 PM
    #16
    Landpirate

    Landpirate [OP] Strong like horse, smart like tractor

    Joined:
    Jul 17, 2018
    Member:
    #259719
    Messages:
    951
    Gender:
    Male
    North Texas
    Vehicle:
    2018 Tacoma BBP SR5 4x4 DCSB
    OME HD leafs, 5100s, CaliRaised skids, UpTop Overland Bravo, KB Voodoo rack, Overlander RTT/awning, DECKED
    First time pulling the awning out. Still have to duck a little bit to get under it, but I like having it on there. Has come in handy several times now.


    Added the front bed rail from a 2nd gen and the tie down cleats.


    Put a memory foam mattress topper on top of the factory foam mattress. Made the bed super comfortable with the thick 0* bag. However, with the memory foam closing the tent up became very difficult. As a result I decided I would rather take the memory foam out and stow it in the Teton bag stuff sack. I would prefer to have all the bedding left in the tent but it doesn't seem to be practicable.

    Also added my Texas Toyota Coalition and Tacomaholic vinyl.

    And I had to break out the Jetboil when the Keurig broke at the office.
     
    Bigdaddy4760 and ChadsPride like this.
  17. Feb 23, 2019 at 7:36 PM
    #17
    Oldie2007

    Oldie2007 Well-Known Member

    Joined:
    Oct 26, 2017
    Member:
    #234220
    Messages:
    25,092
    Gender:
    Male
    First Name:
    Kurt
    Lockhart, TX
    Vehicle:
    2007 Impulse Red Pearl DCSB SR5 PreRunner. 2020 RAV4Hybrid Limited
    A little something every chance we get.
    Very nice thread sir!
     
    ChadsPride and Landpirate[OP] like this.
  18. Feb 23, 2019 at 7:37 PM
    #18
    Landpirate

    Landpirate [OP] Strong like horse, smart like tractor

    Joined:
    Jul 17, 2018
    Member:
    #259719
    Messages:
    951
    Gender:
    Male
    North Texas
    Vehicle:
    2018 Tacoma BBP SR5 4x4 DCSB
    OME HD leafs, 5100s, CaliRaised skids, UpTop Overland Bravo, KB Voodoo rack, Overlander RTT/awning, DECKED
    Thank you!
     
    ChadsPride and Oldie2007[QUOTED] like this.
  19. Feb 24, 2019 at 10:30 AM
    #19
    ChadsPride

    ChadsPride Tacoma Owner & Enthusiast

    Joined:
    Nov 26, 2014
    Member:
    #143119
    Messages:
    127,315
    Vehicle:
    Sponsored by TacomaWorld.com
    Nice! :cheers:
     
    Landpirate[OP] likes this.
  20. Mar 3, 2019 at 7:06 AM
    #20
    Landpirate

    Landpirate [OP] Strong like horse, smart like tractor

    Joined:
    Jul 17, 2018
    Member:
    #259719
    Messages:
    951
    Gender:
    Male
    North Texas
    Vehicle:
    2018 Tacoma BBP SR5 4x4 DCSB
    OME HD leafs, 5100s, CaliRaised skids, UpTop Overland Bravo, KB Voodoo rack, Overlander RTT/awning, DECKED
    TRD Faux grille installed. Working through some "clean sensor" errors.
     
    John14_6, Bigdaddy4760 and ChadsPride like this.

Products Discussed in

To Top