1. Welcome to Tacoma World!

    You are currently viewing as a guest! To get full-access, you need to register for a FREE account.

    As a registered member, you’ll be able to:
    • Participate in all Tacoma discussion topics
    • Communicate privately with other Tacoma owners from around the world
    • Post your own photos in our Members Gallery
    • Access all special features of the site

The MR E30 Project Thread - 2016 TRD 4x4 OR DCSB Edition

Discussion in '3rd Gen. Builds (2016-2023)' started by MR E30, Oct 30, 2018.

  1. Oct 30, 2018 at 11:08 AM
    #1
    MR E30

    MR E30 [OP] Well-Known Member

    Joined:
    Oct 22, 2018
    Member:
    #270223
    Messages:
    2,276
    Gender:
    Male
    First Name:
    Michael
    Wherever it's parked
    Vehicle:
    2021 Silver TRD OR DCLB w/ AluCab and All the Mods
    Truck as of 9/14/2020

    [​IMG]03 - AP by Michael Rickerd, on Flickr

    Most notable photos from the trucks adventures:

    [​IMG]Day 2 - AWC - 44 by Michael Rickerd, on Flickr

    [​IMG]Day 1 - AWC - 22 by Michael Rickerd, on Flickr

    [​IMG]Day 1 - AWC - 10 by Michael Rickerd, on Flickr

    [​IMG]Beauty - 55 - Day 3 by Michael Rickerd, on Flickr

    [​IMG]Beauty - 31 - Day 1 by Michael Rickerd, on Flickr

    [​IMG]Beauty - 17 - Day 1 by Michael Rickerd, on Flickr

    [​IMG]17 - Day 1 by Michael Rickerd, on Flickr

    [​IMG]68 - Day 2 by Michael Rickerd, on Flickr

    October 30th, 2018


    It's been almost ten years since I started my last build thread. Let's see if I still possess the skill to make this entertaining.

    The primary purpose of this thread is to have another recording tool for my newly acquired Tacoma. I already keep a physical binder and an Excel file of all goings on with the truck, but a thread filled with pictures and expanded documentation is never a bad thing IMO.

    This thread definitely won't be the most exciting build thread out there, and progress may be slow at times, and boring at others, but that seems to be how most of my builds go in my experience.

    Overview:
    - 2016 Toyota Tacoma TRD Offroad, Double Cab, Short Bed, in Inferno
    - Purchased on 10/22/18 (originally purchased and serviced by the dealership I purchased it from)
    - 44,551 miles at time of purchase
    - Lacks BSM, PDC, Sunroof, and Seat Heaters

    My Main Goal (as of 10/30/18, as I am sure it will change over time):
    The truck is my daily driver, first and foremost. So all modifications will err towards the side of reliability and comfort. Second, the truck is my work horse for the real estate that I own. So I need to be able to use it to pick up fridges, haul yard waste, carry in lumber, windows, tools, etc. Which leads me into the third duty of the truck. Which is to enjoy the outdoors with, a.k.a. Overlanding. I won't be committing the truck to a full on overlanding build, due to duties 1 and 2. For now, I only take 4-5 trips per year, so bed rack and tent setup/tear down time isn't a huge concern at this point.

    All throughout, I want to pay exquisite attention to the details. I used to blow and go, replacing legitimate clips with zip ties, things like that. I partially blame this on my own inability to care about anything other than how fast it goes, and on the lack of proper working conditions most of the time (parking lots mainly). Not with this one! Nicest vehicle I have ever owned, so it deserves extra attention and time from me.

    Brief Car-Related Background:
    The BMW E30 was the first type of vehicle that really grabbed my attention and enthusiastically brought me into the car world. I have had plenty over the past 13 years, but moved away from them when I moved to Flagstaff, AZ and 4 wheel drive became a much more fitting culture to engage with.

    I had a brief stint with 4 different XJ's, from heavily modified to bone stock, but they never checked the necessary boxes for me.

    Several years ago I picked up my first Toyota. A 2001 Tundra SR5 Access Cab, V8, 4wd, 282,000 miles, that had lived a very difficult life. Despite being beat upon, it performed flawlessly. So much power compared to the XJ's. Plenty of space. Could tow around a racecar with ease (apart from attempting to slow down!) It had a small lift, larger tires, intake, and exhaust.

    I had always yearned for a Tundra, but this truck completely solidified my Toyota fanboy-ness.

    Took the truck loads of places, most recently on the Alpine Loop in central Colorado (Lake City/Ouray area) to the summit of Cinnamon Pass (very easy, made it to the summit in 2wd) and Engineers Pass (took the route out of Ouray, and was very difficult. Hour after hour of 4lo and first gear. Truck handled it like a champ though).

    2001 Tundra at Engineer Pass

    [​IMG]Tundra at Engineer Pass by Michael Rickerd, on Flickr

    Just before I traded it in for the Tacoma I took it to the North Kaibab at the North Rim of the Grand Canyon for a three day excursion. I had picked up a CVT RTT to increase my overlanding/glamping capabilities one week before the trip.

    2001 Tundra in the North Kaibab

    [​IMG]DSC_1035 by Michael Rickerd, on Flickr

    The truck was great, and I was sad to see it go. Moving into serious adulthood and switching to a job which required frequent long distance travel, I had to upgrade. Truck could never maintain a proper alignment, due to what appeared to be some front drivers side frame damage from one of the PO's, which made long freeway drives aggravating. It had 296,000 miles at time of trade in, and more and more of the truck started to show issues.

    So I did some research and found my current Tacoma for sale at the local Toyota dealership. Which brings us to today.

    2016 Tacoma - First Day Home

    [​IMG]2016 Toyota Tacoma TRD Offroad - First day home by Michael Rickerd, on Flickr

    The astute will notice the incorrectly colored drivers side mirror cover. That ended up being a massive negotiation point for me, as the salesman was set on how well the truck had been cared for. I had borrowed the truck from them for 24 hours the day prior and looked over every nook and cranny while I had it at home. I felt that it had been taken care of by the PO, but I didn't let that stop me from negotiating what I felt was a good deal.

    So far I have ordered the Gasshole and Matte Black Tacoma lettering for the tailgate. I extended the AC drain line to below the frame (massive oversight on Toyotas part). I also picked up a Toyota union for the rear diff to complete the rear diff breather modification. Finally, I purchased a new Inferno mirror cover from the dealership this morning.

    First Substantial Task:
    The first real order of business is a thorough detailing of the entire truck, inside and out. I can tell that the PO ran the truck through automated car washes while he owned it. The dealership offers free car washes for life, but that won't cut it. For someone who is familiar with names like Griots Garage and Chemical Guys and is intricately familiar with what claybar actually does, a full blown detail is the only way to go.

    The truck has some minor clear coat scratches that will buff out. All black trim will need to be revitalized with Back to Black. I'll complete a cut and polish, after washing (using the two bucket method!) and claybar, of all of the paint on the truck. I'll follow that up with a machine wax of the entire truck (glass included). I'll post extensive before and after pictures denoting the transformation after it's completed.

    This is the same process (minus the cut) that I take two times a year with the wifes 2016 Subaru Crosstrek. Hers doesn't ever need a cut, as we bought it with 6 miles, never been machine washed, I have been protecting the paint from day one, and it has spent a total of 11 nights outdoors. It doesn't even spend time in the sun during the day, as our store has an underground parking garage where it is parked all day (can you tell that I am extremely jealous? Haha).

    Second Substantial Task:
    The second real order of business with the truck is the mounting of my CVT RTT. I have one of the huge ones, which is the size of a California King mattress. Mainly because I love sleep, and the wife enjoys extra space in the tent while camping. Probably not the best option when paired with the short bed of the Tacoma, but I will make it work.

    The Voodoo rack looks fantastic, along with other products, but I have the desire to own a rack that offers height flexibility on the fly. I am a structural engineer by profession and a mechanical engineer by education, with access to mildly sophisticated modeling and analysis software, so I am going to attempt to design something that isn't a complete turd which solves my self-created problem.

    I want to be able to pack up the bed of the truck and lower the tent down as low as possible, to help with MPG's and drive-ability while on the way to the campsite. But once at camp I want to be able to raise the tent above the roof line of the truck. I like to sleep high off of the ground. My tent also has an annex that I want to have the ability to use when the need arises, without it drooping all over the ground. It also needs to be relatively easy to install and remove from the truck. I also have no desire to incorporate hydraulics into the system.

    Some ideas are already floating around in my head, but I will first create a 3D model of the parts of the truck bed that are relevant to the design.

    I have no idea if my desires can be fulfilled in a reasonable manner, but time will tell. I certainly don't expect, and I know, that it won't be any cheaper than buying what is already out there, but I feel the need to create something unique to me that fits my needs and desires.

    Well, I think that's it for now. Thanks for reading!

    - Mike
     
    Last edited: Sep 14, 2020
  2. Nov 1, 2018 at 2:52 PM
    #2
    MR E30

    MR E30 [OP] Well-Known Member

    Joined:
    Oct 22, 2018
    Member:
    #270223
    Messages:
    2,276
    Gender:
    Male
    First Name:
    Michael
    Wherever it's parked
    Vehicle:
    2021 Silver TRD OR DCLB w/ AluCab and All the Mods
    November 1st, 2018

    Swung by the dealership and picked up the body colored drivers side mirror cover. The PO must have damaged the original one and replaced it with a black version.

    Took 1 minute to swap. Quick and dirty directions:

    - Place thumb along the turn signal portion of the mirror, just below the cover.
    - Use the tips of the fingers of your other hand to pull at the top outside (away from the truck) edge of the cover.
    - Be careful, as the cover will go flying if you aren't paying attention. Does not require a tremendous amount of force to remove.

    [​IMG]New Mirror Cover 11-1-18 by Michael Rickerd, on Flickr

    I also measured and created a simple 3D model of my RTT. Nothing crazy sophisticated about the model, I just need it to ensure that it fits within the side rails of the truck when the rack is being manipulated.

    [​IMG]Capture by Michael Rickerd, on Flickr

    Took copious amounts of notes about the bed and roof of the truck. Need to transition those into a 3D environment as well.

    Checked my rear leaf pack U-bolts based on comments I have read on this site. 52 ft*lbs is the manufacturers call out for torque.

    You'll need a 19 mm deep well socket to get the job done. 5 of my 8 nuts required over 90 degrees of input before reaching the required torque. Glad that I checked them!

    Also scouted out the routing for my rear diff breather mod, as my genuine Toyota union for the rear diff arrived a couple of days ago. I'll post up my process when I get the tube ran.
     
  3. Nov 1, 2018 at 3:43 PM
    #3
    MR E30

    MR E30 [OP] Well-Known Member

    Joined:
    Oct 22, 2018
    Member:
    #270223
    Messages:
    2,276
    Gender:
    Male
    First Name:
    Michael
    Wherever it's parked
    Vehicle:
    2021 Silver TRD OR DCLB w/ AluCab and All the Mods
    November 1st, 2018 #2

    Couldn't wait so I ran my rear diff breather. Purpose of a rear diff breather is to avoid water being drawn into the differential. This can happen at water crossings (of which this truck will see) if the temperature differential between the water and the diff is great enough to create a vacuum inside the diff, thus sucking in water. The stock breather can also easily become clogged with mud and become caked shut. This could prevent air pressure from escaping the diff and cause potential sealing issues.

    Took ~30 minutes to complete without rushing.

    Stuff:
    - ~5 ft of 3/8" ID hose from a local auto parts store. No need to buy the expensive fuel lines if you don't want to.
    - Genuine Toyota Union. Available on Amazon for $11.32
    - (2) 3/8" hose clamps
    - Pipe tape (if you want).
    - 12 mm wrench for union install

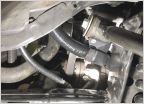
    Remove the stock breather (centered-ish in the picture) and save it for later. You'll attach it to the far end of the hose.

    [​IMG]Rear Diff Breather by Michael Rickerd, on Flickr

    Screw the new union into the top of the diff. Clamp your hose to it. Leave enough slack (you can match the brake lines in terms of excess tubing) in the tubes for axle articulation. Put one loop in the tube at its highest point. I chose to secure it to the thick bundle of wires running to the back of the truck with black zip ties.

    [​IMG]3/8" Tube Routing by Michael Rickerd, on Flickr

    Continue to connect the tubing to the wiring. Install the stock breather to the end of the tube via hose clamp.

    [​IMG]Stock Breather to Tube by Michael Rickerd, on Flickr

    Tuck the tube into the area behind the drivers side tail light. Go as high as you can/like/want to. You can also remove your tail light and secure the tubing up higher, but I didn't want to disassemble the tail light at this time.

    [​IMG]Tube Routing at Taillight by Michael Rickerd, on Flickr

    Waiting on my tail gate letters to arrive so I can put those on.
     
  4. Nov 1, 2018 at 7:13 PM
    #4
    Rocky.Mtn

    Rocky.Mtn Well-Known Member

    Joined:
    Aug 6, 2017
    Member:
    #226091
    Messages:
    477
    Canada
    Vehicle:
    2024 Tacoma TRD OR (Hybrid)
    Really need to the diff breather mod. Nice one!
     
  5. Nov 2, 2018 at 8:01 AM
    #5
    MR E30

    MR E30 [OP] Well-Known Member

    Joined:
    Oct 22, 2018
    Member:
    #270223
    Messages:
    2,276
    Gender:
    Male
    First Name:
    Michael
    Wherever it's parked
    Vehicle:
    2021 Silver TRD OR DCLB w/ AluCab and All the Mods
    Thanks, I see it as one of those very cheap and easy insurance policies.
     
  6. Nov 5, 2018 at 7:58 AM
    #6
    MR E30

    MR E30 [OP] Well-Known Member

    Joined:
    Oct 22, 2018
    Member:
    #270223
    Messages:
    2,276
    Gender:
    Male
    First Name:
    Michael
    Wherever it's parked
    Vehicle:
    2021 Silver TRD OR DCLB w/ AluCab and All the Mods
    November 3rd, 2018

    I started the morning off by applying my Empyre Offroad Matte Black Tailgate Lettering. The instructions were very straightforward. The soapy method worked very well. I will say, avoid using too sticky of a tape to help lift the sticker off of the backing. Too sticky and you may have an issue removing the decal from the tape. On the "T" I used duct tape (he does recommend masking tape, which I did not have on hand), which was too sticky, and left a slight crease in one portion of the letter. I was able to flatten it out after it dried a bit, but I was worried that I goofed it up. Anyways, install went well and they fit very well. I attempted to squeeze most of the soapy water out but found that the stickers still moved a bit. So I let it bake in the sun for 15 minutes before retrying.

    I like them so much, and they add so much character to the back of the truck (see last picture of post), that I am ordering a second set to store away for the future.

    After that was done I went ahead and completed an entire interior detail. Carpets, headliner, and seats. Followed by all interior plastics. Then all interior glass/clear plastic. I then cleaned inside all of the door jams, seals included.

    I then went into a thorough exterior detail. I didn't take any pictures of the process, but I've listed a general outline below:

    - Two bucket car wash - One bucket for rinsing of the sponge and one for application of soapy water. Helps keep you from rubbing dirt back onto your paint. A grit guard from chemical guys is a great addition to each bucket as well.
    - Then I pulled the truck inside the garage and did a full claybar. The claybar was able to remove all defects that had formed on the exterior of the clear coat. The truck has four scratches through the clear and paint that I was able to find. The surface of the hood and the front windshield were the worst parts, by far.
    - Followed up with Griots Garage 'Perfecting Cream' to take care of the minor swirl marks and blemishes in the paint. Wipe off excess as you go.
    - Next up was Griots Garage 'Best in Show Wax'. Lowest speed on the 6" random orbital and you cover the entire car at once, windows included, but not the headlights or taillights. A little bit of this stuff goes a loooong way.
    - Machine removal of the wax was next. Used a larger orbital buffer with a very very low speed.
    - Refurbished all trim with some back to black applied with a microfiber.
    - Finished it off with a quick tire wet spray on the tires.

    The end result:

    [​IMG]2016 Tacoma - First Detail and Tailgate Lettering Application by Michael Rickerd, on Flickr

    [​IMG]2016 Tacoma - First Detail and Tailgate Lettering Application by Michael Rickerd, on Flickr

    Nice and shiny.

    Now to get it dirty!

    The purpose of the full detail is two fold really. I wanted to remove the clear coat scratches and protect the paint for the upcoming winter. But I also wanted to use this task as a form of a reset for the truck and I. Kind of like starting from scratch, getting to know it in great detail, and solidifying the fact that it is mine. Weird I know, but it's what works for me!

    Thanks for reading.
     
    dspec likes this.
  7. Nov 5, 2018 at 12:35 PM
    #7
    dspec

    dspec Well-Known Member

    Joined:
    Sep 11, 2018
    Member:
    #265928
    Messages:
    222
    Gender:
    Male
    Nice man! You'll enjoy the truck. Also Engineer pass is a great...
     
  8. Nov 5, 2018 at 1:47 PM
    #8
    MR E30

    MR E30 [OP] Well-Known Member

    Joined:
    Oct 22, 2018
    Member:
    #270223
    Messages:
    2,276
    Gender:
    Male
    First Name:
    Michael
    Wherever it's parked
    Vehicle:
    2021 Silver TRD OR DCLB w/ AluCab and All the Mods
    Thanks! I want to do another Engineers Pass summit in the new truck. Hoping to wiggle it into one of my trips in 2019.
     
  9. Nov 7, 2018 at 1:58 PM
    #9
    MR E30

    MR E30 [OP] Well-Known Member

    Joined:
    Oct 22, 2018
    Member:
    #270223
    Messages:
    2,276
    Gender:
    Male
    First Name:
    Michael
    Wherever it's parked
    Vehicle:
    2021 Silver TRD OR DCLB w/ AluCab and All the Mods
    November 7th, 2018

    Was heading back home after a site visit down in Prescott, AZ and ran into the type of sign that you can't pass up.

    [​IMG]Prescott 7 by Michael Rickerd, on Flickr

    Heading East on SR 169, right after the I-17 intersection, the paved road turns into dirt. I didn't spend much time back in there, but there were lots of offshoots to explore.

    Ended up at an abandoned something.

    [​IMG]Prescott 5 by Michael Rickerd, on Flickr

    [​IMG]Prescott 4 by Michael Rickerd, on Flickr

    First flex of the truck since I bought it. Really impressed, even in stock trim.

    [​IMG]Prescott 6 by Michael Rickerd, on Flickr

    [​IMG]Rear End Lean by Michael Rickerd, on Flickr

    [​IMG]Prescott 3 by Michael Rickerd, on Flickr

    [​IMG]Prescott 2 by Michael Rickerd, on Flickr

    Really impressed with the truck. Very comfortable and it feels very confident/stable. Excited to plan a trip with a couple of local guys and get some more seat time!
     
  10. Nov 10, 2018 at 6:34 AM
    #10
    MR E30

    MR E30 [OP] Well-Known Member

    Joined:
    Oct 22, 2018
    Member:
    #270223
    Messages:
    2,276
    Gender:
    Male
    First Name:
    Michael
    Wherever it's parked
    Vehicle:
    2021 Silver TRD OR DCLB w/ AluCab and All the Mods
    November 9th, 2018

    Got off of work early yesterday, so I decided to head out to the Cinder Hills OHV Area just North of Flagstaff on the 89A. It's a rather large adventure area, mostly for things other than trucks, but it's still fun.

    I haven't been there in years, in my modified 2000 XJ.

    Completely stock (susp/tires wise) TRD 4x4 OR. I definitely need better tires before messing around in cinder pits. Almost got completely stuck in an area that was a breeze for my XJ with semi decent offroad tires.

    Took the truck up to 65 mph on long straight stretches of road and it is incredibly comfortable and stable at those speeds. Very impressed.

    The sun wasn't cooperating, but oh well.

    [​IMG]Cinder Hills 5 by Michael Rickerd, on Flickr

    [​IMG]Cinder Hills 4 by Michael Rickerd, on Flickr

    Found a motorcycle berm and decided to see if I could max out my roll/pitch meter. Was able to hit 30 degrees. Unnerving for sure. (picture doesn't quite do it justice)

    [​IMG]Cinder Hills 3 by Michael Rickerd, on Flickr

    Wide open. This is ~11 miles from my house.

    [​IMG]Cinder Hills 2 by Michael Rickerd, on Flickr

    I need to get to upgrading this truck so it's more enjoyable to look at in these pictures!

    I may have Monday off for Veterans day, so I am planning a ~150 miles trip south, then east, then north back into town.
     
    Last edited: Jan 24, 2019
  11. Nov 12, 2018 at 8:24 AM
    #11
    MR E30

    MR E30 [OP] Well-Known Member

    Joined:
    Oct 22, 2018
    Member:
    #270223
    Messages:
    2,276
    Gender:
    Male
    First Name:
    Michael
    Wherever it's parked
    Vehicle:
    2021 Silver TRD OR DCLB w/ AluCab and All the Mods
    November 10th, 2018

    Decided to take the time and create a practical storage solution for the RTT.

    Used a pulley system I had leftover from back in the day. Used to use them for holding bikes up in the air.

    One person operation is possible, but it works a lot better with two people.

    Created a backup support system since the wife's car is parked under the tent most of the time.

    [​IMG]CVT RTT Ceiling Mount by Michael Rickerd, on Flickr

    Going to check out a Relentless bed rack this afternoon to use while I continue the design of my custom setup (which has been slow due to workload unfortunately).
     
    5nahalf likes this.
  12. Nov 15, 2018 at 12:43 PM
    #12
    MR E30

    MR E30 [OP] Well-Known Member

    Joined:
    Oct 22, 2018
    Member:
    #270223
    Messages:
    2,276
    Gender:
    Male
    First Name:
    Michael
    Wherever it's parked
    Vehicle:
    2021 Silver TRD OR DCLB w/ AluCab and All the Mods
    November 15th, 2018

    Picked up a barely used, basically new, Relentless Modular Bed Rack for my RTT from a local TW member.

    I'll be painting it or getting it powder coated soon, but decided to leave it on the back of the truck for my little trip tomorrow, even though nothing will be mounted to it. Just want to let everyone know that I am SRS BZNZ.

    [​IMG]Relentless Modular Bed Rack 11-25-18 by Michael Rickerd, on Flickr

    ARB OBA is the next on the list as I want to have the option of airing down on dirt roads (which I won't be able to do tomorrow unfortunately). I need it mounted in the engine bay, preferably between the grill and the radiator, so I need to do some research on which ARB compressor best works in that situation.
     
  13. Nov 17, 2018 at 6:51 AM
    #13
    MR E30

    MR E30 [OP] Well-Known Member

    Joined:
    Oct 22, 2018
    Member:
    #270223
    Messages:
    2,276
    Gender:
    Male
    First Name:
    Michael
    Wherever it's parked
    Vehicle:
    2021 Silver TRD OR DCLB w/ AluCab and All the Mods
    November 16th, 2018

    I will start this post by saying that I really wish I had had sliders for today's adventure. Holy moly.

    Had the day off, so I grabbed a buddy and we drove down the 17 to the Lake Montezuma exit and headed south on NF-618. Took NF-215 out to West Clear Creek and explored the creek a bit.

    At the 618/215 intersection

    [​IMG]11-16-18 Day Trip from I-17 to Happy Jack by Michael Rickerd, on Flickr

    Found a rode to a hill top which eventually lead to the discovery of a giant metal water gathering platform that fed into a small drinking hole, which was monitored by US government wildlife cameras. I'm not sure if they saw any interesting animals, but they definitely caught two guys poking around.

    [​IMG]11-16-18 Day Trip from I-17 to Happy Jack by Michael Rickerd, on Flickr

    Picturesque road down into West Clear Creek. Had never been to this area of AZ before and was impressed at how much water and vegetation there was.

    [​IMG]11-16-18 Day Trip from I-17 to Happy Jack by Michael Rickerd, on Flickr

    After we left West Clear Creek we headed back to the 618 to take the NF-214 east over to Lake Mary Road.

    This is where the nail biting begins.

    Before we left the creek we tossed lunch under the hood to be warmed up.

    [​IMG]11-16-18 Day Trip from I-17 to Happy Jack by Michael Rickerd, on Flickr

    Pictures don't quite do it justice, but it took us 3 hours to go 10 miles. Needed spotting for 2 of those hours. Got to test out 4Lo though! Thoroughly! Never had traction issues, even at 32 psi, but the abundance of sharp steep rocks was disconcerting without a spotter.

    Lots and lots of rocks, lots and lots of issues with stock mudflaps being bent and crushed. One front skid encounter, early on, as the spotter was learning the trucks ground clearance abilities. And several hits on the Predator Tube Step, front drivers side.

    [​IMG]11-16-18 Day Trip from I-17 to Happy Jack by Michael Rickerd, on Flickr

    [​IMG]11-16-18 Day Trip from I-17 to Happy Jack by Michael Rickerd, on Flickr

    [​IMG]Damaged Step Bar by Michael Rickerd, on Flickr

    This wouldn't have been nearly as bad if the truck wasn't bone stock, but it made it through!

    About 4 miles from the end of the dirt road we passed under some power wires

    [​IMG]11-16-18 Day Trip Under Power Lines by Michael Rickerd, on Flickr

    Sliders are a definite must have. The stock steps are crap for things like this.
     
    lambo likes this.
  14. Nov 27, 2018 at 3:04 PM
    #14
    MR E30

    MR E30 [OP] Well-Known Member

    Joined:
    Oct 22, 2018
    Member:
    #270223
    Messages:
    2,276
    Gender:
    Male
    First Name:
    Michael
    Wherever it's parked
    Vehicle:
    2021 Silver TRD OR DCLB w/ AluCab and All the Mods
    November 27th, 2018

    My 73 dollar ebay TRD Pro grill arrived last night. During lunch I threw it on.

    Very straight forward install. Plenty of YouTube videos describing the process. I will add that if you are having a hard time getting the stock grill out of the body matched housing, there are two different sets of clips for the two stock pieces (chrome bezel and the main cheese grater portion). Working on the bezel first and then the center piece makes it much easier. No broken tabs. I stored the stock grill in the box that the Pro grill came in and stored it in my attic. I don't plan on using it, but you never know!

    Really really makes the stock front end much more attractive. Decided to keep the letters the color that they came as, which is grey. I may black them out one day with SEM trim paint, but I figured it was easier to paint them black later instead of trying to remove black paint to go back to grey.

    [​IMG]New TRD Pro grill 11-27-18 by Michael Rickerd, on Flickr

    Best mod thus far for my truck. Lots of people do this upgrade, but if you're on the fence, use some of that Xmas bonus to enhance the looks of your truck.
     
    This site contains affiliate links for which the site may be compensated.
    #14
    lambo likes this.
  15. Dec 3, 2018 at 8:53 AM
    #15
    MR E30

    MR E30 [OP] Well-Known Member

    Joined:
    Oct 22, 2018
    Member:
    #270223
    Messages:
    2,276
    Gender:
    Male
    First Name:
    Michael
    Wherever it's parked
    Vehicle:
    2021 Silver TRD OR DCLB w/ AluCab and All the Mods
    December 3rd, 2018

    I just ordered my remote start system, with the cell phone module, from JMeitz here on TW.

    I park outside at night most nights, and it is winter time now, and I leave my house early in the AM 5 days a week, so being able to start the truck from inside my house to warm it up and start defrosting the windshield while wearing my robe is very handy.

    Will update the thread with install and programming difficulty, and first impressions when I get it in.
     
    jmeitz likes this.
  16. Dec 17, 2018 at 11:53 AM
    #16
    MR E30

    MR E30 [OP] Well-Known Member

    Joined:
    Oct 22, 2018
    Member:
    #270223
    Messages:
    2,276
    Gender:
    Male
    First Name:
    Michael
    Wherever it's parked
    Vehicle:
    2021 Silver TRD OR DCLB w/ AluCab and All the Mods
    December 15th, 2018

    Got back in to town late Friday and decided to start off Saturday by installing the remote start that I purchased from JMeitz here on TW.

    Here is the link to his For Sale thread:
    https://www.tacomaworld.com/threads...-and-cell-for-at.533197/page-25#post-19343210

    The product was assembled and packaged well. His YouTube install video is very detailed and left no unknowns.

    He pre-programmed the cell module for me, so install time was only ~30 minutes, with me being very careful and double checking everything.

    Works flawlessly. Used it for the first time this morning. The parking lights flash when engaging the remote start so I could tell it was working by looking out of my window as I pressed the key fob.

    [​IMG]Remote Start App by Michael Rickerd, on Flickr

    If you're on the fence about a mod like this, go for it. Very handy feature. Yes the truck shuts off when I open the door, but I only use the feature when the truck will be running for at least a few minutes before i hop in. That doesn't bother me.

    Already scheming on the next mod. I figure that one at a time seems to be a good idea.
     
    jmeitz likes this.
  17. Jan 21, 2019 at 10:49 AM
    #17
    MR E30

    MR E30 [OP] Well-Known Member

    Joined:
    Oct 22, 2018
    Member:
    #270223
    Messages:
    2,276
    Gender:
    Male
    First Name:
    Michael
    Wherever it's parked
    Vehicle:
    2021 Silver TRD OR DCLB w/ AluCab and All the Mods
    January 21st, 2019

    Just ordered my 4X Innovations Weld-On DOM rock sliders with square main tube.

    Their drop test video inspired a lot of confidence in their product. The site mentioned a 4-6 week lead time, but hopefully they can knock it out sooner!
     
    lambo likes this.
  18. Jan 24, 2019 at 7:18 AM
    #18
    MR E30

    MR E30 [OP] Well-Known Member

    Joined:
    Oct 22, 2018
    Member:
    #270223
    Messages:
    2,276
    Gender:
    Male
    First Name:
    Michael
    Wherever it's parked
    Vehicle:
    2021 Silver TRD OR DCLB w/ AluCab and All the Mods
    January 23rd, 2019

    And just two days later I receive an email telling me that my '4-6 week lead time' for my rock sliders from 4X Innovations has already passed! Tracking number shows a delivery of next Monday. Excellent!

    Chatted up a CWI at my gym this morning, and we are going to schedule a weekend at his place to weld these sliders up and onto the truck!

    Placing an order with Relentless Fab today for some more metal bits. Itching to complete my first several day trip in the truck and I need to prepare a bit more.
     
    lambo likes this.
  19. Jan 28, 2019 at 7:27 AM
    #19
    MR E30

    MR E30 [OP] Well-Known Member

    Joined:
    Oct 22, 2018
    Member:
    #270223
    Messages:
    2,276
    Gender:
    Male
    First Name:
    Michael
    Wherever it's parked
    Vehicle:
    2021 Silver TRD OR DCLB w/ AluCab and All the Mods
    January 28th, 2018

    Just finished an order for a 48" hi-lift jack (to go along with my Relentless Fab brackets), an offroad hi-lift base, handle keeper, D-Ring shackles, and tree saver strap to add to the recovery bundle associated with the truck. I already have a recovery strap, so I should be semi-capable if something moderate happens out on the trail.
     
    lambo likes this.
  20. Mar 12, 2019 at 9:22 AM
    #20
    MR E30

    MR E30 [OP] Well-Known Member

    Joined:
    Oct 22, 2018
    Member:
    #270223
    Messages:
    2,276
    Gender:
    Male
    First Name:
    Michael
    Wherever it's parked
    Vehicle:
    2021 Silver TRD OR DCLB w/ AluCab and All the Mods
    March 12th, 2019

    Waiting on the weather and temperature to be favorable to schedule my weld-on slider install with my buddy, so they continue to sit in my garage.

    [​IMG]4X Innovations DCSB Weld On Rick Sliders by Michael Rickerd, on Flickr

    In the meantime, a good friend upgraded from a 2nd gen Tacoma to a 2019 Raptor, so he gave me his old bed mat before trading in his truck.

    [​IMG]New Bed Mat and Front Floor Mats - 3-7-19 by Michael Rickerd, on Flickr

    Definitely a handy thing to have, as tools/materials sliding around in my bed was no fun.

    Also picked up a set of Husky X-Act Contour front floor mats from Auto Anything for ~130 dollars.

    Excellent fit and finish.

    [​IMG]New Bed Mat and Front Floor Mats - 3-7-19 by Michael Rickerd, on Flickr

    Also, for record keeping sake, I took a crazy drive down the I-17 from Flagstaff to Phoenix the day after our record breaking snow fall , which was 35.9 inches in 24 hours.

    I was glad to be in my Tacoma, and not my old Tundra.

    [​IMG]Tacoma on empty I-17 southbound - 2-22-19 by Michael Rickerd, on Flickr

    Beginning to plan a trip up into the Escalante sometime early April for a nice 4 day weekend.
     

Products Discussed in

To Top