

-
Welcome to Tacoma World!
You are currently viewing as a guest! To get full-access, you need to register for a FREE account.
As a registered member, you’ll be able to:- Participate in all Tacoma discussion topics
- Communicate privately with other Tacoma owners from around the world
- Post your own photos in our Members Gallery
- Access all special features of the site
 Is the Fumoto F133N oil drain valve accessable with the Ptr60-35190 TRD skid plate installed?
 PSA: Don't buy an RSI Smartcap if you live in a cold climate - frozen locks
 Third gen tailgate strength
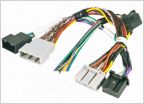 2020 Factory Radio Add Amp Adapter
 Aftermarket front camera
 Tool Box
Audio Upgrade Build
Discussion in '3rd Gen. Tacomas (2016-2023)' started by CO_Taco125, Nov 1, 2018.


