1. Welcome to Tacoma World!

    You are currently viewing as a guest! To get full-access, you need to register for a FREE account.

    As a registered member, you’ll be able to:
    • Participate in all Tacoma discussion topics
    • Communicate privately with other Tacoma owners from around the world
    • Post your own photos in our Members Gallery
    • Access all special features of the site

My Shell Interior Lighting Project

Discussion in 'Tonneau Covers, Caps and Shells' started by destin_meeks, Nov 20, 2018.

  1. Nov 20, 2018 at 10:41 AM
    #1
    destin_meeks

    destin_meeks [OP] I used to fix people's crappy stereos

    Joined:
    Jul 14, 2017
    Member:
    #223997
    Messages:
    3,677
    Gender:
    Male
    First Name:
    Destin
    Tuscaloosa, AL
    Vehicle:
    2017 SSM DoubleCab TRD Off-Road 4x4
    This is a thread I originally posted in the "Lighting" forum, bit I figured it was more helpful on this forum, so I'm re-posting for others that it might help! This is a direct copy/paste from that thread


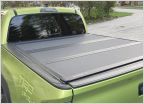
    So recently I had a Leer 100XQ shell put on the truck, and as anyone with a shell knows, They are dark inside. So I wanted some light.

    It seems that most people go with either LED strips on the roof, or LED strips under the bed rails. While strips on the roof are great, they blind you while you're looking inside. And for my personal taste, they look a bit cheap stuck on the carpeted roof (it is a very cheap option though so no big deal.)

    I wanted something very bright (don't we all) that I didn't have to be blinded by every time I look in my truck bed. I also wanted something that turned on automatically when I opened the glass door.

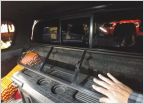
    I'll start with a finished picture, and then if you stick with me, I'll show you what I did!


    This won't be much of a "How-To" but it was a very simple process and I will gladly answer any questions if I can!

    I AM A MOBILE ELECTRONICS CERTIFIED PROFESSIONAL INSTALLER (MECP) SO I AM CONFIDENT IN MY OWN ABILITIES CONCERNING 12VOLT WIRING APPLICATIONS. HOWEVER, I AM NOT RESPONSIBLE FOR ANYTHING IF YOU CHOOSE TO FOLLOW WHAT I DID. IF YOU ARE NOT CONFIDENT IN SOLDERING OR MAKING SECURE 12V CONNECTIONS, PLEASE ALLOW A PROFESSIONAL TO DO THIS FOR YOU.

    I'll start with a parts list as well as current pricing, before tax and shipping.

    2- Oznium Diamond LED Strips, Cool White - $14.99ea.
    https://www.oznium.com/diamond-led-strip

    1- Oznium Magnetic Switch, Straight - $5.99
    https://www.oznium.com/magnetic-switch

    1- 1/2"x36" Aluminum Flat Bar - $2.68
    https://www.homedepot.com/p/Everbilt-1-2-in-x-36-in-Aluminum-Flat-Bar-800217/204604762

    1- fairly large magnet (maybe the size of a small pack of Juicy Fruit gum) - Free, had laying around the garage
    (this may not be necessary but I wanted a magnet stronger than what was included with the switch)

    Finally, miscellaneous things.

    A few pieces of adhesive lined heat shrink. This is a good kit if you don't do much wiring.
    https://www.amazon.com/gp/product/B073R69KNB/ref=oh_aui_detailpage_o01_s00?ie=UTF8&psc=1

    Enough 2-conductor wire to reach whatever you want to tap your power from. I used 20awg because my run was only about 4 feet. If you are going to the engine compartment, I would probably use 18awg just to be safe. These strips only pull about 1.5 amps so no need for anything crazy.

    2 short screws
    I used 1/2" pan head self tappers, but anything that can screw into your shell will work fine. Just keep them short so they don't come through the shell.

    Some good quality super glue.
    To glue the strips to the aluminum bar. These strips get very hot very fast so use good adhesive that won't let go from heat (or cold, if you're up north.)

    Tools

    Drill
    Philips bit
    Saw with metal blade
    Heat gun or butane torch (for heat shrink. Please don't use a lighter because you will burn your shrink and it will look bad)
    Soldering Iron and solder

    This project could be done without soldering, or without heat shrink, but I personally wouldn't do it without both. If you don't want so solder your connections, just cover them in heat shrink. If you want to use electrical tape to cover them instead of heat shrink, solder the connections so they are good and strong.


    I won't go into too much detail about everything because there isn't much to say.

    Here is how everything looks when assembled.


    I cut about 10" off the flat bar (cut to fit both strips plus half an inch on each end for screw)

    Strips power/ground get soldered together, and then soldered to about 1.5 feet of wire. The magnetic switch has about 1 foot of lead, and that plus the 1.5 feet of lead we added to the strips gave me enough length to put my switch body off to the side where the latch is so it's out of the way.


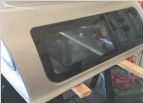
    My magnet is mounted on the glass door right next to this


    So, when magnet is close to switch (lid closed) then lights are off


    When magnet is away from switch (lid open) light comes on


    So here is a very crude path that our 12v power will take


    12v power in from bottom, red wire. will go into red side of switch, come back out white side of switch, back into red 1.5' lead into lights, then out through black ground from lights into black ground of main power

    (in the picture, red, yellow, green, blue)

    I mounted the flat bar with strips attached just below my 3rd brake so the light points inward and not at my face.


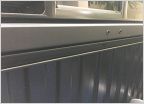
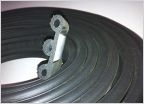
    Ran the wiring into the rubber weather stripping, over to the drivers side and down under the bed rail.

    So glass lid closed, no light


    Glass lid open, light


    If you have any questions, feel free to ask!
     
    chrslefty, kywoodsrider, TK11 and 3 others like this.
  2. Nov 20, 2018 at 5:18 PM
    #2
    MolonLabeTaco

    MolonLabeTaco Well-Known Member

    Joined:
    Jan 30, 2018
    Member:
    #242953
    Messages:
    2,786
    Gender:
    Male
    First Name:
    Dude
    N. Texas
    Vehicle:
    '12 DC 4x4 OR
    Awesome info. Thanks!
     
  3. Dec 10, 2018 at 6:11 PM
    #3
    tacoma guy

    tacoma guy Well-Known Member

    Joined:
    Jul 8, 2010
    Member:
    #39944
    Messages:
    1,756
    Gender:
    Male
    First Name:
    Joe
    Phoenix Az.
    Vehicle:
    2011 Tacoma Prerunner TRD
    Bilstein 5100's on all four corners. Front set @ 0 with OME 883x coils. Alcon leaf springs. Viper Alarm. Wet Okole seat covers. WeatherTech Floor liners front and back. Oem Toyota chrome exhaust tip. ARE Shell. America Outlaw Wheels.
    Nice write up. As I am in the process of doing the same thing . We're did you get your power from?
     
  4. Dec 11, 2018 at 12:03 PM
    #4
    destin_meeks

    destin_meeks [OP] I used to fix people's crappy stereos

    Joined:
    Jul 14, 2017
    Member:
    #223997
    Messages:
    3,677
    Gender:
    Male
    First Name:
    Destin
    Tuscaloosa, AL
    Vehicle:
    2017 SSM DoubleCab TRD Off-Road 4x4
    I actually have a small (maybe 6ah) battery in the back cubby, tied into the 12v power circuit of the 7-pin trailer harness. This way I keep a fully charged battery, and the light isn't tied to the truck battery. I doubt I will ever accidentally leave it on (the light is plenty bright to notice its on, even in daylight) but if I do, I won't kill my cranking battery.

    That was also part of a dual battery project for down the road. Tapping into the 7-pin harness, you get a 12v source, fused at 40A.

    Had I not wanted to add a battery back there, I would have just run a length of 18awg power and ground wire along the frame rail up to the battery where I have a Blue-Seas fuse block. The strips pull less than 2 amps so no need for thick wire.
     
    doublethebass likes this.
  5. Dec 11, 2018 at 5:41 PM
    #5
    tacoma guy

    tacoma guy Well-Known Member

    Joined:
    Jul 8, 2010
    Member:
    #39944
    Messages:
    1,756
    Gender:
    Male
    First Name:
    Joe
    Phoenix Az.
    Vehicle:
    2011 Tacoma Prerunner TRD
    Bilstein 5100's on all four corners. Front set @ 0 with OME 883x coils. Alcon leaf springs. Viper Alarm. Wet Okole seat covers. WeatherTech Floor liners front and back. Oem Toyota chrome exhaust tip. ARE Shell. America Outlaw Wheels.
    Oh Ok Yeah I see what your say I was thing of running from the battery Just wanted see if there was another, better way. From the battery it is Thanks bud from replying and for the info Much appreciated!
     
  6. Dec 12, 2018 at 7:22 AM
    #6
    CaTaco101

    CaTaco101 Well-Known Member

    Joined:
    Feb 2, 2014
    Member:
    #122148
    Messages:
    155
    Gender:
    Male
    California
    Vehicle:
    '13 TRD Off-Road PreRunner
    Curious to see this dual battery setup.

    Can’t rationalize a full size but something small for bed accessories without fear of draining everything.

    Why not tap into the trailer harness even if not doing dual battery?

    Thanks.
     
  7. Dec 12, 2018 at 1:16 PM
    #7
    destin_meeks

    destin_meeks [OP] I used to fix people's crappy stereos

    Joined:
    Jul 14, 2017
    Member:
    #223997
    Messages:
    3,677
    Gender:
    Male
    First Name:
    Destin
    Tuscaloosa, AL
    Vehicle:
    2017 SSM DoubleCab TRD Off-Road 4x4
    The trailer harness is only powered with ignition. The lights wouldn’t work unless the truck was running.

    As for the dual battery, it’s just a tiny SLA battery from Walmart (used for deer feeders) connected straight to the trailer harness circuit. I might be ruining the battery by running it like this, but it was super cheap and it does what I need it to do. One day I’ll do a real dual battery setup for a camping/overland style setup using a CTEK or RedArc, but for now this is all I need. January will be a year I e been running it like this and no issues yet. If the battery has issues, I’ll just get another one. Cheaper than a DC-DC charger for how I’m using it.
     
  8. Oct 6, 2019 at 7:00 PM
    #8
    destin_meeks

    destin_meeks [OP] I used to fix people's crappy stereos

    Joined:
    Jul 14, 2017
    Member:
    #223997
    Messages:
    3,677
    Gender:
    Male
    First Name:
    Destin
    Tuscaloosa, AL
    Vehicle:
    2017 SSM DoubleCab TRD Off-Road 4x4
    Been a lot of new shells I’ve seen lately so figured I’d bump this back up
     
  9. Nov 17, 2019 at 6:27 PM
    #9
    Newlife

    Newlife Well-Known Member

    Joined:
    Jun 22, 2013
    Member:
    #106845
    Messages:
    8,574
    Gender:
    Male
    First Name:
    Adam
    Knoxville TN
    Vehicle:
    2020 t4r orp
    Bone f’n stock for now
    Curious how command strips would hold to the carpet.
     
  10. Nov 17, 2019 at 6:33 PM
    #10
    StG

    StG Well-Known Member

    Joined:
    Feb 19, 2015
    Member:
    #149095
    Messages:
    117
    Gender:
    Male
    Valley of the Sun, AZ
    Vehicle:
    15 DCSB TRD
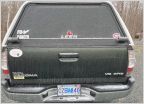
    What kind of shell do you have? The lock on your rear hatch looks beefy & much nicer than my Leer. Is it aftermarket?
     
  11. Nov 17, 2019 at 7:17 PM
    #11
    destin_meeks

    destin_meeks [OP] I used to fix people's crappy stereos

    Joined:
    Jul 14, 2017
    Member:
    #223997
    Messages:
    3,677
    Gender:
    Male
    First Name:
    Destin
    Tuscaloosa, AL
    Vehicle:
    2017 SSM DoubleCab TRD Off-Road 4x4
    I wouldn’t expect much. Worth a shot though?
     
  12. Nov 17, 2019 at 7:18 PM
    #12
    destin_meeks

    destin_meeks [OP] I used to fix people's crappy stereos

    Joined:
    Jul 14, 2017
    Member:
    #223997
    Messages:
    3,677
    Gender:
    Male
    First Name:
    Destin
    Tuscaloosa, AL
    Vehicle:
    2017 SSM DoubleCab TRD Off-Road 4x4
    This is the 100xq, stock latch
     
  13. Dec 11, 2020 at 5:48 PM
    #13
    Bartlett18

    Bartlett18 Well-Known Member

    Joined:
    Apr 28, 2011
    Member:
    #55745
    Messages:
    66
    Gender:
    Male
    Edmonton, Alberta, CANADA
    Vehicle:
    2009 Silver Tacoma ShBx DBLC 4X4
    3"Lift, 285/70/17, OVTune, fog light mod, oil, volt, vacuum gauges, map light mod, RI light bar/pods, Leer 100XQ, bedliner lights, LR UCAs, Rear airlift bags, tinted side windows, XD Revolver rims, colour coded door protectors, 100/90 headlight bulbs and harness, 65 fog bulbs and harness, side splitter mirrors, Bilstein 5100s, OME 887 springs, 4:30 gears, TruTrac, Hurst/Core short shifter, CC grill,
    IMG_9183.jpg

    Hey, just added Oznium LED bolt lights to my Leer XQ. 11mm. Amber. The rear LED is wired to the park lights and the front one is wired into the turn signals. This is a still from a video, where the lights are all on at the time.
     

Products Discussed in

To Top