1. Welcome to Tacoma World!

    You are currently viewing as a guest! To get full-access, you need to register for a FREE account.

    As a registered member, you’ll be able to:
    • Participate in all Tacoma discussion topics
    • Communicate privately with other Tacoma owners from around the world
    • Post your own photos in our Members Gallery
    • Access all special features of the site

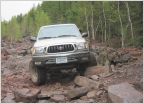
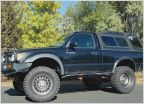
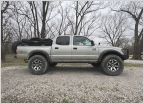
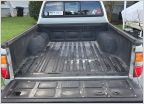
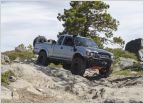
2002 Tacoma TRD-OR DC 4x4 - Build Thread

Discussion in '1st Gen. Builds (1995-2004)' started by tmswell, Nov 16, 2018.

  1. Nov 16, 2018 at 1:32 PM
    #1
    tmswell

    tmswell [OP] Well-Known Member

    Joined:
    Oct 23, 2018
    Member:
    #270369
    Messages:
    143
    Gender:
    Male
    Bay Area, California
    Vehicle:
    2002 Tacoma TRD-OR DC 4x4
    Hey Everyone -- Recently joined on and thank you for the warm welcome! My Intro Thread
    Goal with this thread is to share my Tacoma experience.

    In Progress:
    - 33.4" Tires going on after these Nittos die... They just keep rocking!

    On-Going Maintenance and Mods:
    10/19/18 - Purchased the Truck - Miles: 172,008
    10/20/18 - OE Air Filter, Headlight bulbs, OEM Key, & New OE Corner Lights
    10/22/18 - Nitto Ridge Grappler 265/75/16 (AMAZING tires)
    10/29/18 - Denso (AC) Air Compressor, Continental Belts, Fuel Filter & Spark Plugs.
    11/01/18 - TRD Off-Road (Mountain Decals) Dark Grey
    11/09/18 - New Rockford Fosgate Speakers (replaced OEM)
    11/16/18 - 2x Nozzle Assy, Wshr (222N) PN: 85381-04030 (Windshield Sprayer Nozzles)
    11/21/18 - BudBuilt Front Skid Plate - Ordered Bare-Metal & Sprayed w/Bed Liner.
    11/22/18 - Low Range Off Road Bed Bar - Black Semi-Gloss
    11/29/18 - CBI Off-Road Sliders (Bolt-On, KkOut, DOM -Drawn Over Mandrel)
    12/16/18 - Icon Front/Rear Shocks/Struts -- Waiting on Add-a-leaf
    12/26/18 - Add-A-Leaf ICON Leafs and height adjustments to 2.5" lift front/back
    12/29/18 - Alignment and height adjustments for 38.5" to wheel arches.
    01/15/19 - Magnaflow Muffler & High-clearance Exhaust.
    01/18/19 - Tepui Tent Installed
    01/20/19 - OE Headlight Housing Replacements & Adjusted
    02/10/19 - CB Radio Installed
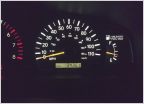
    04/11/19 - Cluster Repair
    08/10/19 - Relentless Predator / Tacoma Wrap Around Rear Bumper & Swing Arm w/High-hitch
    08/10/19 - Rear License Plate Light and Lugs for Rear Spare Tire Mount
    12/26/19 - Sway Bar End Links, Tie Rod Ends (outer), Alignment, oil change, winch install and Rigid front lights.
    05/06/20 - F/R Diff Fluid and D/P F Axles
    05/18/20 - Smog - Catalyst Reset and re-smog
    06/11/20 - CBI Bed Racks Installed
    08/04/20 - Steven's Creek Toyota ( Lower Ball Joint Recall)
    08/18/20 - Timing Belt, Water Pump / Alternator, Upper/Lower Coolant Hoses
    10/23/20 - Surprise Alternator Replacement - OE
    01/22/21 - Oil Change & OE Muffler Installed
    02/05/21 - Current Miles: 192,350


    Current:
     

    Attached Files:

    Last edited: Feb 8, 2021
    KSDoubleTaco and Taco critter like this.
  2. Nov 16, 2018 at 1:34 PM
    #2
    hyper15125

    hyper15125 Headlight Retrofitting Hobbyist Vendor

    Joined:
    Feb 11, 2015
    Member:
    #148420
    Messages:
    2,235
    Gender:
    Male
    NJ (609)
  3. Nov 16, 2018 at 1:35 PM
    #3
    tmswell

    tmswell [OP] Well-Known Member

    Joined:
    Oct 23, 2018
    Member:
    #270369
    Messages:
    143
    Gender:
    Male
    Bay Area, California
    Vehicle:
    2002 Tacoma TRD-OR DC 4x4
    You beat me to it :) Uploading now
     
  4. Nov 16, 2018 at 1:36 PM
    #4
    02hilux

    02hilux What do you mean there’s no road, I’m here

    Joined:
    Sep 14, 2016
    Member:
    #197244
    Messages:
    6,271
    Planet: EARTH
    :worthless:

    Just because
     
  5. Nov 16, 2018 at 1:37 PM
    #5
    hyper15125

    hyper15125 Headlight Retrofitting Hobbyist Vendor

    Joined:
    Feb 11, 2015
    Member:
    #148420
    Messages:
    2,235
    Gender:
    Male
    NJ (609)
    :boink:
     
  6. Nov 16, 2018 at 1:45 PM
    #6
    tmswell

    tmswell [OP] Well-Known Member

    Joined:
    Oct 23, 2018
    Member:
    #270369
    Messages:
    143
    Gender:
    Male
    Bay Area, California
    Vehicle:
    2002 Tacoma TRD-OR DC 4x4
    Los Padres 11/2018
    Camping trip 1: Pipe Tobacco makes camping just that much better
    Camp1_zps2mogcyfw_cff682bceeb486af829ddc3aecb437a823d99a3f.jpg

    Buddy's Jeep.
    camp2_zpsdmk7s2si_d241089c3cb7ab37e30c7f7313cef78983a6bc9a.jpg

    Camping Trip #2:
    Camp3_zpsusaveznz_a30c4c3a65324c8e982d3dc2e86baa8f69febe18.jpg

    Camp4_zpsgkignr3v_e4c849153b1c65f3f423c11e52cca2a8062e1679.jpg

    Camp5_zpswtglwdas_f9ea7df126ac354a6c7e6c0197f60e0f357233d9.jpg
     
  7. Nov 16, 2018 at 1:50 PM
    #7
    tmswell

    tmswell [OP] Well-Known Member

    Joined:
    Oct 23, 2018
    Member:
    #270369
    Messages:
    143
    Gender:
    Male
    Bay Area, California
    Vehicle:
    2002 Tacoma TRD-OR DC 4x4
    Mirror_zpsem4phpld_b22289bd0e2b8382911a0eb28181e285229951c3.jpg

    Corner7171_zpsmgznoauk_0fa2442ada6e44f9970c3ffa36849fac1bf0d78f.jpg
     
    tcBob likes this.
  8. Nov 16, 2018 at 1:55 PM
    #8
    Matic

    Matic The "OFG" Baby!!!

    Joined:
    Sep 8, 2009
    Member:
    #22436
    Messages:
    26,677
    Gender:
    Male
    First Name:
    Tricky Dick
    Easley, SC
    Vehicle:
    1 owner 2002 TRD, SR5, DC, 2.7. Full OME suspension, STT pro's.
    OME 881 coils with OME nitrochargers shocks up front. TC UCA's OME Dakars with extra leaf in the rear. Warn 8000 winch with 80ft custom braided synth line. Custom 60ft synth extension. All pro tube bumper, Hi-lift jack, Safari Snorkel, Wilco tiregate. 2019 Jeep JLUR.
    Welcome.
    1st gen, best gen. :cheers:
     
  9. Nov 16, 2018 at 2:36 PM
    #9
    02hilux

    02hilux What do you mean there’s no road, I’m here

    Joined:
    Sep 14, 2016
    Member:
    #197244
    Messages:
    6,271
    Planet: EARTH
    Nice

    Limited edition too. Those seats are better then non limited ones
     
  10. Nov 16, 2018 at 10:35 PM
    #10
    tmswell

    tmswell [OP] Well-Known Member

    Joined:
    Oct 23, 2018
    Member:
    #270369
    Messages:
    143
    Gender:
    Male
    Bay Area, California
    Vehicle:
    2002 Tacoma TRD-OR DC 4x4
    Are they? The adjustable lumbar -- is that the only difference regarding the seats?
     
  11. Nov 19, 2018 at 7:01 PM
    #11
    Matic

    Matic The "OFG" Baby!!!

    Joined:
    Sep 8, 2009
    Member:
    #22436
    Messages:
    26,677
    Gender:
    Male
    First Name:
    Tricky Dick
    Easley, SC
    Vehicle:
    1 owner 2002 TRD, SR5, DC, 2.7. Full OME suspension, STT pro's.
    OME 881 coils with OME nitrochargers shocks up front. TC UCA's OME Dakars with extra leaf in the rear. Warn 8000 winch with 80ft custom braided synth line. Custom 60ft synth extension. All pro tube bumper, Hi-lift jack, Safari Snorkel, Wilco tiregate. 2019 Jeep JLUR.
    Me thinks color coded fender flares also.
     
  12. Nov 20, 2018 at 9:54 AM
    #12
    tmswell

    tmswell [OP] Well-Known Member

    Joined:
    Oct 23, 2018
    Member:
    #270369
    Messages:
    143
    Gender:
    Male
    Bay Area, California
    Vehicle:
    2002 Tacoma TRD-OR DC 4x4
    Yes -- Limited so a lot of Chrome bits here and there (Bumpers, mirrors, handles) along with the fluffy seats.

    Correct! But, as it is with most adjustable lumbars, it's always a little inflated even when I'd prefer it completely flat haha!
    Correct! Color matched FFs. :thumbsup:
     
  13. Nov 20, 2018 at 11:40 PM
    #13
    707Tacoma

    707Tacoma Active Member

    Joined:
    Apr 7, 2018
    Member:
    #249764
    Messages:
    26
    Gender:
    Male
    First Name:
    Matthew
    Vehicle:
    2004 Toyota Tacoma
    Those upgrades. :ohsnap:
     
  14. Nov 21, 2018 at 4:34 PM
    #14
    tmswell

    tmswell [OP] Well-Known Member

    Joined:
    Oct 23, 2018
    Member:
    #270369
    Messages:
    143
    Gender:
    Male
    Bay Area, California
    Vehicle:
    2002 Tacoma TRD-OR DC 4x4
    Got the BudBuilt front Skid. They were kind enough to send the front skid while they build the transmission skid so I could have it in time for my trip to Death Valley.

    Got the Bed Bar from LowRangeOffRoad and I'll have to get creative to install it with the plastic bed liner. So that's next!

    SkidPlate_zpsauhqgkpj_fbd95ff3f19b4d798b343cfdc41b0e6afe2ff622.jpg

    BedBar22_zpstkm8nkh6_f9c05134c1f3c60c31a9f4e78eda651319b3fdfc.jpg
     
  15. Nov 25, 2018 at 10:05 PM
    #15
    tmswell

    tmswell [OP] Well-Known Member

    Joined:
    Oct 23, 2018
    Member:
    #270369
    Messages:
    143
    Gender:
    Male
    Bay Area, California
    Vehicle:
    2002 Tacoma TRD-OR DC 4x4
    Installed the skid without paint... then re-installed it with bed liner.

    SkidPlate_zpsauhqgkpj_d22e13e250faa84847abdc25ec085a4e60b9fb65.jpg


    Screen%20Shot%202018-11-25%20at%2010.00._fdd69de9ed08c2712175ed08f2dcaecaa3a17773.jpg
     
  16. Dec 4, 2018 at 2:26 PM
    #16
    tmswell

    tmswell [OP] Well-Known Member

    Joined:
    Oct 23, 2018
    Member:
    #270369
    Messages:
    143
    Gender:
    Male
    Bay Area, California
    Vehicle:
    2002 Tacoma TRD-OR DC 4x4
    Alright! Got a lot done on Soma (Silver Tacoma) :)
    I drilled new holes in the Bed Bar so the bolts wouldn't impact each other, painted it black with a rattle can and threw on the Hi-Lift. Works great.

    As I wrapped up that project, I got the CBI Bolt-On Rock Rails (bare metal, kick outs, no fill plates, & DOM - Drawn Over Mandrel). CBI Really pulled through on these Rails and got them to me in time before I went to Death Valley. Thanks again!

    The Rails Arrived:


    Got all set up for installation:


    Passenger side set up:


    Driver after rust-oleum bed liner:


    Driver side installed:


    Passenger side installed:


    I'll post some of the install in a bit.
     
    Area51Runner likes this.
  17. Dec 4, 2018 at 5:36 PM
    #17
    tmswell

    tmswell [OP] Well-Known Member

    Joined:
    Oct 23, 2018
    Member:
    #270369
    Messages:
    143
    Gender:
    Male
    Bay Area, California
    Vehicle:
    2002 Tacoma TRD-OR DC 4x4
    A little more details about the installation.
    Here's the view of the frame rail you're going to snug-fit these rails on.


    I recommend using a jack to press up each of the 4 rails, alternating which one you're jacking/pressing on the frame. (pre-painted)


    Painted and slowly making it's way on.


    Driver side almost completely pressed to the frame.


    for the driver side install, make sure you loosen up the brake line bracket and wiring so those bolts will slide right through.


    This is how the bolts should look between above the frame rail.


    And how Soma looked after a few hours in Death Valley this past weekend.
     
  18. Dec 4, 2018 at 11:55 PM
    #18
    tmswell

    tmswell [OP] Well-Known Member

    Joined:
    Oct 23, 2018
    Member:
    #270369
    Messages:
    143
    Gender:
    Male
    Bay Area, California
    Vehicle:
    2002 Tacoma TRD-OR DC 4x4
    Also spent the last week modifying the speaker brackets for some new JBLs. Took about 3 rounds and a lot of Felt around the door cards (Along with a few Door Clips) to get those installed without a ton of random noise.
     
  19. Dec 17, 2018 at 10:39 AM
    #19
    tmswell

    tmswell [OP] Well-Known Member

    Joined:
    Oct 23, 2018
    Member:
    #270369
    Messages:
    143
    Gender:
    Male
    Bay Area, California
    Vehicle:
    2002 Tacoma TRD-OR DC 4x4
    Got the Icon Suspension all installed.
    Notes for if anyone hasn't installed Icon, its rather simple --
    FRONT
    Step 1: Slightly loosen wheel lugs and lift vehicle and add support jack stands.
    Step 2: Remove front wheel (21mm)
    Step 3: Remove Sway Bar End Links - use a hex socket and wrench (I believe 17mm).
    Step 4: Remove the bottom bolt holding the bottom of the shock to the lower arm. tapping it out slowly with a ratchet extension, I used a pry bar leveraged against the upper arm and between the spring to compress the spring a bit and allow me to get the bottom bolt removed.
    lastly, I removed the top 3 bolts holding the top of the shock housing and popped right out--no problems.
    After installing the shock, make sure to tighten back up those end-links and torque everything to the proper specifications.
    REAR
    Step 1: Lift vehicle and remove wheel
    Step 2: Remove Spare Tire -- Its possible to do this without removing the spare but I pulled it for access.
    Step 3: Remove bottom bolt of the strut and 3 methods i tried to get that off was
    a) a tie rod puller that slowly slides the shock off the bottom mount.
    b) flat head screwdriver and tap the strut off.
    c) pry bar or tie rod separator to slide between the back washer and strut.
    Step 4: Remove top bolt and same options to slide that off.
    Note: the Icon shocks I had were the aluminum 2.0 and have a reservoir. For this specific shock, it's mounted to itself (comes with the necessary brackets). Note the orientation of your rear suspension articulation and orient the shock accordingly. For my truck, made sense to have the reservoir face the rear of the truck.
    tighten to 53 lb ft. (refer to manual or instructions) DO NOT GO OVER 90 lb ft. or the bolt will split in 1/2... not that that happened to me and I had to manufacture my own bolt....
    If you're having difficulty installing the strut, use another jack to either adjust that side of the axle up or down to help the strut on the mount.
    Should be good to go (this should be one of the easier installs you do :)
     
  20. Dec 26, 2018 at 8:39 PM
    #20
    tmswell

    tmswell [OP] Well-Known Member

    Joined:
    Oct 23, 2018
    Member:
    #270369
    Messages:
    143
    Gender:
    Male
    Bay Area, California
    Vehicle:
    2002 Tacoma TRD-OR DC 4x4
    finally installed the add-a-leaf:
    Follow the instructions provided by Icon Vehicle Dynamics and here are a few things that helped me along the way.
    1) jack supports on the frame along with a 2nd lift at the axle to move up and down when removing and installing the add-a-leaf pack.
    2) you will not need to remove the OEM Leaf Spring pack however, you will need to remove the Overload leaf (The bottom-most leaf). I used a tie-rod puller to hold the bolt in place while removing the middle leaf nut holding the bands together. I used C-clamps around the bolt to firmly hold the bands together to remove the bolt, loosened them to install the final add-a-leafs (Rather swapping for the overload leaf) and tightening them again to install the leafs together. lastly, you will need to cut the center bolt to 1/2" and the U-bolts provided by Icon will need to be cut, as well.
     

Products Discussed in

To Top