1. Welcome to Tacoma World!

    You are currently viewing as a guest! To get full-access, you need to register for a FREE account.

    As a registered member, you’ll be able to:
    • Participate in all Tacoma discussion topics
    • Communicate privately with other Tacoma owners from around the world
    • Post your own photos in our Members Gallery
    • Access all special features of the site

The Pope's Incredibly Slow Build

Discussion in '2nd Gen. Builds (2005-2015)' started by PopeHodge, Dec 9, 2018.

  1. Dec 9, 2018 at 4:52 PM
    #1
    PopeHodge

    PopeHodge [OP] Well-Known Member

    Joined:
    Jan 14, 2013
    Member:
    #95220
    Messages:
    232
    Gender:
    Male
    High Country, Colorado
    Vehicle:
    23 TRD OR DCLB
    Hey Everyone! Welcome to my build page.

    2013 Toyota Tacoma TRD Sport
    DCSB
    Magnetic Grey Metallic
    5-Speed Auto

    IMG-8046.jpg

    Current Mods as of 06/25/2020

    Suspension:
    - ToyTec Boss 2.5 Series Performance Extended Travel Coilover
    - Rear ToyTec BOSS 2.0 Remote Reservoir Shocks
    - ToyTec 2” Add-A-Leafs (Removed)
    - OME Dakar ELO95R Rear Leaf Springs
    - OME Dakar AAL
    - SPC Adjustable Upper Control Arms
    - ToyTec U-Bolts

    Wheels & Tires:
    - @SCSPerformance SCS Stealth 6 17 X 8.5
    - BFGoodrich KO2 265/70/17 (Removed)
    - Cooper AT3 XLT 285/70/17

    Interior:
    - WeatherTech Floor liners
    - Wet Okole Seat Covers Front & Back
    - @ImMrYo Mirror Relocation
    - LED Dome & Map Lights
    - Driver Seat Mag-lite Mod
    - Salex Center Console & Glovebox Organizers
    - Dog Platform
    - Dog Platform V2
    - Complete Soundproofing of all Four Doors
    - Soundproofing of Floor
    - @Papadave418 Drawer System

    Exterior:
    - OEM Roof Rack
    - Softopper (Removed)
    - Plasti-dipped Emblems Emblems back to stock.
    - Window Tint
    - @mattgecko Bed and Hood Lights
    - Bedmat
    - RedLine Tuning Hood Struts
    - Bullaculla Trailer Harness Relocate Bracket
    - TruXedo TruXport Tonneau Cover
    - @KB Voodoo 10” Bed Rack/Long Bed
    - Super Cheap TRD Preaux Grille
    - ARB 1250 Awning
    - @At The Helm Bed Stiffeners


    A Tacoma had been my dream car since I was a kid, and it was an awesome day when that dream got to become a reality. I purchased it brand new in February 2013. I still feel (pretty much) the same way about it as the day I got it.

    I'm going to do my best to catch up to where the truck is now. I have a problem of doing small mods and forgetting to take pictures beforehand and during the process.

    I didn't take any pictures at the dealership. I was too excited.

    The most important thing for me off the bat was preserving & protecting the interior.I had WeatherTech floor mats ordered before I took possession of the truck, so I put them in at the dealership and took off. Shortly after that, I added a set of Wet Okole seat covers, @ImMrYo mirror relocation bracket, LED dome & map lights, a bed mat, and bed lights from @mattgecko.

    IMG-6091.jpg
    IMG-6089.jpg
    IMG-6090.jpg
    IMG-6088.jpg
    IMG-6095.jpg

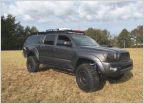
    Following these mods, the truck sat this way for awhile. Then I got the itch to get some new shoes. Knowing that it would be a long time before I was going to lift the truck, I decided to only go with 265/70/17 tires. I knew I wanted to support Vin and @SCSPerformance, so I picked up a set of SCS Stealth 6 in August of 2015.

    IMG-6078.jpg
    IMG-6092.jpg
    IMG-6093.jpg
    IMG-6096.jpg

    Shortly after I got these installed, I found a softopper on Craigslist. It's still on the truck today, but I can't wait for a different system.
    IMG-7875.jpg

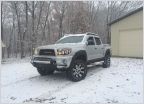
    The truck then essentially sat like this from August 2015 until July of 2018 when I travelled to Colorado, visited @Toytec Lifts , spent a long time bugging Hugo, and ended up walking out the door with one of their complete lift kits along with SPC UCA's. For my needs, and as someone who wants to get into more mild off-roading eventually but doesn't really get the chance to do a whole lot right now, this kit has been perfect.

    (Picture below is not with the lift installed)
    IMG-8046.jpg

    After the long road trip to Colorado, I was annoyed with how loud the truck is. It never really got to me before, but I guess I'm getting old (30 years).

    I read all of the soundproofing threads on here, ordered all of the materials to do all 4 doors, spent a TON of time doing it, and it dropped the cabin noise by 0.5 DB's. :annoyed:
    Not worth the time it took at all. I haven't given up on this process yet, as I plan on doing the roof and floor as well to see if that changes anything.

    The kit sat in the garage until I was able to take time to install it in October of 2018. I don't have any pictures post install yet, and the only picture I have during the install is the one below. I told you in the beginning I have a knack for forgetting to take photos.

    IMG-8588.jpg

    When I went back to my parents to see family for Thanksgiving, I noticed my pup didn't really like the hammock system I had in the backseat anymore. She was always fidgeting and just didn't seem comfortable. After researching a handful of build threads here, I decided to build her a platform for the back, to give her more space. I did the split design, to allow me to use one side of the seats if needed. (Not pictured is the tether system I have for her to protect her in the case of an accident.)
    IMG-8698.jpg
    IMG-8701.jpg

    After I built that, I realized my dog wasn't going to safely be able to jump up into the truck anymore with the 3" lift and added height of the platform. She's getting older (8 years) and she doesn't need to be making that jump if she doesn't have to. I realized that my dad had a bunch of left over scrap wood in his garage, along with some left over exercise mat. I quickly built a ramp for her to use to get in and out. Super simple, but works like a charm.

    Having her eat her dinner on the ramp to get her used to it. Took about 5 minutes after that to train her to walk up and down it and now she loves it.
    IMG-8703.jpg


    I'll have to get updated pictures of how the truck sits now. There aren't any major mods in the plans right now. I travel extensively for work and it's hard to justify putting a bunch into the truck right now. I hope to change that and add some sort of camping system, but we will see.

    Thank you for visiting this page. TacomaWorld has been an amazing resource for me. If you have any questions, feel free to ask!
     
    Last edited: Jun 24, 2020
  2. Dec 12, 2018 at 2:38 PM
    #2
    PopeHodge

    PopeHodge [OP] Well-Known Member

    Joined:
    Jan 14, 2013
    Member:
    #95220
    Messages:
    232
    Gender:
    Male
    High Country, Colorado
    Vehicle:
    23 TRD OR DCLB
    December 12th, 2018:

    Anti-Glare Hood Vinyl:
    After my last road trip, the sun was reflected off of the hood scoop and into my eyes almost the entire 9 hour trip.

    Hit up @CBoy808 and got one of his anti-glare decals. Ridiculously fast shipping. Used the wet/baby soap installation method and it went on fairly easily with some patience.

    Hood.jpg
     
    CBoy808 and doublethebass like this.
  3. Dec 12, 2018 at 11:44 PM
    #3
    CBoy808

    CBoy808 The Original Sticker Dude

    Joined:
    Mar 21, 2013
    Member:
    #100265
    Messages:
    1,053
    Gender:
    Male
    Vehicle:
    Tacoma Mall Crawler
    looks great thanks!
     
    PopeHodge[QUOTED][OP] likes this.
  4. Dec 22, 2018 at 8:46 AM
    #4
    PopeHodge

    PopeHodge [OP] Well-Known Member

    Joined:
    Jan 14, 2013
    Member:
    #95220
    Messages:
    232
    Gender:
    Male
    High Country, Colorado
    Vehicle:
    23 TRD OR DCLB
    December 21st, 2018:

    Drawer Build Started:

    For awhile, I was thinking about possibly getting a Decked system or some other form of pre-fabricated drawer system to keep things accessible and organized, and so that I could stop having to crawl into the bed to get things.

    Ultimately, they were all way too expensive. Not only that, I wanted to have a “half-bed” system, so I could use the other side for bigger items.

    I found the great write-up by @Papadave418 , and not only loved his design, but also really liked how he provided cut-lists, item lists, and blue-prints. I’m not the best at building this kind of stuff, so the fact that he had a proven, solid, and working system I figured it would be more than enough for me.

    Just got started last night, and am about to continue working on it here shortly.

    Started with Marine Grade 7-ply 1/2” Plywood and had a local cabinet company cut the wood. I then used a finishing sander to smooth out any imperfections, while keeping the edges for now. Using glue, brad nails, and eventually countersunk screws to hold everything together.

    I don’t know what I’m doing, but we are figuring it out as we go.

    If you’re interested in seeing better pictures and a much better thread regarding this drawer system, please check out @Papadave418 thread!!

    DF567EFB-EF6B-438B-A3D9-0AC1598CD0AC.jpg
    9C0CEFE7-AB38-4381-B153-C56CD6978685.jpg
    C3300F74-B0F5-4F64-946A-054744C0F9DE.jpg
     
    Papadave418 likes this.
  5. Dec 22, 2018 at 2:59 PM
    #5
    Papadave418

    Papadave418 Well-Known Member

    Joined:
    Jul 17, 2017
    Member:
    #224251
    Messages:
    1,935
    Hey this is awesome! I hope it goes well and you are off to a solid start!
     
    PopeHodge[OP] likes this.
  6. Dec 23, 2018 at 6:13 PM
    #6
    PopeHodge

    PopeHodge [OP] Well-Known Member

    Joined:
    Jan 14, 2013
    Member:
    #95220
    Messages:
    232
    Gender:
    Male
    High Country, Colorado
    Vehicle:
    23 TRD OR DCLB
    Drawer Build Update:

    Made some decent progress yesterday and today, but after some major frustration and a handful of time redoing some things multiple times, I’m sort of at a stand still.

    Have quite a bit left to do, but mentally I need to step back and look at how to go about it.

    C9BD4604-8BE1-46EE-82E0-00E41DB4E00A.jpg 7CC0E612-BD58-48A2-84B2-4B33CF9A62FA.jpg F8081A08-ECA7-483B-A98A-856EB0E8E30F.jpg 134DEC89-6510-4454-A868-884BABFBC74B.jpg FDBFDBEB-A7D3-41D9-A772-2B33A16B4ABD.jpg
     
  7. Dec 23, 2018 at 8:03 PM
    #7
    Papadave418

    Papadave418 Well-Known Member

    Joined:
    Jul 17, 2017
    Member:
    #224251
    Messages:
    1,935
    Looks good. What issue are you having
     
  8. Dec 23, 2018 at 9:40 PM
    #8
    PopeHodge

    PopeHodge [OP] Well-Known Member

    Joined:
    Jan 14, 2013
    Member:
    #95220
    Messages:
    232
    Gender:
    Male
    High Country, Colorado
    Vehicle:
    23 TRD OR DCLB
    @Papadave418 The coffee table lifts I'm using are different than yours, and didn't want to play nice. They were bent and the tolerances are different on each one, so it took quite a bit of work getting them to sit square. I still don't love that they're spring loaded, and may end up changing them out later on, but they'll work for now.

    I'm trying to figure out how I'm going to do the bottom "faceplate". I like your piano hinge, but I mounted my stove top tracks a little different so I'm not quite sure exactly how I'm going to tackle that part.

    Put my first coat of poly on just now. I think my plan is to poly all of the inner wood, and then paint the "carcass" black.
     
  9. Dec 23, 2018 at 10:06 PM
    #9
    Papadave418

    Papadave418 Well-Known Member

    Joined:
    Jul 17, 2017
    Member:
    #224251
    Messages:
    1,935
    Yeah those finer points of the build are tough to figure out sometimes based on your configuration. I was building solo and couldn’t get the coffee table lifts to stay shut for me to mount them. Had to zip tie them halfway closed so that I could mount them. It was a pain!
     
    PopeHodge[OP] likes this.
  10. Dec 25, 2018 at 12:14 AM
    #10
    Sauzacoma

    Sauzacoma IG: @Stancaban

    Joined:
    Apr 18, 2017
    Member:
    #216580
    Messages:
    193
    Gender:
    Male
    First Name:
    Chris
    Southern California
    Vehicle:
    2017 TRD Off-Road (DCLB)
    Question about the poly you're using. Does it give off any harmful fumes? I was told by some workers at HD that certain polys aren't safe for close quarters due to the fumes or "toxic chemicals" in it. I took what they said with a grain of sand cuz, well its home depot...
     
  11. Dec 25, 2018 at 7:17 AM
    #11
    Papadave418

    Papadave418 Well-Known Member

    Joined:
    Jul 17, 2017
    Member:
    #224251
    Messages:
    1,935
    I’m not sure, I did mine outside because I prefer to breathe the cleanest air I possibly can :)
     
    PopeHodge[OP] likes this.
  12. Dec 25, 2018 at 10:44 PM
    #12
    PopeHodge

    PopeHodge [OP] Well-Known Member

    Joined:
    Jan 14, 2013
    Member:
    #95220
    Messages:
    232
    Gender:
    Male
    High Country, Colorado
    Vehicle:
    23 TRD OR DCLB
    The poly I used barely had an odor to it at all. I did it in the garage, but had one of them opened a third of the way. I would recommend approaching it the same way I would with painting, or any other work with an odoriferous substance, and use it in a well ventilated area.
     
    Sauzacoma[QUOTED] likes this.
  13. Dec 25, 2018 at 10:54 PM
    #13
    Sauzacoma

    Sauzacoma IG: @Stancaban

    Joined:
    Apr 18, 2017
    Member:
    #216580
    Messages:
    193
    Gender:
    Male
    First Name:
    Chris
    Southern California
    Vehicle:
    2017 TRD Off-Road (DCLB)
    I really dig this, especially the multiple layers of slides and surfaces! Those hinges are sweet too, I have them on a coffee table at home, never thought of incorporating them in a storage build, but man oh man do I like it. I just wrapped up my thread on my storage solution so I'm going through looking at others trying to gain more inspiration.
    https://www.tacomaworld.com/threads/3rd-gen-tacoma-bed-storage-platform-build.584111/#post-19455228
    ^there it is if you wanna take a look!
     
    PopeHodge[QUOTED][OP] likes this.
  14. Dec 28, 2018 at 9:07 PM
    #14
    PopeHodge

    PopeHodge [OP] Well-Known Member

    Joined:
    Jan 14, 2013
    Member:
    #95220
    Messages:
    232
    Gender:
    Male
    High Country, Colorado
    Vehicle:
    23 TRD OR DCLB
    Drawer Build Update 12/28/18:

    The holidays & family have taken precedence over this for the most part, but I have been able to make some progress.

    Have quite a bit of painting left to do. Need to finish both face plates. Then figure out how I’m going to do the D-Rings in the bed of the truck. I’d rather use turnbuckles into the existing D-Rings, but there’s I don’t think there’s really a way to make that work.

    12809656-E731-443A-8FEF-07BD6D2ACB96.jpg A3E36CBD-A1E1-4122-897E-91AC24B0EC72.jpg C1CAEEB0-325E-4542-AEFC-BBF14EE7D9F0.jpg
     
    Last edited: Dec 28, 2018
    Papadave418 likes this.
  15. Dec 30, 2018 at 10:04 PM
    #15
    Sauzacoma

    Sauzacoma IG: @Stancaban

    Joined:
    Apr 18, 2017
    Member:
    #216580
    Messages:
    193
    Gender:
    Male
    First Name:
    Chris
    Southern California
    Vehicle:
    2017 TRD Off-Road (DCLB)
    I used turnbuckles for mine and haven't had issues with the unit bending/tipping when my drawer & cooler slides are all the way out? Might not wanna rule it out!
    Also, apologies if I missed this somewhere, but what slides are you running?
     
    PopeHodge[QUOTED][OP] likes this.
  16. Dec 30, 2018 at 10:55 PM
    #16
    PopeHodge

    PopeHodge [OP] Well-Known Member

    Joined:
    Jan 14, 2013
    Member:
    #95220
    Messages:
    232
    Gender:
    Male
    High Country, Colorado
    Vehicle:
    23 TRD OR DCLB
    Yea, I know people have success with the turnbuckles. We will see what I end up doing. Like your build, by the way!

    The two smaller slides are from here:
    https://www.amazon.com/Liberty-D80622C-ZP-W-22-Inch-Bearing-Drawer/dp/B0064MDR76/ref=as_sl_pc_tf_til

    The two big 450lbs locking slides are from here:
    https://www.cabinetparts.com/p/fulterer-drawer-slides-side-mount-drawer-slides-FULFR5400L56

    Again, I can't take credit for finding them. PapaDave put up his purchase list on overlandbound and I just bought them blindly, essentially.
     
  17. Dec 30, 2018 at 11:30 PM
    #17
    Sauzacoma

    Sauzacoma IG: @Stancaban

    Joined:
    Apr 18, 2017
    Member:
    #216580
    Messages:
    193
    Gender:
    Male
    First Name:
    Chris
    Southern California
    Vehicle:
    2017 TRD Off-Road (DCLB)

    Well there's plenty of options out there. Could opt for a base plate of 1/2" ply bolted between the bed and d-rings, and then mount each component to that with L-brackets. I'm sure whatever you do will be cool, lookin forward to see it!

    Oh nice I remember looking cabinet parts' site, I love the lock in/out feature.
     
  18. Jan 3, 2019 at 12:54 PM
    #18
    PopeHodge

    PopeHodge [OP] Well-Known Member

    Joined:
    Jan 14, 2013
    Member:
    #95220
    Messages:
    232
    Gender:
    Male
    High Country, Colorado
    Vehicle:
    23 TRD OR DCLB
    Drawer & BedRack 01/03/19

    Well, it took longer than anticipated; but I guess I should’ve expected that with the holidays and work. However, it’s “finished”. I’m sure there will be some continual changes as I use it and figure out what works for my needs, but I’m happy with it right now.

    If you’re looking at this and haven’t yet, please check out @Papadave418 and his thread. He is the mastermind behind this, and was kind enough to provide basically all of the information needed. Thanks again, Dave!

    7083362B-42DF-42E9-AA91-DD5900305A84.jpg C46DCC31-E3E1-4A68-969B-55C605522B01.jpg CE668320-4C3D-4DE3-BF32-2574CA5AD834.jpg 70354201-4FF8-4702-B39B-140457DFD840.jpg

    After completing the drawer, I was able to put on my @KB Voodoo bed rack. Assembly was super easy and the thing is solid.

    5C585B16-987E-41E1-AD4F-24AAF4E75D8D.jpg
    9E210700-CE36-4A03-BE7A-979A63C329DB.jpg
    D08A7ED9-E054-4B9D-94EC-275A7BE3916F.jpg

    Now I just need to find time to use it all!
     
    Papadave418, Atomic and KB Voodoo like this.
  19. Jan 3, 2019 at 3:10 PM
    #19
    Papadave418

    Papadave418 Well-Known Member

    Joined:
    Jul 17, 2017
    Member:
    #224251
    Messages:
    1,935
    That looks awesome! Wow great job and very clean build, better than mine!
     
  20. Jan 14, 2019 at 1:42 AM
    #20
    basically_stock_

    basically_stock_ 3rd Shift Lurker

    Joined:
    Jan 9, 2016
    Member:
    #174488
    Messages:
    252
    Gender:
    Male
    First Name:
    Eric
    Iowa
    Vehicle:
    2009 TRD Sport, Free & Clear
    2" lift, SCS Ray 10, Falken Wildpeak's
    Looks good so far
     
    PopeHodge[OP] likes this.
To Top