

-
Welcome to Tacoma World!
You are currently viewing as a guest! To get full-access, you need to register for a FREE account.
As a registered member, you’ll be able to:- Participate in all Tacoma discussion topics
- Communicate privately with other Tacoma owners from around the world
- Post your own photos in our Members Gallery
- Access all special features of the site
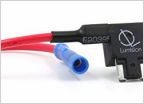 Which fuse to add-a-circuit for an LED light bar switch?
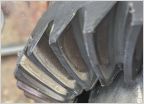 Read my Ring/Pinion wear
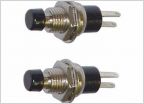 GLOVES BOX LIGHTS
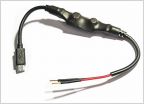 Dash Cam Install - Will it work
 Looking for plug diameter and pitch
 2016 aftermarket tow hitch / wiring mounting installation question
Upper control arm bolts?
Discussion in '3rd Gen. Tacomas (2016-2023)' started by Hiluxski, Feb 8, 2017.
Page 2 of 5
Page 2 of 5
