1. Welcome to Tacoma World!

    You are currently viewing as a guest! To get full-access, you need to register for a FREE account.

    As a registered member, you’ll be able to:
    • Participate in all Tacoma discussion topics
    • Communicate privately with other Tacoma owners from around the world
    • Post your own photos in our Members Gallery
    • Access all special features of the site

No Name For It Yet

Discussion in '3rd Gen. Builds (2016-2023)' started by Oscar I, Dec 26, 2018.

  1. Dec 26, 2018 at 4:34 PM
    #1
    Oscar I

    Oscar I [OP] No longer a toyota driver

    Joined:
    Dec 23, 2018
    Member:
    #276746
    Messages:
    683
    Gender:
    Male
    EDIT 12-31-2018
    In an effort to keep it semi organized in here I'm going to link each install to this page for quick reference.
    Edit 2 same day.
    I'm also going to keep this thread as an adventure report thread.
    Links will be at the bottom of this post.
    ________________________________________________________________

    Getting ready to start it. So this is a place holder of sorts.


    And I have no idea what to call this thing yet. I traded in the Grouchicon on it.

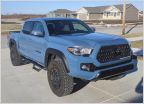
    2019 DCSB TRD OR
    Premium and Tech Packages
    [​IMG]

    [​IMG]


    Stuff already done.
    1. AJT Fob: Link to install
    2. N2 Auto Start: Link to install
    3. ECGS Needle Bearing Eliminator
    4. OCD organizers: Link to install
    5. Bunch of Toyota themed patches: Most Recent Patch Whore Post
    6. Tacform offroad cell mount.
    7. Taco Garage DMM
    8. OME ish Lift Kit

    To do list

    1. Breather extensions
    2. AC drain mod
    3. Sliders (leaning toward expedition one right now)
    4. @KB Voodoo high rise bed bars (enroute)


    Items still debating

    1. Skids
    2. Bumpers
    3. Winch
    4. Traction pads
    -----------------------------------------------------------------------------
    This also is going to be a reference for all my adventures in the Taco.
    I'll post links here to the posts about the adventures as they happen.

    Newfoundland Mountains 12-30-2018 with Expedition Utah
     

    Attached Files:

    Last edited: Jan 18, 2019
    Rockefelluh and SCHALICKE like this.
  2. Dec 27, 2018 at 1:02 PM
    #2
    Oscar I

    Oscar I [OP] No longer a toyota driver

    Joined:
    Dec 23, 2018
    Member:
    #276746
    Messages:
    683
    Gender:
    Male
    AJT Key Fob Review and Assembly
    This is the first mod I have done to the Tacoma. Not because it was the first thing I wanted it’s just the first one to show up.
    The first thing I noticed about the Tacoma when I test drove it was the PTS (Push to Start) key is very flimsy and light weight. While sitting in the dealership I actually had it slide out of my pocket. With all the things I access these days having gone to electronic codes or biometrics I don’t carry a key ring anymore to weight it down and that key falling out while sitting was concerning. Granted I was kicked back with my feet up waiting on them but still. So, when I was browsing the forum and saw these I thought I’d give it a try. In addition to being a bit heavier than factory and substantially sturdier I liked that I could color match it to my Calvary Blue 2019. Despite the cosmetic appeal this change also lets it stand out from other Toyota keys.
    Here is how it came packaged.
    I assume the screws were in a separate bag because you can select from a few screw colors.
    [​IMG]
    Comparing to the OEM fob it’s about the same size just not as rounded
    [​IMG]
    [​IMG]
    To put this together is a simple task.
    First step is to get the guts out of the OEM Fob. Opening it is done with the metal key inside the fob.
    [​IMG]
    Once open simply move the guts to the new fob.
    [​IMG]
    Next take the spring out of the hardware bag and press it into the key release.
    [​IMG]
    Then insert it into the space for the release. One side is deeper the other than other, so it won’t go together backwards.
    [​IMG]
    Finally place the back plate on and install the screws. Don’t crank them down just tighten them to snug and maybe a ¼ turn more.
    [​IMG]
    I think it matches the Calvary Blue well.

    [​IMG]
     
    Last edited: Dec 27, 2018
  3. Dec 28, 2018 at 3:08 PM
    #3
    Oscar I

    Oscar I [OP] No longer a toyota driver

    Joined:
    Dec 23, 2018
    Member:
    #276746
    Messages:
    683
    Gender:
    Male
    Waiting on a bunch of parts so today was free mods or what I already had.

    Put a couple of my patches on the headliner and changed the off screen on the deck.
    I have a bunch of Toyota patches on the way too so I'm saving some room for them before my other 50 some odd patches get put in.

    [​IMG]

    [​IMG]

    And decided to wheel it this weekend.


    Taking her out this weekend and no bumpers yet. Need a recovery point for the rear. Wont be the first rig I've gotten stuck with a drive out tag.
     
    Last edited: Dec 28, 2018
    SCHALICKE likes this.
  4. Dec 29, 2018 at 2:46 PM
    #4
    Oscar I

    Oscar I [OP] No longer a toyota driver

    Joined:
    Dec 23, 2018
    Member:
    #276746
    Messages:
    683
    Gender:
    Male
    Heading out for the first time in a Toyota in probably 15 years. It’s nice having the space for all my recovery gear and everything without having to be creative with where to put them. I don’t know what I’m going to do with all this space.
    But speaking of space I hated how the glove box was a giant waste of space. That type of cavernous opening meant stack it high and hope it doesn’t fall or waste it. Browsing taco world came up with this.
    The OCD Glove Box organizer
    [​IMG]
    Center console was the same way. Here I did a mix of OCD and EDBETOS. They work nicely together. I would have gone OCD for both but couldn’t find one with a coin holder.
    [​IMG]
    Then I had to add my trusty Trasharoo. This won’t stay on all the time but IF I’m headed out on the trail she comes with me. Picking up trash as I go and having a convenient place to put the trash the group generates is handy. I adhered to the tread lightly principles long before I heard of them. Working with them and the Blue-Ribbon Coalition as I got more into the off-road game meant this thing was a necessity. Nice that it mounts to the tailgate easily.
    [​IMG]
    And back to gear stowage. I needed somewhere to put all the trail essentials. In the Jeep I used a lot of bags as they would conform to odd spaces. Here I have a bed, but they just slide around too much back there. (bed mat is on the list of mush haves now) So after browsing the box stores looking for a solution I found these at Home Da Pot. A good height so not a lot of wasted space and the cover still closes easily. Enough room I’m not worried about a bed mat making them too tall either. Probably going to pick up a few more for camping gear come spring. 9 bucks each if you’re looking.
    [​IMG]
    [​IMG]
     
    Thunder Fist likes this.
  5. Dec 29, 2018 at 2:49 PM
    #5
    Taco_Outcast

    Taco_Outcast Active Member

    Joined:
    Dec 23, 2018
    Member:
    #276719
    Messages:
    26
    Gender:
    Male
    Vehicle:
    2019 TRD Off-Road w/ tech and premium
    Looks good! What bumpers are you going with?
     
    GottaTacoma and Oscar I[OP] like this.
  6. Dec 29, 2018 at 2:55 PM
    #6
    Oscar I

    Oscar I [OP] No longer a toyota driver

    Joined:
    Dec 23, 2018
    Member:
    #276746
    Messages:
    683
    Gender:
    Male
    Thats a great question. I have to sell my other truck before I can worry about that too much so I haven't really dived into bumpers yet. I know I want something that is high clearance on the front and the rear needs to cut the bed back to wheel well so that coming off rocks I don't trash the bed.
     
  7. Dec 29, 2018 at 3:05 PM
    #7
    Steves104x4

    Steves104x4 Well-Known Member

    Joined:
    Apr 17, 2010
    Member:
    #35468
    Messages:
    15,834
    Gender:
    Male
    First Name:
    Steve
    Buffalo NY
    Vehicle:
    2010 RC 2.7 4x4
    BUCKLE UP! It makes it harder for Aliens to pull you out of your Truck.
    Good job, Oscar. Looking good! Edit: I’ve named your truck “The Gatekeeper” :rolleyes:
     
    Last edited: Dec 29, 2018
    Oscar I[OP] likes this.
  8. Dec 29, 2018 at 3:23 PM
    #8
    SuperBad

    SuperBad Well-Known Member

    Joined:
    Aug 13, 2016
    Member:
    #194456
    Messages:
    8,817
    Gender:
    Male
    First Name:
    Jason
    Dallas, TX
    Vehicle:
    2017 MGM Tacoma OR DCSB
    Truck stuff
    Heres some threads that may help when your ready to for bumpers.
    Front bumpers:
    https://www.tacomaworld.com/threads/complete-third-gen-tacoma-front-bumper-thread.502517/
    Rear bumpers:
    https://www.tacomaworld.com/threads/3rd-gen-rear-bumper-thread.530302/
     
    Oscar I[QUOTED][OP] likes this.
  9. Dec 29, 2018 at 3:29 PM
    #9
    Oscar I

    Oscar I [OP] No longer a toyota driver

    Joined:
    Dec 23, 2018
    Member:
    #276746
    Messages:
    683
    Gender:
    Male
    Gracious. Have one for sliders? My only requirement there is they are frame mounted and flare out in front of the rear tires. Not sure about functionality but I dig the look on that flare out. And no aluminum sliders. I beat up my last set so bad they weren't sliders they were smears.
     
    SuperBad[QUOTED] likes this.
  10. Dec 29, 2018 at 3:31 PM
    #10
    Thunder Fist

    Thunder Fist Well-Known Member

    Joined:
    Feb 11, 2017
    Member:
    #210312
    Messages:
    5,594
    Gender:
    Male
    First Name:
    David
    Birmingham, AL
    Vehicle:
    2017 MGM TRD OR DCSB
    Like, so many.
    Looks great!
     
  11. Dec 29, 2018 at 3:44 PM
    #11
    SuperBad

    SuperBad Well-Known Member

    Joined:
    Aug 13, 2016
    Member:
    #194456
    Messages:
    8,817
    Gender:
    Male
    First Name:
    Jason
    Dallas, TX
    Vehicle:
    2017 MGM Tacoma OR DCSB
    Truck stuff
    never seen one for sliders. Steel with kick outs are easy to find. Next question is bolt on or weld on. You may have a local shop that sells them and could save on shipping. I went bolt on but it this is my first 4wd vehicle and I cant weld. Kinda wish I would have just done weld on and saved some money.
     
  12. Dec 29, 2018 at 3:49 PM
    #12
    Oscar I

    Oscar I [OP] No longer a toyota driver

    Joined:
    Dec 23, 2018
    Member:
    #276746
    Messages:
    683
    Gender:
    Male
    I need a new welder but I can weld decently.
    I built this as my first major welding project.

    [​IMG]2018-10-13 14.55.14 by Oscar Indy, on Flickr

    [​IMG]2018-06-24 14.13.02 by Oscar Indy, on Flickr

    Its a long process but I love the trailer.
     
    SuperBad[QUOTED] and Steves104x4 like this.
  13. Dec 29, 2018 at 4:58 PM
    #13
    Oscar I

    Oscar I [OP] No longer a toyota driver

    Joined:
    Dec 23, 2018
    Member:
    #276746
    Messages:
    683
    Gender:
    Male
    Utah is a fun state. It's too hot or too cold alot.
    Enter the auto start. N2 Designs hooks up taco world members so shoot him a message.
    I'll have a write up and how to done for this soon.

    [​IMG]
     
    SuperBad likes this.
  14. Dec 29, 2018 at 6:03 PM
    #14
    Oscar I

    Oscar I [OP] No longer a toyota driver

    Joined:
    Dec 23, 2018
    Member:
    #276746
    Messages:
    683
    Gender:
    Male
    FB_IMG_1546134130280.jpg I may or may not be a patch whore
     
    SuperBad likes this.
  15. Dec 29, 2018 at 8:19 PM
    #15
    SuperBad

    SuperBad Well-Known Member

    Joined:
    Aug 13, 2016
    Member:
    #194456
    Messages:
    8,817
    Gender:
    Male
    First Name:
    Jason
    Dallas, TX
    Vehicle:
    2017 MGM Tacoma OR DCSB
    Truck stuff
    That'll look good behind the Taco!
     
  16. Dec 30, 2018 at 6:57 PM
    #16
    Oscar I

    Oscar I [OP] No longer a toyota driver

    Joined:
    Dec 23, 2018
    Member:
    #276746
    Messages:
    683
    Gender:
    Male
    Well I doubled the number of miles I have on the truck today. Spent the whole day wheeling the high desert of Western Utah with some kick ass guys.

    Super impressed with the truck. Love the crawl control and MTS. Put them to the test in the snow on the trail and was happy with it. Ran the locker a few times to and everything worked as advertised.... EXCEPT.

    Screw those factory tires. I have the worst luck with Goodyears. I'll post pictures once I'm done recovering from 14 hours on the road with a toddler and a pregnant wife.

    Let's suffice it to say that I managed to pop the same tire twice.... yeah twice. 20181230_120556.jpg
     
  17. Dec 31, 2018 at 1:03 PM
    #17
    Oscar I

    Oscar I [OP] No longer a toyota driver

    Joined:
    Dec 23, 2018
    Member:
    #276746
    Messages:
    683
    Gender:
    Male
    Auto start write up as promised.

    [​IMG]
    Full disclosure N2 Designs is having me write a new install guide for this kit so if these end up being very similar to his included instructions in the future you will know why. This is not however what I sent him. Similar but that was much more professional. This is just a quick write up.
    Available here: https://www.n2designsinc.com/shop
    TacoWorld Discussion here: https://www.tacomaworld.com/threads...remote-starter-kit-at-mt-smart-module.568990/
    Required tools:
    • Philips head screw driver (long)
    • 10 mm socket and ratchet combo
    • Trim removal tools (recommended but not required)
    Box contents:
    • Remote start module x1
    • Wiring harness x1
    [​IMG]
    Steps:
    Remove lower steering column cover.
    1. Rotate steering wheel 90° off center in either direction.
    2. Remove screw in lower steering column cover.
    3. Rotate steering wheel 90° off center in the opposite direction of first turn.
    4. Remove screw in lower steering column cover.
    5. Squeeze both sides of lower steering column cover together and pull down. This will pop the cover loose. The upper and lower covers are clipped together.
    6. Slide lower cover forward and down to remove. Set aside.
    [​IMG]
    [​IMG]
    [​IMG]
    Remove driver side Door Entry Panel.
    1. The Door Entry Panel is the bottom plastic cover between the driver seat and the door.
    2. This is clipped in. Pull straight up or use trim tools to pop clips loose. Work rear to front until panel is free. Set aside.
    [​IMG]
    Remove driver side Kick Panel.
    1. On the firewall there is one plastic clip. To remove this clip use 10mm socket. It should come loose with a half turn.
    2. Using trim tools if available pull the kick panel towards the rear and center of the vehicle. Two white angled clips hold the panel in. Ensure the clips are with the panel. This will ensure easier installation when finished. Set panel aside.
    [​IMG]
    [​IMG]
    Remove lower driver side dashboard trim.
    1. Remove 10mm bolt at lower left corner of panel. This bolt was exposed by removing the kick panel.
    2. Remove two 10mm/Philips screws from lower edge of dashboard trim.
    3. The panel is held in by clips. Start at the bottom edge of the panel and using trim tool work around the edge until all clips are loose.
    4. At this point the panel will be loose but there are still several electrical connectors holding it. It is not necessary to remove these connections. Allow the panel to hang.
    [​IMG]
    Install N2 Designs Wiring Harness.
    1. The provided wiring harness allows for add on modules (Cellphone Integration available separately) and is also compatible with other vehicles. This harness has several connectors that WILL NOT be used for this installation.
    2. Locate the BLACK connector on the bottom right of the steering column and disconnect it.
    3. Route the supplied harness with the two black connectors behind the dash and up to the connector. Connect the factory wiring connector to the harness and then plug the harness into the steering column. Route the wire harness with the other wires in the area. SHOWN WITH HARNESS INSTALLED
    4. Route the white connectors labeled “B” to the upper left side where the engine control units are located.
    5. Using the image for reference remove the ECU connection indicated. Take the factory harness and plug into the connector labeled “B” (remove sticker to make connection). Plug harness into ECU.
    [​IMG]
    [​IMG]
    Connect to N2 Designs Auto Start Module. FIGURE 7
    NOTE
    The power connection and program button hold must be accomplished simultaneously. If you don’t get the programming lights indicated simply unplug and start over.​
    1. Locate the small 4 pin BLACK connector that connects to the N2 Designs Auto Start Module. There are two small black 4 pin connectors. Only 1 is keyed to fit the N2 Designs Auto Start Module.
    2. While holding the program button in on the module connect the power connector to the module. A single blue light will illuminate on the module. Release the program button. If you hold the button too long the light will change to different colors and combos.
    3. Connect the long white connector to the same side of the N2 Designs Auto Start Module as the power connector.
    4. Connect the small WHITE and the small RED connectors to the opposite side of the N2 Designs Auto Start Module.
    [​IMG]
    [​IMG]
    Pair N2 Designs Auto Start Module to Vehicle.
    1. With all connections made to vehicle and N2 Designs Auto Start Module.
    2. One single BLUE light illuminated on N2 Designs Auto Start Module.
    3. Turn the vehicle ignition on. Press the Start button twice.
    4. The light on the N2 Designs Auto Start Module will go off.
    5. Shortly after the blue light on the module will start flashing rapidly.
    6. Pairing is now complete. Turn off the vehicle. One press of the Start button.
    Stowing N2 Designs Auto Start Module
    1. Route the connected module and wiring harness up behind the ECUs. There is an open area the module and the harness wires can be stowed securely.
    Test the auto Auto Start
    1. Close all doors and hood.
    2. Ensure the vehicle is in a well-ventilated area to avoid exhaust gas inhalation.
    3. Press the lock button on the key fob three times SLOWLY (About 1 sec per press). The N2 Designs Auto Start Module is listening for 3 button presses registered by the OEM key system. If you push too quickly it won’t register the button presses.
    4. The vehicle should start its auto start process.
    5. To shut the vehicle off once started with the module press the lock button 3 more times.
    Reassemble
    1. Install the trim in reverse of the removal process.
    Done
     
    doublethebass and Shveet like this.
  18. Dec 31, 2018 at 4:06 PM
    #18
    Oscar I

    Oscar I [OP] No longer a toyota driver

    Joined:
    Dec 23, 2018
    Member:
    #276746
    Messages:
    683
    Gender:
    Male
    First adventure post
    -----------------------------------------------------------------------------------------
    I'm going to just piggy back on @Kevin B. report with some more pictures and some notes on them.
    Meeting at Delle early was a long haul for us. After 2 hours on the road Alice was ready for running circles around everyone and chasing @Rock Taco s dog around. Kyle is missing from this photo because he got the time right but the location wrong :p
    [​IMG]
    Luckily it was a holiday for the bombing range we had to cross. Something about grumpy men in Humvees didn’t really fit with the calm serenity the morning was offering.
    [​IMG]
    [​IMG]
    [​IMG]
    [​IMG]
    [​IMG]
    The mine before the cause way had a lot of neat stuff laying around.
    [​IMG]
    [​IMG]
    [​IMG]
    [​IMG]
    [​IMG]
    Alice didn’t quite make it onto the causeway
    [​IMG]
    It was a new experience driving across part of Salt Lake. Water on both sides was not something I had done before.
    [​IMG]
    [​IMG]
    Rubber chicken is judging you. (Don’t ask about the rubber chicken. The story is not as much fun as wondering about its mystery)
    [​IMG]
    [​IMG]
    Pump houses have a interesting back story. Shame to just let all that effort sit and rust.
    [​IMG]
    Train decided to come across the causeway as we were just done airing down. Not sure exactly what the etiquette is for this situation but we just waited. Anyone know the answer there? Keep going or stop and wait for them to pass?
    [​IMG]
    [​IMG]
    Making it out to the Newfoundlands we were treated to the first signs of a beautiful day with beautiful scenery. It was much warmer here than in the wind on the causeway.
    [​IMG]
    [​IMG]
    [​IMG]
    [​IMG]
    [​IMG]
    8 months pregnant and bouncing around in the taco. Shes a trooper and loves this stuff as much as I do. Tried to talk her into staying home but she didn’t wanna miss it.
    [​IMG]
    Just now 2, Alice was having a hard time climbing the hills to see the mines we were exploring. She found a ride tho. And added to her ever growing rock collection. I think this is the stop she earned her nick name. I wanna say it was Kevin that started calling her Boo like from Monsters Inc. Apparently her stomps and squeaks of excitement are way to similar. Honestly, I see it. That name may stick.
    [​IMG]
    [​IMG]
    The North Eastern corner of the Newfies
    [​IMG]
    [​IMG]
    Headed to find some trail thru fresh snow
    [​IMG]
    Half way to the cabin
    [​IMG]
    Kevin decided to go for a slip n slide ride
    [​IMG]
    [​IMG]
    The double locked 80 didn’t have any trouble
    [​IMG]
    North Western Corner of the Newfies
    [​IMG]
    This guy kept following me around.
    [​IMG]
    What a view
    [​IMG]
    That’s one way down the hill
    [​IMG]
    Mini arch created by a fallen spire on the northern most tip of the range
    [​IMG]
    Oh and I trashed a stock goodyear. Twice actually. Split a lug on the way across the causeway and it was just leaking a little. Threw some air in kept going. Until the graboid mentioned above decided to slash the side wall. Glad it was the tire that was already bad…..
    [​IMG]
    More pics of that when I get them.

    Route and Stats
    [​IMG]
    [​IMG]
    [​IMG]
     
    dman100, EatSleepTacos and Gunshot-6A like this.
  19. Dec 31, 2018 at 7:47 PM
    #19
    Oscar I

    Oscar I [OP] No longer a toyota driver

    Joined:
    Dec 23, 2018
    Member:
    #276746
    Messages:
    683
    Gender:
    Male
    The tire shenanigans.
    Yesterday I popped the factory front right tire twice.
    The first was just a slow leak. Actually split a lug down the middle. IE throw air in it and limp it home.

    But the second one was a 3 in gash in the sidewall followed up by stupidity with a stupid ass exhaust jack. I will never in my life use one of these again. 3 strikes its out on this. First two times I've tried these ended up using a bottle jack too.

    The fun starts with a ripped sidewall... You can see the offending rock on the left side of the trail.
    first try, bag stops the spare from going on and we can't get to the valve to release the air.
    (The clouds move in)
    [​IMG]

    Bag try two and it rolled sideways, blocking the air inlet.
    (now a light snow starts)
    [​IMG]

    Try three was a screw jack on the lower A-arm and it all got better.
    [​IMG]
     
    SuperBad likes this.
  20. Jan 1, 2019 at 6:06 PM
    #20
    Oscar I

    Oscar I [OP] No longer a toyota driver

    Joined:
    Dec 23, 2018
    Member:
    #276746
    Messages:
    683
    Gender:
    Male
    [​IMG]
    Craigslist score. 50 bucks for oem bed mat.

    [​IMG]
    First of my Toyota themed patches came in too.
     
    SuperBad likes this.

Products Discussed in

To Top