1. Welcome to Tacoma World!

    You are currently viewing as a guest! To get full-access, you need to register for a FREE account.

    As a registered member, you’ll be able to:
    • Participate in all Tacoma discussion topics
    • Communicate privately with other Tacoma owners from around the world
    • Post your own photos in our Members Gallery
    • Access all special features of the site

Done! Seat heaters installed front and rear 2015 quadcab

Discussion in '2nd Gen. Tacomas (2005-2015)' started by pearing, Jan 30, 2019.

  1. Jan 30, 2019 at 5:14 PM
    #1
    pearing

    pearing [OP] Well-Known Member

    Joined:
    Aug 4, 2018
    Member:
    #261610
    Messages:
    5,184
    Gender:
    Male
    Wisconsin
    Vehicle:
    2015 SR5 quadcab
    Done and they all work. Hardest part of the whole thing was the passenger seat! 20+ hours start to finish. Wiring intensive. Lots of hog rings. Learned LOTS! Only destroyed, two clips and one seat lever cover-$8.89 at Toyota dealer... Now on to the inverter, or... machine guns.20190123_162652.jpg
     
    EdinCincinnati and Pork Chopper like this.
  2. Jan 30, 2019 at 5:31 PM
    #2
    shaeff

    shaeff Roaming Around

    Joined:
    May 22, 2016
    Member:
    #187639
    Messages:
    582
    Gender:
    Male
    First Name:
    Chris
    Hudson Valley, NY
    Vehicle:
    '07 DCSB SR5 6MT 4x4
    Nice! What parts did you end up using/where’d ya get ‘em?
     
  3. Jan 30, 2019 at 5:34 PM
    #3
    EdinCincinnati

    EdinCincinnati Well-Known Member

    Joined:
    Mar 11, 2013
    Member:
    #99457
    Messages:
    2,445
    Gender:
    Male
    First Name:
    Ed
    Ohio
    Vehicle:
    2014 4x4 TRD OR
    How’d you do the rear seats? I’d like to see that.

    I have the same setup in the front. Great Addition!
     
  4. Jan 30, 2019 at 6:30 PM
    #4
    pearing

    pearing [OP] Well-Known Member

    Joined:
    Aug 4, 2018
    Member:
    #261610
    Messages:
    5,184
    Gender:
    Male
    Wisconsin
    Vehicle:
    2015 SR5 quadcab
    Here is the link to my discussion about the back seats, and front seats:

    Something different-Installing rear seat heaters... | Tacoma World

    Something Different: Rear seat heaters Pt II | Tacoma World

    The heating elements came from Amazon: Amazon.com: Besond Universal car seat Heater Rectangle hi-Off-lo Switch Carbon Fiber Heater Element Two Seats: Automotive

    Huh... I paid MORE for these. Switches fit perfect in the center "smaller" holes above the center consul, and the wiring is fairly straight forward. There are several threads on here how to do the actual installation for the front seats-start here and explore: Katzkin Leather and Seat Heaters Install | Tacoma World

    Lots of thinking and planning went into this project. I bought a Bussman 40A circuit breaker and three Blue Sea 4 fuse fuse blocks-get these on amazon. Get a good heatshrink tube kit. Get the style that has adhesive and lots of sizes. Also get some 1/4 inch expandable sleeving material-I bought a 100' roll. 10agw wire-I bought 100' and then several colors of 16agw at 25', plus all the fittings. I had 'kits' left over from my father in-laws estate and cut off the plastic... You will need two add a fuse micro size plus a box of 15a and two boxes of 3a micro fusses. For the others fuse blocks I used the larger size fuse and you will need a box of 10a and 15a plus two boxes of 3a fuses. I made a custom bracket and had it powder coated for the engine compartment. Also need a red 18" and black 12" battery cable-got mine from NAPA to go from battery to circuit breaker and the ground.
    Here is a picture of the engine compartment (I added a 6 fuse block as well for other additions...):

    20190119_103957.jpg


    I ran 10agw wire with an Anderson connector (JUNK!!!) through the firewall to a fuse block that I made up with more 10agw wire to go to the heater elements. All of this is connected and tucked under the center consul. An image of the fuse block:

    20190119_135752.jpg


    This is typical-the others use 16AWG wire and are for the power to the switch (switched!) and the lights so the lights on the switches come on when the lights are turned on. All of this is tucked under the center consul.
    Power for these are from the factory fuse block behind the coin tray. 3rd from the lt top row on mine was switch with the lights! Don't know if it dims and don't care as they are not that bright. These are all fused at 3 amps. 3 over or so from there, again top row of fuses is a 15A that I tied into for the switched power for the heaters. I used a 15a in the add a fuse and then 3a for each of the lines to the switches.
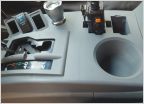
    For the rear seats I had to cut the plugs off from the heating elements and extend the length to get to the center consul where the switches are. I measured and cut holes for the rear switches in the back of the consul-not sure if I like it or not and will have to see on the durability... time and my children will tell!

    Feel free to pm me with questions.

    Pat
     
    Zac of all trades likes this.
  5. Jan 30, 2019 at 7:11 PM
    #5
    shaeff

    shaeff Roaming Around

    Joined:
    May 22, 2016
    Member:
    #187639
    Messages:
    582
    Gender:
    Male
    First Name:
    Chris
    Hudson Valley, NY
    Vehicle:
    '07 DCSB SR5 6MT 4x4
    Nicely done, I think I may have even commented in your other thread.
     

Products Discussed in

To Top