1. Welcome to Tacoma World!

    You are currently viewing as a guest! To get full-access, you need to register for a FREE account.

    As a registered member, you’ll be able to:
    • Participate in all Tacoma discussion topics
    • Communicate privately with other Tacoma owners from around the world
    • Post your own photos in our Members Gallery
    • Access all special features of the site

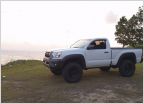
“Obi Wan Tacomi” out of NOVA

Discussion in '2nd Gen. Builds (2005-2015)' started by Choco_Taco, Jul 25, 2016.

  1. Apr 8, 2018 at 8:00 AM
    #101
    PennSilverTaco

    PennSilverTaco Encyclopedia of useless information...

    Joined:
    Jul 15, 2014
    Member:
    #134007
    Messages:
    66,133
    Gender:
    Male
    First Name:
    Charlie
    Central Bucks, Pennsylvania
    Vehicle:
    2010 Zombie Truck
    Will it work on my Taco's seats? That's what I'm interested in using it for...
     
  2. Apr 8, 2018 at 8:21 AM
    #102
    Choco_Taco

    Choco_Taco [OP] Sarcastic AF

    Joined:
    May 20, 2016
    Member:
    #187453
    Messages:
    1,776
    Gender:
    Male
    First Name:
    Tim
    Fredericksburg, VA
    Vehicle:
    2009 Black DCSB TRD OR
    As in a carpet cleaner? If so, I have no idea, but I’ll ask him. Let me know if that’s what you are talking about.
     
  3. May 15, 2018 at 2:59 PM
    #103
    Choco_Taco

    Choco_Taco [OP] Sarcastic AF

    Joined:
    May 20, 2016
    Member:
    #187453
    Messages:
    1,776
    Gender:
    Male
    First Name:
    Tim
    Fredericksburg, VA
    Vehicle:
    2009 Black DCSB TRD OR
    I forgot to add this picture to my own build page. :anonymous:

    I bought these headlights something like a year ago from a guy on Craigslist, but I haven’t had much time to put them on due to two boys involved in different sports, plus being an Assistant Scoutmaster for their Scout Troop. So yeah, excuses excuses.

    Anyway I finally took some time to put these on the truck on Friday, only to learn by Monday that they were illegal, so that would fail the state inspection and I could get a ticket. So Monday night I had to rush and take them back off putting the stock headlights back on before the storm came in, and before I got a ticket. But here’s a picture of what they looked like while they were on.
    Before:
    1C2322BE-6C60-45D1-B4FE-853BCFD4FEC5.jpg

    After:
    249CD80F-8FD5-4A1B-839F-E701CE91DEB5.jpg
     
    Last edited: Apr 4, 2020
    Casper66 and PennSilverTaco like this.
  4. May 15, 2018 at 5:16 PM
    #104
    Casper66

    Casper66 grumpy ass

    Joined:
    Apr 3, 2016
    Member:
    #183160
    Messages:
    31,546
    Gender:
    Male
    First Name:
    Chris
    Culpeper, Va.
    Vehicle:
    '15 DCSB TRD Sport 4wd super white (sold) '13 access cab SR5 4wd
    piddly stuff
    Light bar needs lights on it
     
  5. May 15, 2018 at 7:00 PM
    #105
    Choco_Taco

    Choco_Taco [OP] Sarcastic AF

    Joined:
    May 20, 2016
    Member:
    #187453
    Messages:
    1,776
    Gender:
    Male
    First Name:
    Tim
    Fredericksburg, VA
    Vehicle:
    2009 Black DCSB TRD OR
    :anonymous:
     
    Casper66[QUOTED] likes this.
  6. Jul 7, 2018 at 8:07 AM
    #106
    Choco_Taco

    Choco_Taco [OP] Sarcastic AF

    Joined:
    May 20, 2016
    Member:
    #187453
    Messages:
    1,776
    Gender:
    Male
    First Name:
    Tim
    Fredericksburg, VA
    Vehicle:
    2009 Black DCSB TRD OR
    I was at Camp Olmsted, Goshen Scout Reseration with my boys going through summer camp. As I have done for the past two years, I use the time they are in merit badge classes to do some mods to my truck. This week, I started putting front lights on my light bar. I wasn’t able to finish those due to the limited supplies I brought with me. I installed them and ran some of the wires, but will finish installing the switch later.

    The other thing I wanted to accomplish was cleaning the headlights. I bought a $20 Sylvania lens cleaning kit from O’Reillys and finally got around to doing them on Thursday. We’ve had a few run ins with black bears, so that shifted our camping priorities a bit. Anyway this is the kit I bought and the results are amazing. I will be very interested to see if these results last long, which I really hope it does.

    One tip, if you go this route, have a lot of water and paper towels with you. Since I was camping I didn't have a hose, I had to keep refilling my water bottle.

    6B3757B6-7145-408B-9C0A-60F9B0B962B6.jpg 63D59757-431E-404A-A3D7-45B39A1B2B38.jpg FD36C094-9D69-47A4-BD74-38EA0F31A4F8.jpg
     
    Casper66 likes this.
  7. Jul 8, 2018 at 11:24 AM
    #107
    Choco_Taco

    Choco_Taco [OP] Sarcastic AF

    Joined:
    May 20, 2016
    Member:
    #187453
    Messages:
    1,776
    Gender:
    Male
    First Name:
    Tim
    Fredericksburg, VA
    Vehicle:
    2009 Black DCSB TRD OR
    I was getting the tires rotated today and painted the calipers and drums. Not too thrilled about different colors front and back but it does look a lot better. As in the past, I used Rustoleum paint, and it turns out really good.

    62E90EAF-EDF4-4D38-8676-71DD9FB55531.jpg B06D45B6-243A-4229-AD17-7EC8ACFCF4A1.jpg
     
    Casper66 likes this.
  8. Nov 28, 2018 at 3:52 AM
    #108
    Choco_Taco

    Choco_Taco [OP] Sarcastic AF

    Joined:
    May 20, 2016
    Member:
    #187453
    Messages:
    1,776
    Gender:
    Male
    First Name:
    Tim
    Fredericksburg, VA
    Vehicle:
    2009 Black DCSB TRD OR
    Monday night I ordered these wheels. I was having SO many problems with the balancing of the old wheels, and the steering wheel was shaking at anything over about 50mph. The wife gave me the okay to order new wheels and I found these on sale for about $100/ea. A friend of mine who owns a mobile tire shop (basically brings the tire shop to you) ordered them, mounted and balanced. The old wheels were 16x8, and these are 16x9, so an inch wider, which means I have to do more trimming of the wheel well area. Hopefully once I pick up the 5100's from another member here, that won't be an issue at all! Here are some pictures of the rims and tires on the truck and I’m pretty happy with these.

    wheels.jpg
    3963B1FB-2E05-473F-951A-BAAA13181DCD.jpg
    A3B87139-4265-4071-BBB4-B0ACA59E9450.jpg
     
    Last edited: Apr 4, 2020
  9. Jan 19, 2019 at 6:00 AM
    #109
    Choco_Taco

    Choco_Taco [OP] Sarcastic AF

    Joined:
    May 20, 2016
    Member:
    #187453
    Messages:
    1,776
    Gender:
    Male
    First Name:
    Tim
    Fredericksburg, VA
    Vehicle:
    2009 Black DCSB TRD OR
    So I’ve been dealing with this for a while. Looks ghetto as hell but haven’t bothered ordering the right one yet. I’m trying to find the exact same kind with the rear male-female connectors but haven’t had luck yet. Guess no job is ever “done”.

    BA1926B9-A05B-4488-99E9-536AC9270B55.jpg
    4073C386-0F6C-441B-9155-F4E8D7B5FBEC.jpg
     
  10. Jan 28, 2019 at 3:26 AM
    #110
    Choco_Taco

    Choco_Taco [OP] Sarcastic AF

    Joined:
    May 20, 2016
    Member:
    #187453
    Messages:
    1,776
    Gender:
    Male
    First Name:
    Tim
    Fredericksburg, VA
    Vehicle:
    2009 Black DCSB TRD OR
    Well I fixed the switch issue. I had to trim the dash a bit with an razor and a chisel, but it fits really good and tight, and covers the marks I made on the dash with the razor. The switch is obviously much bigger than the switches next to it, and I really didn’t want to cut part of the dash, but figured I already had the switch in, and I didn’t want to buy another switch and rewire everything.

    Fixed:

    B57B837E-8ADC-4D8F-8E4C-7BBE14524B09.jpg

    Picture with lights off:

    38D590F1-082F-48F8-B493-9D1E14CE7BE6.jpg

    Picture with the lights on:

    53DF4F5B-C449-4214-8C81-6F42A88D33BE.jpg
     
    Last edited: Feb 4, 2019
  11. Feb 17, 2019 at 1:50 PM
    #111
    Choco_Taco

    Choco_Taco [OP] Sarcastic AF

    Joined:
    May 20, 2016
    Member:
    #187453
    Messages:
    1,776
    Gender:
    Male
    First Name:
    Tim
    Fredericksburg, VA
    Vehicle:
    2009 Black DCSB TRD OR
    I’ve been trying to coordinate with @Fish12South for about six months (or more) now to get his old set of Bilstein 5100s for the front. This has become increasingly important once I got my new wheels because the wheels are much wider than stock, and the driver side rubbed when turning the wheel hard to one side (like backing into my driveway).

    Today was finally the day! He drove up to help me install them, and I would have had a much more difficult time without his help- and his tools! :D

    We got them installed, set at .85, and only had a few issues to figure out since my LCAs wouldn’t drop out of the way. :annoyed: Lifted my front end a few inches and more importantly NO RUB!

    Before:
    1F287CFD-0497-45C0-AEEA-298F304623B1.jpg A284AAF4-09F3-4F36-AC23-9754676A3989.jpg 8A19307F-F268-4667-A144-BF6C97137585.jpg 9EFCE57E-8109-4955-A6D9-134A85391679.jpg 770BB0DF-D235-4020-B717-AAE309D41EA2.jpg 5BA84BBE-C45F-4EC0-B99D-6B7503204C48.jpg

    Ready to install!
    4584EB68-836E-4E7E-812D-E573E8CC35F4.jpg 597EE5B0-E754-473F-9D46-559311A82873.jpg C8DB3D51-D72C-47BD-A98E-1CCEE22CE2E7.jpg

    After:
    702A010A-01F6-4912-A592-FC537D2A7EA8.jpg
     
  12. Jun 23, 2019 at 5:17 AM
    #112
    Choco_Taco

    Choco_Taco [OP] Sarcastic AF

    Joined:
    May 20, 2016
    Member:
    #187453
    Messages:
    1,776
    Gender:
    Male
    First Name:
    Tim
    Fredericksburg, VA
    Vehicle:
    2009 Black DCSB TRD OR
    Yesterday it was out with the old...
    9D8F1D11-1B0C-4D67-A456-A6283A388A44.jpg
    and in with the new...
    BA69B144-AF6E-4AC6-8B70-455344583662.jpg

    I used the write-up from this thread
    https://www.tacomaworld.com/threads/hella-supertones-horns-install-guide.98465/ which made the install really easy, especially since the instructions provided by Hella were worthless.

    For the left horn, I bought a small ‘L’ bracket and mounted it on an unused hole with some small 10mm bolt, washer, and nut, which is also where I connected the horn’s ground wire. For the right side, the radiator tube blocks that same hole, so I reused the old horn’s mounting bolt, and connected the ground wire to one of the close by radiator mounts.

    The Hella horns come with its own relay, but unfortunately it’s pretty difficult to read so just take your time and make sure you are connecting the right thing.
    The relay has four spade connectors: #30 goes to the battery as this horn draws more amperage than the old horn; #87 goes to the positive of each horn (not marked-just pick a connector); #85 is the ground; #86 attaches to the existing horn wire.

    These are much louder than the stock horns, which is what I wanted, but a little “rice burner” sounding for my tastes. I would love to get some of the train horns, but those are much more expensive than I want to dish out right now.
     
  13. Feb 22, 2020 at 9:14 AM
    #113
    Choco_Taco

    Choco_Taco [OP] Sarcastic AF

    Joined:
    May 20, 2016
    Member:
    #187453
    Messages:
    1,776
    Gender:
    Male
    First Name:
    Tim
    Fredericksburg, VA
    Vehicle:
    2009 Black DCSB TRD OR
    One of my other hobbies is DE shaving razors and shave brushes. I am fortunate that I get to travel for my work, and take the opportunity to get something shaving related.

    It started with a cheap Chinese twist-to-open (TTO), and then I bought a Dirty Bird Bill bowl.
    4E0A74D0-0581-4BED-8017-F99CCA48F04A.jpg
    On a trip to Italy I went to the local supermarket and picked up a couple of European shaving creams not available over here.
    ED317D31-0436-4833-80ED-915B27D52070.jpg 51B1E044-FB52-4082-8160-9735824A6E62.jpg
    In Kansas City some years ago, I stopped at a swap-meet, and bought a gold Gillette 3-piece razor with a box, and a brush.
    75A15779-688A-42C7-B3BD-4402366A6B9C.jpg
    0C3B47A9-3C6C-40F4-AF29-37BAA55B2F48.jpg
    5DB3AB6B-DBAE-4498-8AA7-CF821C285C1B.jpg 669962C5-7436-4590-AA12-97C858EEB56A.jpg
    At an antique store here in town I bought a Gillette Ball-end Tech (not sure of year).
    E6BCC1F7-51C5-4EE4-B776-62E5F65F9D60.jpg
    Off Facebook marketplace I was extremely fortunate enough to get Rubberset 400 brush from a guy who had to ship it to me. I want to restore it with a new knot and clean up the handle, but haven’t gotten into that yet.

    7CE411FC-643C-48FB-88B9-9E69FE08B34E.jpg 4F42AF9C-C9CB-4428-944E-0FA13FAA3AAC.jpg
    A3CF7408-ECA8-440F-B714-61CE8DACF5BF.jpg

    I also picked up the RazoRock newer version of this brush which only has a synthetic knot that’s very soft and easy to face lather with.
    64574471-47FC-43FA-B47E-DC62D9D4E64D.jpg

    I also picked up about 100 Gillette DE blades from a guy locally.
    828DBE65-C059-403B-9738-0255B4DB4CF8.jpg

    I was recently in Florida and I picked up this 1966 Gillette Slim Adjustable. After cleaning / disinfecting the razor I’ve used it a few times and love it!

    86699F8D-62A6-414E-BA61-777700C8B65C.jpg 98D31A1E-BEED-42FC-83DF-31FEAC6019FE.jpg 3F46D1C4-A14F-489D-8071-E1CB73BD1557.jpg
     
    Last edited: Apr 25, 2020
  14. Feb 22, 2020 at 9:15 AM
    #114
    Choco_Taco

    Choco_Taco [OP] Sarcastic AF

    Joined:
    May 20, 2016
    Member:
    #187453
    Messages:
    1,776
    Gender:
    Male
    First Name:
    Tim
    Fredericksburg, VA
    Vehicle:
    2009 Black DCSB TRD OR
    While going through the COVID-19 quarantine time, I began the restoration of my Rubberset 400 ‘3’ shaving brush. I’m horrible at taking pictures during my projects. It took a while to get to this point. I used a knife to cut off the bristles, and remove them from the rubber. I then used a small drill bit to make holes in the rubber, finally getting it all out. I had to soak the handle in WD-40, and used two rubber grips to unscrew the two pieces. It was very dirty inside, so I still have some cleaning to do.

    00C6694C-1FB5-4149-83D1-7E22AE1667E4.jpg 3E1E49F7-0B80-4EDB-9FD2-7A45FEF99931.jpg

    and here’s the final product. There isn’t as much bloom in the knot as I would have liked, but I’m pretty sure that’s because I set the knot too low. Still a great brush and a really like the handle!

    47B848BA-932B-4F6F-8937-02EE6B96FAF8.jpg 51DB9196-3775-4203-A235-0675B56921E8.jpg
     
    Last edited: Nov 15, 2020
  15. Feb 22, 2020 at 9:15 AM
    #115
    Choco_Taco

    Choco_Taco [OP] Sarcastic AF

    Joined:
    May 20, 2016
    Member:
    #187453
    Messages:
    1,776
    Gender:
    Male
    First Name:
    Tim
    Fredericksburg, VA
    Vehicle:
    2009 Black DCSB TRD OR
    Last edited: Feb 22, 2020
  16. Apr 25, 2020 at 4:24 AM
    #116
    Choco_Taco

    Choco_Taco [OP] Sarcastic AF

    Joined:
    May 20, 2016
    Member:
    #187453
    Messages:
    1,776
    Gender:
    Male
    First Name:
    Tim
    Fredericksburg, VA
    Vehicle:
    2009 Black DCSB TRD OR
    Older picture....still makes me giggle.
    3E29ACC3-F759-4427-8D48-1A6D01D126E6.jpg
     
  17. Apr 25, 2020 at 4:28 AM
    #117
    Choco_Taco

    Choco_Taco [OP] Sarcastic AF

    Joined:
    May 20, 2016
    Member:
    #187453
    Messages:
    1,776
    Gender:
    Male
    First Name:
    Tim
    Fredericksburg, VA
    Vehicle:
    2009 Black DCSB TRD OR
    I painted the engine cover with plasti-dip, just to do something. I also used the Turtle Wax headlight restoration kit. I only used the compound instead of the sanding disk and polish like I had originally planned because I thought it did a pretty good job with just the compound. I also bought the Meguire’s PlastX, which I used on my wife’sSienna, and it did a really good job too.

    I looked back at my previous posts and the other headlight kit lasted about 2 years, so not a bad deal for the money.

    0C2AFB95-84DC-4264-8C8E-7E602CB3480A.jpg 29F4BDD5-B5E7-4F79-AEAE-99758F27F01B.jpg

    Before using the rubbing compound:
    0B8F7B83-FECA-4828-857B-A359839CA82A.jpg

    After two passes of the rubbing compounds.
    172562ED-C3C0-4425-AEDE-3540AA8323AC.jpg
     
    Last edited: Apr 25, 2020
  18. Nov 15, 2020 at 6:00 AM
    #118
    Choco_Taco

    Choco_Taco [OP] Sarcastic AF

    Joined:
    May 20, 2016
    Member:
    #187453
    Messages:
    1,776
    Gender:
    Male
    First Name:
    Tim
    Fredericksburg, VA
    Vehicle:
    2009 Black DCSB TRD OR
    Here’s my current patch collection. I don’t like to spend more than $10 on a patch, but the “Choco Taco” patch was just a bit more. But I wanted that one for obvious reasons. I’ll keep adding to it as I see patches that are cool and fairly inexpensive. This picture doesn’t actually capture all the patches, but I’m not use how to get them all into one picture.

    C4D5681E-3008-4689-A14D-8FB9AD1074A0.jpg
     
  19. Nov 15, 2020 at 6:15 AM
    #119
    Choco_Taco

    Choco_Taco [OP] Sarcastic AF

    Joined:
    May 20, 2016
    Member:
    #187453
    Messages:
    1,776
    Gender:
    Male
    First Name:
    Tim
    Fredericksburg, VA
    Vehicle:
    2009 Black DCSB TRD OR
    Here’s a couple more DE razors I picked up. Actually one is a single edge, it’s a Gem Featherweight, circa 1950’s. I picked this up for about $12 at an antique store near me, which I was really surprised how much DE stuff they had.

    EC42CCC1-FB58-46A5-AB26-D83E570A4C4F.jpg


    I then bought a travel Gillette, which is like a micro-size razor. I haven’t used it yet, but I’m sure I’ll get a lot of use out of this one. I plan on making a travel case out of an Altoids tin case, liner with some felt around cork to make the compartments in the case. I’d like to add blades inside the case, but I’m not sure how much space I’ll have to work with.

    2B161B96-7ABD-49F8-98FE-57CE9A5601E0.jpg
     
  20. Jan 7, 2021 at 2:18 PM
    #120
    Choco_Taco

    Choco_Taco [OP] Sarcastic AF

    Joined:
    May 20, 2016
    Member:
    #187453
    Messages:
    1,776
    Gender:
    Male
    First Name:
    Tim
    Fredericksburg, VA
    Vehicle:
    2009 Black DCSB TRD OR
    This is going to get picture heavy. This week we’re having our master bathroom redone. We’re having our useless soaker bathtub taken out, our crappy shower taken out and redone, a new floor put in, and a new toilet installed. We’re also having bead board with a chair rail installed.

    Here is the existing bathroom.
    0D1C7557-4A1F-4F43-93D5-5DE2B7BBD465.jpg EFF8F928-054A-4227-9EE1-0E912D18AFBB.jpg BB7E8134-A4B0-4476-8126-102E67C2EFBB.jpg 0E302E6E-7E8D-4003-B6FE-345D49D1C951.jpg
     

Products Discussed in

To Top