

-
Welcome to Tacoma World!
You are currently viewing as a guest! To get full-access, you need to register for a FREE account.
As a registered member, you’ll be able to:- Participate in all Tacoma discussion topics
- Communicate privately with other Tacoma owners from around the world
- Post your own photos in our Members Gallery
- Access all special features of the site
 CaliRaised Switch Panel
 Can't get into Temp Check mode on 2016 TRD
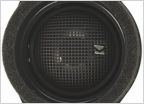 Yet another audio update thread
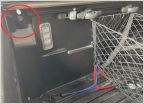 Adding Cargo Tie Downs
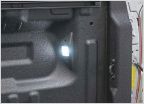 Stupid questing about factory lightning in bed. T
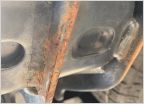 2017 Undercarriage Surface Rust
How to - Installing new Speakers in your 3rd Gen
Discussion in '3rd Gen. Tacomas (2016-2023)' started by SomethingNew71, Jul 4, 2018.
Page 5 of 10
Page 5 of 10
Products Discussed in


