

-
Welcome to Tacoma World!
You are currently viewing as a guest! To get full-access, you need to register for a FREE account.
As a registered member, you’ll be able to:- Participate in all Tacoma discussion topics
- Communicate privately with other Tacoma owners from around the world
- Post your own photos in our Members Gallery
- Access all special features of the site
 Stock suspension isn't working well, what is appropriate upgrade for me?
 Painting the knuckle?
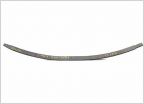 What suspension for my needs
 Anyone care to chime in...
 2016 Taco Off-road 4x4 6-9" lift - Parts list Help
3 leaf AAL installed on TSB leaf pack
Discussion in 'Suspension' started by Apex1, Mar 21, 2019.


