1. Welcome to Tacoma World!

    You are currently viewing as a guest! To get full-access, you need to register for a FREE account.

    As a registered member, you’ll be able to:
    • Participate in all Tacoma discussion topics
    • Communicate privately with other Tacoma owners from around the world
    • Post your own photos in our Members Gallery
    • Access all special features of the site

000Doodie000 - 15 DCSB - TRD - OR - Build Thread

Discussion in '2nd Gen. Builds (2005-2015)' started by 000doodie000, Feb 8, 2018.

  1. Dec 27, 2018 at 10:43 PM
    #41
    000doodie000

    000doodie000 [OP] Well-Known Member

    Joined:
    Jun 12, 2016
    Member:
    #189457
    Messages:
    860
    Gender:
    Male
    First Name:
    J
    Vehicle:
    2015 Taco TRD Off-Road
    Many and always modding Wheels Suspension lift Armor Electrical gadgets etc...
    I will post up the installation of the KC 10 inch light bar 4" rounds and a PIAA Driving light bar soon...
     
  2. Jan 6, 2019 at 6:41 PM
    #42
    000doodie000

    000doodie000 [OP] Well-Known Member

    Joined:
    Jun 12, 2016
    Member:
    #189457
    Messages:
    860
    Gender:
    Male
    First Name:
    J
    Vehicle:
    2015 Taco TRD Off-Road
    Many and always modding Wheels Suspension lift Armor Electrical gadgets etc...
    Well, I ended up sending the 4 RZR inch rounds back to KC. Long story short the quality for the cost just was not there. The build was fine but the wire splices were not good. Some folks might not care but I was not a fan. For the cost these should have proper soder and shrink-wrap. Customer service was great and there were no issues on the return.


    splices2.jpg

    The KC C-Series 10" light bar is great. Install coming soon.
     
    Last edited: Jan 6, 2019
  3. Jan 6, 2019 at 6:59 PM
    #43
    000doodie000

    000doodie000 [OP] Well-Known Member

    Joined:
    Jun 12, 2016
    Member:
    #189457
    Messages:
    860
    Gender:
    Male
    First Name:
    J
    Vehicle:
    2015 Taco TRD Off-Road
    Many and always modding Wheels Suspension lift Armor Electrical gadgets etc...
    Last edited: Jan 6, 2019
  4. Jan 19, 2019 at 5:33 PM
    #44
    000doodie000

    000doodie000 [OP] Well-Known Member

    Joined:
    Jun 12, 2016
    Member:
    #189457
    Messages:
    860
    Gender:
    Male
    First Name:
    J
    Vehicle:
    2015 Taco TRD Off-Road
    Many and always modding Wheels Suspension lift Armor Electrical gadgets etc...
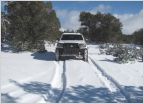
    Had some time to enjoy a snow run last weekend. (1/12) We ran Rampart Range Road and took 322 down. It was a great time cutting fresh tracks in the powder. There was between 5" to a Foot. maybe a little deeper in some spots. I had a minor slid off once and it took a bit to dig out enough to get back up. Also grabbed a quick shot of my buddy showing some flex. :)

    RR-322-1.jpg
    RR-322-powder.jpg
    RR-322-Thumbs-up.jpg
    post-digout.jpg
    flexing.jpg
     
  5. Apr 1, 2019 at 10:37 PM
    #45
    000doodie000

    000doodie000 [OP] Well-Known Member

    Joined:
    Jun 12, 2016
    Member:
    #189457
    Messages:
    860
    Gender:
    Male
    First Name:
    J
    Vehicle:
    2015 Taco TRD Off-Road
    Many and always modding Wheels Suspension lift Armor Electrical gadgets etc...
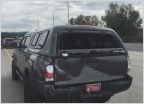
    Well its Cap (nearly finished) vs Cap (original design).

    * note I did ask to remove the round tubes in favor of Thule tracks. Other than that...

    1. the top sheet on the door is no longer aluminum (design change I was told about, but he never answered how the cost difference would be made up)
    2. the rear hatch is stainless steel ( a little wavy, from the PC process) The stainless was added for no extra charge, not sure I like the waviness though.
    3. The pad locks were a surprise add. (off-road they will beat the crap out of the cap, so not really useful)
    4. The door angle is longer than expected (I should have caught that in earlier photos, but I didn't)
    5. He did throw in the powder coat since its been a little over a year getting it done. (nice but, the price was about the same as aluminum cost) Maybe shipping will be free to make up for no aluminum top???​

    Its not completely finished yet, so I am holding out hope that I will like it more once its all finished. I am hoping the lockable T-latches are workable so I don't have to use the padlocks. (off-road they will beat the crap out of the cap). I suspect there is a different sort of latch in mind considering the odd clip looking parts on the sides by the 4 holes.

    I am not quite sure what to think at this point. I really don't want to lose out on my cash up front.... but shipping is likely to cost me another $150 to $200... unless that is how the difference is between the aluminum price and shipping will be made up.

    If the latches are not lockable and they are on the outside, I think if he offered me a full refund I would take it. I waited a year to get to this point and I am not sure the surprise design changes are all that exciting. :(


    (I keep going back and forth on it because it was not cheap, its been a long wait, and I am not sure I like the surprises... I am trying to not be ungrateful but again it was not cheap, and I am not sure many updates came without me prompting.)

    What are your thoughts?

    CAP VS CAP.jpg
     
    Last edited: Apr 1, 2019
  6. Apr 8, 2019 at 9:14 PM
    #46
    000doodie000

    000doodie000 [OP] Well-Known Member

    Joined:
    Jun 12, 2016
    Member:
    #189457
    Messages:
    860
    Gender:
    Male
    First Name:
    J
    Vehicle:
    2015 Taco TRD Off-Road
    Many and always modding Wheels Suspension lift Armor Electrical gadgets etc...
    Made a few minor changes to update...

    Updated Spod Mount to a custom one created by Meso Customs.

    upload_2019-4-8_22-14-1.jpgSpod Image 2.jpg


    Also Notice I installed the Meso Map lights and Dome lights (not pictured)
     
  7. Apr 25, 2019 at 9:05 PM
    #47
    000doodie000

    000doodie000 [OP] Well-Known Member

    Joined:
    Jun 12, 2016
    Member:
    #189457
    Messages:
    860
    Gender:
    Male
    First Name:
    J
    Vehicle:
    2015 Taco TRD Off-Road
    Many and always modding Wheels Suspension lift Armor Electrical gadgets etc...
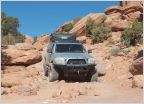
    Great trip out to Texas Creek this past weekend!

    Texas Creek-2.jpg
    Sangre de Cristo Mountains 1.jpg
    Texas Creek 1.jpg
    Sangre de Cristo Mountains 4.jpg IMG_20190420_135821.jpg
     
  8. Aug 30, 2019 at 7:53 PM
    #48
    000doodie000

    000doodie000 [OP] Well-Known Member

    Joined:
    Jun 12, 2016
    Member:
    #189457
    Messages:
    860
    Gender:
    Male
    First Name:
    J
    Vehicle:
    2015 Taco TRD Off-Road
    Many and always modding Wheels Suspension lift Armor Electrical gadgets etc...
    Its been a while and I have made a few changes to the nightmare long-distance over-promised and under-delivered custom cap. Here is the original design:
    000doodie000 tacoma model thule.jpg


    I have been madly working on changes to the "Custom rear cap" from KORE that I ordered as a custom job during a group buy on 3/2/18. In that time I saw a few other GB and larger projects he posted on Facebook. The product arrived a few weeks ago (arrived 8/28/19). I would definitely not recommend KORE it arrived with way too many unapproved & uncommunicated design changes, was beat up, and rusted. I felt like I received an expensive used product!

    I am not sure what his situation was completely but with only minimal communication it was really difficult not to be extremely frustrated. His wife did finally jump in on the business email and helped to get the cap shipped, so at least I received something. I did appreciate her responsiveness once she was involved. (If it was not for her, I am pretty sure I would have paid full price up-front and received nothing.)

    So why did it feel like I received an expensive used product???

    It arrived with
    • rusted hinges and latches
    • rusted clips and shocks shaft
    • there were missing bolts in one of the latches
    • the cap had quite a bit of damage: (The damage occurred because it was shipped in a make-shift crate (with no top or bottom) that busted the only two cross supports (one diagonally across the top and one diagonally across the bottom) See photos below for most of the damage.

    The final product was also supposed to ship with multiple components that failed to arrive with the cap: (here are a few examples)
    • keys for the padlocks (I ended up having to cut off the locks)
    • weatherstripping
    • end caps for the tracks, etc.

    Last couple of items;
    • The cap is also grossly overweight (supposed to be 150 to 200 lbs and it ended up at about 375 lbs.) I am pretty sure it is overweight due to swapping the aluminum cap out for steel. He did tell me about it, after the fact and did not refund me the $$ difference. It was also quite a bit more expensive for shipping as a result.

    • The major design change on the rear door lost me nearly a foot of top cap because of the angle changes. On a 5 foot bed, that is a lot of realestate. Losing the locking Ts in place of padlocks and hasps was also bad. (who wants padlocks banging and floppy handles banging around when you are off-road?) Not me!

    Unfortunately, He still has not responded to my inquiries for component types he used (like the roof tracks and d-ring tracks) so ordering the missing parts is a bit of a pain. (I am not even asking for him to send me parts!, I just want to know so I can order correct parts to finish the job)
    I communicated the damage as well (I figured maybe I'd get a little back in shipping costs... ...<if you are wondering, there is a little sarcasm there>)

    At this point, since the cap has to be re-powdercoated, I am going to have a friend grind some of the welds to make it look more polished and fix the broken hinge weld. I am going to have appropriate locking and opening mechanisms put on it. Then I will have my neighbor do the re-powdercoat.

    In the end, there was so much wrong it is just really hard for me to get past it. Seeing some of his other work prior, it just seemed to me like he really didn't care about me or the project a few months after he started.
    I have seen some other TW posts since this project was underway and it looks to me like Kore 4x4 (Tony) is just inconsistent and is inexperienced at running a business. My guess it he had a hobby that he wanted to make money on and its just not working out well (or at least its not working out well for some of his customers)

    Lessons learned:
    1. Find someone local or choose a vetted vendor (to at least make your chances better in receiving a good product)
    2. Be very clear up front on timelines, specs, and process requirements for any changes once its agreed. Additionally, be clear on the process if timelines are not met. (this goes both ways as I am sure if I had not paid, he would not have done the job)
    3. Treat it like a business transaction, if it does not work out, follow-through on #1 and part ways. (that is what it is)
    4. If you can pay a partial then ONLY pay a partial! NEVER pay 100% up front. If you have to pay 100% then the shop is probably over leveraged and shouldn't be taking on the work anyway.


    Here are some photos of it after it arrived (there are more, but you get the idea):

    no endcaps.jpg
    Bent in shipping..jpg
    rusty and missing bolts.jpg ding and PC gone.jpg ding from inside out.jpg front scratches.jpg internal scratches.jpg topcreases.jpg rusted strut.jpg
    items 1.jpg
     
    Last edited: Aug 30, 2019
  9. Aug 30, 2019 at 8:04 PM
    #49
    000doodie000

    000doodie000 [OP] Well-Known Member

    Joined:
    Jun 12, 2016
    Member:
    #189457
    Messages:
    860
    Gender:
    Male
    First Name:
    J
    Vehicle:
    2015 Taco TRD Off-Road
    Many and always modding Wheels Suspension lift Armor Electrical gadgets etc...
    Its been several months since my last truck mod posts. I have installed a few custom ram mounts from ballsoutoffroad and an extended diffbreather kit ( I got lazy and just ordered direct from YotaShop.com since pricing out the specific Toyota parts ended up getting the cost nearly the same as the kit. It was just easier to order the kit. I ran the breather line up behind the driver rear tail-light.

    A group of us will also be heading out to Ouray/Silverton for a little over a week, to hit some amazing trails so I'll post up some photos when I return.

    Imogene
    - https://www.trailsoffroad.com/trails/1408-imogene-pass
    - https://www.trailsoffroad.com/trails/2650-imogene-pass-alternate-northern-access
    Black Bear
    - https://www.trailsoffroad.com/trails/2651-black-bear-pass
    Ophir
    - https://www.trailsoffroad.com/trails/404-ophir-pass
    Corkscrew-California
    - https://www.trailsoffroad.com/trails/267-corkscrew-pass
    Engineer-Cinnamon (Alpine Loop)
    - https://www.trailsoffroad.com/trails/290-engineer-pass
    - https://www.trailsoffroad.com/trails/2739-engineer-pass-alpine-loop-connector
    - https://www.trailsoffroad.com/trails/258-cinnamon-pass
    Governor Basin
    - https://www.trailsoffroad.com/trails/2492-governor-basin
    Sydney Basin
    - https://www.trailsoffroad.com/trails/2753-sydney-basin
    Yankee Boy
    - https://www.trailsoffroad.com/trails/1160-yankee-boy-basin
    Kendall Mountain
    - Kendall Mountain 170910
    Bolam Pass
    - Bolam Pass 080828
    maybe Buffalo Boy
    maybe Stony Pass
    - https://www.trailsoffroad.com/trails/467-stony-pass
    maybe Kite Lake

    I should have posted up some from the last few trips, but I was too busy to do much posting online or on Instagram (heh priorities, If I had more folks reading the posts I'd probably put a priority on it, but there are so many other things that need to get done o_O)
     
  10. Sep 21, 2019 at 11:24 PM
    #50
    000doodie000

    000doodie000 [OP] Well-Known Member

    Joined:
    Jun 12, 2016
    Member:
    #189457
    Messages:
    860
    Gender:
    Male
    First Name:
    J
    Vehicle:
    2015 Taco TRD Off-Road
    Many and always modding Wheels Suspension lift Armor Electrical gadgets etc...
    Some photos from the latest trip...

    IMG_20190905_165607.jpg IMG_20190906_190707.jpg PANO_20190905_154042.vr.jpg IMG_20190906_172020.jpg PANO_20190906_135752.vr.jpg

    There was so much to see none of these photos really do it justice. Overall it was a great week!
     
  11. Sep 21, 2019 at 11:45 PM
    #51
    000doodie000

    000doodie000 [OP] Well-Known Member

    Joined:
    Jun 12, 2016
    Member:
    #189457
    Messages:
    860
    Gender:
    Male
    First Name:
    J
    Vehicle:
    2015 Taco TRD Off-Road
    Many and always modding Wheels Suspension lift Armor Electrical gadgets etc...
    Added the start of my dual batter kit this last weekend and a tailgate lock. (in prep for the final update on my custom cap)
    IMG_20190922_002839.jpg IMG_20190922_002830.jpgIMG_20190922_002746.jpg
     
  12. Dec 20, 2019 at 7:49 PM
    #52
    000doodie000

    000doodie000 [OP] Well-Known Member

    Joined:
    Jun 12, 2016
    Member:
    #189457
    Messages:
    860
    Gender:
    Male
    First Name:
    J
    Vehicle:
    2015 Taco TRD Off-Road
    Many and always modding Wheels Suspension lift Armor Electrical gadgets etc...
    Well, had another great weekend helping out the Forrest service again this year. This is typically an annual event for the Colorado LandCruiser Club.
    This year my partner and I ended up helping recover a Ford Excursion (required winching), A Ford Raptor (snatch strap), a 4-Runner and Ram truck (using trax), and a Jeep XJ (required winching). I didn't snap any photos during recovery because if it were me, I'd probably not want photos evidence that I had gotten my self in and needed someone else to extract me. ;)

    The photos are from Day2. We were pretty busy on Day1.IMG_20191208_090215.jpg IMG_20191208_115218.jpg IMG_20191208_120710.jpg IMG_20191214_150213.jpg 000_0001.jpg
     
    Last edited: Dec 20, 2019
  13. Dec 20, 2019 at 7:59 PM
    #53
    000doodie000

    000doodie000 [OP] Well-Known Member

    Joined:
    Jun 12, 2016
    Member:
    #189457
    Messages:
    860
    Gender:
    Male
    First Name:
    J
    Vehicle:
    2015 Taco TRD Off-Road
    Many and always modding Wheels Suspension lift Armor Electrical gadgets etc...
    Great weekend. :) Finally finished up my dual battery and ditch lights installations.


    IMG_20191220_155219.jpg IMG_20191220_155230.jpg IMG_20191220_155236.jpg IMG_20191216_211952.jpg
     
  14. Dec 20, 2019 at 8:15 PM
    #54
    000doodie000

    000doodie000 [OP] Well-Known Member

    Joined:
    Jun 12, 2016
    Member:
    #189457
    Messages:
    860
    Gender:
    Male
    First Name:
    J
    Vehicle:
    2015 Taco TRD Off-Road
    Many and always modding Wheels Suspension lift Armor Electrical gadgets etc...
    I just realized I had forgotten to note (yes I know its a TW forum and this is mostly about my Taco and places I've been) But... I couldn't help but post some shots of my daughter and I working on changing out the cam sensors on her Xterra (both bank1 and bank2). She jumped right in, it was awesome!

    IMG_20191011_180111.jpg
    IMG_20191011_173148.jpg IMG_20191011_173129.jpg


    And a shot of her rig from this summer..

    IMG_20180706_160152.jpg IMG_20180706_161347.jpg
     
    Last edited: Dec 20, 2019
    BEAR_KNIFE_FIGHT and RockiesTaco like this.
  15. Feb 2, 2020 at 3:00 PM
    #55
    000doodie000

    000doodie000 [OP] Well-Known Member

    Joined:
    Jun 12, 2016
    Member:
    #189457
    Messages:
    860
    Gender:
    Male
    First Name:
    J
    Vehicle:
    2015 Taco TRD Off-Road
    Many and always modding Wheels Suspension lift Armor Electrical gadgets etc...
    Well it’s been a busy few days. I received a new CB and HAM radio at Christmas and finished up the installation this week. I figured while I was wiring things up I would go ahead and add in some extra USB ports as well. The kids like their power when we all go out, so I figured it was time to stop running their wires from the front to the back seat.

    Installing the USB ports was a bit more trouble than I expected, it’s not perfect, but it worked out fine in the end.

    The following components are what I used:


    Radio

    Finding the programming software for this is a major pain in the arse! There are two versions, best I can tell, some of these radios will only work with v1 and some will only work with V2. V1 seems to be what most people use and it’s from a Russian site very tough to dig up, so I posted the link I used below. This radio it is not supported by Chirp.

    Manual program is intuitive if you have any type of technical background. I watched a couple you tube videos and the rest was simple to figure out. I certainly don’t have it all figured out, but I am able to program it just fine.


    Radio Antenna(s)

    I chose two different ones the smaller cannon style is for daily driving and primarily vehicle to vehicle comms. I use the Tram dual band when I want to hit repeaters and get larger range. Truthfully both work really well so if you only want to do one, either will work.
    CB:

    CB Antenna:

    USB kits:


    I used my own automotive wire and some add a fuse taps which I connected under my dash using the trailer wire 7.5 amp and Power (cigarette lighters) 15 amp fuses. I added a 5 amp fuse with the 7.5 and a 7.5 amp fuse with the 15.
    I also use a marine heat shrink wrap on all my wiring and when I solder them I typically do it in two ways, 1. Solder, then cover with a little electrical tape and finish it off with a marine grade heat shrink. Or 2. I have been testing out some new premium solder heat shrink butt connector sleeves (from Amazon) which so far seem to do a good job and connections test well. I still cover it with a marine grade heat shrink for good measure because it just looks cleaner. I didn’t list either here because you can get it from amazon pretty easy or harbor freight.

    · Note on the Yohan Quick charger that I placed in the back of the center console for the rear seats, It has constant power so I specifically chose the USB with the on off switch.


    Some Photos of finished work:


    1. Front Antenna.jpg 2. Rear Antenna.jpg Z9. Radio Power On.jpg Z9.1 USB power 1.jpg

    I almost forgot, I picked up the 84” wiring kit from sPOD and connected to my extra battery so now the only thing connected to my primary is the winch (which is separated by a solenoid and power switch so it only draws when I turn it on). In all I am finally read to start looking for what is next on the project list.
     
    Last edited: Feb 2, 2020
  16. Feb 2, 2020 at 3:03 PM
    #56
    000doodie000

    000doodie000 [OP] Well-Known Member

    Joined:
    Jun 12, 2016
    Member:
    #189457
    Messages:
    860
    Gender:
    Male
    First Name:
    J
    Vehicle:
    2015 Taco TRD Off-Road
    Many and always modding Wheels Suspension lift Armor Electrical gadgets etc...
    Here are some Installation photos so you can see what it took to actually complete the installation:


    ZZ2. - install radio in console.jpg ZZ3. -install radio in console 2.jpg

    Z1.Running wires.jpg
    Z2.Grommet FW Running wires.jpg
    Z3.Running wires.jpg
    Z4.0. Running wires.jpg
    Z4.1. Fuses.jpg
    Z5. Putting it back.jpg
    Z6. Putting it back.jpg
    Z7.  Finished putting it back.jpg
    Z8. Radio Power.jpg
     
    Last edited: Feb 2, 2020
  17. Feb 17, 2020 at 2:38 PM
    #57
    ypahuboy

    ypahuboy Well-Known Member

    Joined:
    Apr 12, 2017
    Member:
    #216092
    Messages:
    89
    Gender:
    Male
    First Name:
    Brian
    Vehicle:
    2009 Tacoma DCSB TRD OR
    Did you hook up the blue wire of the Redarc to an ignition source?
     
  18. Feb 17, 2020 at 5:25 PM
    #58
    000doodie000

    000doodie000 [OP] Well-Known Member

    Joined:
    Jun 12, 2016
    Member:
    #189457
    Messages:
    860
    Gender:
    Male
    First Name:
    J
    Vehicle:
    2015 Taco TRD Off-Road
    Many and always modding Wheels Suspension lift Armor Electrical gadgets etc...
    I left the blue disconnected so it uses standard trigger settings. I do not believe the 2015 Taco has a variable voltage alternator/smart alternator. (when I watch the voltage on the battery it normally runs between 13.8 and 14.2 , sometimes lower depending on temperature. (so it would seem to be ok on my 15 with the standard trigger.)

    upload_2020-2-17_18-16-18.jpg
     
    ypahuboy[QUOTED] likes this.
  19. May 19, 2020 at 3:24 PM
    #59
    000doodie000

    000doodie000 [OP] Well-Known Member

    Joined:
    Jun 12, 2016
    Member:
    #189457
    Messages:
    860
    Gender:
    Male
    First Name:
    J
    Vehicle:
    2015 Taco TRD Off-Road
    Many and always modding Wheels Suspension lift Armor Electrical gadgets etc...
    Finally got around to an exhaust re-route. I wasn't going to do it because I have the Mobtown skid setup (for non-reroute) but I hit it pretty hard about a month ago and the exhaust would rattle against it (at certain harmonics) It annoyed the crap out of me.

    No more issue now! Time to put the armor back on. Once it breaks I will be replacing it with a new set, unless I decide that the extra inch is worth the $$ (or someone here on TW is making a set and wants to sell me one on the cheap) :)
    IMG_1828.jpg


    I did check and it sounds like the left side cat may be void on the warranty (if there is an issue). However, the right side should be fine because it has not been modified.
     
  20. Jun 8, 2020 at 8:20 PM
    #60
    000doodie000

    000doodie000 [OP] Well-Known Member

    Joined:
    Jun 12, 2016
    Member:
    #189457
    Messages:
    860
    Gender:
    Male
    First Name:
    J
    Vehicle:
    2015 Taco TRD Off-Road
    Many and always modding Wheels Suspension lift Armor Electrical gadgets etc...
    My brother, my son and I just finished an amazing 7 day trip starting in Dell City Texas and ending in Antonito Colorado (1178 miles). The trail is called New Mexico Back Road Discovery trail (https://ridebdr.com/nmbdr/). One of my brothers buddies joined us on day 6. Definitely a trip well worth it! Its a pretty easy trip some minor wheeling but overall just great driving, scenery, and camping. Some photos below:

    IMG_2015.jpg

    IMG_3026.jpg
    IMG_1916.jpg
    IMG_2272.jpg
    IMG_3020.jpg
     
    Helpme likes this.

Products Discussed in

To Top