1. Welcome to Tacoma World!

    You are currently viewing as a guest! To get full-access, you need to register for a FREE account.

    As a registered member, you’ll be able to:
    • Participate in all Tacoma discussion topics
    • Communicate privately with other Tacoma owners from around the world
    • Post your own photos in our Members Gallery
    • Access all special features of the site

Vel's "Slow" 1976 FJ40 "restomod"

Discussion in 'Other Builds' started by velillen, Oct 27, 2016.

  1. Aug 6, 2017 at 5:14 PM
    #21
    velillen

    velillen [OP] Well-Known Member

    Joined:
    Dec 14, 2013
    Member:
    #118589
    Messages:
    5,855
    Gender:
    Male
    First Name:
    Nick
    Wyoming
    Vehicle:
    2011 Access Cab 4x4
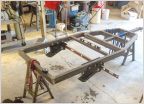
    Well i started blasting the frame today. First time ever using the sand blaster (ive used cabinet ones before) so took a bit of learning to get it up and running. Have to say though, using the fine black beauty media from tractor supply....it ran pretty damn well. Really just needed to keep it above approx 1/4-1/3 full of the media and it would run just fine. It had some trouble cutting through the thicker undercoat but Ill just hit those spots with the grinder. I also found a couple spots that will need work (stubs from old exhaust hangers and some mounting holes for after market bumper) but nothing major.

    Sadly I bought all that TSC had so i picked up 2 bags of the medium course black beauty as well. Lets just say that didnt work out so well lol. Its way to thick for the nozzle that comes with the blaster. I cant find any nozzles for the style deadman that comes with the blaster that are bigger so I might pick up a different style one that has bigger nozzles.

    Only other thing....the deadman really wears on your wrist. So i swapped mine out for a ball valve. So much more comfortable!

    Anyways plan is to have it all blasted and the spots i want fixed up, fixed by the end of the week. Then get it painted sometime the next week as the paint should be here Friday

     
  2. Aug 18, 2017 at 3:56 PM
    #22
    velillen

    velillen [OP] Well-Known Member

    Joined:
    Dec 14, 2013
    Member:
    #118589
    Messages:
    5,855
    Gender:
    Male
    First Name:
    Nick
    Wyoming
    Vehicle:
    2011 Access Cab 4x4
    Well finished up blasting the frame. It wasnt a 100% but like 90-95%. Plenty good enough for me. After cleaning up i started the POR-15 process. Cleaning followed by their metal prep. After letting it dry i got the first coat of POR-15 applied. Feels good to know it will be protected if it dews/rains now. I still need to apply the second coat, then the tie-coat, and ill be top coating with semi-gloss black "farm implement" paint.

    PS...i like using the grey POR-15 when you know you will be top coat. Makes seeing any areas you didnt get easy

     
  3. Aug 25, 2017 at 6:10 PM
    #23
    velillen

    velillen [OP] Well-Known Member

    Joined:
    Dec 14, 2013
    Member:
    #118589
    Messages:
    5,855
    Gender:
    Male
    First Name:
    Nick
    Wyoming
    Vehicle:
    2011 Access Cab 4x4
    Feel like i hit a milestone today. Get to put things back together...and spend more money! Ordered the engine and transmission mount bushing, adapter kit, clutch, and new bolts. Then realized i have no idea where the U-Bolt plates for the front axle are (ordered new ones) and realized i was going from a auto to manual so needed to order a flywheel. I still need to pick up the stock clutch fork assembly but that can be done later.

    But o well I should have everything in the next few days. I need to make the transmission mount but that shouldnt be to much work. But once thats done and all parts are in I *should* be able to complete driveline install minus driveshafts (if mine dont work), suspension install (well minus shocks), and brake lines from calipers to the frame.

     
  4. Aug 31, 2017 at 5:37 PM
    #24
    velillen

    velillen [OP] Well-Known Member

    Joined:
    Dec 14, 2013
    Member:
    #118589
    Messages:
    5,855
    Gender:
    Male
    First Name:
    Nick
    Wyoming
    Vehicle:
    2011 Access Cab 4x4
    And progress! The axles are mounted to the frame via the leaf springs. Also go the transmission mocked up to see how it would land....and well the stock bellhousing support bracket is in the way....of course id didnt cut it off when i had the chance!


    But Im getting there. I couldnt find the plasma cutter consumables to i figured it was a good time to stop and finish things up this weekend. My short list of things to do...

    -Remove bracket thats in the way
    -Fabricate transmission mounts
    -Finish up brake lines
    -Install clutch
    -Install Transmission

    Ill probably need help when i actually go to do the transmission install so that might take a bit to do
     
  5. Sep 25, 2017 at 11:02 AM
    #25
    velillen

    velillen [OP] Well-Known Member

    Joined:
    Dec 14, 2013
    Member:
    #118589
    Messages:
    5,855
    Gender:
    Male
    First Name:
    Nick
    Wyoming
    Vehicle:
    2011 Access Cab 4x4
    Well got to play a bit on the Fj40. I was missing the rear bed support and brackets for the "skid plate" Luckily my old tub had them so I cut that section out and spent a bit removing the spot welds. Ill clean them up and get them welded in place hopefully in the not to distant future.

    full_b56750b5120d72a24bc166f99960384c55886de6.jpg


    Then had both the good and the bad

    bad- filled the transfer case with oil. Only to discover it leaks at the "nose cone" section. Not sure why so Ill have to take it apart and check it out. Hoping its just something simple like pinched gasket.

    The good - New quarter panels and front fenders show up Thursday. The new rear sill already showed up. So just have to finish up a few plug welds and then move the body to the frame and weld in the body supports and itll be time to get the body really cut up!
     
    Martyinco likes this.
  6. Sep 25, 2017 at 11:04 AM
    #26
    inesshell

    inesshell blah blah blah

    Joined:
    Aug 2, 2011
    Member:
    #60986
    Messages:
    7,164
    Vehicle:
    All stock Superwhite 10' AC
  7. Sep 25, 2017 at 7:18 PM
    #27
    velillen

    velillen [OP] Well-Known Member

    Joined:
    Dec 14, 2013
    Member:
    #118589
    Messages:
    5,855
    Gender:
    Male
    First Name:
    Nick
    Wyoming
    Vehicle:
    2011 Access Cab 4x4
    And in my typical take 2 steps forward and one step back....I messed up! I noticed a small leak coming from the transfer case after filling it. I couldnt tell 100% where it was coming from (gasket on extension housing to case or elsewhere) so figured best bet would be remove the extension. Got it off just fine but noticed the bearing was in rough shape. Had noticeable rust on it. Figured hell why not replace it.

    Now normally i check my FSM just to make sure I dont miss something stupid. Im still pretty new to internals of transfer cases and the such. But this time i figured it was simple so no need to. Put it in the press and started pressing down thinking the bearing would push the seal out and all would be good. Well got bout two "ugga duggs" from the air jack on the press and then a nice loud pop. And this is what I was left with

    full_68fe5841d9dfa2b33bbc6b6aed7c9ccfc8f8c4cc.jpg

    Yup should have checked the FSM and I would have realized there is a retaining clip holding that bearing in. Thankfully it just popped and nothing went flying (though i do stand to the side as much as i can and wear safety glasses in the garage).

    Be a minorly expensive opps thatll push buying other things back a bit more. But at the same time Ill be contacting a vendor and probably picking up a couple other things I'll need but was holding off on

    Surprisingly no swearing was done. It happened, i saw it, walked away and went inside to see the dog scared (from the pop) standing at the door, went out and threw the ball for the dog for a few minutes, and then came in and looked at how bad the damage was
     
    SnowroxKT likes this.
  8. Feb 24, 2018 at 9:42 PM
    #28
    velillen

    velillen [OP] Well-Known Member

    Joined:
    Dec 14, 2013
    Member:
    #118589
    Messages:
    5,855
    Gender:
    Male
    First Name:
    Nick
    Wyoming
    Vehicle:
    2011 Access Cab 4x4
    Been way to long with no updates sooo here we go!

    First off was fixing the transfer case extension. Well not fixing it, but replacing it. Ordered a used one and replaced the bearing and got it bolted back up. But that didn't solve the leak, which I found out was front one of the bolt holes which meant the paper gasket wasn't making a good enough seal. So I used some ultra black rtv and fixed that issue.

    I also ordered a FJ60 series H42 top cover. This moves the shifter location back about 4"

    full_2f7bcca45569e7945c811358b616e0023284d316.jpg
     
  9. Feb 24, 2018 at 9:45 PM
    #29
    velillen

    velillen [OP] Well-Known Member

    Joined:
    Dec 14, 2013
    Member:
    #118589
    Messages:
    5,855
    Gender:
    Male
    First Name:
    Nick
    Wyoming
    Vehicle:
    2011 Access Cab 4x4
    From there I put the body back on and quickly discovered the newest problem. The old mounting points were not going to work. The location puts the transfer case shifter and H42 shifter against the front heater. because this had a TH350 in it, this wasn't an issue the PO had and not one that had crossed my mind. So once the body comes back off, itll just be a matter of shifter the drive drive ~4" back

    full_6519f777182e39319e3c37c150427792c9ba3c29.jpg
     
  10. Feb 24, 2018 at 9:48 PM
    #30
    velillen

    velillen [OP] Well-Known Member

    Joined:
    Dec 14, 2013
    Member:
    #118589
    Messages:
    5,855
    Gender:
    Male
    First Name:
    Nick
    Wyoming
    Vehicle:
    2011 Access Cab 4x4
    While the body is on, I went ahead and got the old sill out and the two new rear quarters in. Still not 100% done with them but well on their way! After I get thse done Ill focus on the bed support piece and the dash area. Then its just removing all the broken bolts and itll be ready for sandblasting and paint

    full_70b30483d8e9a882f2b05f2fde69518be591ca9e.jpg
    full_e89ebf9f11a17cd112e24ca4db80cf6cd78fbee8.jpg
    full_8ee046fb72e8c61d89a3b19298a04a6b488c5832.jpg


    And now were are pretty well caught up
     
    utroda and AKSig88 like this.
  11. Mar 13, 2018 at 1:17 PM
    #31
    velillen

    velillen [OP] Well-Known Member

    Joined:
    Dec 14, 2013
    Member:
    #118589
    Messages:
    5,855
    Gender:
    Male
    First Name:
    Nick
    Wyoming
    Vehicle:
    2011 Access Cab 4x4
    Decided to tackle relocating the drivetrain ~4 inches to the rear.

    Got the drivers side scab plate welded in. Got the passengers side welded up on two sides. Also cleaned up the engine mounts in the sand blaster. Got the mount mocked up and am pretty happy with it. It ended up being the 19.5" back from the front cross member that Downey recommends.

    full_19679c12e5dca5895c13a1d038daff16ef47ef88.jpg

    Also took the PO's automatic shifter off the trans tunnel. Thankfully he left the holes for the shifters pretty much intact. I used that to help located the engine. Its pretty well centered in the hole, if not a tad bit towards the rear. Theres still a good ~3" of clearance from the back of the engine to the firewall.

    full_dc0eb6fb324ad56a563d60419d688adb18f9df3a.jpg
     
  12. Mar 13, 2018 at 1:18 PM
    #32
    velillen

    velillen [OP] Well-Known Member

    Joined:
    Dec 14, 2013
    Member:
    #118589
    Messages:
    5,855
    Gender:
    Male
    First Name:
    Nick
    Wyoming
    Vehicle:
    2011 Access Cab 4x4
    Probably wasn't the best way to do things but got all four scab plates welded in, all for mounts welded in, the engine bolted down, the new AA propeller installed, and the propeller loosely bolted in. Got the engine mounts all painted up. For the transmission mounts I only got some primer on them for now. Once I pull the body and have better access I may end up doing some better clean up of the welds and then top coat. The drivers side trans mount wasn't bad to do at all but the passengers side had some...interesting challenges. The welders I always work with joke around about how you aren't really a welder till you can make a weld upside down, reaching around something, and able to only in one specific position which is of course painful to be in for more than 2 seconds. Well outside of the upside down part I got to experience that! Reaching around the top of the transfer case while looking between the housing extension and propeller. And trying to weld right handed (im left handed). But its done!

    After that was all done I decided to look at the front shocks and FJ60 power steering. Loosely got the front fenders on and got the shock towers tacked in place. Took a quick look at the power steering but was getting hungry and it was close to cleanup time for work so stopped there. It looks like itll mount up right where I'd figured it would though (and will require some fender cutting)

    full_c85e9a5297da71a5515d3bcdb46ad3ddef927de7.jpg

    The one "new" issue I discovered is Ill have to probably flip the lower shock mounts. Right now looking straight down from the top the bottom of a shock would be 180 out of the pin. But that should be a somewhat easy fix...cut it off and reweld it. Or see if theres a pin I could replace it with....either way ive got time for that fix
     
    JoeK likes this.
  13. May 10, 2019 at 8:57 PM
    #33
    velillen

    velillen [OP] Well-Known Member

    Joined:
    Dec 14, 2013
    Member:
    #118589
    Messages:
    5,855
    Gender:
    Male
    First Name:
    Nick
    Wyoming
    Vehicle:
    2011 Access Cab 4x4
    been a long time since I updated. But life got in the way! Got engaged, moved her in with em, ect ect. Havent stopped just been lots of small stuff in between other projects.

    I got the radiator and the FJ60 power steering pump mounted. Had to cut a bit of the radiator support and weld in a filler piece to fit around the pump.


    I also did some of my first AN lines and did the power steering lines. The radiator has a built in transmission/PS cooler so i used that. Hard to see but I also got the fuel line ran from the mechanical pump up to the carb.


    Theni started a bit on the exhaust. I havent been happy with what Ive seen for y-pipes (or cross over or whatever you call them) so i am making my own. Got the passengers side down and under the oil pan and to the drivers side. Wasnt happy with my pipe to connect the drivers side to the new piping so Ill redo it


    But anyways....been lots of house projects and then prepping the Tacoma for a ~5k mile trip
     
    utroda, AKSig88, Martyinco and 3 others like this.

Products Discussed in

To Top