

-
Welcome to Tacoma World!
You are currently viewing as a guest! To get full-access, you need to register for a FREE account.
As a registered member, you’ll be able to:- Participate in all Tacoma discussion topics
- Communicate privately with other Tacoma owners from around the world
- Post your own photos in our Members Gallery
- Access all special features of the site
 Oil filter housing replacement....
 New to pick ups and lifts. Please help
 A strange whistle at 2000 RPM or so...
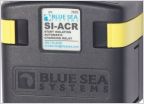 Automatic Charging Relays for dual battery system
 Damn.. 2024 RAV4 hybrid stolen from their driveway
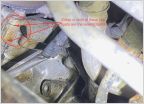 Help!!! power steering pump leak or timing cover leak?
OEM Brake Change
Discussion in '3rd Gen. Tacomas (2016-2023)' started by TheTacoMarine, Jun 12, 2019.
Page 2 of 2
Page 2 of 2


