1. Welcome to Tacoma World!

    You are currently viewing as a guest! To get full-access, you need to register for a FREE account.

    As a registered member, you’ll be able to:
    • Participate in all Tacoma discussion topics
    • Communicate privately with other Tacoma owners from around the world
    • Post your own photos in our Members Gallery
    • Access all special features of the site

Virginia Build

Discussion in '3rd Gen. Builds (2016-2023)' started by Andromedus, Jun 22, 2019.

  1. Jun 22, 2019 at 6:11 PM
    #1
    Andromedus

    Andromedus [OP] Per aspera ad astra.

    Joined:
    Oct 15, 2018
    Member:
    #269513
    Messages:
    19
    Gender:
    Male
    Vehicle:
    2017 MGM TRD OR A/T
    Finally getting around to this after a few months. Going to keep this first post as a brief "before" for comparison and then where she is at currently (I'll try to update this as additions are made), plus the long term plank/wish list of what I'm thinking about doing.

    Oct 2018:
    Made the switch to a truck. Traded in the Mazda 3 for a 2017 Tacoma MGM TRD-OR AT. Miss driving a manual and the MPG from the Mazda, but I wont go back, love the Tacoma too much.


    IMG_20181006_165400812_HDR.jpg
    Before:
    IMG_20181019_170645694_HDR.jpg

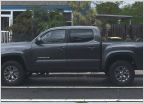
    Current: (as of June 2019)
    IMG_20190627_202655_343.jpg

    As she stands currently....

    Suspension:
    Bilstein 5100 shocks (front)
    OME NitroSport shocks (rear)
    OME 887 coilsprings
    OME Dakar Leaf Pack
    HS 1/4" spacer for taco lean

    Tires/Wheels:
    265/75/16 Duratracs (C-load)
    Spidertrax wheel spacers
    Vinyl blackout OEM wheels
    Blue vinyl TRD center caps

    Exterior:
    True bolt-on Bushwacker pocket fender flares
    Ultimate turn signals
    TRDPro Black grille
    Custom TRD OR decals
    3rd Brake and license plate lights swapped for LEDs
    Plastidipped chrome badges

    Interior:
    Huskey mat floor liners
    Interior lights swapped for LEDs (red and white)
    Front dash cigarette lighter swapped for voltmeter/USB quick charge port
    Console organizers
    Meso's TRD cointray

    Engine:
    K&N air filter

    -------------------------------------------------------------------------------------------------

    Mods on deck:
    Power folding side mirrors (we will see if this works out or not... parts on order)

    Backlog/Too poor to do yet list:
    Bed stiffiners
    Rocksliders (haven't settled on which yet, open to suggestions)
    Bed rack/gear
    Interior switch project (relocate switches, add additional for leds)
    OEMassive smoke sequential turn signal headlights
    HoneyBadger front bumper
    HC rear bumper
    Odyssey deep cycle battery
    Onboard compressor
    Anytime rear and front cameras
    Front skid plate
    Tint windows
    Driver side holster
    Install the HAM (on the fence if I want to cut a hole for the antenna or do something else... maybe Meso's 3rd brake light with the antenna mount)
    "De-chrome" interior (paint or replace the steering wheel badge, vinyl for the other parts probably)
     
    Last edited: Jun 27, 2019
  2. Jun 23, 2019 at 8:28 AM
    #2
    barelfly

    barelfly Well-Known Member

    Joined:
    Jun 1, 2019
    Member:
    #294988
    Messages:
    967
    Gender:
    Male
    Vehicle:
    2019 Cavalry Blue Tacoma TRDOR, 2014 Iceberg FJC
    @Andromedus

    Do you have any photos showing where the tire sits in relation to the fender? So, from the front. I’m looking at options, and am thinking of doing what you have done here, blacking out the stock OR wheel and going 265/75. And adding the spacer for a better stance.

    Truck looks great as well!

    Thanks
     
    Andromedus[OP] likes this.
  3. Jun 23, 2019 at 8:41 AM
    #3
    Casper66

    Casper66 grumpy ass

    Joined:
    Apr 3, 2016
    Member:
    #183160
    Messages:
    32,001
    Gender:
    Male
    First Name:
    Chris
    Culpeper, Va.
    Vehicle:
    '15 DCSB TRD Sport 4wd super white (sold) '13 access cab SR5 4wd
    piddly stuff
    Where you at in Va?
     
  4. Jun 23, 2019 at 11:22 AM
    #4
    Andromedus

    Andromedus [OP] Per aspera ad astra.

    Joined:
    Oct 15, 2018
    Member:
    #269513
    Messages:
    19
    Gender:
    Male
    Vehicle:
    2017 MGM TRD OR A/T
    You bet, happy to. I will say, took the truck for a spin right after spacers (before the lift and tires). I was surprised how noticeable the change in handling was. Took corners so much better in my opinion. Been meaning to get some more details about the lift up, added some of the pics at the bottom. Unfortunately my OEM OR fender flares are off at the moment, but it should still give you an idea.

    ----------------------------------------------------------------------------------------------------------------------------------------------------------------

    I'm all about saving money where I can, so I decided to to the lift myself. As DIY project go, it took way longer than I expected. I started around 8PM and finished around 7:30 AM the next morning. That's how it goes when you just have a floor jack instead of a lift, and trying to lift those leaf packs in while laying on the ground was a fun challenge, ha. But what really racked up the time was getting those OME rear shocks in. I don't know if it was just my truck... but dang, took me a good hour and a half to get one in. The bottom mount was just too tight. Even with WD40 and a hammer it took forever to get it to line up. Kept pinching the bushing. If anyone out there has some advice or insight into why this was such an issue, I'd love to learn what I could have done differently.

    Partlist:
    Bilstein 5100 shocks (front)
    OME NitroSport shocks (rear)
    OME 887 coilsprings
    OME Dakar Leaf Pack (medium duty)
    Spidertrax wheelspacers
    1/4" Headstrong spacer for taco lean
    Bushings (spacing on the brand, but I know it wasn't the OME bushing kit because they were on back order for 2 weeks so I finally took 4WP up on their suggested replacement)

    IMG_20190524_182241137.jpg


    Before measurements:
    35.25 pf 34.75 df 36.75 pb 37 db

    After measurements: (still on stock tires)
    37 pf 36.75 df 38.75 pb 39 db


    IMG_20190605_201230.jpg


    Tried to get the same angles on these pics, but they don't line up perfectly.

    No spacers/lift:
    nospacer.jpg

    Spacers/lift/new tires: (forgot to get a pic before I took the fenders off)
    spacerandtires.jpg

    Test fitting the Bushwacker pocket flares:

    testfit.jpg


    Overall, glad I did this first lift myself. Learned a lot and saved some cash that I can put right back towards the truck. But man did it take longer than I thought.
     
    barelfly[QUOTED] likes this.
  5. Jun 23, 2019 at 11:26 AM
    #5
    Andromedus

    Andromedus [OP] Per aspera ad astra.

    Joined:
    Oct 15, 2018
    Member:
    #269513
    Messages:
    19
    Gender:
    Male
    Vehicle:
    2017 MGM TRD OR A/T
    I was wondering if that question would come up. So I am actually in UT. Ever since high school with a couple of friends, I have been naming my vehicles. Finally settled on Virginia for the Tacoma.

    Figured I could have another of the many "<insert username or tacoma model> build thread" titles, or use a name.
     
    Casper66[QUOTED] likes this.
  6. Jun 23, 2019 at 11:35 AM
    #6
    Casper66

    Casper66 grumpy ass

    Joined:
    Apr 3, 2016
    Member:
    #183160
    Messages:
    32,001
    Gender:
    Male
    First Name:
    Chris
    Culpeper, Va.
    Vehicle:
    '15 DCSB TRD Sport 4wd super white (sold) '13 access cab SR5 4wd
    piddly stuff
    Well caught my attention anyway :thumbsup:
     
  7. Jun 23, 2019 at 6:22 PM
    #7
    barelfly

    barelfly Well-Known Member

    Joined:
    Jun 1, 2019
    Member:
    #294988
    Messages:
    967
    Gender:
    Male
    Vehicle:
    2019 Cavalry Blue Tacoma TRDOR, 2014 Iceberg FJC
    Looks great. Thanks for the additional photos and info!

    How are the vinyl cover isn’t holding up? I think I’m going to paint, as I really like the black look of the stock wheels.

    Thanks again.
     
  8. Jun 24, 2019 at 9:28 PM
    #8
    Andromedus

    Andromedus [OP] Per aspera ad astra.

    Joined:
    Oct 15, 2018
    Member:
    #269513
    Messages:
    19
    Gender:
    Male
    Vehicle:
    2017 MGM TRD OR A/T
    So far so good on the vinyl. Honestly, they were pretty cheap compared to new wheels, so even if they make it a year or so I'd be happy to redo them. Only had them on for a few weeks, but so far so good. Been impressed they handled the mud without issue. If you are interested, here is the thread where I got mine. https://www.tacomaworld.com/threads...cap-inlays-and-tacoma-decals-for-sale.537257/
     
  9. Jun 27, 2019 at 8:26 PM
    #9
    Andromedus

    Andromedus [OP] Per aspera ad astra.

    Joined:
    Oct 15, 2018
    Member:
    #269513
    Messages:
    19
    Gender:
    Male
    Vehicle:
    2017 MGM TRD OR A/T
    Got the fender flares on!

    I'll be honest, I don't think it is ever going to feel comfortable drilling holes in my vehicle. However, it paid off.

    Partlist:
    Bushwacker pocket style fender flares
    120 grit sandpaper
    Krylon spray on bedliner
    x34 1-1/4" long 5/16"-18 thread black-oxide alloy steel (this was a mistake on my part, I would suggest stainless steal, I will probably go over the heads with bed liner or something to better seal and protect the bolts from rust)
    x192 Black nylon plastic washers 5/16" screw size
    x68 Stainless steal washers for 5/16" screw size
    x34 Stainless steal locknuts 5/16"-18 thread

    I have seen a few other forum members turn the Bushwackers into actual bolt-ons, I just followed their processes.

    After test fitting the Bushwackers and deciding to move forward, I sanded them down with 120 grit sand paper. After sanding, I cleaned them off, wiped them down, and started painting them puppies with bedliner. I did an initial light coat, and then two heavier ones giving it about 20 minutes to dry between coats.

    Showing the finish before sanding and after the bedliner.

    IMG_20190622_105230372.jpg

    After removing the OR fender flares and clips, I installed the Bushwackers the way they were meant to be by bolting them inside the wheel well. Then, I made marks where all holes would need to be drilled.

    IMG_20190624_182239783.jpg

    *NOTE* Something that would have been useful info when I did this... On the front fender flares, the second bolt hole from the front of the vehicle, don't drill each of those holes. The way the Bushwakers line up with the front bumper, your hole will drill into the middle of an enclosed bracket on the backside of the bumper. Short of disassembling a lot more for the effort of one bolt, you aren't going to reach it. After drilling one whole and realizing the problem, I just dremelled off most of the bolt and installed it like the fake bolts that come with the Bushwackers.

    Measure a couple of times and confidently drill the holes. Not something you want to get wrong. Drilled my small pilot holes then worked up to a 5/16" drill bit. Another thing I forgot to do was to put tape down for a cleaner hole. Mentioning in hopes of reminding someone else. Either way, it worked out and the holes will be hidden behind the fender flares.

    IMG_20190624_185757423.jpg


    I don't know how helpful this is, but I did go over each of the holes with some paint. Driving the bolts through the holes in the fender was pretty tight and likely took most of it off.

    IMG_20190627_185650490.jpg

    This was another piece of info I didn't find on the forum before hand but I thought was useful. I ended up using 6 nylon washer between the fender and fender flare. Fit nice and snug, didn't hear any loose.

    IMG_20190627_185639019_HDR.jpg

    From hear it was just a matter of getting back behind the fenders and bolting the bushwackers down. Took some time, but they turned out well. Was on the fence as to whether or not I'd like the bushwackers, but by toning down the gloss with bedliner, I really liked the end result. Let me know what you think.

    IMG_20190627_200714685.jpg IMG_20190627_200708237_HDR.jpg
     

Products Discussed in

To Top