

-
Welcome to Tacoma World!
You are currently viewing as a guest! To get full-access, you need to register for a FREE account.
As a registered member, you’ll be able to:- Participate in all Tacoma discussion topics
- Communicate privately with other Tacoma owners from around the world
- Post your own photos in our Members Gallery
- Access all special features of the site
 New guy wondering about Axle Flange Bolt
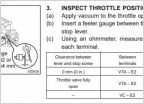 Throttle body
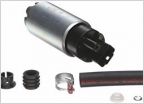 Aftermarket fuel pump
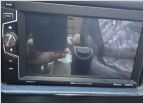 Radio/speaker upgrade
 Under dash squeak:Help identify component
 DIY: Docooler Keyless Entry
New Cylinder Head install
Discussion in '1st Gen. Tacomas (1995-2004)' started by 03 Mountain goat, Jul 12, 2019.


