1. Welcome to Tacoma World!

    You are currently viewing as a guest! To get full-access, you need to register for a FREE account.

    As a registered member, you’ll be able to:
    • Participate in all Tacoma discussion topics
    • Communicate privately with other Tacoma owners from around the world
    • Post your own photos in our Members Gallery
    • Access all special features of the site

mandog's Hard Shell Camper & Stories from the Road

Discussion in '3rd Gen. Builds (2016-2023)' started by mandog, Oct 7, 2019.

  1. Oct 7, 2019 at 5:01 PM
    #1
    mandog

    mandog [OP] Lesser-Known Member

    Joined:
    Oct 7, 2019
    Member:
    #307297
    Messages:
    459
    Race City, USA
    Vehicle:
    2017 4WD Off-Road Quicksand Overland
    Hi-diddly-ho Neighbors! :wave:

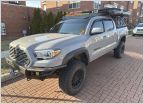
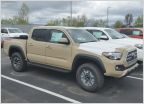
    In October of 2019 I purchased a ‘17 Tacoma TRD-OR 4x4 dipped in Quicksand...

    As the title of this thread states, my intention is to convert the tacoma for overlanding.
    I will update the first post of this thread with recent views and outline any completed/future mods.​
    Badlands, SD​

    During the summer I work as a captain on a research vessel and then truck travel through the winter.
    A link to my stories from the road can be found below and within the topic as well.

    https://www.mandogsays.com
    CLICK >HERE< for zhee YOOTUBES

    Have a look around, feel free to comment, ask questions or shoot the shit.
    We’re all friends here!


    :hattip:mandog /out


    [ PURCHASING DAY ]
    Trade-in next to purchase​

    [ CURRENT LOOK ]
    October 2021
    [ ARTWORK ]


    [ LATEST BUILD VIDEO ]


    [ CURRENT TRAVEL STATUS + UPDATES ]

    Currently: Mooresville, NC

    2019 UPDATES:

    + November Update: Final builds before New Mexico, post #12
    + December Update: Enter Land of Enchantment, post #17

    2020 UPDATES:

    + Spring Update: Return to NC, post #26
    + End of Summer Update: Covid, Bahamas & Hurricanes, post #32
    + Fall Update 1: Leaving Florida, post #33
    + Fall Update 2: 40-Day Yellowstone Excursion, post #34
    + Winter Update: Late Bahamas Trip & Installs, post #38

    2021 UPDATES:
    + January Updates: Journey West & Enter Arizona, post #53 & post #56
    + Arizona Trips: Tonto NF: post #61, Sedona: post #65, Bulldog Canyon post #81
    + Fall Update: Summer recap + winter prep, post #101

    [ TRUCK MODS ]

    01.
    GRILL: Raptor Style with amber lights (included in purchase)
    02. Plasti-dipped emblems + bumper end caps (see post #3)
    03. Raised tailgate letters (see post #3)
    04. SEAT COVERS: Custom embroidered Clazzios (see post #7)
    05. TOPPER: Leer 180 with windoor sliders, headliner & flip down front
    06. Bedrug carpeted Bed-liner
    07. TIRES: Falken Wildpeak A/T3W 265/75/16’s (1 blew, 3 worn see post #87)
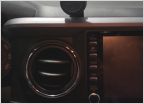
    08. DASH KIT: Expedition Essentials 3TPAM + RAM hardware (see post #8)
    09. ROOF RACK: PrinSu CabRack (see post #10)
    10. Custom reflectix windoor shades (see post #12)
    11. Windoor opening limitations + locking shackles (see post #11)
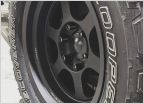
    12. Vinyl wheel overlays (see post #12)
    13. HOOD WRAP: TRD Off-Road by RLC designs (see post #12)
    14. Platform sleeper setup with removable panels (see post #12)
    15. Plano 52" storage box (roof-mounted) (see post #12)
    16. Plano 1819 Sportsman’s box (roof-mounted)
    17. Rotopax 4 gallon fuel storage x2 (roof-mounted)
    18. Custom interior topper shelves (see post #14)
    19. Scan Gauge II onboard diagnostics
    20. End-ding seat belt silencers (ripped out speaker)

    21. DITCH LIGHTS: Cali Raised LED pods + OEM switch (see post #33)
    22. FRIDGE: ARB 47QT single zone (see post #33)
    23. SUSPENSION PT1: Ironman4x4 Stage 2 foam cell pro kit (see post #40)
    24. SUSPENSION PT2: Wheelers superbumps front/rear + ubolt flip kit (see post #36)
    25. SPEAKERS: Kicker 6x9’s and Suburu Tweeters (see post #42)

    26. MESO + AJT Designs chrome delete kit (see post #47)
    27. ECGS Bushing for needle bearing swap

    28. Por-15 Chassis Rust Preventative (see post #52)
    29. TSB Update 04B04
    30. PrinSu Grab Handles (see post #73)
    31. Body Armor Hitch skid plus step
    32. Smittybilt Defender basket
    33. TIRES: Duratrac 33s // 285/75r16 E-Load
    34. KDMAX 6.0 performance tune
    35. Redline hood struts
    36. Anytime front / rear camera
    37. License plate reverse override
    38. Blacked out sequential turn signals

    [ OVERLANDER EQUIPMENT ]

    If you're unfamiliar, Overlanding is vehicle customization with the intention to enable the driver to travel beyond civilization and into more remote, often more challenging areas. Overlanders typically enjoy off-grid camping and try to be self-sustained for extended periods of time.

    SLEEPING
    2" memory foam mattress topper + waterproof cover
    Cabelas Outfitter XL -20 sleeping bag
    Sea to Summit Trek TKi sleeping bag
    Sea to Summit Comfort light mattress pad (removed)
    2 soft throw blankets + 12v electric warming blanket

    ELECTRONICS
    GoPro Hero 7 Black
    2016 iPad Pro 9.7"
    2020 iPhone SE
    Lenovo Ideapad 3
    Bose Quiet Comfort headphones
    Transcend 2TB USB storage
    GAIA subscription based trail maps
    Garmin Instinct Solar wristwatch

    SOLAR & BATTERY
    YETI GoalZero 400W lithium power bank
    BALDR 330W portable power station
    Rockpals foldable 100W solar panel
    ARB Zero 47 QT single zone fridge (anderson cabled to 12v plug in)

    COOKWARE
    Coleman liquid fuel two-burner stove
    MSR XGK EX portable camping stove (backup)
    MSR Deluxe Alpine kitchen set
    GSI outdoors two-person cook set
    MSR trail base gravity water filter
    Lodge dutch oven skillet combo
    Siberian Alpha Pro 22QT cooler (swapped for ARB fridge)
    OXO pour over coffee maker + gooseneck kettle

    CAMPING
    MSR Hubba Hubba two-person tent (tent days are over I think)
    Green elephant pop-up utility tent (gone. blew off in SD)
    Reliance Jumbo-tainer 7-gal water jug
    Advanced Elements 5 gallon solar shower
    Custom built slatted shower stand
    Tri-fold utility shovel // splitting axe // hatchet
    UCO heating lantern converted to clean fuel (don’t use)
    Marchway lightweight folding chairs
    Trekology medium camping table
    Endless breeze 12V fan + mini usb fan

    OFF-ROAD + RECOVERY
    3x Rothco gear bag with assortment of tools
    ARB rapid air down kit // air compressor
    Rhino 20ft, 3" tow strap plus D-ring and soft shackles

    [ FUTURE MODS ]
    +
    Black out Headlamps — AlphaRex Nova

    Down the road (aka wishlist):
    Skid plates: RCI, All-Pro, SOS concepts, Ironman
    Front bumper: CBI, Lil B, Coastal Off-road high clearance or BAMF hybrid
    Rear bumper: CBI high clearance swing out, Brute Force dual or All-pro apex
    Wheels: Right now, I think FJ steelies are the winner but also like the look of SCS Ray10’s, Methods, fifteen52 and Volk Te37.

    See post #2 for vehicle search...
     
    Last edited: Oct 5, 2021
    Hobbs, BlueRidgeFly and davidstacoma like this.
  2. Oct 7, 2019 at 5:10 PM
    #2
    mandog

    mandog [OP] Lesser-Known Member

    Joined:
    Oct 7, 2019
    Member:
    #307297
    Messages:
    459
    Race City, USA
    Vehicle:
    2017 4WD Off-Road Quicksand Overland

    [ BUYING ]


    While searching for this vehicle, I was stuck between opting for a gently-used, low-mile 2016/17 or spending a little extra $$$ and landing myself an 18 or 19. No matter the year, I required the same options: TRD Off Road, DCSB, 4x4 and hopefully colored in Quicksand, Cement or one of the silvers.

    Despite approaching Toyota dealerships during model year-end clearance events, none seemed too interested in letting their 2019's go for anything short of internet list price. I knew my next big buy would be a brand new topper, so those 19's weren't for me.

    Back to the drawing boards...

    The reason I wanted the newer years were two things, resale value obviously, but also TSS came aboard in 2018. Toyota safety sense has some nifty adaptive cruise control features and seeing as how I would be road-trippin', it seemed worthwhile at first. But the more I looked, the more I noticed people trying to figure out ways for how to disable this feature than really expressing the joy of having it in place.

    I certainly wasn't willing to budge on 4x4 being a necessity and I didn't want to go below 2016 for the TRD OR (ya'll know why :cool:). Some may disagree, but I felt the TRD OR had hard features to replicate on a stock SR or Sport. Namely, crawl control and locking rear diff. Lucky for me, I circled back to a listing I'd seen early on in my search and it wound up being the one!


    It had the aftermarket grill as seen, which was something I was going to modify, likely to the TRD PRO style, but this one suits me just fine. I was OTD paying 32k with a small trade-in from my 04 Nissan Frontier. No add-on warranties, as I found it at a Buick GMC dealer, but it does still have 19k on the factory warranty. If anyone has tips on buying warranties post-purchase, I'm all eyes! :cookiemonster: Now that I had the truck I wanted, the first thing was to take care of those unsightly chrome pieces.

    See post #3 for DIY Blackout Emblems, Bumper End Caps and Raised Tailgate Letters...
     
    Last edited: Dec 10, 2019
    Hobbs and Klondike Kid like this.
  3. Oct 7, 2019 at 7:24 PM
    #3
    mandog

    mandog [OP] Lesser-Known Member

    Joined:
    Oct 7, 2019
    Member:
    #307297
    Messages:
    459
    Race City, USA
    Vehicle:
    2017 4WD Off-Road Quicksand Overland
    [ BLACKOUT EMBLEMS ]

    So the first "mod" I had to take care of was those unsightly chrome pieces... Namely, the door emblems and bumper end caps. I had done some research on how this "blacked out" look could be achieved:

    - Purchase overlay stickers and cover the emblems ($135 for a pack on Ebay)
    - Purchase already black emblems and replace existing ones (12.95/per on Ebay)
    - Remove and paint emblems myself (cheap, but removal/reinstall required)
    - Paint emblems with no removal (chosen method)

    I wanted to be cost-effective here, but trust me, I did a lot of research first as the thought of spray painting onto my week old truck was not an idea I considered lightly. Rest assured, the quality of Plasti-dip is as described, completely removable!

    I chose Plasti-dip over Rustoleum's version as I read it was thinner and harder to remove than the thicker, more durable Plasti-dip. Though, I'm sure both products are fine...

    MATERIALS ( for both emblems and bumper caps )
    2 Cans Plasti-Dip black (color is noted by the cap)
    1 Roll 1" Painters tape
    Scraps of junk newsletters
    Utility razor
    Long strike matches

    STEPS
    1. Tape off the immediate surrounding area with just tape
    2. Cover a large spray area with newspapers
    3. Spray thin coats of Plasti-dip with 15-20 min of dry time in between
    (usually the prep work on other sections gave ample time)
    4. Apply multiple coats (I did 5)
    5. Removal of spray protection paper, then tape... Carefully!
    (plasti-dip is continuous and can pull up areas you dont want removed)
    6. Using the non-striking end of the match stick, roll or pick up the parts in between the letters. When its starting to pull up, hold in other hand the utility knife and slice along letters edges

    NOTES
    It took me approximately 5 hours with running to the store for a second can of Plasti-dip
    (I was also doing bumper end caps, see 2nd stage)

    It was fairly easy and I found the results to be close to what I wanted. The issue is "picking" at the excess Plasti-dip and I had a few scuffs to the material. The last step (#6) requires patience!

    It was a royal pain in the d*ck to remove the parts in between the letters. Almost made me wish I did take off the emblems for painting just so I could handle that part easier.


    [ BLACKOUT BUMPER END CAPS + RAISED LETTER INSERTS]

    Same thing with the emblems, tape off the surrounding areas, cover a wide spray area with paper, apply multiple coats in thin, building layers. The thinner the coat the better it turns out. Remove paper, then tape carefully. Have knife handy for slicing away any parts wanting to come up.

    NOTES
    For this job in general I would recommend protecting a much wider area than expected, or simply painting in a sheltered area. I unfortunately had stiff October winds and found little black dots way beyond my anticipated spray zone. The majority of it all came up with ease, using a microfiber rag and alcohol, but made me cringe. I also laid in the black raised tailgate letters ( link in OP ).


    SUMMARY
    Two $5 cans of Plasti-dip, $20 tailgate inserts from Amazon + 5 hours labor was surely an easy, economical approach to clean up and toughen the overall appearance of the vehicle. I think you can do it all with one can, but it doesn't spray as evenly towards the end, and those final coats are the ones you want looking the cleanest. So get two cans! :thumbsup:


    This site contains affiliate links for which the site may be compensated.
    #3
    Klondike Kid likes this.
  4. Nov 3, 2019 at 2:46 PM
    #4
    mandog

    mandog [OP] Lesser-Known Member

    Joined:
    Oct 7, 2019
    Member:
    #307297
    Messages:
    459
    Race City, USA
    Vehicle:
    2017 4WD Off-Road Quicksand Overland

    Projects en route and soon to be installed!!

    .... Clazzio vinyl seat covers with custom embroidery ✅
    .... Leer 180 topper with windoor sliders
    .... Falken Wildpeak AT3W 265/75/16’s
    .... Expedition Essentials 3TPAM dash mount kit
    .... RAM Mounts dash hardware for iPad Pro and iPhone
     
  5. Nov 3, 2019 at 2:49 PM
    #5
    Hobbs

    Hobbs Anti-Lander from way back…

    Joined:
    Mar 20, 2016
    Member:
    #181838
    Messages:
    22,346
    Yep…
    Vehicle:
    Rock Bangen', Desert Tamin', Gold Findin' Machine!
    Cool! I like Quicksand Tacos!

    I've got the Leer 180 with Windoors and I dig it!
     
  6. Nov 3, 2019 at 2:54 PM
    #6
    mandog

    mandog [OP] Lesser-Known Member

    Joined:
    Oct 7, 2019
    Member:
    #307297
    Messages:
    459
    Race City, USA
    Vehicle:
    2017 4WD Off-Road Quicksand Overland
    Thanks Hobbs! I can’t wait to get the topper and tires on. Its going to totally transform the vehicle.
     
  7. Nov 6, 2019 at 1:30 PM
    #7
    mandog

    mandog [OP] Lesser-Known Member

    Joined:
    Oct 7, 2019
    Member:
    #307297
    Messages:
    459
    Race City, USA
    Vehicle:
    2017 4WD Off-Road Quicksand Overland
    It's been a busy week with deliveries, assemblies, installs, returns and new orders.

    Clazzio Seats have been installed and man, oh man do they transform the interior:


    While I wait for the new 3TPAM wiring cover to get powder coated from Expedition Essentials, I began assembling the various RAM Mounts components I had already received.

    I really struggled with the assembly of the Tab-lock iPad holder. I had to use a pencil to place tiny locking nuts within the gaps of its slide tracks, while pushing a screw from behind that just knocked the nut back out. After struggling with this for 20 minutes, I was on to the next melt-down...


    As you can see, there is absolutely no way you can attach the end clamp and not expect it to be pried loose from the row of screws. It offers no back support and barely a lip to hold it in place.

    Considering this is sold as a locking "security" device, a very obvious weak point has been overlooked. Anyone in a rush could twist the clamp right off the main housing and voila — tablet has a new owner.

    Aside from the poor concept, its also clunky, tough to align, rough on the device when using the spring clamp and it wouldn't fit the iPad with a keyboard case. So I sent it back to instead try the X-grip mount for 9-10" tablets and see how it fares once I have it in hand.

    I ordered direct from Landloop.net as they are a few bucks cheaper than RAM Mounts and even offered a free shipping + 5% discount promo code. :thumbsup:


    Next, I was off to my local Leonard shop to get the Leer 180 Topper + Bed Rug installed:

    Just a teaser, but this thing is slick! I will post more when I have tires on and can update with some of the time-lapse video projects I have been working on. Oh, and I couldn't hold out any longer on a Prinsu cab rack. It's ordered :rofl:


    Stay tuned for more updates coming soon!!

    .... Falken Wildpeak AT3W 265/75/16’s — DELIVERED (Awaiting install)
    .... Expedition Essentials 3TPAM dash mount kit — 1/2 DELIVERED (Awaiting wiring cover)
    .... RAM Mounts hardware — DELIVERED / RETURNED (Tab-lock for X-Grip)
    .... PrinSu Design Cab Rack Roof Rack — ORDERED
     
    Last edited: Nov 19, 2020
    J&ATacoma and jwctaco like this.
  8. Nov 12, 2019 at 6:36 PM
    #8
    mandog

    mandog [OP] Lesser-Known Member

    Joined:
    Oct 7, 2019
    Member:
    #307297
    Messages:
    459
    Race City, USA
    Vehicle:
    2017 4WD Off-Road Quicksand Overland
    Wrapped up the Expedition Essentials 3TPAM dash accessory mount and installed a few RAM mounts hardware for an iPad and iPhone.


    *AS OF OCTOBER 2019 THERE ARE NEW CHANGES TO THE 3TPAM DASH KIT*
    Instead of the base mount and body being together in one piece, they are now separate.


    Let's get right to the meat of my thoughts on this install... It was not easy, it was not fun, but it was accomplished 100% to my satisfaction. My complaints are the instructions not including a hardware information sheet.


    Hopefully, this walkthrough can be used as a reference.


    EXPEDITION ESSENTIALS 3TPAM DASH ACCESSORY MOUNT INSTALL GUIDE


    TOOLS NEEDED

    Phillips head screwdriver (check if it can pass through the holes of your dash kit)
    9 & 10mm socket + driver
    Needle-nose pliers
    Rubber tipped Alligator clamps
    Drill with 1/4" bit
    Metal file (small enough to pass through a 1/4" hole. Rounded is preferred)


    STEPS
    1.
    Remove radio bezel trim piece (pops out easily by hand)
    2. Remove radio by taking out four surrounding bolts (10mm)
    3. Remove A/C trim piece (notice on the left side the groove that is tucked beneath)
    4. Find your cigarette lighter connection from behind and disconnect it by pulling back (no tabs)

    *DO NOT REMOVE ITS CONNECTORS, YOU WILL BE TAPPING INTO IT*

    5. Using the supplied snap-lock wire connectors, add the existing wire into the back slot, nearest to the fold and place the new supplied wire on the slot closest to the outside edge. Hold in place with one hand while pinching together the snap-lock using needle-nose pliers.

    Notes, notes and more notes: This part is very hard! :annoyed:I wish they would have given extra snap locks. Luckily I had some on hand as one got boogered up in the process. I also split down the middle of the existing wiring housing a few centimeters with a razor blade to give it a little more space/freedom.

    I found needle-nose pliers worked better for reaching into the tight space and accurately applying pressure to the metal wedge that goes into the wires from the snap-lock connector. As of 2019 on a 3rd Gen Tacoma.. Purple is positive // black & white is negative.


    6. Reconnect the Plug onto your cigarette lighter.
    Feel the orientation of the flat metal prongs with your hands and then rotate the plug to match.
    7. Run the new wiring up to the top where the radio sits
    8. Reinstall the A/C trim piece.
    9. Reinstall radio, bolting only the BOTTOM BOLTS
    10. For the top bolts, add in the support brackets. Shorter on Left // Longer on Right
    Keep these relatively loose for the time being. You may have to adjust to get the radio bezel to fit right as well as getting the base mount to line up.
    11. While the radio bezel trim piece is still removed, take the *NEW* (as of Oct. 2019) separate base mount and lay it on top of the radio bezel.
    12. Clamp the two together and mark your drill spots.
    For the slotted sections, I would just go ahead and drill out the entire slot. Also drill/file out the notch for the wiring harness to fit between.

    *IF YOU'RE WONDERING WHICH HOLES TO DRILL, DRILL ALL BUT THE THREADED ONES*


    13.
    Install the base mount to the radio bezel using the LEFTMOST and RIGHTMOST countersunk holes. Use the short, flat-topped machine screws + a washer and nyloc nut (9mm).
    I had to notch out a small portion of one of the clips for the screw to lay straight.
    14. Install the middle bracket, which is the fatter of the two S-shaped aluminum pieces.
    This is where a labeled hardware guide would be useful! Use the rounded 3/4" phillips head machine screw + a washer and nyloc nut (9mm).


    *I DID NOT LIKE THE TINY GAP BETWEEN THE DASH AND MAIN BODY HARDWARE, SO I ADDED IN SOME WEATHER STRIPPING AND RETIGHTENED EVERYTHING DOWN*


    15.
    Snap your radio bezel back into place, and determine if the holes going through the base mount line up with the radio brackets inside the dash. If not, remove and file/drill as needed.
    16. If it's good, leave the radio trim securely in place and mount the left and right brackets.
    17. Install the three, flat-topped machine screws into the tops of the brackets first!
    That way everything is level and then you can adjust and tighten your brackets.
    18. Using a skinny screwdriver tighten down the left and right brackets.


    And there you go! 3TPAM is ready for accessories!


    Thanks for reading! Any questions or comments, feel free to leave them below or in PM.

    Stay tuned for more .... PrinSu Cab Rack and TRD hood wrap up next!!
     
    Last edited: Nov 17, 2019
    davidstacoma likes this.
  9. Nov 12, 2019 at 7:12 PM
    #9
    mandog

    mandog [OP] Lesser-Known Member

    Joined:
    Oct 7, 2019
    Member:
    #307297
    Messages:
    459
    Race City, USA
    Vehicle:
    2017 4WD Off-Road Quicksand Overland
    Got a chance to make it up to Stone Mountain this past weekend with the nephew. It was really nice hiking in 60 degree weather before it all falls to shit. The leaf change was subtle, but such is life. Broke in the new Falkens and am underway with a website video that I'll post soon :wink:


    davidstacoma likes this.
  10. Nov 17, 2019 at 4:36 PM
    #10
    mandog

    mandog [OP] Lesser-Known Member

    Joined:
    Oct 7, 2019
    Member:
    #307297
    Messages:
    459
    Race City, USA
    Vehicle:
    2017 4WD Off-Road Quicksand Overland
    I'll try and keep this concise, but wrapped up the week with quite a few installs...

    INSTALLED
    + Prinsu cab rack arrived and got installed :yay:
    + Swapped out factory interior lights with LEDs
    + Worked on a hack for windoors opening too far
    + New valve stem covers plus a new hitch cover
    + Cut out reflectix for windoor insulation // stealth

    SOON TO BE

    + 3TPAM wiring cover has arrived and ready to get mounted
    + Vinyl wheel covers have arrived. Just waiting for a warm day
    + RLM sign group's TRD logo hood wrap is on its way

    PICTURES

    Prinsu Rack


    Valve Stems


    Interior LEDs


    Bigfoot :cookiemonster:


    Windoors hack


    For the windoor hacks, I'm still a little unsure if this will be the final product. I'm looking to prevent drippage from rainwater. Assuming this comes from the tilt of the glass being towards the shell vs down and away from the vehicle... However, if I limit the degree of its tilt any further, it will be right at smack your forehead level and make access a PIA.

    Feel free to comment with any additional ideas or solutions that have worked for you.


    Coming soon: Hood wrap, tire decals and platform design!
     
    Last edited: Nov 17, 2019
  11. Nov 20, 2019 at 8:39 AM
    #11
    mandog

    mandog [OP] Lesser-Known Member

    Joined:
    Oct 7, 2019
    Member:
    #307297
    Messages:
    459
    Race City, USA
    Vehicle:
    2017 4WD Off-Road Quicksand Overland
    Still waiting on that warm day to do vinyl stuff... :tumbleweed:
    Ya think a 60º day wouldn’t be so hard to come by!!

    Reworked the windoor hack a little further to make sure they angled down just enough to get rainwater to pitch outwards towards the ground.


    Also, sticking with this weed eater string, crimps plus heat-shrink combo, I fab’d a security shackle concept to lock the T-handles from inside.

    Basically, drilled a hole in the swivel portion of the T-handle and installed an eye-bolt. Mounted a U-bolt on the interior bulkhead near to where the tailgate closes and then designed a shackle to clip in between these two points. Keeps the handle from being turned! :locked: Woot!!


    Coming up next, vinyl installs, platform sleeper, solar power bank and roof rack organization!
     
  12. Nov 26, 2019 at 7:00 PM
    #12
    mandog

    mandog [OP] Lesser-Known Member

    Joined:
    Oct 7, 2019
    Member:
    #307297
    Messages:
    459
    Race City, USA
    Vehicle:
    2017 4WD Off-Road Quicksand Overland
    Wow, yet another progress-filled week of installs and DIY assemblies! :bikewheelie2:

    INSTALLED
    +
    3TPAM wiring cover installed
    + Reflectix painted, trimmed to fit and velcroed in
    + Vinyl installs: wheel overlays, hood wrap + mandog decals
    + Platform sleeper constructed, carpeted and installed
    + Plano 52" case for roof rack: brackets fab'd and mounted

    SOON TO BE

    + YETI GoalZero + Rockpals 100W solar panel testing
    + Upper shelving design, fabrication + install
    + Configuring: bedding, cooler, cookware, camp gear, recovery gear, tools, clothing
    + Also... water is getting inside the shell. In more places than one :frusty:


    PICTURES

    Reflextix windoor shades
    Mocked up a template using plastic to then cut the shades to fit in the interior frame.
    Duck taped edges for rigidity and then derped the outward-facing side.


    Vinyl installs


    Took a little break for some fun in the sun!


    Also, wow!! Siberian Cooler came loaded with all of this free swag!!


    Back to work... Platform sleeper setup

    The two rear, smaller boards can be removed and set aside for a full-width sitting area. The middle board works as a partition to the sitting area and rear-access storage space.


    Plano guncase mount

    Cut mounting brackets to size and using 1/4" carriage bolts attached to roof rack. Filled in all around the bolts with GE black weatherproof silicone.


    Nearly complete! Stay tuned for the final touches before hitting the road! :plane:
     
    J&ATacoma likes this.
  13. Nov 28, 2019 at 11:49 AM
    #13
    mandog

    mandog [OP] Lesser-Known Member

    Joined:
    Oct 7, 2019
    Member:
    #307297
    Messages:
    459
    Race City, USA
    Vehicle:
    2017 4WD Off-Road Quicksand Overland

    :hungry:

    Happy Thanksgiving Tacoma Friends & Fam!

    Tested out the camper shell last night... & it slept really well!!


    My weed eater crimps both snapped, though. So, I’ve since swapped out for paracord and its much more user friendly. Adjustable, durable, removable, etc. etc.


    Further testing on the yeti goal zero. I’m inputting 50-60w today with the Rockpals 100w solar panel. Thanks to the busted weed eater cords, I’m able to open up the rear glass fully and catch the sun at a nice angle. Otherwise, I would only be making 20-30w with the reduced angle.

    Here’s to progress... Cheers! :cheers:
     
    J&ATacoma likes this.
  14. Dec 5, 2019 at 4:16 PM
    #14
    mandog

    mandog [OP] Lesser-Known Member

    Joined:
    Oct 7, 2019
    Member:
    #307297
    Messages:
    459
    Race City, USA
    Vehicle:
    2017 4WD Off-Road Quicksand Overland
    It’s been a chilly week, but testing out the topper has been successful. I’ve slept every night in it since the last post. Due to the nighttime temperatures (30s), I’ve added in a 12v warming blanket that draws low wattage from the GoalZERO (about 30w max, with on/off cycles). I’ve also added in the three-season sleeping bag as a barrier shell. With the right amount of layers, I reckon all this should allow me to get into the single digits and be alright. Might add a wool blanket if any more is needed.

    The shelving has been a real bore, but they’ve both been built, fitted, stained and coated. Starboard side has been installed and am also adding in some hooks within the shelving to attach a bungee net. Will do a full write-up of the shelving fabrication once its completed.


    In conjunction to testing the sleeper setup, I am also testing other areas of “truck life” like cooking and camp setup. Not a huge stretch for me, but either way, getting comfortable with things has been beneficial. Especially with arrangement of items. On that front, I also decided to add a Plano 1819 storage box to accommodate taller, messier things like camping fuel and other items.


    Yummmo! :hungry:
     
    BlueRidgeFly and J&ATacoma like this.
  15. Dec 7, 2019 at 10:54 AM
    #15
    mandog

    mandog [OP] Lesser-Known Member

    Joined:
    Oct 7, 2019
    Member:
    #307297
    Messages:
    459
    Race City, USA
    Vehicle:
    2017 4WD Off-Road Quicksand Overland
    Took a much needed creative break, to do something creative! Enjoy :wink:

     
    Last edited: Dec 7, 2019
    frenchee likes this.
  16. Dec 7, 2019 at 12:03 PM
    #16
    mandog

    mandog [OP] Lesser-Known Member

    Joined:
    Oct 7, 2019
    Member:
    #307297
    Messages:
    459
    Race City, USA
    Vehicle:
    2017 4WD Off-Road Quicksand Overland
     
    Last edited: Dec 7, 2019
  17. Dec 25, 2019 at 1:35 PM
    #17
    mandog

    mandog [OP] Lesser-Known Member

    Joined:
    Oct 7, 2019
    Member:
    #307297
    Messages:
    459
    Race City, USA
    Vehicle:
    2017 4WD Off-Road Quicksand Overland


    Merry Christmas :santa: Tacoma Friends & Fam!
    Hoping your holidays are turning out warm, festive & merry! :cheers:


    It’s been some time since my last post, which means the trip out west has begun!

    I’ve since completed all the builds and installs, packed and organized the interior, tested and retested all of the various components to the truck and finally hit the road!

    Traveling near 1800 miles in the span of seven days, I‘ve camped along rivers within Tennessee and Kentucky. Ducked into Mammoth Cave when the rains would not cease. Nestled into a frozen wildlife management area only to be awoken to the sounds of what seemed like a local militia firing off their rifles at dawn. Traveled up winding roads to camp atop a mountain in Arkansas’ Ozark National Forest. Found myself within a sunny, but warm disc golf course in Oklahoma and slept at the canyon floor of Palo Duro State Park in Texas.

    It’s been a whirlwind and everything performed beautifully. I couldn’t be happier with the work I’ve put in and now its time to finally enjoy the road. The plan is to explore New Mexico extensively before moving on to other Southwest features.

    In the meantime, I will catch up on things here in Santa Fe and enjoy the good town vibe of this historic, capital city. Stay tuned and hit subscribe if you want to see more!

    Campsites from along the way...


    Kentucky (Houchin’s Ferry, Brownsville)


    Eastern Arkansas (Big Lake WMA, Blytheville)


    Western Arkansas (Sam’s Throne, Mt Judea)


    Oklahoma (Henryetta Nichols, Henryetta)


    Texas (Palo Duro, Canyon)


    New Mexico (Hwy 104, Las Vegas)
     
    J&ATacoma and frenchee like this.
  18. Jan 7, 2020 at 6:38 PM
    #18
    mandog

    mandog [OP] Lesser-Known Member

    Joined:
    Oct 7, 2019
    Member:
    #307297
    Messages:
    459
    Race City, USA
    Vehicle:
    2017 4WD Off-Road Quicksand Overland


    Well, I’ve spent the past few weeks catching up on video projects :ballchain: and above we have my Tacoma build video that encapsulates what’s been outlined thus far in the thread.

    From here, I can move on to exploring New Mexico and will be bringing out a story for the website once the final two videos are produced. Hope you enjoy! I sure did. :headbang:
     
  19. Jan 24, 2020 at 8:32 AM
    #19
    mandog

    mandog [OP] Lesser-Known Member

    Joined:
    Oct 7, 2019
    Member:
    #307297
    Messages:
    459
    Race City, USA
    Vehicle:
    2017 4WD Off-Road Quicksand Overland


    Two weeks worth of editing and three days spent attempting to resolve an audio issue... Finally, its being released!! :ballchain:

    Off to a mountainous caldera to celebrate and soak in the joys with hot springs before visiting an ancient Puebloan city that probably never dreamed of YouTube. Also adjacent to this site, will be the exploration of Los Alamos.. where dreams of death were constructed.

    :hattip:/mandog
     
  20. Jan 24, 2020 at 5:51 PM
    #20
    Byoung04

    Byoung04 Well-Known Member

    Joined:
    May 11, 2016
    Member:
    #186689
    Messages:
    206
    Gender:
    Male
    First Name:
    Ben
    Arkansas
    Vehicle:
    2019 Cement TRD OR DCSB
    Cool build, I've been looking at doing the exact same thing with my 2019. Been looking at the Leer 180 or Century High-C.

    Very inspirational.

    Ben
     

Products Discussed in

To Top