

-
Welcome to Tacoma World!
You are currently viewing as a guest! To get full-access, you need to register for a FREE account.
As a registered member, you’ll be able to:- Participate in all Tacoma discussion topics
- Communicate privately with other Tacoma owners from around the world
- Post your own photos in our Members Gallery
- Access all special features of the site
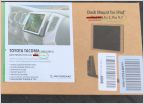 Reviewing the Scosche iPad Dash Mount Kit... Pretty sweet.
 Readylift 69-5212 lift kit
 AFe cold air intake...looking
 Airflow snorkel bolt size?
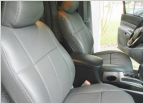 Seat covers
 New to this community with my just acquired 2008 Tacoma
Elmer is getting some goodies
Discussion in '2nd Gen. Tacomas (2005-2015)' started by 2DaMtns, Jun 10, 2016.
Page 1 of 2
Page 1 of 2

