1. Welcome to Tacoma World!

    You are currently viewing as a guest! To get full-access, you need to register for a FREE account.

    As a registered member, you’ll be able to:
    • Participate in all Tacoma discussion topics
    • Communicate privately with other Tacoma owners from around the world
    • Post your own photos in our Members Gallery
    • Access all special features of the site

2nd Gen (2015) Tacoma Speaker upgrade, completely Plug and Play, No splicing, no cutting, no trimmi

Discussion in 'Audio & Video' started by Luke-Maine, Jan 25, 2020.

?

IS this upgrade worth it?

Poll closed Aug 25, 2020.
  1. Yes

    2 vote(s)
    66.7%
  2. No

    0 vote(s)
    0.0%
  3. I buy nice stock systems duh

    0 vote(s)
    0.0%
  4. Id go way further

    1 vote(s)
    33.3%
  1. Jan 25, 2020 at 3:00 PM
    #1
    Luke-Maine

    Luke-Maine [OP] Well-Known Member

    Joined:
    Nov 23, 2019
    Member:
    #311496
    Messages:
    125
    Gender:
    Male
    First Name:
    Luke
    Vehicle:
    15' White 2wd Access cab, 5 lugger
    Led Reverse Lights, Hitch, Foglights, K&N Air Filter.
    2nd Gen (2015) Tacoma Speaker upgrade, completely Plug and Play, No splicing, no cutting, no trimming


    Like most of us, I thought the audio quality in my non-JBL tacoma was really lacking. I read that the entune head unit is severely limited from the bad quality of stock speakers, and that's correct. This write up is about replacing the two main door speakers in a Tacoma, for a total of $55 at the time of writing (1/24/20).


    Huge thanks to irayfz6 - https://www.tacomaworld.com/members/irayfz6.215940/

    He really made this happen in terms of finding the correct parts


    What you need:


    Parts:


    Kenwood KFC-6966S Speaker Pair - https://www.amazon.com/gp/product/B07B6FP8PW/ref=ppx_yo_dt_b_asin_title_o01_s02?ie=UTF8&psc=1
    Speaker Mounting Adapters - https://www.amazon.com/gp/product/B00IIC6CPE/ref=ppx_yo_dt_b_asin_title_o01_s01?ie=UTF8&psc=1


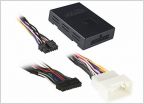
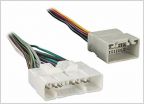
    Speaker Wire Adapters - https://www.amazon.com/gp/product/B01GEIP7RW/ref=ppx_yo_dt_b_asin_title_o04_s02?ie=UTF8&psc=1


    Tools:


    Basic trim removal tool kit - https://www.amazon.com/gp/product/B00HNMLQAG/ref=ppx_yo_dt_b_asin_title_o04_s00?ie=UTF8&psc=1


    Better Quaity trim tool kit with case - https://www.amazon.com/SunplusTrade...stener-Removal/dp/B01M3SP84D/ref=sr_1_1_sspa?


    Screw driver (only philips needed) - https://www.amazon.com/Lutz-6-in-One-Screwdriver-Orange/dp/B07D913ZD7


    With a screwdriver, trim tool, speakers, mount adapters, and wire adapters this is a quick, plug and play process. There is no fabrication or splicing. even the polarity (+ and -) is set and done with the adapters, using two different size connectors, just as comes on the speakers.


    The first step is to take the door panel off. I will recommend you watching TacomaHolics youtube video on this: https://www.youtube.com/watch?v=QcsTwIpyVK8


    There are two screws, and one clip to remove. Both screws are behind small plastic flaps, use your trim tools. One behind the large door handle, and one behind the small one that opens the door.

    HGiO7HOnv6iWWzgidYeVOWpvXuBRgHORC6DZfyRJ_7b556fc89bf396b9cc958ce14da675ad967e918f.jpg

    The pin is in the part of the door panel is near the tweeter. Use a screwdriver to push the middle part. It is then able to be pulled out with a trim tool.

    Photo from tacoma holics video:


    ITiWuqmmG4z2b-aDo-O12edIzf2zqH0HWGxdN_6G_f10a6e8c83c1e0cb5f9b8667ef2db765a0ee2b25.jpg
    Pull of the plastic triangular piece, starting at the top. It simply pulls off, and pushes back on.

    pH7Y70EiEodPI9g6_o_sOM3Fbm4CwLVdw3n2V5kO_d12755d0f3cd06330789cb05cb83c0dbf8fe787a.jpg


    With both screws, and the clip in a safe spot, we can pull the door panel. I find it best to start using four fingers, pull the panel on the lower corner close to the cab. Pull until you hear an audible noise. Now pull every few inches along both sides and the bottom of the panel. Be sure its all unclipped. The door panel will now lift up and off the door. Set it aside in a safe spot where it wont get damaged.

    UiBZzNRkXp9uKam7HixFoFbNAC9Q2credjGir8Pv_0646d4d9629e6a89fddc329f2f74e4f473aa951e.jpg

    You can now unplug the stock speaker, pressing down on the little tab in the connector. Take out all 4 screws holding it in, and keep for later. The old speakers are generally trash, but maybe somebody on the forum wants them.

    jX6SLNa4CSXrwEhsde3iDA15dksWQ077hqwFOhnr_cfac5277948a132ace2f2a319ac88412811c8e89.jpg

    Now you need to screw the new speakers into their mounting adapters. The speakers come with 4 screws for each. Use all 4, it should look like this:


    eOfpbUO5wD4TxBN6BydncgR4mk119wMmrUJUVnjZ_2647c8ae21000fe1f3d137f3d3f0a878cc42e876.jpg
    Feed the wire through the routing hole in the mounting frame. You need to connect the two wires from the adapter, into the speaker. This setup uses two different size connectors, simply connect them where they fit. use the 4 screws from earlier to screw the frame into the door. Plug in the connecter, be sure they clip together correctly. It should now look like this:

    yaDYF15utUBklArK9UL6Hu2QyL0vUyrU52yL0L4l_26c7c26c21ca2a03c2c48bdfec74a471f8559f27.jpg


    Congrats! You’re essentially done.


    Now you need to reinstall the door panels, and throw some music at this.

    Start the door panel installation by sliding in the top part, so the window seals line up with the window. Carefully push it on, and give it a good hit all around the outside so the clips attached. You should be able to hear the clips attached. Put in the small pin by the doorframe, both screws, and the flaps that cover them.


    Repeat for the other door


    Enjoy your newfound audio quality!!

    Speaker test:
    https://www.youtube.com/watch?v=Gy0TwaFPT_0

    Please give me some feedback below!

    If you have any concerns about doing this yourself i'm glad to assist you, leave a message.
     
  2. Apr 16, 2021 at 12:44 PM
    #2
    AbePDX

    AbePDX Well-Known Member

    Joined:
    Dec 27, 2016
    Member:
    #205804
    Messages:
    84
    Gender:
    Male
    First Name:
    Abe
    Portland OR
    Vehicle:
    2007 Silver Mica Tacoma TRD OR V6 MT 6
    what about the rear ones and the tweeter?
     
  3. Apr 16, 2021 at 2:50 PM
    #3
    GRNT4R

    GRNT4R Well-Known Member

    Joined:
    Feb 24, 2020
    Member:
    #320266
    Messages:
    1,028
    Gender:
    Male
    NC - Triad
    Vehicle:
    2010 TRD Sport DCLB 4WD Silver
    TBD
    He went with a coax speaker in the front door so most of his highs are at his legs. For that price on a speaker replacement, you won’t get a component set with separate mid bass and tweeter.
    There are many other options if you want better sound for a little more money
     
    AbePDX[QUOTED] likes this.
To Top