1. Welcome to Tacoma World!

    You are currently viewing as a guest! To get full-access, you need to register for a FREE account.

    As a registered member, you’ll be able to:
    • Participate in all Tacoma discussion topics
    • Communicate privately with other Tacoma owners from around the world
    • Post your own photos in our Members Gallery
    • Access all special features of the site

Bumper/Swing-out Carrier Fabrication...

Discussion in 'Technical Chat' started by Zebinator, Sep 24, 2019.

  1. Sep 24, 2019 at 10:38 AM
    #1
    Zebinator

    Zebinator [OP] Well-Known Member

    Joined:
    Nov 30, 2014
    Member:
    #143381
    Messages:
    918
    Gender:
    Male
    Norcal
    Vehicle:
    06 Tacoma TRD Offroad
    Hey all - i'm planning to build a swing out carrier on an existing bumper and thought about starting this to collect ideas and info....

    First nugget comes from Scott B. who linked me to this draw latch:

    https://www.southco.com/en-us/c2/c2-32-105

    I've noticed some of the more "integrated" units seem to use a pivot that looks a lot like a front axle/bearing set. Any idea if this is the case (and if so, what vehicle they might be scavanged from?)

    Thanks - will post more info as i come across it.

    Zander
     
    Manfred likes this.
  2. Sep 25, 2019 at 7:27 AM
    #2
    taco-newb

    taco-newb Active Member

    Joined:
    Jun 11, 2017
    Member:
    #221203
    Messages:
    30
    Gender:
    Male
    Brigham City, UT
    Vehicle:
    2010 Grey Tacoma 4dr TRD Sport
    2" level in front
    I'm in the same boat. I was actually looking at some of the tube doors for jeeps and think they might be an interesting option to use as the swing out portion. They even have latches that look that they might work. Just use the existing jeep door mounts or upgrade if you need stronger but might be a good idea to upgrade to heavier mounts. They might even be short enough for a dual setup.

    Just FYI...
     
    Manfred likes this.
  3. Sep 25, 2019 at 7:33 AM
    #3
    GHOST SHIP

    GHOST SHIP hates you.

    Joined:
    Mar 9, 2015
    Member:
    #150537
    Messages:
    22,385
    First Name:
    GHOST
  4. Sep 25, 2019 at 7:37 AM
    #4
    eccracer104

    eccracer104 O.G. Member

    Joined:
    Apr 9, 2008
    Member:
    #5854
    Messages:
    14,167
    Gender:
    Male
    First Name:
    Mike
    San Diego, CA
    Vehicle:
    2016 Tundra 4x4
  5. Sep 25, 2019 at 7:42 AM
    #5
    taco-newb

    taco-newb Active Member

    Joined:
    Jun 11, 2017
    Member:
    #221203
    Messages:
    30
    Gender:
    Male
    Brigham City, UT
    Vehicle:
    2010 Grey Tacoma 4dr TRD Sport
    2" level in front
    I think I've looked at that as an option also. Looks great actually. The only thing with the tube doors is you could easily build the dual swing out and the tube doors can be found for under $200 I believe. Of course you would still need hardware. Thanks for the info. Good to have options.
     
  6. Sep 25, 2019 at 7:50 AM
    #6
    GHOST SHIP

    GHOST SHIP hates you.

    Joined:
    Mar 9, 2015
    Member:
    #150537
    Messages:
    22,385
    First Name:
    GHOST
    The dual shear hinges are easier to adapt to existing bumpers FYI. The single pivot (with spindle and bearings) requires you to reinforce the bumper in the corner where you'll be adding the hinge due to the way force is applied by the design. I don't know if 4xinnovations sells the tire carrier alone or if it's only an add-on for their bumpers. If you were to buy just the hinge and latch, anyone capable enough to burn those on should be capable enough to build you the actual swing out.


    I might know a guy...
    :anonymous:
     
    eccracer104[QUOTED] likes this.
  7. Sep 25, 2019 at 8:07 AM
    #7
    eccracer104

    eccracer104 O.G. Member

    Joined:
    Apr 9, 2008
    Member:
    #5854
    Messages:
    14,167
    Gender:
    Male
    First Name:
    Mike
    San Diego, CA
    Vehicle:
    2016 Tundra 4x4
    Oh do you now :spy:
    Yeah you can buy the hinge and latch separate and then build the tube for the carrier how you want it.

    The 4x hinge is dual shear - (and fortunately my bumper has a nice flat area to burn this to).
    upload_2019-9-25_8-1-51.jpg


    Fixing up the 4x latch will be more work, but it's a nice latch -
    upload_2019-9-25_8-3-53.jpg


    One of these guys would probably be easier -
    https://www.ruffstuffspecialties.co...MI-633vJ_s5AIVARx9Ch3V-waSEAkYASABEgIFqfD_BwE
    upload_2019-9-25_8-5-10.jpg

    Swing out is a long ways away for me. My spare still fits enough under the bed that I'm not concerned about it until I jump to 35" tires.
     
  8. Sep 25, 2019 at 8:12 AM
    #8
    GHOST SHIP

    GHOST SHIP hates you.

    Joined:
    Mar 9, 2015
    Member:
    #150537
    Messages:
    22,385
    First Name:
    GHOST
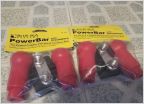
    I have one of those little red handle guys on my own swing out that I made. They're surprisingly strong for what looks like a pair of ungraded 8mm nuts holding the latch closed, you just have to make sure to orient them correctly. Haven't had a problem bouncing around on trails or rough terrain, but I'd like to add something else (like a hitch pin) for redundancy and as a failsafe.
     
    eccracer104[QUOTED] likes this.
  9. Sep 25, 2019 at 9:14 AM
    #9
    Scott B.

    Scott B. Well-Known Member

    Joined:
    Nov 11, 2014
    Member:
    #142118
    Messages:
    4,462
    Gender:
    Male
    First Name:
    Scott
    Georgia
    Vehicle:
    2015 ACLB SR5 4x4 Expo
    I've been thinking about using the SouthCo latches.

    I'm not sure, but I think you have to pull the handle to "open" the latch, in order to close the swingout.
     
    Zebinator[OP] likes this.
  10. Sep 25, 2019 at 2:24 PM
    #10
    Zebinator

    Zebinator [OP] Well-Known Member

    Joined:
    Nov 30, 2014
    Member:
    #143381
    Messages:
    918
    Gender:
    Male
    Norcal
    Vehicle:
    06 Tacoma TRD Offroad
    Thanks so much for the contributions, all. This is really helpful. I want to recess a post for the hinge like the guys from Expedition One... but will be starting with the 4Xinnovations plain bumper... so that diy kit from A to Z might be very helpful.

    Personally I like the southco draw latch as it's oriented the right direction and you don't have to flip a bail over the catch to latch it. it does have a pin hole for security, if needed...

    Sketch forth coming....


    [​IMG]
     
  11. Sep 25, 2019 at 8:29 PM
    #11
    6 gearT444E

    6 gearT444E Certified Electron Pusher

    Joined:
    Feb 3, 2018
    Member:
    #243372
    Messages:
    7,770
    Deep South
    Herculiner Hootus
    +1 for the 4x latch. Added a swingout to a relentless bumper a few years ago, took around 8 hours from start to finish. I later added a jerry can mount. Not my truck but built for a buddy of mine.
    19247725_10114588596273014_6582143915354594186_n.jpg 20621275_10114685755570004_6601118037478468490_n.jpg


    20622233_10114685755664814_2276623942291672698_n.jpg
    20637853_10114685756039064_2926138693864367052_n.jpg 20294059_10114588620818824_4234039902754190970_n.jpg
     
    Area51Runner and Zebinator[OP] like this.
  12. Sep 28, 2019 at 2:55 PM
    #12
    Zebinator

    Zebinator [OP] Well-Known Member

    Joined:
    Nov 30, 2014
    Member:
    #143381
    Messages:
    918
    Gender:
    Male
    Norcal
    Vehicle:
    06 Tacoma TRD Offroad
    This site contains affiliate links for which the site may be compensated.
    #12
  13. Oct 13, 2019 at 9:27 AM
    #13
    Zebinator

    Zebinator [OP] Well-Known Member

    Joined:
    Nov 30, 2014
    Member:
    #143381
    Messages:
    918
    Gender:
    Male
    Norcal
    Vehicle:
    06 Tacoma TRD Offroad
    Parts are all here!

    i like how they just stuck a shipping label on the bumper. That's how it showed up. (i mean, what's going to happen to it, after all)

    Plenty of beef in there to weld the spindle:

    It's kinda daunting to start hacking in to a shiny new $800 bumper, so I spent some more time sketching before going nuts.

    At this point I just want to get the bumper hacked up and welded back together so i can get it powdercoated and on the truck.
     
    Last edited: Oct 13, 2019
  14. Oct 13, 2019 at 11:31 AM
    #14
    Zebinator

    Zebinator [OP] Well-Known Member

    Joined:
    Nov 30, 2014
    Member:
    #143381
    Messages:
    918
    Gender:
    Male
    Norcal
    Vehicle:
    06 Tacoma TRD Offroad
    Hey, what wall tube is that? .120? Or thinner?
     
  15. Oct 14, 2019 at 7:26 PM
    #15
    6 gearT444E

    6 gearT444E Certified Electron Pusher

    Joined:
    Feb 3, 2018
    Member:
    #243372
    Messages:
    7,770
    Deep South
    Herculiner Hootus
    i believe either .120 or .188. It’s a heavy swing out. Thankfully I don’t have to pay to fill that gas tank.
     
  16. Oct 15, 2019 at 9:38 AM
    #16
    Zebinator

    Zebinator [OP] Well-Known Member

    Joined:
    Nov 30, 2014
    Member:
    #143381
    Messages:
    918
    Gender:
    Male
    Norcal
    Vehicle:
    06 Tacoma TRD Offroad
    Ha ha! Indeed. Yeah I want to find the balance between heavy and not too flexy. Thanks!
     
  17. Jan 25, 2020 at 1:23 PM
    #17
    Scott B.

    Scott B. Well-Known Member

    Joined:
    Nov 11, 2014
    Member:
    #142118
    Messages:
    4,462
    Gender:
    Male
    First Name:
    Scott
    Georgia
    Vehicle:
    2015 ACLB SR5 4x4 Expo
    Any updates?

    I am getting to point where I am actually going to work on mine.
     
  18. Jan 31, 2020 at 5:24 PM
    #18
    Zebinator

    Zebinator [OP] Well-Known Member

    Joined:
    Nov 30, 2014
    Member:
    #143381
    Messages:
    918
    Gender:
    Male
    Norcal
    Vehicle:
    06 Tacoma TRD Offroad
    Funny you should ask! YES! I need to get some pics uploaded... I’m pretty much done on the bumper - a couple holes to cut for lights but it’s all welded up and just needs prep for powder coat. Next on to the tire carrier. Stand by!
     
  19. Feb 1, 2020 at 11:30 AM
    #19
    Zebinator

    Zebinator [OP] Well-Known Member

    Joined:
    Nov 30, 2014
    Member:
    #143381
    Messages:
    918
    Gender:
    Male
    Norcal
    Vehicle:
    06 Tacoma TRD Offroad
    Bumper Progress!
    Let the hacking begin:

    Wasn't too sure how this was going to work as I was cutting in to the wall too...

    My pivot is going to obscure almost all the jack point so I needed to move it over...

    Jack point widened. Pivot test fit. You can see i had to machine a little flat to get it to fit so tight against the inside wall of the bumper...

    The welding... not so pretty. Sigh.

    Cut a couple pieces out of 1/4" bar to fill in the jack point and the top of the bumper next to the pivot... All cleaned up!

    What's left:
    - throw one more bead on the pivot in the jack point opening...
    - drill holes for the license plate lights
    - drill/cut cutouts for my reverse lights

    Then on to the tire carrier!
     
  20. Feb 29, 2020 at 8:54 AM
    #20
    Zebinator

    Zebinator [OP] Well-Known Member

    Joined:
    Nov 30, 2014
    Member:
    #143381
    Messages:
    918
    Gender:
    Male
    Norcal
    Vehicle:
    06 Tacoma TRD Offroad
    I realized that drilling the last few holes in the bumper for the tire carrier was going to require actually making the tire carrier... at least partially... and that led to various other realizations, like, oh yah, I need some kind of pin/stop thing to keep the tire carrier from flopping all over when i'm opening it and the truck isn't perfectly level... So, this has gotten more complicated.

    Machining the end of the arm to mate up to the pivot... I found this nutty cutter in the wtf bin (my dad must have found it at an auction) which was a relief, because i didn't have a 2-1/4" hole saw. Anyway, it was VERY LOUD so i added clamps to keep the thing from ringing like mad. (worked pretty well!)


    Then, on to the pivot latch bits:


    What you're looking at is a small piece of box set in to the carrier arm right next to the pivot. Through that i've got a piece of 1/2 OD tube going vertically through both pieces of box. In the tube is a 3/8" pin that will drop down in to a hole in the bumper to hold the carrier open. A spring will sit in the tube on top of the pin to keep the pin pressed down... Next up is to machine a slot in the tube for the pin's "trigger" that will get screwed in to the pin sideways. No, i won't be able to weld all sides of this assembly but oh well. It's gonna be strong as hell and look clean!
     
    smelly621 likes this.

Products Discussed in

To Top