

-
Welcome to Tacoma World!
You are currently viewing as a guest! To get full-access, you need to register for a FREE account.
As a registered member, you’ll be able to:- Participate in all Tacoma discussion topics
- Communicate privately with other Tacoma owners from around the world
- Post your own photos in our Members Gallery
- Access all special features of the site
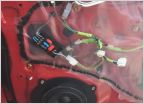 My Radio upgrade saga
 Preventing rodents from getting under the hood
 Another source for the inexpensive LRV Protecta bed mat.
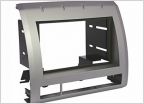 2011 audio upgrade questions
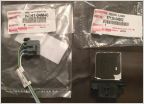 Recirculating air button help
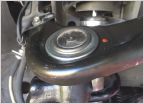 Upper ball joint install now completed
Hood Strut Rivet Install Fail
Discussion in '2nd Gen. Tacomas (2005-2015)' started by Sinjhin, Apr 16, 2020.
Page 1 of 5
Page 1 of 5
Products Discussed in


