1. Welcome to Tacoma World!

    You are currently viewing as a guest! To get full-access, you need to register for a FREE account.

    As a registered member, you’ll be able to:
    • Participate in all Tacoma discussion topics
    • Communicate privately with other Tacoma owners from around the world
    • Post your own photos in our Members Gallery
    • Access all special features of the site

COVID19 mod-a-thon (BHLM flush mount morimoto 5.0 (keep your bumper on, permaseal tips) & front cam

Discussion in '3rd Gen. Tacomas (2016-2023)' started by soL_cement, May 2, 2020.

  1. May 2, 2020 at 6:44 PM
    #1
    soL_cement

    soL_cement [OP] Member

    Joined:
    Apr 9, 2018
    Member:
    #250005
    Messages:
    5
    First Name:
    Sunny
    Bay Area
    Vehicle:
    '18 Cement TRD OR DCSB MT
    Used the shelter in place to get the Taco closer to a finished product, who am i kidding it’ll never be done, but we can call it the ‘new normal’ (sorry)


    I was forced into premium and tech packages, since leather, moonroof and a stick were nonnegotiable. Of course the stick doesnt come with a push button start (why not??), and the parking sensors ARE ONLY ON THE BACK?!? Theres a backup camera WTF do we need sensors back there for!


    Front cam has always been necessary, for trail and parking. Got the front/back anytime camera kit from @runnin4tacos since that switch is boss. I needed to get a different camera since im not a fan of the TRD Pro grill, and needed a horizontal mount for the stock 18 OR grill. Got me a $40 NATIKA off amazon which worked beautifully. Also picked up the sequential black mirror turn signals off R4T, which look fresh though they are not super bright (i bet the MESO ones are brighter, but i really love the sequential look) fwiw the screw driver and panel popper included in the turn signal were the two main tools i used for the BHLM


    Install was pretty straightforward, didnt take too many pics here other than the finished product. #builtnotbought a custom spring washer out of the bottom of a beer can and some electrical tape. Ran the wires through a grommet on the passenger side firewall, and tapped into power at the relays behind the passenger kick panel. If you use the NATIKA camera, beware the included taps are too large gauge for the small gauge camera wires, so it won't piece the casing. Either prestrip, or use twist caps (took me a few hours to locate that problem!)


    OK now the real juicy stuff, BHLM with morimoto 5.0 projectors and profile pivot sequential custom DRL board. I really couldn't justify/afford the $200+ extra for the RX350 projectors (including a clear lens and tune) in an already $500+ project. Based on the retrofit source and lightwerkz it seemed like their brackets for the Morimoto 5.0s would be a direct bolt on. NOT THE CASE. I started with TRS retro-quick "kit" that was supposed to be “designed for the tacoma” per the TRS rep. Maybe with the 4.0 projecctor, but for the 5.0 the bracket NEEDS to be modified. Only two holes line up, so you will need to drill two more holes in the projector housing. Also, either you need to trim the inside of the bracket so it fits in front of the projector, then the projecter will be recessed 1/2” or more in the headlight housing. Or you need to cut the projector so that you can mount the bracket behind the projector for a flush mount. The TRS bracket is half the price of the lightwerkz bracket, so i prob should have just kept that one since i ended up cutting the projector. I thought the lightwerks one would not need modificaiton.


    the TRS retro-quick bracket


    I was a bit irritated with TRS, and timed it right that lightwerkz was having its 20% off spring sale. Returned most of the stuff to TRS and got everything from lightwerkz. The lightwerks bracket does not need to be modified if you use it as in front of the projector. However with this you will get the 1/2” recess of the lense.


    lightwerkz bracket


    OR like i mentioned with the TRS bracket you can cut down the projector housing and get a flush mount. More on this later...


    Ok back to the beginning. YOU DO NOT NEED TO TAKE OFF THE FRONT BUMPER. If you are careful you wont break things like i did.


    1. Remove the grille (2 10mm screws, two pop rivets) and the inner spalsh shields (1 pop rivet each side)

    2. Take the front 3-4 or more 10mm screws that hold the fender flare on (OR) rather than just grabbing and pulling like i did to break some tabs,then go around to the inside of the fender and release the 3 tabs, NOW you can pull the flare off through the double sided tape

    3. Remove two screws under the side of the front bumper cover, and use the panel pryer to release the plastic retaining clip in the wheel well

    4. Use a panel pryer, and release the corner of the bumper cover away from the bracket, from here you can access the lower 10mm headlight bolt

    5. Two more 10mm screws on top of the headlight, and either pull straight forward, or release the clip at the inside lower corner.

    I taped the outside of the lenses with masking tape. This was not necessary and I prob wouldn't do it again. It leaves A LOT of adhesive on the lens, which is easy enough to get off with goo gone. The real problem was that as I was putting everything back together i had to take it off the tape anyway to make sure it looked right inside, and there was no dust inside. It was difficult to tell between adhesive on the outside and dust on the inside sometimes.


    Remove all the rubber, screws, and clips that you can.


    Now the part most people are scared of, baking. Let me tell you, just bake it. I did my baking first thing in the morning, and thought i remembered the procedure, and of course didnt double check. I baked the first one at 390!! Started to smell burning plastic around 5-7 mins and looked and saw the parts that were touching metal were melting. I melted two ~3” holes in the back of the housing. Good news, I placed it in such a way that none of the mounting areas were too bad melted. I epoxyed the melted plastic back over the holes, and it is totally fine now.


    At that temp, it popped open REALLY easy. I used the morimoto seam splitter which was all i needed. It was a waste of money since I already owned a fuel line pliers, but $10 was a drop in the bucket. Caliper spreaders was also a waste of money that didnt get used. Honestly all i needed was a pair of gardening gloves, the small screwdriver and panel popper from the sequential mirror turn signal box, and the seam splitter/hose puller


    That being said, dont go that high. The second one i did 290 for 12 minutes and only slightly melted the lower inner clip. Id prob go 275 for 12 minutes if i did it again. Id also probably put it lens side down on some parchment paper, since the clear lens def can tolerate a lot more heat than the black backing. I did them face forward, and even with some melting it turned out fine.


    Now heres the first tip. When you are prying, try to keep the permaseal in the backing channel, and dont split the permaseal, try to release the lens from it. If there is any permaseal that sticks to the lens, try to get that off while its still hot. I wonder if goo gone would work, i just rubbed at it with my gloved hands, non gloved hands, and carefully scraped with a screw driver.


    Once the lens is clear, remove the bezels and stick the lens in a garbage bag to minimize dust, dont worry about the permaseal till you are ready to put everything back together. Its MUCH easier to work with when its cold. I did the first one right after i baked it and got the seal out in 4 pieces. Did the second one before i put everything back together and got it all out in 1 piece. just start disassembling the reflector buckets and projector. I used an egg carton to keep all the screws organized, 18 spots, i needed 19.

    I did the standard paint job, just the bezels with krylon fusion satin black and left the reflective buckets reflective. Didnt prep them other than wipe them down, maybe i should have only time will tell. I hit the amber lenses with some VHT, its hard to tell how dark they will get since you spray the inside, i prob did 4 light coats and they came out DARK. 1-2 is prob fine. Do the painting now so you can let it dry and add extra coats if you need to.


    I really wanted a sequential switchback DRL, so i got the profile pivot universal kit, and cut the stock DRL board, drilled holes and attached with picture wire. Id say it looks great, however there are a couple of the LEDs that glow both white and amber all the time. You can barely tell, and the sequential looks dope so im happy. Its possible that if i insulated the stock DRL board with electrical tape before attaching the new LEDS and made sure the picture wire was also insulated this wouldn’t have happened. Oh well.


    The wiring is a bit confusing, i wired the new DRL module (three wires are ground, power, and turn) into the stock(ground, DRL(full), park(dim)), and then spliced the turn wire into the engine side of the harness on the park wire. To truly make the DRL work like stock, you will need an additional relay on the engine side to switch between full and dim for the DRL. Im waiting for my relays, so I can update how that goes once i do it next week. For now, they turn off when the headlights or parking brake are on, which id imagine is how the profile RGBs function too, though i cannot confirm this.


    Now for the pucker part. If you want the projector lenses to be flush (stock position) in the headlight housing, youll need to cut down the projector housing, i used a dremel with a cutting wheel. Notch out the bottom corners (next to the high beam solenoid, and opposite) Make sure you trim enough so it doesn’t hit the screw holes in the headlight housing (that the bracket screws onto). I also had to trim the top slightly so it doesn’t hit the top screw holes. You will have to trim the housing way down, which makes A LOT of dust. Put the projector in a bag, and have a shopvac running. Honestly this is all hidden, so as long as the 4 screw holes that hold the bracket are intact you can cut away most of the rest of it. I wish i had done this, instead i kept trimming little by little until the projector fit perfect.
    morimoto 5.0 left, stock right


    Now get that pesky permaseal out, and get everything back together. The trick to the permaseal, is TAKE YOUR TIME, and you are trying to separeate it from the plastic, not cut scrape, rip, melt or break it. Use a small screw driver or plastic panel pryer, and free up each side from the channel. I thought of it like “breaking the bead” on a tire. If you can separate all the way down to the bottom of the channel great, but you really just need to get that top corner to break free from the plastic. Go all the way around on the outside edge, and then the inside edge. Then, find a spot that is fully freed up, grab it with and put gentle tension on it as you stick a small flat head screwdriver and roll the permaseal out. Again dont pry scrape or rip, but roll it. If you did a good job with freeing up the sides, it will just roll on out in one whole piece.
    so satisfying!


    Wipe everything down, blast with compressed air, and screw everythign back together. Stretch your retrorubber to just fill the channel. Try to avoid too much over the screw holes. Line up the lens on the backing and give it a good squeeze all the way around.


    Bake per instructions, i think its 260* for 7 minutes, then go around with a pliers or channel locks and squeeze the lens on tight. Try to squeeze at the screw hole with your channel locks while you screw to get it threaded properly.


    You can take your high beam solenoid pig tail out through the DRL seal, or the low beam seal. If you cut any seal, re-enforce it with electical tape or epoxy because once you snip it it will continue to tear. I reinforced with electrical tape, and put some gorilla tape over the top to hold everything tight.

    i did the silicone ring next to the projector, the headlight seal pushed in, then the lock ring, then the bulb and retaining ring

    finished product

    you can see the morimoto lens is flush, in its stock position


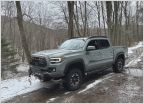
    and for those of you who read to the bottom, my truck was so dirty because just before i started this project, we found the most epic camp spot of all time thanks for reading!
     
    inksin, jluu44, siniquezu and 8 others like this.
  2. May 2, 2020 at 6:51 PM
    #2
    rcarpio19

    rcarpio19 Well-Known Member

    Joined:
    Sep 19, 2019
    Member:
    #305707
    Messages:
    414
    Gender:
    Male
    First Name:
    Ronnie
    Vehicle:
    2019 Cement Tacoma TRD OR
    Looks nice!!
     
  3. May 2, 2020 at 7:13 PM
    #3
    Coolfinedonewicked

    Coolfinedonewicked Well-Known Member

    Joined:
    May 3, 2018
    Member:
    #252455
    Messages:
    201
    Gender:
    Male
    Kaua’i, Hawai’i
    Vehicle:
    2019 Cement Tacoma TRD OR DCSB
    Thank you for the write up.
     
  4. May 2, 2020 at 7:46 PM
    #4
    Dammit Evie

    Dammit Evie Evie the Schnauzer

    Joined:
    Jun 4, 2018
    Member:
    #255466
    Messages:
    881
    Gender:
    Male
    First Name:
    Mike
    IDAHO-.-. .-.. .- ... ... .. ..-. .. . -..
    Vehicle:
    2018 Tacoma TRD Sport 4x4 DCSB A/T MGM
    Exterior Mods: TRD Pro SS catback exhaust | TRD Pro Grille | Redline Tuning hood QuickLIFT | OEM Tacoma bedmat | Black running boards | Derped chrome badges | Me-So Gashole | TRD Pro 17x8Alloy wheels Interior Mods: Black Clazzio Napa Leather seat covers |Aluminum stereo knobs Engine Mods: TRD Pro Intake Air Box Up Coming Mods: 265/70R17 Falken Wildpeak tires
    Excellent write up, thank you!
     
  5. Aug 6, 2020 at 9:17 AM
    #5
    avi8or_co

    avi8or_co Well-Known Member

    Joined:
    Dec 15, 2018
    Member:
    #275897
    Messages:
    594
    Gender:
    Male
    Vehicle:
    2019 Cavalry Blue TRD Sport
    Just curious...once all the work is done, do the aiming adjustments work normally? I assume they do since the new projector is simply mounted where the other one was.
     
  6. Aug 6, 2020 at 9:55 AM
    #6
    Khoadattran

    Khoadattran Well-Known Member

    Joined:
    Jul 7, 2019
    Member:
    #298519
    Messages:
    766
    Gender:
    Male
    First Name:
    Khoa
    Any videos of the headlights and drl in action?
     

Products Discussed in

To Top