1. Welcome to Tacoma World!

    You are currently viewing as a guest! To get full-access, you need to register for a FREE account.

    As a registered member, you’ll be able to:
    • Participate in all Tacoma discussion topics
    • Communicate privately with other Tacoma owners from around the world
    • Post your own photos in our Members Gallery
    • Access all special features of the site

Front Diff Removal and Install

Discussion in '2nd Gen. Tacomas (2005-2015)' started by jtrue, Jun 19, 2017.

  1. Jun 19, 2017 at 11:43 AM
    #1
    jtrue

    jtrue [OP] Well-Known Member

    Joined:
    Jun 2, 2016
    Member:
    #188593
    Messages:
    170
    Gender:
    Male
    SLC, UT
    Vehicle:
    2014 Super White Tacoma TRD
    Picking up new rear with Harrop elocker and 4:10s along with new front diff with just gears and new ECGS bushing for my 14 DCLB. Anyone have a link with step by step instructions for front diff removal? Is it the same as 1st Gen?
     
  2. Jun 19, 2017 at 12:33 PM
    #2
    jtrue

    jtrue [OP] Well-Known Member

    Joined:
    Jun 2, 2016
    Member:
    #188593
    Messages:
    170
    Gender:
    Male
    SLC, UT
    Vehicle:
    2014 Super White Tacoma TRD
    Found it at ttora, linking here so others can find it if searching specifically on TW.
     
  3. Jun 19, 2017 at 12:57 PM
    #3
    stickyTaco

    stickyTaco Fuck Cancer

    Joined:
    Dec 11, 2012
    Member:
    #92904
    Messages:
    5,928
    Gender:
    Male
    First Name:
    Zack
    Reno/Tahoe
    Vehicle:
    '12 DCSB TRD-OR
    Fox/Dakar with Relentless goodies and stuff
    Thanks for the link. I'll be regearing in a few months so this will be helpful.
     
  4. Jun 28, 2017 at 6:12 PM
    #4
    jtrue

    jtrue [OP] Well-Known Member

    Joined:
    Jun 2, 2016
    Member:
    #188593
    Messages:
    170
    Gender:
    Male
    SLC, UT
    Vehicle:
    2014 Super White Tacoma TRD
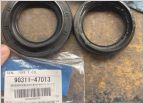
    These just came in, waiting on extended brake lines while I have to bleed and then ready to install!

    IMG_20170627_193533_041.jpg
     

    Attached Files:

    Sna, Tsinajinii and stickyTaco like this.
  5. Jul 12, 2019 at 8:09 AM
    #5
    ToyotaRoamer86

    ToyotaRoamer86 Well-Known Member

    Joined:
    Jun 20, 2017
    Member:
    #221993
    Messages:
    520
    Gender:
    Male
    First Name:
    Brandon
    Frisco, CO
    Vehicle:
    2007 Tacoma TRD Sport
    4.10 geras?? That is all
     
  6. Jul 12, 2019 at 8:39 AM
    #6
    Taco'09

    Taco'09 Well-Known Member

    Joined:
    Dec 31, 2008
    Member:
    #12073
    Messages:
    1,876
    Gender:
    Male
    Op, I've done the Eaton/Harrop install on my front and the thing i remember the most vividly is how deceptively heavy it was. Do yourself a favor and rent/borrow a suitable jack such as a transmission jack, as trying to do this alone was not a lot of fun.
     
    whatstcp likes this.
  7. Jul 12, 2019 at 4:15 PM
    #7
    jtrue

    jtrue [OP] Well-Known Member

    Joined:
    Jun 2, 2016
    Member:
    #188593
    Messages:
    170
    Gender:
    Male
    SLC, UT
    Vehicle:
    2014 Super White Tacoma TRD
    This thread is about 2 years old. Yes, went with 4.10s to bring the truck back to factory spec when bumping up to 33's. Didn't want or need anything more as most of my "wheeling" is on forest service roads and I'm not doing a ton of crawling. I had no issue doing this with a normal jack and some 3/4 ply, but YMMV.
     
  8. Jun 4, 2020 at 5:40 PM
    #8
    UnrestrictedPilot

    UnrestrictedPilot Well-Known Member

    Joined:
    Jul 31, 2019
    Member:
    #300860
    Messages:
    50
    Gender:
    Male
    First Name:
    Josh
    Vehicle:
    2008 Tacoma Double Cab
    Hey Jtrue did you find any good instructions on doing this? Do you have a difficulty level by chance?
     
  9. Jun 4, 2020 at 6:30 PM
    #9
    jtrue

    jtrue [OP] Well-Known Member

    Joined:
    Jun 2, 2016
    Member:
    #188593
    Messages:
    170
    Gender:
    Male
    SLC, UT
    Vehicle:
    2014 Super White Tacoma TRD
    These are the instructions linked above. Make sure you swap the stub shaft from the old diff to the new one. I did it by myself and it was rather difficult, having a helper would be nice. If you have never done it before plan on a full day.
     
  10. Jun 5, 2020 at 1:57 PM
    #10
    UnrestrictedPilot

    UnrestrictedPilot Well-Known Member

    Joined:
    Jul 31, 2019
    Member:
    #300860
    Messages:
    50
    Gender:
    Male
    First Name:
    Josh
    Vehicle:
    2008 Tacoma Double Cab
    Okay I saw these online but didnt know if there were a better set out there. Do you have a picture of a stub shaft? Im not sure if that would apply to me but i am planning on getting a built 3rd member to swap in there fro ECGS with the air locker up front.
     
  11. Jun 5, 2020 at 5:18 PM
    #11
    jtrue

    jtrue [OP] Well-Known Member

    Joined:
    Jun 2, 2016
    Member:
    #188593
    Messages:
    170
    Gender:
    Male
    SLC, UT
    Vehicle:
    2014 Super White Tacoma TRD
    It sounds like you'll be swapping out both the front diff and rear 3rd member w/ air lockers installed by ECGS in both?

    The stub shaft is specific to the front diff. If you're buying a new diff with the airlocker already installed and returning your diff as a core then you need to do this, otherwise the ADD collar will slide over and have nothing to enagage 4wd. Link here: https://eastcoastgearsupply.com/files/PDF%20Files/toyota-clamshell-stub-shaft-removal.pdf
     
    Tango Bravo likes this.

Products Discussed in

To Top