1. Welcome to Tacoma World!

    You are currently viewing as a guest! To get full-access, you need to register for a FREE account.

    As a registered member, you’ll be able to:
    • Participate in all Tacoma discussion topics
    • Communicate privately with other Tacoma owners from around the world
    • Post your own photos in our Members Gallery
    • Access all special features of the site

New Pioneer DMH-WC6600NEX flush mount install

Discussion in 'Audio & Video' started by PreRunnerSeth, May 27, 2020.

  1. Jul 6, 2020 at 8:18 AM
    #601
    zachrdz

    zachrdz Active Member

    Joined:
    Jan 2, 2017
    Member:
    #206375
    Messages:
    27
    Gender:
    Male
    First Name:
    Zach
    Texas
    Vehicle:
    2017 Cement Tacoma TRD Pro
    The Yellow/Black and Yellow/Green cables are not used as plim has stated.

    Make sure to also connect the solid blue wire that is attached to the antenna to the Blue/White wire on the harness, it should be the only 3-way connection. If you do not connect this solid blue wire, the antenna will still work, but its signal will be poor.

    The solid Orange wire also goes with the Orange/White cable for screen dimming.

    Outside of these wires, the rest should match up color to color.
     
  2. Jul 6, 2020 at 8:21 AM
    #602
    LaggyEvo

    LaggyEvo Well-Known Member

    Joined:
    Oct 18, 2018
    Member:
    #269826
    Messages:
    106
    Gender:
    Male
    First Name:
    Matt
    Gainesville, FL
    Vehicle:
    2018 Cavalry Blue TRD PRO MT
    285/75r16 BFG KO2
    Thanks I was actually wondering about that blue wire that comes off the antenna adapter. I also ended up with two reverse camera harnesses so I guess I’ll find out which one matches the factory pin connector.
     
  3. Jul 6, 2020 at 8:56 AM
    #603
    zachrdz

    zachrdz Active Member

    Joined:
    Jan 2, 2017
    Member:
    #206375
    Messages:
    27
    Gender:
    Male
    First Name:
    Zach
    Texas
    Vehicle:
    2017 Cement Tacoma TRD Pro
    No problem, I also ended up with two backup camera cables and found that the harness with more wires/same colors works.

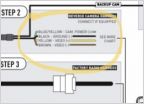
    Here are some images I took of the cables I ended up using for the install. I didn't buy the satellite radio adapter, so I didn't use the satellite cable that came with the sT02 box. The red lines/crosses mark the cables that weren't needed for my install.

    Also, when programming the maestro I would just go with the default options it gives you for the steering wheel. I had to flash that thing 4 times to finally realize the default options were the best. The buttons on the right of the steering wheel, even though configurable, will not do anything but control the small dash screen/secondary display, so it seems configuring those buttons to do anything else is pointless. The cool thing is that I am still able to see the songs and control the radio with the secondary display like before with the original radio, the only screen that seems to not work in the secondary display is the compass. I've also tried updating the firmware to the 1.13 update using the CarAVAssist app, but even though I've tried three different phones, I cannot get it to successfully transfer the update via hotspot. I will be trying the usb stick method later instead. Currently, I have not seen any issues with the 1.10 version that is installed though, CarPlay seems to work great (wireless and wired through the usb port).

    Edit: Added photo of pioneer cables. Not shown, but also used the AXXESS - 4-Pin OE USB Retention Adapter, the Metra Antenna Adapter and an RCA/aux cable for the install.

    IMG_3683.jpg
    IMG_3685.jpg
    IMG_3682.jpg
    IMG-3687.jpg
     
    Last edited: Jul 6, 2020
    venkman781, BountyOR_VF2 and fj4fun like this.
  4. Jul 6, 2020 at 10:03 AM
    #604
    cameleon50

    cameleon50 Well-Known Member

    Joined:
    Jan 14, 2014
    Member:
    #120593
    Messages:
    203
    Gender:
    Male
    Weatherford, Tejas!
    Vehicle:
    YotaWerx'd 2017 TRD PRO CEMENT
    Hammer Hanger, Kings 2.5, ICON Leaf + UCA, Marlin, OEM Audio Plus, OVTune, Nitro 5.29, MESO, Victory 4x4
  5. Jul 6, 2020 at 10:15 AM
    #605
    zachrdz

    zachrdz Active Member

    Joined:
    Jan 2, 2017
    Member:
    #206375
    Messages:
    27
    Gender:
    Male
    First Name:
    Zach
    Texas
    Vehicle:
    2017 Cement Tacoma TRD Pro
    cameleon50[QUOTED] likes this.
  6. Jul 6, 2020 at 12:39 PM
    #606
    LaggyEvo

    LaggyEvo Well-Known Member

    Joined:
    Oct 18, 2018
    Member:
    #269826
    Messages:
    106
    Gender:
    Male
    First Name:
    Matt
    Gainesville, FL
    Vehicle:
    2018 Cavalry Blue TRD PRO MT
    285/75r16 BFG KO2
    The pictures of the different harnesses above are very helpful, wish I had them before starting this haha. I just finished my install today, drilled out the OEM brackets after mocking them up with the old and new radios sitting side by side on a table to get the depth right. the only thing I didnt install was the mic since I was sweaty and tired but I want to eventually mount it near the factory one. The screen sticks out maybe 1/8" and I could play around with the side mounts if I wanted to since the way I drilled the holes left some slop for adjustment. My only gripe is the backup camera resolution seems pretty bad. I cleaned it and everything and still seems about half the resolution as stock.
    g4x3hmks6acr9L_XLhr8E2FVxFY34c9QHUgQ_dhj_120abcf969cf5096aa863ad7689d93e9ff4a5f42.jpg

    Anyone have any recommendations for routing the microphone wiring?
     
    Last edited: Jul 6, 2020
    zachrdz and cameleon50 like this.
  7. Jul 6, 2020 at 1:58 PM
    #607
    PreRunnerSeth

    PreRunnerSeth [OP] Well-Known Member

    Joined:
    Aug 12, 2009
    Member:
    #21110
    Messages:
    4,457
    Gender:
    Male
    Apex, NC
    Vehicle:
    16 Super White Limited 4x4
    it just seems worse because you're seeing the crappy stock camera on a bigger high res screen
     
    Volksparts, emund and Ch78 like this.
  8. Jul 6, 2020 at 3:48 PM
    #608
    zachrdz

    zachrdz Active Member

    Joined:
    Jan 2, 2017
    Member:
    #206375
    Messages:
    27
    Gender:
    Male
    First Name:
    Zach
    Texas
    Vehicle:
    2017 Cement Tacoma TRD Pro
    Awesome! I noticed the same thing with my camera and just chalked it up to it now being shown on a higher res screen. As for the mic, I just ran it under the weather stripping up to the side pillar. I would like to get it to sit where the oem mic is, but not sure how to get it there and what I would need to pull apart. I did see other users mention it's possible, but if someone can post some picture of the process that would be greatly appreciated!

    I followed the steps in this video to run the mic wire (starting at 3:35)

    IMG-3715.jpg

    Here are some pics of the final install and how it sits.

    IMG_3709.jpg
    IMG_3702.jpg
    IMG_3705.jpg

    I initially bought the American International TOYK974 Dash Kit, but wasn't too happy about the way it was sitting and just ended up modifying the original brackets which took forever.

    The lime green indicates the holes I am currently using after a bunch of trial and error. I drew some blue arrows to where I think it may actually work better to sit flush.
    The blue arrows are exactly where there are existing bumps in the metal that make it easy to guide a drill through, so I may try modifying the bracket again and move my two screws on each side to the blue location instead of the green. You can see with the attached pic of the radio, if using the blue location it may be easy to move forward and backward to adjust because of the multiple screw holes available on the radio there. Note that the picture of the radio with the screws wasn't my final location, I had to modify it more after it was taken, which is why I drew the lime green indicators on the bracket to show the current state I'm using. Honestly though, I think it still looks good the way it's currently angled since it kind of goes with the look of the dash, so I'm torn on whether I want to put time into making it sit flush.

    IMG_3691.jpg
    IMG_3690.jpg
     
    Last edited: Jul 6, 2020
  9. Jul 6, 2020 at 3:58 PM
    #609
    Khoadattran

    Khoadattran Well-Known Member

    Joined:
    Jul 7, 2019
    Member:
    #298519
    Messages:
    766
    Gender:
    Male
    First Name:
    Khoa
    I am going to hook up a front camera to the head unit but I got a question on the wiring though. Where do I tap this red wire to?

    20200706_173109.jpg
     
    Biscuits likes this.
  10. Jul 6, 2020 at 5:14 PM
    #610
    Ch78

    Ch78 GBO!

    Joined:
    Apr 22, 2016
    Member:
    #185006
    Messages:
    2,330
    Gender:
    Male
    First Name:
    Chris
    Tomball, TX
    Vehicle:
    25’ Landcruiser 1958
    Tuned By D3 Performance
    I had this problem also but the OP gave me info on how to do it a few pages back that worked perfectly.

    Pull the overhead console down. Take clip off the mic then push it under the headliner into the overhead console area. Disconnect the OE mic then pop it out. You can tuck OE harness into a empty hole. Use double sided tape to secure the mic in the OE spot. Now tuck the mic cable under the edge of the headliner then down the pillar molding then route through the dash to back of the radio. I didn’t pull the moulding out, I just used a trim tool and pushed it under the edge.
     
    zachrdz[QUOTED] likes this.
  11. Jul 6, 2020 at 7:37 PM
    #611
    plim

    plim Well-Known Member

    Joined:
    Aug 9, 2019
    Member:
    #301681
    Messages:
    84
    Gender:
    Male
    First Name:
    Pascal
    Vehicle:
    2019 Black TRD Pro

    I forgot to order this harness, so I just took of the plastic of the pioneer gps cable, and removed the original plastic of the factory gps antenna wire. It’s really easy to do with a small screwdriver or de-pinning tool. Then put the Pioneer plastic back on to the factory wire, and everything fits fine. No harness needed :)
    Below is a picture of the pioneer wire, sans plastic plug, and the original factory plastic plug.
    8F25EED7-7D40-4ADD-86A9-CEF40BB96195.jpg 26AF074E-32DA-4317-B06A-D567CFB94850.jpg
     
    Last edited: Jul 6, 2020
    Biscuits and zachrdz[QUOTED] like this.
  12. Jul 6, 2020 at 8:32 PM
    #612
    CoAlpha

    CoAlpha Well-Known Member

    Joined:
    May 10, 2020
    Member:
    #327565
    Messages:
    104
    Gender:
    Male

    did you have to drop the whole top? or just the corner and jam your arm up there? thanks
     
    zachrdz and Arisian like this.
  13. Jul 6, 2020 at 9:16 PM
    #613
    Arisian

    Arisian Well-Known Member

    Joined:
    Jun 11, 2020
    Member:
    #331160
    Messages:
    47
    Gender:
    Male
    Vehicle:
    2019 Gray Tacom SR5
    none yet!
    Welp - my 2 weeks of troubleshooting and ordering replacements are almost done. I can't believe I had to replace every single component...sheesh. Just glad to be, truly, on the final mile

    Got the unit and Maestro working tonight. I'll do the final trim and alignment over the weekend - it faces up a bit, but that doesn't bother me so much as Im pretty tall, and the angle is suitable. The GPS antennae adapter broke (wire came out of male connector) during the process, so I'll have to fix that this weekend as well. While I'm in there I may run a new front camera (anyone have a suggestion for model?) and also a Mini HDMI to HDMI cable (was looking for a knockout for it, anyone have suggestions there, too?)

    So a few questions:
    • Recommendations on front camera?
    • Recommendations on wiring boards for the battery? Ie, if I'm going to be adding components, like front-end camera, that require power, what's the most elegant way to do this? I may not be asking this question correctly - apologies in advance!
    • Recommendations on HDMI media knock out panel?
    • Lastly, There are two antennae connectors (3, actually) that come off the stock radio - the far left is the GPS antennae, what is the far right? Same connection style...

    Lastly, I also leave you all with an amazing discovery I fell upon over the Holiday weekend - Curry garlic ketchup! Holy crap... it's amazing. You'll thank me later.


    IMG_4315.jpg
    IMG_4316.jpg IMG_4311.jpg
     
    Biscuits, Markdizle, Ch78 and 2 others like this.
  14. Jul 7, 2020 at 4:01 AM
    #614
    Ch78

    Ch78 GBO!

    Joined:
    Apr 22, 2016
    Member:
    #185006
    Messages:
    2,330
    Gender:
    Male
    First Name:
    Chris
    Tomball, TX
    Vehicle:
    25’ Landcruiser 1958
    Tuned By D3 Performance
    Just pull the overhead console. You don’t need to drop the headliner, just slightly pull it enough in the center to push the mic through then tuck the cable under the edge by the windshield.
     
    Taco_dak likes this.
  15. Jul 7, 2020 at 6:34 AM
    #615
    dwillhere1

    dwillhere1 Well-Known Member

    Joined:
    Feb 22, 2019
    Member:
    #284029
    Messages:
    429
    Gender:
    Male
    First Name:
    Dan
    Surprise, AZ
    Vehicle:
    2017 TRD OFFROAD
    Nice!! So the whole time it was the deck. Glad u got it going! The antenna on the right tied up with the radio antenna is Satellite for factory xm or whatever radio.
     
    Arisian[QUOTED] likes this.
  16. Jul 7, 2020 at 6:58 AM
    #616
    Arisian

    Arisian Well-Known Member

    Joined:
    Jun 11, 2020
    Member:
    #331160
    Messages:
    47
    Gender:
    Male
    Vehicle:
    2019 Gray Tacom SR5
    none yet!
    So a few questions:
    • Recommendations on front camera?

    • Recommendations on wiring boards for the battery? I'm very ignorant to auto-wiring, assume it all goes through the fuse box? Ie, if I'm going to be adding components, like front-end camera, that require power, what's the most elegant way to do this? I may not be asking this question correctly - apologies in advance! Any direction on this would be ah-maz-ing - Ive searched the forums but I must be looking for the wrong thing.

     
  17. Jul 7, 2020 at 7:48 AM
    #617
    dwillhere1

    dwillhere1 Well-Known Member

    Joined:
    Feb 22, 2019
    Member:
    #284029
    Messages:
    429
    Gender:
    Male
    First Name:
    Dan
    Surprise, AZ
    Vehicle:
    2017 TRD OFFROAD
    I use the Blue Sea Sysytems Blade fuse Block. I have a 6 circuit panel. This gets its own 4gauge wire from the +12v and its own 4 gauge ground directly to a good metal surface. It is available on AMAZON in different quantity circuits. I believe it is good to run up to 30A fuses. All of my external power and lighting is fed from this to either switches or relays to control switches. To add a circuit in the interior of the truck i use (add a circuit fuse taps) these will give u an additional lead from one fuesed location and still allow original fuse to be installed. There is also a 90 degree mini hdmi to female hdmi available on amazon that will convert the mini to regular that u can plug a device directly into or run an hdmi cable to and use the dash insert like u show above.

    https://www.amazon.com/Blue-Sea-Systems-5025-Blade/dp/B000THQ0CQ/ref=sr_1_2?crid=QMB1P4GHJ8PI&dchild=1&keywords=blue+sea+6+circuit+fuse+block&qid=1594133435&sprefix=blue+sea+6%2Caps%2C202&sr=8-2


    https://www.amazon.com/CableCreatio...1&keywords=mini+hdmi+90&qid=1594133693&sr=8-3

    I don't have enough room behind my deck because i have the 7600. So this is why i bought the 90.

    74B9B6BD-D6E6-47D0-BDA2-8F04DAAB9574.jpg
     
    Last edited: Jul 7, 2020
    Arisian[QUOTED] likes this.
  18. Jul 7, 2020 at 10:38 AM
    #618
    Arisian

    Arisian Well-Known Member

    Joined:
    Jun 11, 2020
    Member:
    #331160
    Messages:
    47
    Gender:
    Male
    Vehicle:
    2019 Gray Tacom SR5
    none yet!
    This is 100% what I had in mind. Thank you. Ordering now! I'd be stoked to see more details of your setup!

    Now... to wade through these forums to find a good front cam setting and install - I can't seem to find any consensus? Thoughts?

    I'm debating these two - but unsure which would have the easiest install (obvious the license plate mount would:
     
    Last edited: Jul 7, 2020
  19. Jul 7, 2020 at 12:35 PM
    #619
    dwillhere1

    dwillhere1 Well-Known Member

    Joined:
    Feb 22, 2019
    Member:
    #284029
    Messages:
    429
    Gender:
    Male
    First Name:
    Dan
    Surprise, AZ
    Vehicle:
    2017 TRD OFFROAD
    I've looked at camera 2. Don't have one yet but looks like it would tuck somewhere better. Let me know what u want to see and I'll work on some pics.
     
  20. Jul 7, 2020 at 12:36 PM
    #620
    crashdb

    crashdb I break chainsaws

    Joined:
    Aug 16, 2017
    Member:
    #226954
    Messages:
    9,699
    Gender:
    Male
    First Name:
    Dave
    Manassas, VA
    Vehicle:
    2008 Toyota Matrix
    Rollin' hydrocarbons!
    The Natika can fit in the grille. I have one in my Pro grille.
     
    Arisian likes this.

Products Discussed in

To Top