1. Welcome to Tacoma World!

    You are currently viewing as a guest! To get full-access, you need to register for a FREE account.

    As a registered member, you’ll be able to:
    • Participate in all Tacoma discussion topics
    • Communicate privately with other Tacoma owners from around the world
    • Post your own photos in our Members Gallery
    • Access all special features of the site

New Pioneer DMH-WC6600NEX flush mount install

Discussion in 'Audio & Video' started by PreRunnerSeth, May 27, 2020.

  1. Aug 14, 2020 at 6:43 PM
    #941
    MunchTIME

    MunchTIME Well-Known Member

    Joined:
    May 2, 2018
    Member:
    #252340
    Messages:
    806
    SD, CA
    I’m an idiot and I figured it out eventually i cut the rca connectors off the harness in error and wired them to the radio speak outputs. Then i spliced them back on and connected them to the front left and right speaker outs but still had a problem. Turned out i had the LPF on for the front speakers. Turned that off and it’s golden
     
    dwillhere1[QUOTED] likes this.
  2. Aug 14, 2020 at 6:49 PM
    #942
    FrayAdjacent

    FrayAdjacent Well-Known Member

    Joined:
    Aug 7, 2017
    Member:
    #226135
    Messages:
    374
    Gender:
    Male
    First Name:
    Matthew
    Austin, TX
    Vehicle:
    2017 Tacoma SR5 4x4
    I actually got to get out this evening at dusk, and was able to confirm my unit IS dimming when the headlights turn on. I could see it fade over a few seconds. Seems to be fine... so that's at least another thing I didn't connect badly! I'm waiting on a right angle USB C connector. I'm going to route a short male to female cable out under the edge of the trim so I can plug the phone into the head unit for wired Android Auto.

    And BTW, fuck Google on this shit... I've been using Play Music for a couple years with a lot of tracks I've uploaded, but most of them showed the same (wrong) album art. I had most of the tracks on my phone, so I copied them to my puter, deleted them from the phone and then updated all of the ID3 information. Probably 1/3 of the tracks were wrong, and maybe 1/4 didn't have ID3 tags at all. Once cleaned up, I started to upload them again. It stopped at 363 tracks and would NOT upload any more.

    Then I get the email about Play Music going away and being replaced by YouTube Music. So I check that out, have it transfer my shit over, upload the remaining tracks. Seems good. I get into the truck earlier today and try to play music with it, and it starts OK, but then when I manually selected a track, it stopped and complained about not being able to play the video. WTF? Damnit, Google. Oh, and apparently you have to have a premium account on YT Music to be able to stream to Android Auto. WTF, Google??
     
  3. Aug 14, 2020 at 8:24 PM
    #943
    dwillhere1

    dwillhere1 Well-Known Member

    Joined:
    Feb 22, 2019
    Member:
    #284029
    Messages:
    429
    Gender:
    Male
    First Name:
    Dan
    Surprise, AZ
    Vehicle:
    2017 TRD OFFROAD
    Nice! Glad u got it
     
    MunchTIME[QUOTED] likes this.
  4. Aug 14, 2020 at 9:36 PM
    #944
    bumfluff

    bumfluff New Member

    Joined:
    Aug 14, 2020
    Member:
    #337681
    Messages:
    1
    Just got my new 2020 and wondering if anyone knows if/how this headunit set up will work with the new birds eye 360 camera? Is there any aftermarket solution at this point? I'm assuming no, but i figured i would confirm with the experts.

    Btw first post, I trolled for hours before purchasing though, happy to be official!
     
  5. Aug 15, 2020 at 6:53 AM
    #945
    daveeasa

    daveeasa FBC Harness Solutions

    Joined:
    May 14, 2020
    Member:
    #328079
    Messages:
    7,445
    Gender:
    Male
    First Name:
    David
    PNW
    Vehicle:
    2016 Tacoma OR DCSB 6MT, 2005 RC 5MT PreRunner, 2002 Tundra SR5 RCLB 4x4
    I had read your post earlier but didn’t understand it at the time. So I stumbled through this one myself last night.

    I don’t personally think the instructions are all that well done. Outside of the sheet listing wire colors for the few which vary.

    Two or three extra photos or diagrams would go a long way to help clarify. Especially for cutting off the front speaker rca’s and the ODBII connection.

    Shoot, a 3 minute YouTube on how to prep the harness would rock. Step 1 could be stash the harnesses which are not used in one bag and put them somewhere out of the way.

    I’ll try to take a photo and mark it up.
     
  6. Aug 15, 2020 at 11:29 AM
    #946
    dwillhere1

    dwillhere1 Well-Known Member

    Joined:
    Feb 22, 2019
    Member:
    #284029
    Messages:
    429
    Gender:
    Male
    First Name:
    Dan
    Surprise, AZ
    Vehicle:
    2017 TRD OFFROAD
     
    daveeasa[QUOTED] likes this.
  7. Aug 15, 2020 at 2:55 PM
    #947
    mistareeman

    mistareeman Well-Known Member

    Joined:
    Jun 7, 2019
    Member:
    #295648
    Messages:
    92
    Your Mom
    Vehicle:
    2019 ORDCSBMT4x4
    Damn it. Screw this thread and everyone posting pictures of this fantastic solution for vehicles without AA/CP.

    I just ordered my kit from Amazon.
     
    MunchTIME likes this.
  8. Aug 15, 2020 at 2:57 PM
    #948
    crashdb

    crashdb I break chainsaws

    Joined:
    Aug 16, 2017
    Member:
    #226954
    Messages:
    9,699
    Gender:
    Male
    First Name:
    Dave
    Manassas, VA
    Vehicle:
    2008 Toyota Matrix
    Rollin' hydrocarbons!
    Welcome to Tacoma World.
     
    max_o and mistareeman[QUOTED] like this.
  9. Aug 15, 2020 at 3:00 PM
    #949
    FrayAdjacent

    FrayAdjacent Well-Known Member

    Joined:
    Aug 7, 2017
    Member:
    #226135
    Messages:
    374
    Gender:
    Male
    First Name:
    Matthew
    Austin, TX
    Vehicle:
    2017 Tacoma SR5 4x4

    THAT is why my radio won't tune. I am missing that wire. Nowhere to be found. Ugh.

    Yep, checked the box, where I threw all the things I didn't think I needed... that cable isn't in there. I found one on Amazon that looks like it should work.

    This connects to the grey cable from the truck, right? I know the blue wire needs to be spliced to the blue and blue/white wire on the regular harness.
     
    Last edited: Aug 15, 2020
  10. Aug 15, 2020 at 8:12 PM
    #950
    TiHo

    TiHo Well-Known Member

    Joined:
    Aug 26, 2018
    Member:
    #264160
    Messages:
    351
    Gender:
    Male
    Vehicle:
    2018 TRD Sport
    Yep you got it. Splice the blue wire into the blue and blue/white wire and plug it into the plug that fits it on the truck.
     
  11. Aug 16, 2020 at 6:26 AM
    #951
    daveeasa

    daveeasa FBC Harness Solutions

    Joined:
    May 14, 2020
    Member:
    #328079
    Messages:
    7,445
    Gender:
    Male
    First Name:
    David
    PNW
    Vehicle:
    2016 Tacoma OR DCSB 6MT, 2005 RC 5MT PreRunner, 2002 Tundra SR5 RCLB 4x4
    I worked through the brackets last night. Used a 1/8” drill bit on the nubs and as pilot holes then enlarged to 7/16 for mounting. The brackets still work great with the etune which is a nice option to keep. I marked the mounting holes on the etune just in case I swap it back for a sale or something.

    I think everyone is aligning the fourth hole back on the screen brackets with the top factory hole and from there the rest is all about aligning the pivot so the screen lays flat. I drilled out the two bottom holes for the larger unit and left it attached to the screen brackets.

    EDIT: Just to be clear, these photos are when I mistakenly had the brackets on the 3rd hole from the front. I realized after a first test-install that they need to be on the 4th hold from the front and I wound up having to drill a 2nd hole for the rearmost screw which only has one spot vs the 4 which the top and bottom have on the front. The most important information in these photos is the rough angle of the bottom edge of the factory bracket, it's not quite parallel but more of a very slight angle. The good news is you can enlarge any hole you make with a larger bit if you need some wiggle room. The top hole is the factory one so you only really need to fine-tune the pivot or the angle the screen makes with the bezel and if you have the tops relatively snug and the bottoms looser you can press it into place, remove the trim, unbolt, and then make those side bolts/screws nice and tight and it should be golden.

    I'll do my best to get more photos tonight, it will show 2 holes b/c of this goof on my part, so do your best to be smarter than me :)

    AFA91636-6753-4E12-BF0D-45C496785158.jpg CD005DBE-AD35-4EDD-839D-2D0530931BB3.jpg 5C57FAA8-EDEA-421A-88A7-13E22B380AB7.jpg 2E5B85C7-F77B-441C-B53E-F5D23981A08F.jpg B3C92AB7-20B4-4857-A09A-ECB20EC8AEC3.jpg

    EDIT: As noted above, the photos at the top are my first attempt and it was too deep inside the dash. I moved the front screws to the 4th position in front and drilled new holes for the rear screws. Here are photos of how the brackets attach to achieve the flush mount look.

    For anyone starting this I would drill out the nubs, then attach the top holes to the 4th position, then line up the brackets like I show in the pictures below. Then mark and drill the lower front holes, mount them on 4th position to confirm (or drill bigger if slightly off). Last, mark and drill the lower rear holes which are probably the hardest to get just right. You can likely use the markings on the brackets assuming they are in the same spots for all of us.

    4D3839A0-7537-4A41-B7A5-EDCE54E6E191.jpg
    E4EFA4A8-8B3E-42D5-BBF0-F29898D0B96D.jpg
     
    Last edited: Sep 1, 2020
    Ahomeofbones and Toms 17 like this.
  12. Aug 16, 2020 at 7:08 AM
    #952
    Tamagotchee

    Tamagotchee Well-Known Member

    Joined:
    Jan 12, 2020
    Member:
    #315934
    Messages:
    143
    Gender:
    Male
    SWVA
    Vehicle:
    2019 TRD Off Road Tacoma
    Do you need to use the obd2 plug for all vehicle features to show up on the pioneer screen? Or will the maestro do all of that as well?
     
    Last edited: Aug 16, 2020
  13. Aug 16, 2020 at 9:43 AM
    #953
    daveeasa

    daveeasa FBC Harness Solutions

    Joined:
    May 14, 2020
    Member:
    #328079
    Messages:
    7,445
    Gender:
    Male
    First Name:
    David
    PNW
    Vehicle:
    2016 Tacoma OR DCSB 6MT, 2005 RC 5MT PreRunner, 2002 Tundra SR5 RCLB 4x4
    I haven’t yet figured out where the ODBII connector plugs in. Does anyone know? Figure I’ll leave it out since @dwillhere1 says so.

    Anyone else consider a relay for remote out? I’ve got two amps in my future plus maestro and antenna, tempted to wire in a simple relay while I’m connecting things. Probably completely unnecessary.
     
  14. Aug 16, 2020 at 9:59 AM
    #954
    dwillhere1

    dwillhere1 Well-Known Member

    Joined:
    Feb 22, 2019
    Member:
    #284029
    Messages:
    429
    Gender:
    Male
    First Name:
    Dan
    Surprise, AZ
    Vehicle:
    2017 TRD OFFROAD
    I haven’t used a relay in many years. Seems the newer amps start up slow by them selves without popping
     
  15. Aug 16, 2020 at 10:50 AM
    #955
    MikeyL5

    MikeyL5 Well-Known Member

    Joined:
    Dec 14, 2014
    Member:
    #144288
    Messages:
    93
    Gender:
    Male
    First Name:
    Mike
    orlando, FL
    Vehicle:
    2019 TRD Off Road
    2019 Tacoma TRD Off Road Weathertech Floor Mats MESO Customs Black Mirror Blinkers MESO Customs Interior Blackout KitS MESO Customs Interior Light KitS Bakflip F1 bed cover OEM Black TRD Pro Grill TRD Skid Plate TRD Intake & Exhaust YotaLeds Amber Grill Lights Diode Dynamics SS3 Max Amber Fog Diode Dynamics 32” Hidden Light Bar Brandons Customs Retrofit Headlights Vision Pro F1 LED Low Beams Cali Raised 0 degree Rock sliders Cali Raised Raptor Tail Lights Cali Raised Bed Molle panel Stealth custom series Brushed Bronze RAY10 wheels 17x9 -38 Nitto Ridge Grappler 315/70/17 Lil B Fabrication Cab Mount Relocate All Pro Off Road High Angle CV boots Extended Stainless front and rear brake lines SPC LR upper control arms Accutune Fox 2.5 Front Coilover w R/R Accutune Fox 2.0 Rear Shock w R/R & C/A Icon RXT Rear Leaf Springs ECGS Yukon 5.29 ratio differentials ECGS 8 inch clamshell bushing Prinsu Cab Rack Heretic 40” light bar Baja Designs Rock Lights Pioneer DMH6600 head unit OEM Audio Plus Reference 500 Up top overland Thin fin 5% tint, 70% windshield with Windsheild strip 2 degree axle shim Hyper tech speedo recalibration.
    ok so let me say this back to you to make sure u got it right.

    so you did an add a fuse to the fuse box under the dash - into the fuse for the cigarette lighter. Then you connected this add a fuse to the new cigarette adapter you bought from Amazon (which has its own fuse in it). Then you put the Samsung dual usb in that, which powers your fire stick.

    sound right?
     
  16. Aug 16, 2020 at 7:42 PM
    #956
    dwillhere1

    dwillhere1 Well-Known Member

    Joined:
    Feb 22, 2019
    Member:
    #284029
    Messages:
    429
    Gender:
    Male
    First Name:
    Dan
    Surprise, AZ
    Vehicle:
    2017 TRD OFFROAD
    @MikeyL5 close. Lol. First part is right about the fuse. Then ran the positive to behind the switch panel below the ac controls. Here I tapped in the dual usb square style that snaps into the dash in place of one of the switches. On the same wire I tied the positive of the female cigarette adapter and ran this adapter up above the deck. Plugged into the cigarette adapter is a Samsung 3A usb male cig style. So. The dual usb power in the dash and the female cig adapter are powered from the same fuse on the add a fuse plug. I did not install additional fuses for each item. This way if they trip I don’t have to pull the dash apart to replace a fuse. I would only need to replace 1 fuse at the fuse panel location below the dash. Also the ground, I used the same size wire as the positive, grounded it to metal and tapped both items ground to this same wire. I did post all of the parts I ran when I made the post about adding the fire stick. Hope this helps. Any questions feel free to pm me. I bought a whole roll of 14ga 2 conductor cable for these truck projects. So the ground is also close to the under dash fuse panel. This wire is nice because it can run inside and outside if the truck. I even made a dual usb panel on the back of the armrest for rear passengers and a panel in the left back side of the bed. This rear panel gives u usb, 12v cig female plug, voltage readout of the battery and a switch that feeds bed lighting. I could go on and on! Lol. Way too much time and money invested. Lol

    https://www.amazon.com/dp/B07FD2Z6GF


    this is the one I installed in the switch location below the ac controls. The only stock switches I have left in there are the QI charger and the parking sensors. All of the rest I have changed to something else
     
    Last edited: Aug 16, 2020
  17. Aug 16, 2020 at 8:42 PM
    #957
    FrayAdjacent

    FrayAdjacent Well-Known Member

    Joined:
    Aug 7, 2017
    Member:
    #226135
    Messages:
    374
    Gender:
    Male
    First Name:
    Matthew
    Austin, TX
    Vehicle:
    2017 Tacoma SR5 4x4
    I finally got to drive at night... the screen doesn't dim very much at all, and in the screen dimming menu, there's really no manual way to set brightness. That's silly.

    I also noticed that with Waze on dark mode, the screen seems to get dimmer when I turn my headlights OFF. Yeah, it's BRIGHTER with the headlights on!!

    ETA: I found where brightness can be adjusted. The manual states settings under the Picture Adjustment section of the settings will remember settings with both the headlights ON and OFF, so you can tweak both separately. I went and poked around there and found it. A little tweaking of the Brightness, Dimmer and Contrast should get me where I want to be.

    And Amazon sent me the wrong stinking antenna adapter! UGH.
     
    Last edited: Aug 17, 2020
  18. Aug 17, 2020 at 11:20 PM
    #958
    MunchTIME

    MunchTIME Well-Known Member

    Joined:
    May 2, 2018
    Member:
    #252340
    Messages:
    806
    SD, CA
    I’ve been looking through the 3rd gen threads for info on how to install a front camera and it seems everyone uses the dang anytime kit on stock head units. I’m trying to wire one up for use with my 6600 and I’ve got the video RCA plugged in no prob, but where do I wire the camera power wires to? Also, I don’t need to wire in the red wire coming out of the harness near the video out jack, do i?
     
  19. Aug 18, 2020 at 6:23 AM
    #959
    Tamagotchee

    Tamagotchee Well-Known Member

    Joined:
    Jan 12, 2020
    Member:
    #315934
    Messages:
    143
    Gender:
    Male
    SWVA
    Vehicle:
    2019 TRD Off Road Tacoma
    Finally made the purchase. Let’s hope the wife doesn’t find out how much I spent on it. Just posting this pic to make sure I ordered everything I will need. Also, Do you need to use the obd2 plug for all vehicle features to show up on the pioneer screen? Such as open doors, lights etc. Or will the maestro do all of that as well?

    45116316-3EAF-4DD0-80B6-662648B6B74D.jpg
     
  20. Aug 18, 2020 at 7:52 AM
    #960
    daveeasa

    daveeasa FBC Harness Solutions

    Joined:
    May 14, 2020
    Member:
    #328079
    Messages:
    7,445
    Gender:
    Male
    First Name:
    David
    PNW
    Vehicle:
    2016 Tacoma OR DCSB 6MT, 2005 RC 5MT PreRunner, 2002 Tundra SR5 RCLB 4x4
    Photos might help but a camera needs power in and provides video out. Sounds like you have video out connected so you just need to power it. If it takes 12v then connect to any ignition switched power source. The current draw should not be a significant one. Your best option is likely the yellow lead to your 6600 but anything which turns off when the key is out is good. You don’t want constant 12v to the camera.

    Ground can be to the chassis in the engine bay or to the black wire of the 6600.

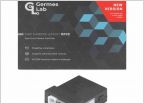
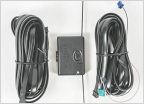
    if you need 6v for the camera that’s where a voltage converter would be needed or maybe there is a spot which already provides 6v since the germes harness has 6v out.

    I’m guessing but I think you have an rca connector with two red pigtails, one on each end, and it’s like 1000 feet long? I didn’t use mine, way too long, and I purchased a 6 pin extension as well since I wanted a single wire in the engine bay and the connections all inside the cab.

    I think the purpose of that cable is to provide power in the same bundle so you’d connect red to 12v ignition switched on the cab side and to camera power on the camera side then camera ground to vehicle chassis. But it’s so long you likely have to zip tie it up somewhere.
     
    MunchTIME[QUOTED] likes this.

Products Discussed in

To Top