1. Welcome to Tacoma World!

    You are currently viewing as a guest! To get full-access, you need to register for a FREE account.

    As a registered member, you’ll be able to:
    • Participate in all Tacoma discussion topics
    • Communicate privately with other Tacoma owners from around the world
    • Post your own photos in our Members Gallery
    • Access all special features of the site

Stock Supercharged Sleeper? 4x4

Discussion in '1st Gen. Builds (1995-2004)' started by TacoBike, Jun 27, 2020.

  1. Jun 27, 2020 at 12:49 AM
    #1
    TacoBike

    TacoBike [OP] The Researcher

    Joined:
    Jul 27, 2018
    Member:
    #260787
    Messages:
    854
    Gender:
    Male
    First Name:
    Mason
    Shingle Springs, California
    Vehicle:
    2000 3.4 Ext Cab TRD 4x4 with original SC
    ARP head studs Supercharger FIC6 AFR gauge painted fenders audio install
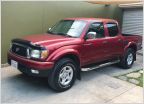
    This is my truck, a 2000 sunfire red pearl 3.4 trd 4x4 with an elocker, ADD hubs, j-shift transfer case, 2nd gen supercharger, and tonneau cover with 206k miles. I finally feel like I have done enough to this truck to warrant making a build thread. Plans are all over the place and not quite sure what I am going to finish with but it will be interesting. :D I bought the truck in June of 2019 to replace my 1998 4cyl 4x4 taco.

    Updated 10/15/20

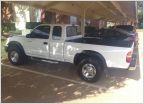
    My old 1998 behind my 2000:
    IMG_4533.jpg

    This is it today:

    24452165-9942-436B-906F-A372E1352627.jpg

    Things I have done to my truck:

    Installed head unit amp and speakers (sub has not been done yet)
    Pulled apart supercharger to make sure it was fine and put it back on
    Painted grill and fenders
    Rebuilt the top end for a headgasket issue
    ARP head studs
    Welded in a bung for the afr sensor
    AFR gauge hooked up and installed on A-pillar
    FIC-6 Hooked up and truck is tuned
    Polished and waxed the paint

    Things for the future:

    Rock sliders
    4x innovations rear bumper
    ADS Shocks
    Methanol?


    Post updates:
    Audio install....................................................................................................................................................................................................................................P1
    Supercharger work..........................................................................................................................................................................................................................P1
    Painting grill, bumper, fenders...........................................................................................................................................................................................................P1
    Head gasket job..............................................................................................................................................................................................................................P1
     
    Last edited: Oct 16, 2020
    BassAckwards, GQ7227 and Bruno’sBud like this.
  2. Jun 27, 2020 at 1:21 AM
    #2
    TacoBike

    TacoBike [OP] The Researcher

    Joined:
    Jul 27, 2018
    Member:
    #260787
    Messages:
    854
    Gender:
    Male
    First Name:
    Mason
    Shingle Springs, California
    Vehicle:
    2000 3.4 Ext Cab TRD 4x4 with original SC
    ARP head studs Supercharger FIC6 AFR gauge painted fenders audio install
    Audio install:

    Sony wx-gs920bh head unit with 3x 5v preouts or 45 amp outs to the speakers
    Rockford Fosgate T400-4 amplifier running ~80 watts to my speakers
    JBL club speakers 60 watts max at 3 ohms

    I ran 4 ga wire from the battery through to my t400-4 rockford fosgate amp under the drivers seat and across the center console to the amp. (under the passenger seat) RCA's followed next to the transmission tunnel and over to the amp. Ground is bolted to the rear center bolt on the passenger seat. Crossovers to tweeters and woofers are in the doors and coaxial woofers are in the rear. Sony head unit tops it off with 5v preouts.

    Sounds super clear and does not clip at max volume (background hum is VERY quiet at max volume too) highs might me slightly tinny sounding but eq fixes it. Absolutely love being able to listen to music again. Needs a sub though, needs the bass to come back. Currently running crossovers high for the woofers and it will fill it out perfectly with a sub.

    Planning on finding a single 500 or 800 watt 12" sub to run at 1 ohm or 2 ohms. Was thinking sealed box for the sound quality, but tell me your thoughts/ what you think would work. Hoping to keep for my sound quality as high as possible but I am not sure which to go for. I am hoping to have something that I can turn up, sound good, and have plenty of bass and even possibly impress my friends.

    Sorry for so few photos, didn't take any when I had the truck pulled all apart. Will try to get follow ups.
     
    BassAckwards likes this.
  3. Jun 27, 2020 at 1:41 AM
    #3
    TacoBike

    TacoBike [OP] The Researcher

    Joined:
    Jul 27, 2018
    Member:
    #260787
    Messages:
    854
    Gender:
    Male
    First Name:
    Mason
    Shingle Springs, California
    Vehicle:
    2000 3.4 Ext Cab TRD 4x4 with original SC
    ARP head studs Supercharger FIC6 AFR gauge painted fenders audio install
    Supercharger work:

    After being told by a friend (incorrectly) that my supercharger was blown and needed a complete rebuild, I took off the supercharger and sourced a stock intake for the truck while I was sitting on sending it to a shop. Some bolts were easy to find while others were harder to find. The bracket my truck has uses the static tensioner so I needed to find the bolt for the front of the block, pick and pull from a buddy saved me on that and other miscellaneous fittings. I was able to keep my trd boost gauge hooked to the vacuum system and it was reading 17.5 lb of vacuum. After eventually pulling apart the supercharger and researching and asking the kind people here how it looked, I was able to figure out that the original installers (Toyota I believe) never hooked up my boost gauge to the boost port. This was why my supercharger never made any boost. So I bought what I needed to to put the supercharger back together and bolted it back up to spec with anarobic rtf and put it on the truck. I hooked up all of the vacuum hoses correctly and bam I had positive boost. I had around 6 pounds on the stock pulley. I also had the stock metal d shaped gasket between the throttle body and supercharger that was lowering my boost pressure. 3 days later I blew a head gasket...

    Stock intake on:
    87EFD9A4-32C7-49ED-A4CF-BC5466D4A9A5.jpg

    Supercharger:
    2A380C09-DFFD-4F02-A720-72469BA2BF07.jpgCFEB6AE0-59F4-4339-A9AA-B68D75FB3D84.jpg

    Supercharger back on:
    EE9D3551-208A-4500-8816-34AB5B8CFCBC.jpg
     
    BassAckwards likes this.
  4. Jun 27, 2020 at 2:10 AM
    #4
    TacoBike

    TacoBike [OP] The Researcher

    Joined:
    Jul 27, 2018
    Member:
    #260787
    Messages:
    854
    Gender:
    Male
    First Name:
    Mason
    Shingle Springs, California
    Vehicle:
    2000 3.4 Ext Cab TRD 4x4 with original SC
    ARP head studs Supercharger FIC6 AFR gauge painted fenders audio install
    Painting the grill, bumper, and fenders:

    So I had been thinking about helping out my truck in looks as I wanted it to look as beautiful as I saw it. The paint is in really good shape and looks great but the fenders and black plastic was looking really tired. I bought flat black primer and paint from Ace hardware and took off the grill first. I sanded and prepped the grill as best as I could. Primed it in 3 layers and painted in another few. Because of where I am, we got a lot of pollen so some pollen got on the paint while I was working but oh well, I am no professional. It turned out great, Flat black was the right choice and I got no runs on the paint.

    Truck before:
    98C647BA-814A-428B-8E0E-9AFE2337DF58.jpg

    Grill painted:
    92A07008-4ADC-4B8E-80C4-C9EE0AD24DB4.jpg

    Next I sanded and painted the front bumper. I used too rough of sandpaper on this and did not go back to a fine enough grit, so the paint showed the scratch marks from sanding. I was able to remedy this by sanding the primer and paint in the spots that needed it and with enough layers you can't tell that I did not do enough prep work on the bumper. Again I used primer and paint by hand and eventually bot a blister on my finger from using the spray can too much. Turned out really well as well too.

    Bumper off and painted:
    5CA0E499-E40B-4EBC-9CDA-5B18DF824DC6.jpg54E69885-8790-4303-B5D5-59F7608094D0.jpg

    Lastly I took off all of my fiberglass fender flares. I cleaned the inside of them and the outside. I sanded them down to ensure that these would be perfect. I painted them with primer then paint once again but I screwed up and got a single run on one of the fenders. I was able to use the sandpaper trick to fix it again. Like the grill and bumper these turned out awesome.

    Fenders off:
    A64B5003-3A46-4D98-AB6F-4DD8BF39BD9D.jpg

    Truck finished:
    C78C0D00-F2AC-4BD2-800F-95848DA91910.jpg

    Overall this took off 10 years off of my truck and really helped the appearance. I would recommend this for absolutely everyone and even if you were selling your truck because for about $50 in materials, I changed to look enough to ask another $500 more for her. (if I ever were to sell my truck, which I won't)
     
  5. Aug 24, 2020 at 7:34 PM
    #5
    Taco Phil

    Taco Phil Taco Phil

    Joined:
    Jun 9, 2019
    Member:
    #295895
    Messages:
    278
    Gender:
    Male
    Galveston, Texas
    Vehicle:
    04 2.7 3RZFE Reg Cab 4X4
    Beautifully stock
    Nice. Gonna do the fenders as well now.
     
    TacoBike[OP] likes this.
  6. Sep 20, 2020 at 12:03 PM
    #6
    Bruno’sBud

    Bruno’sBud Member

    Joined:
    Aug 22, 2020
    Member:
    #338489
    Messages:
    8
    Gender:
    Male
    First Name:
    Ratch
    Bay Area, CA
    Vehicle:
    2000 Tacoma Xtra Cab 4x4 Hunter Green 225k miles
    Mason, the truck looks great! I’ve got a question about the fender
    Flares. There is a black, caulk line filler where the flare meets the body of the truck. What did you use to replace it? Or did you not replace it? Thx
     
    TacoBike[OP] likes this.
  7. Oct 15, 2020 at 5:03 PM
    #7
    TacoBike

    TacoBike [OP] The Researcher

    Joined:
    Jul 27, 2018
    Member:
    #260787
    Messages:
    854
    Gender:
    Male
    First Name:
    Mason
    Shingle Springs, California
    Vehicle:
    2000 3.4 Ext Cab TRD 4x4 with original SC
    ARP head studs Supercharger FIC6 AFR gauge painted fenders audio install
    Didn't have the knowledge or tools to replace it so I painted over it, I only painted the part that was not in contact with the paint so it is still only rubber in contact.
     
    BassAckwards likes this.
  8. Oct 15, 2020 at 5:52 PM
    #8
    TacoBike

    TacoBike [OP] The Researcher

    Joined:
    Jul 27, 2018
    Member:
    #260787
    Messages:
    854
    Gender:
    Male
    First Name:
    Mason
    Shingle Springs, California
    Vehicle:
    2000 3.4 Ext Cab TRD 4x4 with original SC
    ARP head studs Supercharger FIC6 AFR gauge painted fenders audio install
    After putting the super charger back on from inspecting it, the truck drove great! For about three days... I was a little too excited and pushed her too hard while she was too cold and blew a head gasket.

    No choice but to start the tear down.

    This is right before it blew the HG and started throwing huge amounts of coolant through the exhaust.
    IMG_5178.jpg

    Before I could tear down my vehicle and have it as an immovable object, I ordered a head gasket kit from LCEngineering along with ARP head studs. I was lucky to find another member here who sold me the aem fic6 and another who sold me an AFR gauge kit. From then I could start pulling apart my truck.
    IMG_5228.jpg

    Started by doing something I knew how to do well, pulled the supercharger off along with the throttle body and the air box. (My dumbass thought it would be a good idea not to drain the radiator first so I got coolant onto the lower intake manifold.) Pulled all the belts, the timing cover, and the timing belt pulleys. Then drained the radiator:confused:. Got the air box off at the time as well.
    IMG_5238.jpg

    Pulled the ac, power steering, and all wires I could just to get to the exhaust. It was terrible. Rusty and soft metal made it hard and impossible to remove some of the studs. I ordered two sets of exhaust studs from LCE to replace them. (Two because I planned on replacing the rear ones as well, not just the ones in the head.) PO may have gone looking for a vacuum leak in the intake at some point recently because the felpro gaskets were perfect, but I already had new ones so might as well replace them.
    IMG_5242.jpg

    Pulled the valve covers to find that the passenger side head had gotten al little bit hotter than intended in the center where the oil on the cover was darker. All else looked alright to my eyes. No marks on the cam lobes or burnt oil in the heads. Dark spot on passenger side may have happened before I got it, do not know.
    IMG_5247.jpg

    Used cardboard to keep the caps from being mixed up. Removed the cams with the bolts in them to keep the tension. Everything looked good and perfectly fine.
    IMG_5252.jpg

    Removed the last of the cams as well as the head bolts. Almost forgot about the one allen bolt on each head.All ready to pull the heads. Almost at the half way point!
    IMG_5254.jpg

    Pulled the heads and head gaskets from the block and was happy to see no broken gaskets. She didn't eat any metal into the cylinders! Searched and didn't find any cracks in the heads or the block.
    IMG_5266.jpg

    Could see the original boring marks on every cylinder, even at 205k!
    IMG_5270.jpg

    Heads looked alright when looking at them so I took them to M45 automotive, Awesome service by them, a subaru shop that did the decking and cleaning along with a valve job on my heads. They were awesome and always were helpful and very timely with their work.
    IMG_5283.jpg
     
    BassAckwards and GQ7227 like this.
  9. Oct 15, 2020 at 6:25 PM
    #9
    TacoBike

    TacoBike [OP] The Researcher

    Joined:
    Jul 27, 2018
    Member:
    #260787
    Messages:
    854
    Gender:
    Male
    First Name:
    Mason
    Shingle Springs, California
    Vehicle:
    2000 3.4 Ext Cab TRD 4x4 with original SC
    ARP head studs Supercharger FIC6 AFR gauge painted fenders audio install
    Got the heads back and started reassembly. Feeling so close now. Got one head torqued and both cams on when this happens to me. Cam cap stripped out before making the torque spec. Feeling super screwed from this and felt there was no way out. Called a friend and a week or so later we were able to helicoil this and get the stock bolt to work. Saved my butt!
    CYQE8611.jpg

    First head on and pointing to the stripped location. ARP studs in and torqued along with their graphite slip for torqueing.
    FOZI0195.jpg

    I screwed up and dropped one of the arp washers down a head and it fell all the way down the oil galley to the pan. Kicking myself over that one. Replaced it with one of the stock ones and carried on.
    IMG_5358.jpg

    Both heads on and torqued, cams next. Heads are looking beautiful in their shine.
    IMG_5359.jpg

    Took me three tries to put on the first valve cover, first I forgot the hex bolt then the service bolt in the cam and finally got it on correctly. Second one I forgot the hex bolt there as well.
    IMG_5368.jpg

    Up next was the wiring along with the timing belt. I had to rotate the crank off of tdc by 5 degrees to get the teeth of the belt to go where they were supposed to . Then moved it back to tdc. (Don't do this on an interference engine.) Every full rotation of the belt, the belt moves one tooth over. Fuel lines hooked back up and almost ready for the supercharger.
    IMG_5371.jpg

    Exhaust back on and bolted up as well as the bung for the afr sensor is welded in. Timing cover is bolted on and I finally got the supercharger back on! All final wires are connected and vacuum hoses as well.
    IMG_5373.jpg

    Throttle body is back on and the last hoses are finished. Stock airbox is in and the truck is almost ready to start.
    IMG_5376.jpg

    I finished the engine work, filled up the radiator, and double checked all bolts and wires. Everything looked fine so I turned her over. She turned over for a bit. Turned it over again and fuel made it into the lines and started up. Working and sounding great!
    IMG_5398.jpg

    Worked on the afr gauge pod so that it could fit on the a pillar and still fit my hand into the handle. Worked the wires through the cab so that it would fit. Runs perfect at 14.7 and drops to 12 at WOT. Up next: FIC6 and tuning.
    IMG_5397.jpg
     

Products Discussed in

To Top