1. Welcome to Tacoma World!

    You are currently viewing as a guest! To get full-access, you need to register for a FREE account.

    As a registered member, you’ll be able to:
    • Participate in all Tacoma discussion topics
    • Communicate privately with other Tacoma owners from around the world
    • Post your own photos in our Members Gallery
    • Access all special features of the site

MonkeyProof's Misadventures

Discussion in '2nd Gen. Builds (2005-2015)' started by MonkeyProof, Dec 4, 2020.

  1. Dec 4, 2020 at 10:29 PM
    #1
    MonkeyProof

    MonkeyProof [OP] Power Top

    Joined:
    Oct 7, 2008
    Member:
    #9774
    Messages:
    12,599
    SoCal- SGV
    I believe that after owning my 2008 Double Cab for over a decade now, I should have enough content to finally create a "build" thread.

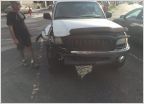
    I bought this Tacoma new with only less than 10 miles on the odometer. And of course me being me. I had to break in my brand new Tacoma still with paper plates and with less than 200 miles on the odometer by attempting to do a triple diamond trail which is infamously known as The Miller Jeep Trail. No less with with stock tires, a front lift achieved only by 5100's on the tallest setting, and with no armor that included not having any sliders. Body damage did happen in a glorious way, but that will be a story for later.

    I'll start this build with the most recent issue that I fixed which was a bad front differential pinion bearing on the flange side.

    End of October of this Pandemic Year we did a quick weekend trip to Death Valley's most Southern Western edge along the Panamint Range. During this trip there was a very slight noise heard from the front when I engaged into 4H, wasn't enough to be concerned about. Just enough to make you think to yourself.."huh" but it kinda went away. A few weeks later I spent the day doing trails in the snow with some close friends and had a blast. During this trip is when the noise quickly became an actual concern that needed to be addressed sooner than never. The slight noise quickly became a very loud grinding noise that started instantly when engaged into 4wd. First thing I did on Monday was to put it up on the hoist (I'm a mechanic so I have access to racks and hoists) to hear where the noise is coming from. Well, the front differential pinion bearing decided to call it quiets..Fuck

    20201108_160418.jpg

    The noisy pinion bearing..
    https://youtu.be/9U0EnIODRCA

    The removal:
    20201113_092815.jpg
    20201113_130344.jpg

    Frankenstied the front wheel bearings with outer CV's that I usually carry as spares while on the trail. Doing so allowed me to still drive my junk in 2wd without worrying about the front wheel bearing assemblies imploding on themselves:
    20201113_130310.jpg

    The Front 8" Clamshell Differential with already installed 4.56 gears and ARB Air Locker Tear Down:

    20201114_151338.jpg
    Removing the flange:
    20201116_072810.jpg

    Used an air hammer to drive the pinion gear past the pressed on flange side pinion bearing. I didn't take a picture of this process.

    Here's the failed flange side pinion bearing and race:
    20201116_084334.jpg
    20201124_074600.jpg

    A quick trip down the street to Yotamasters to pick their brain about my front differential, and to grab what I needed to throw it all back together myself. I also brought to differential in pieces with me to get a second opinion rather or not I needed a complete bearing kit, or just the pinion bearing. Luckily, everyone agreed that the diff only needed the flange side pinion bearing and race. Complete bearing kits are pricey. Those guys at Yotamasters took the time to answer all of my questions about me rebuilding my diff, and also gave me their own tips and advice on how to rebuild it correctly. Yotamasters customer service has always been top notch. So, on my way home with pinion bearing and race, a solid spacer, 2 ARB Air Locker Seals and a pretty sweet sticker pack.
    20201204_222520.jpg
     

    Attached Files:

    Last edited: Dec 5, 2020
    jamesepoop, Crom, llamasmurf and 4 others like this.
  2. Dec 4, 2020 at 11:01 PM
    #2
    GHOST SHIP

    GHOST SHIP hates you.

    Joined:
    Mar 9, 2015
    Member:
    #150537
    Messages:
    22,294
    First Name:
    GHOST
  3. Dec 4, 2020 at 11:41 PM
    #3
    MonkeyProof

    MonkeyProof [OP] Power Top

    Joined:
    Oct 7, 2008
    Member:
    #9774
    Messages:
    12,599
    SoCal- SGV
    Bearing material was found everywhere inside, including the ADD extension Tube. And it all had to be cleaned out.
    Screenshot_20201204-223645_Gallery.jpg

    And since I had the ADD Tube mostly disassembled for cleaning, I went ahead and polished the shift fork with fine sandpaper and some WD-40:
    20201119_204418.jpg
    20201119_204630.jpg

    Soldered the connectors on the ADD actuator motor to make that solid connection, and to prevent any corrosion that may hamper on the fly engagement. 9 times out of 10 it is corrosion in between the connectors that causes the error when trying to engage/disengage 4wd.

    before solder:
    20201112_072415.jpg

    after solder:
    20201112_072705.jpg

    The Assembly:

    There's shims that go between flange side pinion bearing and solid spacer or crush sleeve. The shims help achieve the proper bearing preload.
    20201118_201440.jpg


    My goal was to match the length of the old crush sleeve and shims to the length of the new solid spacer to obtain the desired preload value. It took several tries to find the right combination. Have to take into consideration that the new bearing and race will have slight variances in dimensions compared to the old bearing. It took several attempts installing/removing the pinion gear and bearing before finding the right combination of shims for the bearing preload
    20201120_121736.jpg

    The goal was to get the bearing preload between 8 and 10 inch lbs. I got it right in the middle at 9.
    20201120_132909.jpg

    A check of the gear pattern was spot on, It's really hard to see in the picture as it doesn't show. I also didn't have any gear marking compound available. I didn't expect the pattern to change since it was only the flange side bearing that was replaced. The pattern would have changed and would have to be corrected of a pinion side bearing was replaced.
    20201120_135936.jpg

    Prepping the housing for a very shiny coat of glossy black. I've always liked using Krylon because it dries pretty fast.
    20201120_150655.jpg

    Installing the 2 new ARB Air Locker Seals. getting close to being done. It is recommended to replace them whenever the diff is taking a part.
    20201120_211202.jpg

    Enjoying a Carnitas Torta (it's a SoCal thing) and Margarita to go while assembling the housing.
    20201122_183637.jpg

    Final notes before closing the lid:
    20201120_213747.jpg

    The 10 bolts torqued to 51 ft.lbs per FSM and marked with orange Torque Seal
    20201120_215242.jpg

    Pinion Seal set at the proper depth per FSM, I forgot to take a picture.

    Red ATV applied on the flange:
    20201121_113649.jpg

    Red Lock-Tite applied to the pinion nut and torqued to 250 ft.lbs. plus one extra tug past the click on the torque wrench. The FSM states that the pinion nut should be torqued up 275 ft.lbs but my torque wrench only goes up to 250. I'm sure it will be fine with the red Lock-Tite and the extra pull I gave it.

    Pinion nut properly staked. Front differential is ready to go back on!!
    20201121_120542.jpg

    Front differential back where it's supposed to be. Everything is torqued to the recommended FSM specifications.
    20201121_174621.jpg

    Ain't it pretty looking? Almost ready for the next adventure.
    20201123_171329.jpg
    20201123_171359.jpg
     
    Last edited: Dec 5, 2020
    Reggie4x4, GilbertOz, Skada and 6 others like this.
  4. Dec 5, 2020 at 12:44 AM
    #4
    MonkeyProof

    MonkeyProof [OP] Power Top

    Joined:
    Oct 7, 2008
    Member:
    #9774
    Messages:
    12,599
    SoCal- SGV
    Skid plate rear mount threads were stripped, so they needed to be to repaired. Easy Peasy with these things. They have held up well in other applications on my Tacoma, let's see how well they'll hold up on a very tweaked skid plate.


    20201123_165557.jpg
    20201123_171911.jpg

    Got the front diff and skid plate repaired and installed just in time for a week long trip to Death Valley during Thanksgiving..

    First night in Alabama Hills which is not Death Valley.
    20201126_064317.jpg

    Fresh Herby buttered Turkey Breast Roast..made it while camping in Death Valley on Thanksgiving..


    And this little guy had his own feast with some of the fresh herbs, can't turn your back on them for even a second..


    a few pics
    of that trip.

    Charcoal Kilns
    20201128_100431.jpg

    Trailer with a broken axle.
    20201127_144631.jpg

    20201127_155207.jpg

    A group of Subaru guys spent some trying to get this tent up. Which provided some good entertainment.
    20201128_094005.jpg

    20201128_120544.jpg
    20201128_125023.jpg
     

    Attached Files:

    b_r_o, Crom, eccracer104 and 7 others like this.
  5. Dec 5, 2020 at 9:23 AM
    #5
    MonkeyProof

    MonkeyProof [OP] Power Top

    Joined:
    Oct 7, 2008
    Member:
    #9774
    Messages:
    12,599
    SoCal- SGV
    Just a few short years ago I bought a used 12v fridge from @wheeleveryweekend for some stupid price. Later on they they told they regretted selling the fridge. Its a beast and it works well.

    My desires for the fridge was for to be mounted somewhere inside, and in the back passenger seat area. I didn't want it outside in the bed exposed to the elements. So I removed the seats and made a two piece modular cargo platform that could either be quickly removed, or a combination of platform and seat.
    20171204_181957.jpg
    20171208_184732.jpg

    Scored some upholstery material at the local fabric store that was in the discount section.
    20171210_193802.jpg
    20171210_194029.jpg
    20171213_200634.jpg
    Nylon Footmans Loop for 1" wide lashing straps to secure the fridge in place.
    20171224_103507.jpg

    Fridge is mounted solid!
    20171224_105747.jpg
    20171224_104908.jpg

    Fast forward to the current configuration after removing the JBL Subwoofer and Amplifier which has gained even more precious cargo space.
    20201205_080808.jpg

    The Platform is doggy approved!!
    20171118_214126.jpg
     
    Crom, eccracer104, Hobbs and 2 others like this.
  6. Dec 5, 2020 at 9:49 AM
    #6
    MonkeyProof

    MonkeyProof [OP] Power Top

    Joined:
    Oct 7, 2008
    Member:
    #9774
    Messages:
    12,599
    SoCal- SGV
    That one time when my skid plate tried to leave while coming down Steel Pass in Death ValleyI guess it just had it with my prior shenanigans. The noise it made sounded like the undercarriage had exploded.
    20190222_193559.jpg

    Had to remove it while on the trail that night, and it was 33° outside so that wasn't much fun. Into the bed it goes for the rest of the trip.
    20190222_194015.jpg
     
    Skada, Crom and llamasmurf like this.
  7. Dec 5, 2020 at 1:55 PM
    #7
    MonkeyProof

    MonkeyProof [OP] Power Top

    Joined:
    Oct 7, 2008
    Member:
    #9774
    Messages:
    12,599
    SoCal- SGV
    The second time replacing the passenger side wheel bearing. It was crunchy sounding from inside the cab when driving. Thanks to @Airdog for the use of his homemade bearing removal tool.
    20181221_060828.jpg
    20181221_124650.jpg
    Removing the snap ring to allow the bearing retaining collar to be pressed off.
    20181221_065152.jpg

    Installing @Airdog's bearing removal tool
    20181221_070914.jpg

    Ready for the hydraulic press.
    20181221_092225.jpg

    The bearing race has to be grooved/notched with a cutoff wheel, and then chiseled off with the use of an air hammer.
    20181221_111205.jpg

    The remaining grease that was found inside the bearing was in poor condition.
    20181221_111212.jpg
    20181221_124629.jpg

    I didn't take any pictures of installing the new bearing. Really though, not much to it other than pressing the new bearing onto the axle shift. I also imspectedthe axle shaft and splines for straightness before pressing on the bearing assembly.

    20181221_122424.jpg
     
    Skada, Crom, eccracer104 and 3 others like this.
  8. Dec 5, 2020 at 4:36 PM
    #8
    Airdog

    Airdog did your Mom

    Joined:
    Dec 26, 2012
    Member:
    #93790
    Messages:
    4,539
    Gender:
    Male
    First Name:
    Tom
    SoCal
    Vehicle:
    https://www.tacomaworld.com/threads/airdogs-2012-prerunner-access-cab-slow-build.264263/
    Here's a pic of the axle getting pressed into the bearing to complete your how to...

    [​IMG]
     
    Crom, llamasmurf and MonkeyProof[OP] like this.
  9. Dec 5, 2020 at 4:40 PM
    #9
    MonkeyProof

    MonkeyProof [OP] Power Top

    Joined:
    Oct 7, 2008
    Member:
    #9774
    Messages:
    12,599
    SoCal- SGV
    Nice!!

    Are those ARP studs?
     
    Crom likes this.
  10. Dec 5, 2020 at 5:07 PM
    #10
    Airdog

    Airdog did your Mom

    Joined:
    Dec 26, 2012
    Member:
    #93790
    Messages:
    4,539
    Gender:
    Male
    First Name:
    Tom
    SoCal
    Vehicle:
    https://www.tacomaworld.com/threads/airdogs-2012-prerunner-access-cab-slow-build.264263/
    Yes
     
    Crom and MonkeyProof[QUOTED][OP] like this.
  11. Dec 6, 2020 at 11:20 AM
    #11
    MonkeyProof

    MonkeyProof [OP] Power Top

    Joined:
    Oct 7, 2008
    Member:
    #9774
    Messages:
    12,599
    SoCal- SGV
    I bought a Pro Eagle Jack and holder that I mounted on the bed, on the passenger side. I also bought a very cool spring loaded Jack Handle Mount from Solo Motorsports. Luckily for me, Solo Motorsports is just down the street from me. The good people at Solo asked me to bring the Pro Eagle Jack Handle with me because they wanted to ensure proper fit. It's a good thing too because the diameter of the handle was way too large for the spring loaded end. But that was a quick fix by taking some material off the handle with a lathe. 5 minutes later it was a perfect fit! The customer service at Solo Motorsports was excellent.
    20180222_174142.jpg

    The SoloMotorsport Spring Loaded Jack Handle Holder.
    20180223_191922.jpg

    The Jack Handler best fitted without taking up any room along the rear of my AllPro rear bumper.
    20180225_155929.jpg
    20180225_153933.jpg

    Perfect Fit!
    20180225_160126.jpg
    20180222_180105.jpg
    20180428_190223.jpg

    And of course I ended up breaking in the Pro Eagle Jack the very next weekend out in Death Valley when I had a near catastrophic passenger side spindle failure.
    20180408_084127.jpg
     
    Last edited: Dec 6, 2020
    Skada, Crom, llamasmurf and 2 others like this.
  12. Dec 6, 2020 at 9:35 PM
    #12
    MonkeyProof

    MonkeyProof [OP] Power Top

    Joined:
    Oct 7, 2008
    Member:
    #9774
    Messages:
    12,599
    SoCal- SGV
    I bought my rear Fox 2.0 shocks with adjusters used from AllPro. And I got them really cheap at an offering I couldn't refuse. They were said to be one of the first prototypes for the FJ Cruiser. The original valving wasn't ideal for the Tacoma and especially with all of the crap that I carry with me while on the trail. So I sent them to Down South Motorsports for a revalve. I wanted more compression and less rebound, they did a good job.

    But since the bodies are only 2.0's, the shock oil gets hot enough that every once in a while a main seal will blow and leak oil. I've learned to rebuild my own shocks. I think when I need to rebuild the rear shocks again, I'm going to add some shims on the rebound to slow it down a little.

    It's really not much to a rebuild, just match up the o-rings. Biggest thing is having nitrogen to recharge the reservoir. Fox recommends 200psi
    20201206_213208.jpg
    20191108_141444.jpg
    20191108_120928.jpg
    20191108_082227.jpg
     
    Last edited: Dec 6, 2020
    Crom and GHOST SHIP like this.
  13. Dec 7, 2020 at 12:33 AM
    #13
    tetten

    tetten Cynical Twat Waffle

    Joined:
    Nov 2, 2014
    Member:
    #141581
    Messages:
    2,504
    First Name:
    Andy
    Socal
    Have you checked to see how hot the rears get? I check my rear shocks every once in a while on trips and don't think I've ever felt them warm, even after long distance cruising. I don't recall ever getting the shitty old icon 2.0s I had or the 2.5s I've got now anywhere close enough to cause damage. I'll have to check to see how my shitty old icon 2.0s do on my new truck on my first long trip.
     
  14. Dec 7, 2020 at 6:05 AM
    #14
    MonkeyProof

    MonkeyProof [OP] Power Top

    Joined:
    Oct 7, 2008
    Member:
    #9774
    Messages:
    12,599
    SoCal- SGV
    They get hot enough to almost blister the skin. Heavier valving will attribute to hotter running shocks. Also, there's a lot going on inside the adjusters which also increases the shock oil temps. It comes down to my 2.0's with the heavier valving is not enough shock for my application.
     
    tetten[QUOTED] likes this.
  15. Dec 7, 2020 at 7:39 AM
    #15
    MonkeyProof

    MonkeyProof [OP] Power Top

    Joined:
    Oct 7, 2008
    Member:
    #9774
    Messages:
    12,599
    SoCal- SGV
    This weeks project will be prepping for this weekends project. A complete front end makeover that will include new upper and lower control arm bushings, upper uniballs and new spindles.

    Prepping a new pair of spindles for a pair of JD Fabrication Gussets and Heimed Steering Double Sheer Tab Kit.
    20201206_162810.jpg
     
    Last edited: Dec 7, 2020
    Crom and Airdog like this.
  16. Dec 7, 2020 at 9:14 AM
    #16
    MonkeyProof

    MonkeyProof [OP] Power Top

    Joined:
    Oct 7, 2008
    Member:
    #9774
    Messages:
    12,599
    SoCal- SGV
  17. Dec 8, 2020 at 7:45 AM
    #17
    MonkeyProof

    MonkeyProof [OP] Power Top

    Joined:
    Oct 7, 2008
    Member:
    #9774
    Messages:
    12,599
    SoCal- SGV
    At least once a year I'll go and recharge the front coilovers and shocks with nitrogen for maintenance purposes. Two years ago while doing so I made a pretty dumb mistake without realizing it, the next morning there was a nice pool of shock oil on the ground. I somehow managed to twist the end cap with the hose fitting just enough to make it leak shock oil and the nitrogen.

    So, time to rebuild the front Coil Overs with new seals and shock oil. Fox Red shock oil is the preferred shock oil used in shock rebuilds and that's what I used.

    Fox 2.5 Coil Over seal kit and part number.
    20180830_184729.jpg

    Removing the Coil Overs.
    20180902_132221.jpg

    Having the right tools always makes the job easier, a proper spring remover.
    20180902_135429.jpg

    Lots of nasty inside, Fox Blue shock oil.
    20180902_115223.jpg

    The innards of a Coil Over.
    20180902_132739.jpg
     
    Last edited: Dec 15, 2020
    Crom and GHOST SHIP like this.
  18. Dec 8, 2020 at 9:16 AM
    #18
    GHOST SHIP

    GHOST SHIP hates you.

    Joined:
    Mar 9, 2015
    Member:
    #150537
    Messages:
    22,294
    First Name:
    GHOST
    Where do you get your nitrogen charged? I’m in need of a rebuild and debating just doing it myself.
     
  19. Dec 8, 2020 at 9:50 AM
    #19
    MonkeyProof

    MonkeyProof [OP] Power Top

    Joined:
    Oct 7, 2008
    Member:
    #9774
    Messages:
    12,599
    SoCal- SGV
    You can rent a small 2lb bottle from Air Gas but the cost in that isn't worth it unless you're doing multiple shocks shocks all the time. Or you can find someone that you may know that has one.

    Luckily for me, we do our own race prep on our 6100 truck and 10 car
    , so I have easy access whenever
    20181103_180639.jpg

    A new motor from Turn Key gets replaced every other race. Leaded high octane race fuel makes the aluminum block soft. And since our class (6100) has a sealed motor rule, rebuilding a motor is not an option. The motor has to be ordered directly from General Motors and shipped directly to Turn Key Motors in San Diego
    20180629_203714.jpg
    20190816_090301.jpg
    20190112_103146.jpg
    20200911_134926.jpg
     
    Last edited: Dec 8, 2020
    Crom and GHOST SHIP[QUOTED] like this.
  20. Dec 8, 2020 at 12:40 PM
    #20
    MonkeyProof

    MonkeyProof [OP] Power Top

    Joined:
    Oct 7, 2008
    Member:
    #9774
    Messages:
    12,599
    SoCal- SGV
    Some flex action in Death Valley
    20170324_174818.jpg
    20170324_174744.jpg
     
    Slashaar, Skada, Crom and 2 others like this.

Products Discussed in

To Top