1. Welcome to Tacoma World!

    You are currently viewing as a guest! To get full-access, you need to register for a FREE account.

    As a registered member, you’ll be able to:
    • Participate in all Tacoma discussion topics
    • Communicate privately with other Tacoma owners from around the world
    • Post your own photos in our Members Gallery
    • Access all special features of the site

Truck Bed Upgrade

Discussion in '3rd Gen. Tacomas (2016-2023)' started by RedZeppelin, Dec 9, 2020.

  1. Dec 9, 2020 at 11:43 AM
    #1
    RedZeppelin

    RedZeppelin [OP] Well-Known Member

    Joined:
    Jul 7, 2019
    Member:
    #298567
    Messages:
    132
    Wrapped up two projects this past weekend and wanted to share the outcomes. These really improve the quality of life and make the best use of the bed space for my needs.

    Project One: Shell Lighting

    (final shot first)

    IMG_5076.jpg

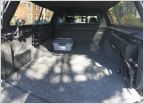
    Running lights in the camper shell is nothing new but I gave a little bit of extra effort to meet my needs. The shell in question is a Snugtop Rebel with the windoors, but it only came with a push button dome light and it wasn't great for output. The LED strips are activated by a magnetic switch that is placed near the window frame on each side. I used these: https://www.amazon.com/gp/product/B07PRQRQH4. The result is that when a windoor is opened, only that side will light up.

    IMG_5077.jpg

    Additionally, I've never liked being blinded when camping and losing all night vision, so red LED lights were definitely desirable. I was able to find an LED brake light kit on Amazon that met these needs (https://www.amazon.com/gp/product/B07R1XVMH7/). With a little clever cutting and soldering, we can even make these lights switchable from white to red. Here's a diagram, hope it makes sense:

    diagram.jpg

    Currently the switch in the panel is only a two position switch so it only toggles on/off. I'm also in a DCSB so I never sleep in the back so there's no override to turn the lights on when the windoors are closed. But it would be as simple as adding a second switch to ground both LED strips. I also found that the running light is enough brightness and you don't need to use the brake lights. Here's a shot showing both the white and red turned on:

    IMG_5085.jpg

    Two other things were very helpful during the install:

    https://www.amazon.com/gp/product/B07JMSWNC8/
    https://www.amazon.com/gp/product/B06XQJ4XKH/

    These helped to secure and route the wiring and the LED strips to the carpeted headliner. They don't hold much weight individually, but then again, the components themselves don't weigh that much. I also put the velcro backing on the strips themselves so I have freedom to move them if I need to.

    Project Two: Air Inflation System

    This has been an ongoing project and one that I'm happy to finally document now that it's finished. So for me, inflating and deflating tires has always felt like a chore and something I felt could use some improvement. This solution is certainly not the cheapest or simplest, but the time savings are undeniable. The heart of it lies with a few components you can buy ready-made:
    1. Expedition Essentials Bedside Compressor Mount + Extension Harness (thanks to @Scoobnoob1103 for the smoking deal on marketplace)
    2. Rago Fabrication remote air line kit:
    3. ARB Twin Air Compressor (or any other compressor you can fit in the bed cubby)
    You can probably already guess where this is going. The ARB twin is mounted in the BCM and powered by the extension harness. Then the Rago mounts are used to run air hose to the wheel wells. I opted for 3/8 ID hose with 1/4" NPT fittings to increase air flow. The end mounts also use universal coupler parts so I can attach a longer air hose at the wheel well if I need to reach another vehicle. These are then capped with dust protectors (https://www.amazon.com/gp/product/B00DE8V4G4) to keep the parts from seizing. Front passenger wheel well:

    IMG_5080.jpg

    Rear passenger wheel well:

    IMG_5083.jpg

    I then use 4 hoses with male air coupler ends and haltec lock-on chucks (https://www.amazon.com/gp/product/B01938M8MW) to connect to the tires themselves. This reduces the amount of hoses needed and if you see the photo from the lighting project, they coil nicely to fit into one medium quickfist. See how they connect:

    IMG_5082.jpg

    As if that wasn't lazy enough, I've also build a control manifold to help with filling. This requires cutting the bed cubby door, but if you've already installed the compressor mount you will have done plenty of chopping already. These are the parts you see below:
    IMG_5078.jpg

    Then behind the door, a few 360 degree swivels ensure that the air hoses don't hit the compressor, and air couplers let me detach the cubby door fully.
    IMG_5079.jpg

    From here, the process for inflating or deflating tires becomes very simple:
    1. Connect all hoses
    2. If deflating, simply open both valves until you hit the desired pressure. 3/8 ID hose makes this very quick
    3. If inflating, open the second valve only and turn on the compressor
    4. Disconnect all hoses
    5. You get the benefit of not having to open the hood or crouch by each tire, so less back pain and fewer people stopping to see if you need help!
    This was a really fun project and I've gotten a few positive comments before, so it's good to finally share this work. Let me know if you have any questions or comments!

    IMG_5079.jpg
     
  2. Dec 9, 2020 at 12:20 PM
    #2
    Lt. Dangle

    Lt. Dangle RIP @stun gun 2016-2020

    Joined:
    Jan 25, 2017
    Member:
    #208645
    Messages:
    7,652
    Ohio
    Vehicle:
    2025 Tundra Platinum OR
    Nice work. Any concerns about that manifold getting knocked around by crap in the bed?
     
  3. Dec 9, 2020 at 12:29 PM
    #3
    Skydvrr

    Skydvrr IG: @kalopsianick

    Joined:
    Sep 13, 2017
    Member:
    #229889
    Messages:
    12,654
    First Name:
    Nick
    YMH
    Vehicle:
    Black '17 OR
    That inflation system is fuckin nice man.
     
  4. Dec 9, 2020 at 12:35 PM
    #4
    RedZeppelin

    RedZeppelin [OP] Well-Known Member

    Joined:
    Jul 7, 2019
    Member:
    #298567
    Messages:
    132
    Somewhat, but the mounting is super solid. Only the door will flex when it’s closed. If anything would break it would be the glass on the gauge or one of the ball valve handles
     
  5. Dec 9, 2020 at 12:44 PM
    #5
    Scoobnoob1103

    Scoobnoob1103 Well-Known Member

    Joined:
    Apr 1, 2018
    Member:
    #249090
    Messages:
    140
    Gender:
    Male
    First Name:
    Charlie
    Vehicle:
    2018 Cement TRD OR
    Wow great setup!!
     
    RedZeppelin[OP] likes this.
  6. Dec 9, 2020 at 12:49 PM
    #6
    boston23

    boston23 Well-Known Member

    Joined:
    Sep 4, 2019
    Member:
    #304290
    Messages:
    3,732
    Gender:
    Male
    First Name:
    Adam
    Eastie
    Vehicle:
    2019 SR5 DCSB 4x4
    Wow nice upgrades, still trying to figure out lighting for my shell.

    May i ask what you do for work?
     
    RedZeppelin[OP] likes this.
  7. Dec 9, 2020 at 12:51 PM
    #7
    RedZeppelin

    RedZeppelin [OP] Well-Known Member

    Joined:
    Jul 7, 2019
    Member:
    #298567
    Messages:
    132
    Software developer lol. Why do something manually for 10 minutes when you can spend 6 hours automating it?
     
    deuceb, s7726, Smacky2020 and 2 others like this.
  8. Dec 10, 2020 at 6:18 PM
    #8
    RedZeppelin

    RedZeppelin [OP] Well-Known Member

    Joined:
    Jul 7, 2019
    Member:
    #298567
    Messages:
    132
    For anyone still interested, I got a chance to test out the system fully tonight, excluding the time to connect hoses.

    Air down 37psi to 15psi: 3m 37s
    Air up 15psi to 39psi: 7m 30s

    Keep in mind this is with all four tires connected so it’s a good volume of air to be working with. Connecting and disconnecting the hoses adds about another minute to these times, but even then you’re looking at less than 15 minutes total whenever you hit a trail.
     
    Smacky2020 likes this.
  9. Dec 10, 2020 at 6:32 PM
    #9
    RushT

    RushT Amateur Everythingist

    Joined:
    Dec 10, 2017
    Member:
    #238171
    Messages:
    5,644
    Gender:
    Male
    North Texas
    Vehicle:
    '18 DCSB TRDOR Inferno
    Yeah, but the real kicker is that you don't ask yourself (or someone else) that question until you've done it manually 50 times.

    eta: Or at least that's the way my brain works.
     
  10. Dec 2, 2021 at 8:35 PM
    #10
    stephenjones

    stephenjones Active Member

    Joined:
    Sep 9, 2021
    Member:
    #376671
    Messages:
    35
    Gender:
    Male
    First Name:
    Stephen
    Vehicle:
    2019 Tacoma TRD Sport
    @RedZeppelin Do all of the tires fill up to the exact same PSI? I'd assume this is the case if because the system is and not closed to each individual tire. SLICK setup. I've now decided to run my single ARB in the rear.

    Where did you pick up your ARB harness extension? I've seen a few but not sure which to snag!
     
  11. Dec 2, 2021 at 10:12 PM
    #11
    Toycoma2021

    Toycoma2021 Well-Known Member

    Joined:
    Jan 3, 2021
    Member:
    #351607
    Messages:
    1,501
    Northern California, Temporarily
    Vehicle:
    2021 Access Cab, LB, AT, V6, Off Road
    OP: I plan on doing something very similar, only with the addition of an air tank. The air tank will be the two rock sliders and my own custom rear bumper. All interconnected with ports at each tire like you have.
     
  12. Jun 24, 2023 at 4:15 PM
    #12
    Silverlogic

    Silverlogic Well-Known Member

    Joined:
    Dec 9, 2018
    Member:
    #275354
    Messages:
    1,156
    Gender:
    Male
    First Name:
    Tyler
    San Diego, California
    Vehicle:
    2018 Silver DCSB TRDOR
    Working on my own setup using OPs as inspiration. Still need to install the chucks at each wheel. Haven't had a chance to is use it yet, but I'm loving how it's looking so far!

    IMG_20230624_155724730.jpg
    IMG_20230624_155737240.jpg
     
    Last edited: Jun 25, 2023
    andthen, TRDRed and RyanDCLB like this.
  13. Jun 24, 2023 at 8:43 PM
    #13
    RyanDCLB

    RyanDCLB Well-Known Member

    Joined:
    Jun 13, 2019
    Member:
    #296235
    Messages:
    3,488
    Gender:
    Male
    Vehicle:
    4/19 DCLBOR
    Nice! I did a custom setup too! Over here
     
  14. Jun 25, 2023 at 11:49 PM
    #14
    Silverlogic

    Silverlogic Well-Known Member

    Joined:
    Dec 9, 2018
    Member:
    #275354
    Messages:
    1,156
    Gender:
    Male
    First Name:
    Tyler
    San Diego, California
    Vehicle:
    2018 Silver DCSB TRDOR
    I tried an inline reg a few months back and just couldn't get it to consistently work. How's yours?
     
  15. Jun 26, 2023 at 12:09 AM
    #15
    RyanDCLB

    RyanDCLB Well-Known Member

    Joined:
    Jun 13, 2019
    Member:
    #296235
    Messages:
    3,488
    Gender:
    Male
    Vehicle:
    4/19 DCLBOR
  16. Jun 26, 2023 at 10:27 AM
    #16
    Silverlogic

    Silverlogic Well-Known Member

    Joined:
    Dec 9, 2018
    Member:
    #275354
    Messages:
    1,156
    Gender:
    Male
    First Name:
    Tyler
    San Diego, California
    Vehicle:
    2018 Silver DCSB TRDOR
    That might be the difference, I wasn't running a tank in front of the regulator. I think the pressure differental fluctuated too much.
     
    RyanDCLB[QUOTED] likes this.

Products Discussed in

To Top