1. Welcome to Tacoma World!

    You are currently viewing as a guest! To get full-access, you need to register for a FREE account.

    As a registered member, you’ll be able to:
    • Participate in all Tacoma discussion topics
    • Communicate privately with other Tacoma owners from around the world
    • Post your own photos in our Members Gallery
    • Access all special features of the site

How to: DIY Wedge Camper

Discussion in 'Tonneau Covers, Caps and Shells' started by Ripcord, Apr 15, 2019.

  1. Jan 4, 2021 at 12:42 PM
    #1101
    foxrcing07

    foxrcing07 KO7FOX

    Joined:
    Aug 12, 2016
    Member:
    #194389
    Messages:
    4,019
    Gender:
    Male
    First Name:
    Morgan
    Modesto, CA
    Vehicle:
    2019 Raptard 2001 TJ
    Dirt
    for anyone doing their own bends/brakes I've used these
    https://www.amazon.com/KAKA-BDS-8-Inches-Sheet-Metal/dp/B015U7JK0I (not this specific one but similar)
    they work well, but are limited to small sizes
    or if you have a harbor freight shop press these are suppose to be great (just got one haven't had time to assemble it yet)
    https://www.swagoffroad.com/SWAG-20-TON-Finger-Brake-Heavy-Duty-DIY-Builder-Kit_p_86.html
     
  2. Jan 5, 2021 at 7:40 AM
    #1102
    Dubiousveracity

    Dubiousveracity Well-Known Member

    Joined:
    Aug 2, 2018
    Member:
    #261489
    Messages:
    356
    Vehicle:
    2018 TRDOR DCSB MT
    none
    I'm in a fairly rural area, so getting more tubing can be a pain. Apparently I didn't get enough 1½ square tubing, and am short one piece on the top of the space frame. Can I substitute a single 1½" tube along the middle for a pair of 1" tubes? Should I divide the are by 3 or center them more?20210105_063810.jpg
    20210105_063753.jpg
     
    JMcFly likes this.
  3. Jan 5, 2021 at 8:26 AM
    #1103
    Machrocket

    Machrocket Member

    Joined:
    Oct 8, 2020
    Member:
    #343186
    Messages:
    15
    Gender:
    Male
    First Name:
    Jamie
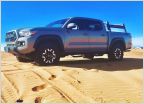
    Some actions shots of the Rig. I am happy with how most everything turned out. The biggest gripe I have with my handy work is the sewing. Mine is all aluminum and landed about 170 ish lbs. its extra long so with the full size bed extended I have about 22 inches of standing room in the bed. I only enter through the bed. Now Im working on my short prinsu rack for a wind deflector.


    20201211_173131.jpg 20201122_164156.jpg 20201211_165334.jpg 20201203_143514.jpg
     
  4. Jan 5, 2021 at 5:01 PM
    #1104
    wolfgang123

    wolfgang123 Well-Known Member

    Joined:
    Jul 7, 2009
    Member:
    #19369
    Messages:
    1,913
    Gender:
    Male
    First Name:
    Skyler
    Charlotte, NC
    Vehicle:
    1997 TACOMA - 4x4
    Thoughts on using steel for the Lower portion of the tent platform? Then aluminum tube for the hinged roof framing. Seems like it would be sufficient for the 3-4' overhang with some additional bracing.. and allot cheaper than all 8020?
     
  5. Jan 5, 2021 at 10:28 PM
    #1105
    nanserb

    nanserb Well-Known Member

    Joined:
    Jan 25, 2016
    Member:
    #176034
    Messages:
    230
    Gender:
    Male
    First Name:
    Elliott
    Vehicle:
    2019 ZR2 Colorado
    That looks fantastic! Love the truck!
     
  6. Jan 6, 2021 at 8:47 AM
    #1106
    foxrcing07

    foxrcing07 KO7FOX

    Joined:
    Aug 12, 2016
    Member:
    #194389
    Messages:
    4,019
    Gender:
    Male
    First Name:
    Morgan
    Modesto, CA
    Vehicle:
    2019 Raptard 2001 TJ
    Dirt
  7. Jan 7, 2021 at 10:14 PM
    #1107
    Jarman02

    Jarman02 Well-Known Member

    Joined:
    Sep 17, 2018
    Member:
    #266568
    Messages:
    147
    Gender:
    Male
    Oregon
    Vehicle:
    2002 Tacoma Xtra Cab
    I used a Brother CS7000X. Did the job just fine. Although, the bigger the machine you can get with more space under the arm, the easier your life will be.

    Might be cheaper, but then you will have to solve for mounting of the keder rail, latches and struts without water intrusion. Plus you lose all the utility of the ability to mount things inside and out via the channels in the 80/20 without making permanent holes.
     
    kjohnson125[QUOTED] likes this.
  8. Jan 7, 2021 at 10:16 PM
    #1108
    Jarman02

    Jarman02 Well-Known Member

    Joined:
    Sep 17, 2018
    Member:
    #266568
    Messages:
    147
    Gender:
    Male
    Oregon
    Vehicle:
    2002 Tacoma Xtra Cab
    I don't have dimensions, but my Jig cost was 85.11 and I had some leftover screws and ties.
     
    JMcFly and AbePDX[QUOTED] like this.
  9. Jan 8, 2021 at 5:32 PM
    #1109
    JMcFly

    JMcFly Well-Known Member

    Joined:
    Aug 11, 2020
    Member:
    #337348
    Messages:
    1,164
    Central FL
    Vehicle:
    2012 Tacoma SR5 4x4
    Darn, in a few pages back Ripcord was going to update the files so they have the bend lines


    Also I too am curious on the welding jig. I’m sure I can save a ton of money by assembling it with pocket holes instead of brackets

    any sort of sewing machine should work. My wife made me a California king sized quilt on her $90 singer sewing machine. Anything is possible
     
  10. Jan 8, 2021 at 7:34 PM
    #1110
    Dubiousveracity

    Dubiousveracity Well-Known Member

    Joined:
    Aug 2, 2018
    Member:
    #261489
    Messages:
    356
    Vehicle:
    2018 TRDOR DCSB MT
    none
    20201231_181519.jpg I didn't use a jig.

    I made the upper section rectangle, then the lower U clamped, tacked and carefully welded to maintain 90 degree corners

    I took some boards and screwed cross pieces and clamped it to the upper section.

    I then tacked the "verticals" and made sure it stayed square as I welded it out. Everything stayed close enough.
     
    Last edited: Jan 8, 2021
    royfra, Rando_lurker and G_W_Chonkr like this.
  11. Jan 9, 2021 at 10:00 AM
    #1111
    Wasatch

    Wasatch Well-Known Member

    Joined:
    Aug 6, 2010
    Member:
    #41303
    Messages:
    392
    @Ripcord , add anything else to seal the roof panel other than the rubber strips in-between the t-nuts?

    I'm wondering if a small bead of silicone is necessary to keep out the water.

    Anyone else have any good tips for waterproofing the roof panel?
     
  12. Jan 9, 2021 at 10:34 AM
    #1112
    howied

    howied Well-Known Member

    Joined:
    Apr 25, 2020
    Member:
    #325807
    Messages:
    92
    Gender:
    Male
    I added a line of silicone and I know a few others did as well. Isn’t going to hurt, but do have to get the bolts in somewhat quickly.
     
  13. Jan 9, 2021 at 3:00 PM
    #1113
    Jarman02

    Jarman02 Well-Known Member

    Joined:
    Sep 17, 2018
    Member:
    #266568
    Messages:
    147
    Gender:
    Male
    Oregon
    Vehicle:
    2002 Tacoma Xtra Cab
    Did anyone silicone their corner pieces in? I think that’s the source of water intrusion when things get reallly wet, such as driving in decent rain and power washing it. Seems like it’s getting into the channel and then dripping in through the bolts
     
    Rando_lurker likes this.
  14. Jan 9, 2021 at 3:48 PM
    #1114
    Wasatch

    Wasatch Well-Known Member

    Joined:
    Aug 6, 2010
    Member:
    #41303
    Messages:
    392
    Ended up ditching the rubber strips (McMaster-Carr # 5537T871)

    Save yourself $60 in the build and just lay a thin bead of silicone on each side of the extrusion. Sealed up great!

    Also worth mentioning my process for mounting the roof:

    -Preload and space out t-nuts (I did a bolt every 8")

    -drill holes in roof panel (measure 3/4'' inward and draw a line, 'x' off where you want to mount the bolts). I used a 21/64 bit instead of 3/8 which seemed too big in the test holes drilled.

    -Dry fit the roof panel. It's tedious, but once you mount it up dry- you'll be able to make adjustments, file out holes to fit, etc. without the stress of the roof laying on wet silicone.

    - Remove paenl, Lay a thin bead of silicone on each side of the extrusion. (I did a standard duty clear as I don't want it to 'glue' the panel to the extrusion, just keep out water)

    -With help, lay down the panel, align it, and screw in the bolts.

    Hope this helps someone!
     
    Last edited: Jan 9, 2021
  15. Jan 10, 2021 at 6:54 AM
    #1115
    jp_flynavy

    jp_flynavy IG: @TrailLimoOverland

    Joined:
    Dec 30, 2016
    Member:
    #206065
    Messages:
    1,013
    Vehicle:
    2015 Tacoma DCLB
    Use silicone. I had huge water intrusion issues in the corners. To a point where I had a small pool lol. Extra on the corners and a neat thin line on the inside perimeter, lower and upper portions.
     
  16. Jan 10, 2021 at 7:16 AM
    #1116
    Beak

    Beak Member

    Joined:
    Jun 16, 2020
    Member:
    #331576
    Messages:
    20
    Gender:
    Male
    First Name:
    Chris
    Vehicle:
    2020 White Tacoma SR 4x4
    Hey dudes, I'm still looking to offload my project in case anyone is interested! Shoot me a DM if you are. I'm in Salt Lake City

    Built for a 3rd gen, but I'm pretty sure it would fit a 2nd gen as well.
     
  17. Jan 10, 2021 at 1:10 PM
    #1117
    overlandozzy1

    overlandozzy1 Well-Known Member

    Joined:
    Oct 3, 2017
    Member:
    #231929
    Messages:
    821
    Gender:
    Male
    First Name:
    Jonathan
    Vehicle:
    2016 WHITE DCLB
    16 DCLB, ADS, 5.29s, 35s, RCI Skids, Baja Designs
    @Ripcord do you have any measurements or plans for the jig you used for the spaceframe?
     
  18. Jan 10, 2021 at 4:26 PM
    #1118
    JMcFly

    JMcFly Well-Known Member

    Joined:
    Aug 11, 2020
    Member:
    #337348
    Messages:
    1,164
    Central FL
    Vehicle:
    2012 Tacoma SR5 4x4
    He doesn’t but you can derive all of the necessary dimensions from the plans for the camper itself. It’s extra work but part of the build process. I’m hopefully building my jig this coming weekend.
     
  19. Jan 10, 2021 at 4:49 PM
    #1119
    RachaelSP

    RachaelSP Well-Known Member

    Joined:
    Feb 27, 2018
    Member:
    #245742
    Messages:
    67
    Gender:
    Female
    First Name:
    Rachael
    Florida
    Vehicle:
    2024 4Runner TRD Off-Road Premium
    This is an awesome project! Just a matter of learning how to weld or find someone that can at least do that part of it for me.
     
  20. Jan 10, 2021 at 7:33 PM
    #1120
    Jarman02

    Jarman02 Well-Known Member

    Joined:
    Sep 17, 2018
    Member:
    #266568
    Messages:
    147
    Gender:
    Male
    Oregon
    Vehicle:
    2002 Tacoma Xtra Cab
    Learn yourself, it isn’t as difficult as you think. I welded mine with a $175 harbor freight welder
     

Products Discussed in

To Top