1. Welcome to Tacoma World!

    You are currently viewing as a guest! To get full-access, you need to register for a FREE account.

    As a registered member, you’ll be able to:
    • Participate in all Tacoma discussion topics
    • Communicate privately with other Tacoma owners from around the world
    • Post your own photos in our Members Gallery
    • Access all special features of the site

D2's East Coast Build & BS

Discussion in '2nd Gen. Builds (2005-2015)' started by D2., Feb 25, 2021.

  1. Feb 25, 2021 at 7:42 AM
    #1
    D2.

    D2. [OP] Well-Known Member

    Joined:
    Dec 1, 2016
    Member:
    #203759
    Messages:
    1,578
    Gender:
    Male
    First Name:
    Dan
    Nova Scotia, Canada
    Vehicle:
    2009 Tacoma - access cab 4x4 2TR-FE
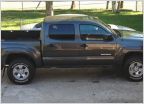
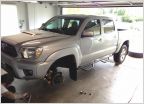
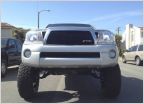
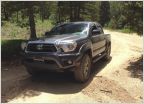
    Cruise Control install. Intermittent wipers Hood lights Bed Lights Sliders 3" lift 886's on Billy 5100's Icon AAL 285/75 R16 Falken Wildpeak AT3W's
    2009 Magnetic Grey Metallic
    AC LB
    2TR-FE with 5sp ( original motor / tranny )
    Base Model ( A/C & power windows, FTW!)


    Bought used in November, 2016.
    Now has 422,000 KM's.

    Big thanks to the NSBS Thread Crew, without you I'd be some dude in a boring vehicle

    Interior Mods:
    - Cruise Control
    - Cobra WX75 CB Radio
    - LED interior lighting
    - Intermittent wipers
    - Tekonsha P3 Brake Controller ( not Pre-wired )
    - Kenwood Aftermarket Radio ( with factory backup camera )

    Future Interior Mods:
    - New Front Drivers Seat ( or some sort of seat cover )
    - Ham Radio
    - Some sort of temp gauge

    Exterior Mods:
    - WhaleFab Sliders ( That's me! Built myself )
    - Plate Bumper with winch
    - under hood lights
    - Aux Relay / Fuse Panel
    - bed lights
    - Hitch

    Future Exterior Mods:
    - Plate Front Bumper ( bought CAD Files, had Cut, need to assemble ) Done! Post coming soon!
    - SPC UCA's
    - Some sort of Rear Bumper, either HC, or tube, or combo, IDK.
    - rock lights ( maybe )
    - Hood Struts
    - Snorkel

    Wheels & Tires:

    - 1st Gen Trundra Rims
    - 275/65 R16 Falken Wildpeak AT3W


    Suspension Current:
    - Bilstein 5100's all around
    - OME 886's
    - Icon 3 Leaf AAL
    - Freedom Offroad UCA's (Would not recommend)

    Future Suspension / Driveline Mods:
    - Extended rear brake lines
    - upgraded rear bump stops
    - upgraded front bump stops
    - Dakar Leaf pack
    - OBA
    - 4.88 Regrear
    - Font / Rear Lockers

    Break / Fix:
    -
    Cat's replaced @ 425,xxx km's
    - OCV replacement (P0011, P0016, P0300, 301,302,303,304 )
    - Engine Rebuild @

    Most recent photos
    DcYpZ_pPGA3gsK40ppHnqUwKjly7mk5OSAJtQJi7_5fe37ef7364b7cc8d3712c47a355614491694e38.jpg
     
    Last edited: Feb 12, 2025
    Poke_squid likes this.
  2. Feb 25, 2021 at 7:42 AM
    #2
    D2.

    D2. [OP] Well-Known Member

    Joined:
    Dec 1, 2016
    Member:
    #203759
    Messages:
    1,578
    Gender:
    Male
    First Name:
    Dan
    Nova Scotia, Canada
    Vehicle:
    2009 Tacoma - access cab 4x4 2TR-FE
    Cruise Control install. Intermittent wipers Hood lights Bed Lights Sliders 3" lift 886's on Billy 5100's Icon AAL 285/75 R16 Falken Wildpeak AT3W's
    Last edited: Mar 2, 2021
  3. Mar 1, 2021 at 11:08 AM
    #3
    D2.

    D2. [OP] Well-Known Member

    Joined:
    Dec 1, 2016
    Member:
    #203759
    Messages:
    1,578
    Gender:
    Male
    First Name:
    Dan
    Nova Scotia, Canada
    Vehicle:
    2009 Tacoma - access cab 4x4 2TR-FE
    Cruise Control install. Intermittent wipers Hood lights Bed Lights Sliders 3" lift 886's on Billy 5100's Icon AAL 285/75 R16 Falken Wildpeak AT3W's
    my Semi RTT build.
    I say semi since it does not collapse, it just "is" :D

    wanting to not waste time finding a flat spot to setup a tent, and deal with rain/snow I went out seeking a solution that was't as much $$ as a RTT.
    I also wanted it to be temporary since I like the look of my truck without stuff in the back. This lead me to a man by the name of Paul Elkins who used fluted plastic ( aka cloroplast, aka voting sign material ) to make a homeless shelter on the cheap.

    https://elkinsdiy.com/product/homeless-emergency-shelter/

    I liked what I saw, bought the plans and went to work.
    Plans were good, everything went together well.

    Dimensions:
    40" wide
    40" high
    92" long

    ACtC-3fVtELbRzNbP-3ymYA6vrNvwXKkvCEWFikp_aa149d9298cce12185c82b310092c6a6cc4f92cc.jpg

    ACtC-3cu-CIKX-2No_01HWX_5GnRu-IFWNYVk_Kk_d0ac9515b3a5f24b2ac452753afdbdb7344e8308.jpg

    ACtC-3dwXH5o7k6zTPn8aEMfCtYmqiodRSMR9rCy_18ab264e3f78e80126bdf7ed22f1ff1742d2bf9b.jpg

    on the inside I used those foam puzzle mats to provide a little cushion and a little insulation.

    this is really light. the whole thing weighs less then 5lbs, as is. Sadly it was too flimsy without a base. next I built a frame for it. Used 3/4" plywood with a ladder style frame made out of 2x4's This allowed me to move it anyware and still have a nice firm base. It also made it so the wind did not carry it away.

    with the shelter built and installed on a frame / platform I went about finding a way to mount it into the truck.

    I used 2x8's in the side pockets of the bed for the mounting. the 2x8's are stood up on the short edge, and I cut out "U's" to really lock in the 2x4 frame. This works really well. Keeps the shelter centered and up off the bottom of the bed allowing me to put boxes underneath. to secure it from falling out, I installed some tie down points to the 2x4 frame and use ratchet straps to snug it down to the D rings in the bed.

    ACtC-3c37XCGwP5HNo2lgtiqijKLNwYvu04Nypr8_fc45197c074b1720f53ae9096a2ead6d78925cb9.jpg

    A wooden ladder was made using the scrap wood left over from the frame.
    ACtC-3daByEgRcmHKAo7_vTxKT9BsqT2UXas0l3L_dee721742e1813b3cb545adea2459b824f56808f.jpg

    Tailgate was the next challenge to tackle. It could not close due to the shelter hanging out, so I used some chain and some screw type chain links to take up the slack. Works really well, and is cheap / versatile.

    For the door I modified an existing door latch on thingiverse and 3d printed it. It works really well and has been on there for 9+ months in the summer heat, and freezing snowy weather.

    I currently can sleep myself and my two boys in this. The 3yr old sleeps width wise up at the front, while my 6yr old and I sleep parallel to each other. yes its a snug fit, but it works, and cost me less then $150 to make :)

    I did end up putting an air dam on the front to deflect the wind which works really well. I've had people travel beside me on the highway who say it does not move or shake.

    Here are some picture of us camping in the shelter.
    Camping: Fall 2020
    ACtC-3deAxkjIvIO25z-MD1U5ZmqViFGO7b3IIkI_9904c903b5266fc6f07a3dfcfdaf99e6568e0513.jpg ACtC-3cPiXknFrRAlJqak4rjJtYJGQBjHc8ic-cV_e363e4d6b18c9c9ae1c425f72d2e28b14f249b86.jpg
    ACtC-3eJxXG9EBiAZwgVj_pATMtcRvDPGZephmru_2195834e6a117608945b8e0f7a76e8a47a31cbd8.jpg
    ACtC-3eQ69nB7xfjBPLeNiCWMBhgpDmrYFizBfpq_76028aace81406179061ded7ce82c70eaa5c06dc.jpg

    Camping outing - January 2021
    ACtC-3dQYeIc_038T5WwqUpEE6EYxVMhVlDSa0Q__2f6906592bbc817a0796e0facf99ab1147a0adea.jpg ACtC-3cCdzNA8dOjF2MmDdVoXfbpy0nRvkCRK895_910d67f7d18b4df4215388c1c1c67d49480f2381.jpg
     
  4. Mar 1, 2021 at 11:54 AM
    #4
    D2.

    D2. [OP] Well-Known Member

    Joined:
    Dec 1, 2016
    Member:
    #203759
    Messages:
    1,578
    Gender:
    Male
    First Name:
    Dan
    Nova Scotia, Canada
    Vehicle:
    2009 Tacoma - access cab 4x4 2TR-FE
    Cruise Control install. Intermittent wipers Hood lights Bed Lights Sliders 3" lift 886's on Billy 5100's Icon AAL 285/75 R16 Falken Wildpeak AT3W's
    Tube Bender FAIL:

    Body Armour is expensive in Canada, almost no one makes this stuff, which means you have to buy from the US, Pay Duties, Shipping and the exchange rate of the day. It adds up quick!

    I wanted sliders first. Found a great thread by a fewllow TW member who gives away the CAD files for the frame plates ( https://www.tacomaworld.com/threads/diy-bolt-on-frame-plates-for-sliders.302192/ )

    I did not want to go the HF pipe bender method, Or the Affordable bender. JD2 benders where out of the question at the time, so I went to ebay and bought some plans. The plans seemed to mimic the Affordable bender in some ways so I took a chance.

    Before i built the bender, I decided to learn CAD and make my own 1.75" tube die. I figured that by using a bunch of 1/8" plate I could cut it at various diameters and stack the plates to give me the profile I wanted.

    ACtC-3d58mp8qx51IfwG5YDX2tPbXQn63PPe9HXh_724692c83af902c80b1ef46837a6d2cf3ba29601.jpg

    Above you can see what I was going for, each plate would be a bit bigger then the last with the idea that the tube would be supported "enough" to not kink.
    ACtC-3dOFOoYrTqokYMTK4F6xHHFwocWMZotIy7M_a053805f94c08d9a3a94416050d4c0a3d006c677.jpg
    ACtC-3flYQgTE2OFxINO11Z3s0QShFVYjX71Ap5I_801ed2c341dbd6339932bacdab7f4267985b0f7d.jpg

    to join the plates, I decided on plug welding them to gether, so I went to work on staggering the holes between plates
    ACtC-3c9Bsd9O3x8bbfE9COiHB41DMzwPgd5uy1w_ebbbfb2db52abcbc523eda5ca312b9fcf493c982.jpg

    Got my stuff cut out at a local metal shop
    ACtC-3dRQNQbK6g2f7asI_Wy2ZxP-QghxhBQiVG4_d33f995a124aefceef313e7296bd89346255e69a.jpg

    and mocked it up on the table
    ACtC-3ecPD-HfEI2w0qEMRnWJsQRrvMRP6dFacyy_2c90d136b21016178d4df4fab30a3c032b912de6.jpg
    ACtC-3cD20mLFZ9MZd1gjKvLxwSEyls1uuYa3uqG_d53a401c74bcd4601296df30ff1e0b1d1aa4d9bc.jpg

    buzzed it in with the hot snot machine....

    ACtC-3e6-qnYpnnQpCS7Xnq8Zq5MOe2GL7EL8oXx_778961ec9ecff62595c0229da57eeca3fecb1c43.jpg

    added the pivot point

    ACtC-3ceimBjhvYjMpjAwVn-PhIIMpPm5_A8geB5_f9e4a53fb339979d46f9331e18e895ef2a397ded.jpg

    Made the rest of the bender frame according to the ebay plans. added a 20T bottle jack for good measure.

    ACtC-3fB4NdAKfRQvCquUIxSuC0t_KuKGE9a72K5_ab0bf443d0ef9a7097a4b4a0d11176768c6c374d.jpg
    ACtC-3c_EZvSd16fN1aZX3h9nNK7VWxes02I9BEu_99428be95a9d39b71bc1ee97414943fa93768a10.jpg
    ACtC-3eB8YFfVNpLiKoWmRSqdiyrzqFe87CF9xgJ_8b647ccac676ba7d8a5779930fed6f7045f2b122.jpg

    Added some more things to the die
    ACtC-3eHfy5sJYoG5xg-W7R2F0kZ3TtUhs375h52_81eb538a3318eac8290d912a32e6602fdb99eae7.jpg

    now for the first real world test. 1.75" .120" wall DOM.

    ACtC-3dbw-xSeei3_CcH6yfmP2dbZbPDUeA55ilI_256c279ef7e0f39da7c6e5d3e7c2c692af6977f2.jpg

    things seemed to be going well after the first few pumps, but then things slowed down. The jack was still working great, I did not see what was happening at first.
    ACtC-3dOBe4SyArrbVvk4Pt17WBdQXNXlE-CDHl5_b25e25f4f830b0d90c2423c3c9e49679300a78f2.jpg

    The bar I used to secure the top part of the jack started to bend... ( it was 1/2 round stock I beleive )
    ACtC-3erQeTPWYNjFP52r-qGxeHRV8Rey5RAEtOm_e8314b755a5ab1036ce1633da44f5622872f7641.jpg

    then I realized that the bottom bar bent too
    ACtC-3d_UzLlQ4wvXjAXPxDXR_tNDn4Yu1JYq-r2_35bcf0aeff6eea04d7db3eb33b2ee089fa7e9121.jpg
    ACtC-3fkOlcUdJ8ulB_pu5aXLifr99ASnmTxf1TM_6bf3201295dc1576856d018b65b9b412924c965b.jpg
    ACtC-3ceNfosVqaMZEdRBGF7IRmfOtT3tLG4utEA_7a74882f0706b1e4f083b8fb2ab6f7c28fd8c1a4.jpg

    :censored:
    back to the drawing board... :pout:

    it did bend something, but also flattened out the curve, definitely not desirable.
    ACtC-3cuBnapjLGSvPA0zm1-_9-K0wSRDEE8lYFL_6c62bb4d640eebc831980c529f1e2509d2cbf89b.jpg


    it seemed like it could not pull the tube through the die and instead started to flatten out the bend. Still full of hope, I tried again with a few changes.

    I reduced the clearance between the bottom mount and the bar stock in hopes it would stop the bottom bar stock from bending
    ACtC-3dOCgb5xeKLrqGjhoIePZLsrYeZhjOHmVYI_2fc80259f75b73a947df470b0419231d40fe0a80.jpg
    ACtC-3eUGYqODFArf21c7_ZUmT5VGbgvYYsbaDMv_dcd6dd791cfb3a23370b58dce2bfa3ea165f75ae.jpg

    Re-enforced part of the frame to stop it from bending
    ACtC-3f1pIJkSFkA0vJbYP3J84txoJ06EthoJSrj_5cdd3401a83b475fb9c208a9be1149bb554c50b8.jpg
    ACtC-3dPxYMFm9zwVQIJ-yetcr9ZKX8rky95aQAO_5a5a6599799a512a6e81f7a446a92911d4a8b5ca.jpg

    and tightened up the clearance on the top bar stock as well
    ACtC-3dBz-BXEIUG2PffdSw0w4N7Gzrc96QvRfhf_e55b40f251e8faf566adb1ff14f15ed24e39c3b1.jpg

    Much more snug!
    ACtC-3da5qh9s6epZ_OCqxHa4gFz3LIManDKbqZ3_30da2e426e59369129c8b0eddce65b670efdcbab.jpg

    Bent up a 2nd piece of tube to 90*
    ACtC-3d3aBdoeNsZeFQ14PX-r7iz3V_pBMi_in3F_731559a16445fdbc021018e4e41878e55c9b537d.jpg

    But still flattened the bend! :frusty:

    since I could not see how to resolve this, and was worried about repeatability I gave up and bought a WoodWard Fab Tube Bender from summit racing, I should have just ponied up the $$ from the start and saved me about $200 from the beginning on wasted metal and supplies.

    ACtC-3c33lL-JLEVmHKhHzgfHz75vpbaB41jvVuy_9cbea9450f68f600f3a65adf787b759c6ab10f43.jpg

    ACtC-3ckzSgMelTSxWQWUxS7K4uYkOyQ6DeD8Gwf_8c4afeabca7d02aad9d63a618ee83dc9c0140d7e.jpg
    ACtC-3cw7nt0mP4HoKbXUjjbdOiRwfNbaG_j1_df_b8224404c17a685a4ad17d2eea813a65ccbc568f.jpg
     
    This site contains affiliate links for which the site may be compensated.
    #4
  5. Mar 2, 2021 at 8:41 AM
    #5
    D2.

    D2. [OP] Well-Known Member

    Joined:
    Dec 1, 2016
    Member:
    #203759
    Messages:
    1,578
    Gender:
    Male
    First Name:
    Dan
    Nova Scotia, Canada
    Vehicle:
    2009 Tacoma - access cab 4x4 2TR-FE
    Cruise Control install. Intermittent wipers Hood lights Bed Lights Sliders 3" lift 886's on Billy 5100's Icon AAL 285/75 R16 Falken Wildpeak AT3W's
    Kenwood Head Unit install, with Backup Camera

    purchased a run-of the mill head unit that had inputs for the backup camera. My truck being an 09 was pre wired for one, but I never had the fancy head unit, or rearview mirror that could use it.

    Soldered up a custom Plug'n play wiring harness for the headunit
    ACtC-3d2YyXDCNkQflK5GLrMhuXdmhkwPNMvSfKq_57503c5c030245458cd2cdb4625ded4b4420b5fa.jpg

    Installed a few rocker switches so I could play DVD's while driving for my kids, and to enable the rear camera anytime I wanted ( helpful when your going back and forth a lot, I find the constant flicking of the camera on/off annoying )

    ACtC-3etLaybpym8UG3hBZjcqhGrpVUwhx2JwQsZ_8b7eb44d1c03c6a16e2cf7191656957cc9c6927c.jpg

    With that taken care of, it was time to wire up the camera.
    here is what I figured out for my 09, YMMV
    ACtC-3cpN9huE3wQmdV_uvqYdp8lRtAm8A1Y1W-1_c38649bd81b56c38d05a1d792bd69e5d64d66351.jpg
    ACtC-3ckX-WwcESvD0Pc4UB9AbEx8z_9X-QTmNt-_4a61122ddbd2caa5384acfd7c9c73786df0635a5.jpg

    This was my Camera connector that was up under the dash on the drivers side.
    ACtC-3cwpfYXghkfNG2BQ6Q1oeww3yLouMaxaArJ_4a54d160eda699598a2f0cf995cd474db8a3561e.jpg

    The factory camera takes 6v to operate. To compensate for this, I bought a little kit from Ebay that would drop the voltage down to 6V. I then spliced into the factory wiring for the camera, and feed it 6V whenever the truck is on. Its been this way since 2017, and no issues yet.
    its the little circuit board that's hanging out in the pic below. I then took some Command strips and hooks and kinda mounted it to a flat part on the fuse box. ( no pic )
    ACtC-3cKOqdzOmh_X6YCF36hlT7mzLOWdq3QqT1k_ec3063edb416e031c4d1588ba8c521434b93d46d.jpg

    I also found the wiring harness that feeds the rear back up light, and spliced that line so I could feed it to my radio so it would know when I'm backing up.

    it all works quite well.
     
    This site contains affiliate links for which the site may be compensated.
    #5
  6. Mar 2, 2021 at 9:19 AM
    #6
    D2.

    D2. [OP] Well-Known Member

    Joined:
    Dec 1, 2016
    Member:
    #203759
    Messages:
    1,578
    Gender:
    Male
    First Name:
    Dan
    Nova Scotia, Canada
    Vehicle:
    2009 Tacoma - access cab 4x4 2TR-FE
    Cruise Control install. Intermittent wipers Hood lights Bed Lights Sliders 3" lift 886's on Billy 5100's Icon AAL 285/75 R16 Falken Wildpeak AT3W's
    SLIDERS!
    this one has been a bit of a journey, but the end result is good :thumbsup:

    Specs:
    1.75" DOM .120 wall
    2" square tube, 1/8" thick
    Frame plate is 3/16" thick

    If you haven't checked out my failed attempt at building a tube bender, have a good laugh at this

    It all started when I was looking for some sliders in Canada, but it was either priced way too high, or not what I wanted. I wanted some MobTown, or BAMF sliders, but the exchange rate and shipping held me back.

    So when I stumbled upon @1 Bored Clerk Frame plate CAD file I knew I had to try. I wanted to make a set for me, and a few friends.
    Check out his thread on the frame plates

    Metal supermarket did the plasma cutting and bending.
    ACtC-3fnKSHc0s9qBCQvQZjYIBgdaPUCUlUDrtbY_1a4be8336df05f81b6f45bd0d54e9c07c6c8a543.jpg
    ACtC-3fSk2LionJlLxJSvNIjESfDUkQW3vNKjKb3_dd5641ec8e70143ab0380e792a2dff78ae290b14.jpg

    I messed around a bit with a DIY tube bender that did not pan out AT ALL! I came to my senses and bought a WoodWard Fab Tube Bender with a 1.75" 120 Degree die.

    yes it was a bit pricy, but it was still cheaper then buying something stateside.
    ACtC-3c33lL-JLEVmHKhHzgfHz75vpbaB41jvVuy_933208daeff1485baf54dc2c363048818d48bc1f.jpg ACtC-3cc9QadNG5cXJ2OdHHY9fAVQa_FAPFEFO_L_509f172496a4c36b7f0311c180edced1d810869f.jpg

    ACtC-3ckzSgMelTSxWQWUxS7K4uYkOyQ6DeD8Gwf_907ae081f56cc75c0a23fba2b9b4f7efd5881b60.jpg

    I bolted it to the floor, grabbed a cheater bar and went to work. After talking to some friends on TW, it was clear I needed some way to find angles on the tube. I already had a digital angle finder, so I designed up a holder similar to the one's I seen on the internet and printed it off.

    ACtC-3eEurwx2T2ojSmzLiOM8fxVHAQg9Pra7bCH_1e19df4b617ee563276b0e528eed3ed72b759c23.jpg

    with this I can keep my "plane of bend" where I want it.

    Volia! First attempt at some sliders!

    ACtC-3cw7nt0mP4HoKbXUjjbdOiRwfNbaG_j1_df_3f9230349cfc9f3e6193eb0600d1ed11f5414b10.jpg

    These were too short, so I ended up re-making them.... 2x :frusty:. Live and learn...
    all is not lots I can use the tube for other things, and some of it is even pre bent! :rofl:

    Next I wanted a way to make a perfect line all the way around the tube, I was still pretty new, and did not really know how to make my marks for the tube bender and for cutting the tube. So I made a tube clamp thingy, it clamps on the tube via friction, and allows you to mark a perfect line all around the tube.

    ACtC-3cz8Uh3tibtMM78gzu5y2NbHT1ldorurlQA_e87ec18e5166023672837aafd434a45e026a0a2f.jpg

    Getting closer to finishing!
    ACtC-3eDwxPwFIyBXezxMQU6bDuVjc5_iZT89YcZ_5026aa1957b55a86a03fcbc80dc4d0fe40573e82.jpg

    adding the bracing to the tube
    ACtC-3fM9tziWbEWfF277PUxgTnFT2YU7usjDQMg_7be2ea23f3abe29480d98981fe4663d90b3a679b.jpg


    I call these "standoff's" They are angled at 20 Degrees
    ACtC-3cQq1yGuLkeRM8A4OoIzQfjWnQbOTqtSLKo_56806d2963bb64d6ff9c40507473ad9e0cdc3258.jpg

    Better pic of the standoff's. Also I circled all the holes that lined up with holes in the frame so I would know how many bolts to buy
    ACtC-3dyyjWEv3oh7MgPeB3tlC8k2L_CIErtPUM5_0f4748e877ba1baa0ee613b00bc79215e0d031ab.jpg

    nothing like a little mock up in the snow

    ACtC-3cE0PufEBHCH1ARlK5Kf7UHVaeAzscDbk92_0b9a76c5551297aae5b51bc54faefd28077eaf03.jpg

    All tacked in!
    ACtC-3fHa4R0Pgpo8sdB4KFjgWQNzJDy2HCBAZrq_2bae2e129ee6e429845657c02fb807545f66e618.jpg

    Test fit on a @Canoehead 's truck
    ACtC-3epSb982KDEzxiaCrXHPaHm-mDqYoqnh1bm_cb2ca71c11056c19b7725d296b2764b04d423f5a.jpg


    :welder:
    ACtC-3drjgz81apTvpqzyPuZ65jhJc6vGTPbPDsF_fbb23ecbe969f1e436be66ad9fe17d4447d02444.jpg

    I decided to go fancy and add my own distinct touch, I added these rear braces to help with deflection

    ACtC-3d_YijBIM-HjJOGRvLXAuYli2-xtS1xCyIw_3a71322f73827e33048f19f21ff694f4abb3d40c.jpg


    Applied some Rustoleum beadliner
    ACtC-3dduu0CZiPX5j3p9i0T_MUp8u8UDw-tP3Sd_ca7f9ebd3daa1500be5406d928b25e078098688b.jpg

    I skipped documenting this step, but really its pretty simple. I took some 1/8" 2" flat stock and cut it into 2" squares, then I drilled holes to accept some 1/2" Grade 8 Hardware. the only fancy thing I did was what you can see in the picture below to the left. those are two square washers with nuts welded to them, and then welded to some steel flat bar. those are to get in the boxed section of the frame since it would be nearly impossible for me to get my hand in there. Everything was painted back and liberal amounts of antiseize was applied.

    ACtC-3caefupDQ6Y0P0TkoSrWZfLcYSxVHDp03B__8edc411d7d6c37ca3a6c06acd9f63a5b3f4e18b4.jpg

    Milk Crates were great for holding up the sider on this one man show.
    Lots of fluid flim applied to the parts that would contact the frame.
    ACtC-3d2ReXhMwzIPxrh0_1-bbPApzqjMQ2p8Yk0_601746c8452898ebb7517ed48c23c52135315357.jpg

    and DONE!! ( or so I thought...)
    ACtC-3eIkYsT85RlXKp-bPpz9fCdwJ8VI0bteWir_3836df98c7c42eff8ad5be83b7caa78876789c89.jpg
    ACtC-3ea3gy9sx2NItPgIka8XKYXexnadKB2Xoi4_80b23e89258823be222b7c081ff5b038631da192.jpg

    These were great, looked great, but they were too close to the pinch weld below the doors. I feared that I would mash the pinch weld if I ever had any hard contact. not wanting to take them off right away I ran them this way for 6 months and took them off in the fall again.

    I figured I needed to extend the standoff's by 2". Lots of cutting and grinding later...
    ACtC-3f_Ms0o1mibppkREYRsW5pcr6QTOprJKC_w_77514767a12bcd461e28275f4c3c8b084f43213b.jpg

    I extended the stand off's 2" and tacked in two of them jus to be sure ( I did not want to do this a 3rd time )

    ACtC-3cx9Ks93hSGQxFKBUL_dApwVxvvZfdcWsWQ_2730e654d8ef935adc06b4fb6bf2a93ced10ee59.jpg

    Annnnd its good! I cut up the rest of the steel, welded it in and proceeded to prep and paint.
    I used POR15, and followed the instructions. I think they came out well ( a bit shiny for my taste, but lets hope it fades in the sun )
    ACtC-3ewQtBzRqQoSPLSq0HBWODPV_CPGzRQLvpZ_98a828c3890c9455fcf2258a26f8c1f77a1d1a9b.jpg

    Here we are today, looking all sexy with my new 3" lift, 33's and my own sliders!
    ACtC-3cpgMzZgzBiJN2_knqrIJQV6vCMpuvExCvD_6747bdf47360b2935aa6d8d57296470327aadb43.jpg

    ACtC-3ffEr7MZwUGEtyJgPrKm_nYngLUb-ia0kvO_1e791fcbc09dc84bfc82aefada4514dd8249b2df.jpg
     
    Last edited: Mar 3, 2021
  7. Mar 2, 2021 at 10:55 AM
    #7
    fatfurious2

    fatfurious2 IG: great_white_taco

    Joined:
    Jun 28, 2014
    Member:
    #132884
    Messages:
    49,632
    Gender:
    Male
    First Name:
    David
    Ashburn, VA
    Vehicle:
    2010 TRD OR Access Cab
    great looking sliders that YOU built!

    Any chance youd want to duplicate the wiring harness for the backup camera, and then ship it to the US? :pray: I suck at wiring diagrams and wiring
     
  8. Mar 3, 2021 at 5:59 AM
    #8
    D2.

    D2. [OP] Well-Known Member

    Joined:
    Dec 1, 2016
    Member:
    #203759
    Messages:
    1,578
    Gender:
    Male
    First Name:
    Dan
    Nova Scotia, Canada
    Vehicle:
    2009 Tacoma - access cab 4x4 2TR-FE
    Cruise Control install. Intermittent wipers Hood lights Bed Lights Sliders 3" lift 886's on Billy 5100's Icon AAL 285/75 R16 Falken Wildpeak AT3W's
    Ha!
    I certainly would, but usually the radios come with one half of the harness, the side that plugs into the radio, and its up to you to figure out how to connect it to the factory stuff. I went on Amazon and bought the toyota harness that plugs into the factory stuff, and then matched up the wires from the Toyota side to the Kenwood side ( in my case )

    Something tells me that by the time you shipped me your radio harness, and I shipped it back it would have cost way more $$ then its worth.

    I can try to help you out if you like. I soldered mine, but crimping is also an option. that have nice crimp connectors these days that have heat shrink built right into them. That would make a real nice connection!

    do you have a particular radio in mind?
     
    fatfurious2[QUOTED] likes this.
  9. Mar 3, 2021 at 7:11 AM
    #9
    fatfurious2

    fatfurious2 IG: great_white_taco

    Joined:
    Jun 28, 2014
    Member:
    #132884
    Messages:
    49,632
    Gender:
    Male
    First Name:
    David
    Ashburn, VA
    Vehicle:
    2010 TRD OR Access Cab
    Not yet. I know I want front and rear camera input. I have the OEM backup camera in the mirror, but i want to move it to the radio, so I might need to get a different one
     
  10. Mar 3, 2021 at 7:22 AM
    #10
    D2.

    D2. [OP] Well-Known Member

    Joined:
    Dec 1, 2016
    Member:
    #203759
    Messages:
    1,578
    Gender:
    Male
    First Name:
    Dan
    Nova Scotia, Canada
    Vehicle:
    2009 Tacoma - access cab 4x4 2TR-FE
    Cruise Control install. Intermittent wipers Hood lights Bed Lights Sliders 3" lift 886's on Billy 5100's Icon AAL 285/75 R16 Falken Wildpeak AT3W's
    I have the kenwood ddx393. Its "old" now but does have the front and rear camera.
    my only annoyance with it is the message that pops up everytime the camera is shown " check for objects before backing up" right at the top of the screen. I need to tap the screen to make it go away. that's one of the benefits with my rear camera anytime switch, I keep that "on" when I have to reposition a bunch of times to hook up my trailer.

    the front camera is one from ebay. it fits in the bottom "loop" of the toyota symbol on the front grill.

    once I go plate bumper, I'll have to move it some where else since I don't think it will be much good.
    Stay tuned, Plate bumper DIY build is currently in the garage! I'll be tacking it up soon :D
     
    This site contains affiliate links for which the site may be compensated.
    #10
    fatfurious2 likes this.

Products Discussed in

To Top