1. Welcome to Tacoma World!

    You are currently viewing as a guest! To get full-access, you need to register for a FREE account.

    As a registered member, you’ll be able to:
    • Participate in all Tacoma discussion topics
    • Communicate privately with other Tacoma owners from around the world
    • Post your own photos in our Members Gallery
    • Access all special features of the site

What Have You Done To Your 2nd Gen Tacoma Today?

Discussion in '2nd Gen. Tacomas (2005-2015)' started by kwalton, Feb 2, 2008.

  1. Apr 17, 2021 at 11:48 AM
    Travlr

    Travlr Lost in the ozone again

    Joined:
    Jan 26, 2019
    Member:
    #280725
    Messages:
    1,706
    Middle'a Utah
    Vehicle:
    2012 Baja Series Access Cab
    Even though the truck is a 2012, it only has 68K miles on it. So I doubt that "wear factor" is an issue. But... I have two new keys and neither one will turn either the door lock or the ignition after being cut. So I guess they must be cut badly if they don't turn the cylinders? They sure look identical to the original.

    So again, just to be clear, the proper chip isn't required to turn the key?
     
  2. Apr 17, 2021 at 12:28 PM
    Naumoff42

    Naumoff42 Well-Known Member

    Joined:
    Jun 11, 2016
    Member:
    #189282
    Messages:
    699
    Gender:
    Male
    Ohio
    Vehicle:
    2015 TRD Offroad
    Is your steering wheel locked up?
     
  3. Apr 17, 2021 at 12:34 PM
    Travlr

    Travlr Lost in the ozone again

    Joined:
    Jan 26, 2019
    Member:
    #280725
    Messages:
    1,706
    Middle'a Utah
    Vehicle:
    2012 Baja Series Access Cab
    Since the key won't turn in the ignition with the new key, it is locked with the new key. Doesn't unlocking the steering wheel depend on the ignition cylinder being rotated?

    With the original key, everything works as expected.
     
  4. Apr 17, 2021 at 12:42 PM
    dpf88101

    dpf88101 Well-Known Member

    Joined:
    Sep 21, 2020
    Member:
    #341518
    Messages:
    359
    Gender:
    Male
    Fluid filmed (black) the whole frame

    tomorrow is spark plugs , PCV, maf, and throttle body.

    2011 DCSB w/46k
     
    jpereira2 and JimIowa like this.
  5. Apr 17, 2021 at 12:56 PM
    point45

    point45 Well-Known Member

    Joined:
    Dec 26, 2019
    Member:
    #314279
    Messages:
    729
    SoCal, OC
    Vehicle:
    05 DCSB TRD offroad
    Installed an rci high lift mount after years of just throwing it in the bed. Had to cut a few inches off the lift to fit it sideways.

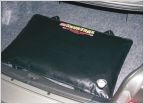
    And just in time for a mojave road run this week, finally installed a fuel pax I bought last year on black Friday. Still will bring a Jerry can of gas lashed to the bed though. Don't feel prepared in mojave with just 3 gallons.

    20210417_125017.jpg
    20210417_125013.jpg
     
  6. Apr 17, 2021 at 1:28 PM
    essjay

    essjay Part-Time Lurker

    Joined:
    Nov 29, 2018
    Member:
    #274276
    Messages:
    3,174
    Gender:
    Male
    First Name:
    Chris
    Concord, CA
    Vehicle:
    2011 Tacoma SR5 (V6/AC/4WD)
    Bent up the spare tire tabs and cut off the exhaust hanger in order to fit a 255/80R17 STT Maxx spare under the bed. It looks like it's clear of the diff and I think that I'm good to go, but haven't had a chance to test it yet.

    [​IMG]

    [​IMG]

    Meso Customs: "Remove Phillips head bolt from inside fuel door (TIP: Use a #2 bit on an impact while holding pressure on the door. Toyota has been known to install these tight)"

    Meso Stupid: *puts hand pressure on door, uses #2 bit on a hand screwdriver, promptly strips screw and has to remove with lockjaws*

    [​IMG]
     
    Last edited: Apr 17, 2021
  7. Apr 17, 2021 at 1:54 PM
    fasteddieyj

    fasteddieyj Well-Known Member

    Joined:
    Nov 25, 2018
    Member:
    #273740
    Messages:
    841
    Gender:
    Male
    First Name:
    Ed
    Hanover, PA
    Vehicle:
    2015 camping/mild wheeling rig. 2014 DD
    K&N cabin air filter. Finally got my winch line pretensioned and installed a Smittybilt winch line thimble.
    taco139.jpg
    Also got my platform installed. Mainly built it so I can strap these 2 bins down that I use to carry my noncold foods for camping.
    taco140.jpg
    Used the factory seat hinges so I can still access the factory storage cubby.
    taco141.jpg
     
    dpele, Gruber1922, T.Barn and 6 others like this.
  8. Apr 17, 2021 at 2:45 PM
    JAGCanada

    JAGCanada Well-Known Member

    Joined:
    Oct 25, 2011
    Member:
    #65834
    Messages:
    546
    Gender:
    Male
    Canada
    Vehicle:
    2010 TRD Sport V6 Auto Double Cab MGM
    9 years and 180K Km later, out with the old & in with the new. Galvanic corrosion where 1/4" aluminium spacer met shock hat. Applying lots of antiseize this time around. 16186957822401677281884381888186.jpg
     
    T.Barn, elricfate, theolee and 3 others like this.
  9. Apr 17, 2021 at 3:24 PM
    tacoma16

    tacoma16 Well-Known Member

    Joined:
    Mar 15, 2011
    Member:
    #53109
    Messages:
    11,094
    Gender:
    Male
    First Name:
    Peter
    Ontario
    Vehicle:
    Double cab SR5 4x4
    Limit straps added
    76836FC8-26CE-42D1-96DF-48C028D830C1.jpg
     
  10. Apr 17, 2021 at 4:40 PM
    r1de

    r1de Well-Known Member

    Joined:
    Sep 14, 2020
    Member:
    #340801
    Messages:
    81
    Gender:
    Male
    First Name:
    Eric - KG6WXC
    Ventura County, CA. USA.
    Vehicle:
    05 Access Cab 4.0L V6 4x4 MT
    2" lift | 5100's | RXT Leafs | Method 701's | Larger Tires
    Created a "proof of concept" for an idea I had.
    Basically, the idea is to be able to mount a 10" touchscreen Raspberry Pi 4 onto the dash of the truck.
    The Pi has a USB GPS device and is loaded with 60+GB of offline aerial and topographic maps.
    [​IMG]
    [​IMG]

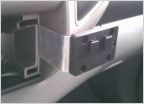
    Here is the mount, ignore the books and the rock, they are just holding it up there so I can see if the dang thing even fits!
    It's not perfect, but that is what happens with you try to just make something, by hand, with barely the proper tools.
    (and yeah, that is a really really good guidebook to have. :thumbsup: )
    [​IMG]

    the (hopefully) finished mounts now look like this:
    [​IMG]

    Anyways, thought some might like to see this.
    I'll update when I am done. :)
     
  11. Apr 17, 2021 at 5:56 PM
    theolee

    theolee www.nickleecreations.com

    Joined:
    Jul 15, 2014
    Member:
    #134025
    Messages:
    6,967
    Gender:
    Male
    First Name:
    Theo
    SAN DIEGO
    Vehicle:
    Black 09 Tacoma SR5 Pre-Runner AC 4.0
    That screw on the gas cap door was one hell of a stubborn bitch. I had to drill mine out because I later found out it was welded on for some crazy stupid reason. The torx screw on the right side of the tailgate was even worse.
    :facepalm:

    20210417_180235.jpg
    (Inside the gate)
    20200220_201221.jpg
     
    Last edited: Apr 17, 2021
    essjay[QUOTED] likes this.
  12. Apr 17, 2021 at 6:59 PM
    Taco4Jaco

    Taco4Jaco Well-Known Member

    Joined:
    Oct 19, 2020
    Member:
    #344309
    Messages:
    384
    Gender:
    Male
    First Name:
    Jacob
    Sacramento
    Vehicle:
    White 2005 TRD OR
    Boys, the Yota Coma is fixed. After a month without it :amen: 9CB0AA1D-57E2-4690-8F6A-430BAE1B3480.jpg755CE915-79F6-4537-8727-8A329028BB88.jpg59AE2664-90A9-4B6E-B69C-5E18F62B418A.jpg


  13. Apr 17, 2021 at 7:21 PM
    powder1134

    powder1134 Well-Known Member

    Joined:
    May 27, 2020
    Member:
    #329500
    Messages:
    1,429
    Gender:
    Male
    Vehicle:
    2014 Tacoma TRD Off Road

    Congrats man! Enjoy it!
     
  14. Apr 18, 2021 at 2:29 AM
    esgordon123

    esgordon123 Well-Known Member

    Joined:
    Nov 29, 2009
    Member:
    #26722
    Messages:
    162
    Gender:
    Male
    First Name:
    Eldridge
    Pensacola FL
    Vehicle:
    2013 Silver access cab
    Husky tool box Led lights Trd rims Ko2’s Ranch hand grill guard Jvc head unit Tailgate camera from tailgatecamera.com A/c knob swap Console and glove box organizers Window tint Led fogs Upgraded oem tail lights Led 3rd brake light
    I used one of those step up drill bits. Worked good for getting that nut off. But I was also replacing the entire assembly. Car wash broke it off. Stupid I know. But lesson learned.
     
  15. Apr 18, 2021 at 2:37 AM
    esgordon123

    esgordon123 Well-Known Member

    Joined:
    Nov 29, 2009
    Member:
    #26722
    Messages:
    162
    Gender:
    Male
    First Name:
    Eldridge
    Pensacola FL
    Vehicle:
    2013 Silver access cab
    Husky tool box Led lights Trd rims Ko2’s Ranch hand grill guard Jvc head unit Tailgate camera from tailgatecamera.com A/c knob swap Console and glove box organizers Window tint Led fogs Upgraded oem tail lights Led 3rd brake light
    All I did was take a pic of it today.

    661ED20F-5D87-4A49-BBE9-BCCE01B92C3F.jpg
     
  16. Apr 18, 2021 at 3:22 AM
    super_white

    super_white Well-Known Member

    Joined:
    Feb 6, 2012
    Member:
    #72230
    Messages:
    8,333
    Gender:
    Male
    First Name:
    Harry
    Connecticut
    Vehicle:
    2012 Tacoma 4X4
    Thanks for the tip. I have a Dremel and step drill bits, it's coming off one way or another.
    I'll be using a small amount of anti-seize when it goes back together.
     
  17. Apr 18, 2021 at 3:32 AM
    super_white

    super_white Well-Known Member

    Joined:
    Feb 6, 2012
    Member:
    #72230
    Messages:
    8,333
    Gender:
    Male
    First Name:
    Harry
    Connecticut
    Vehicle:
    2012 Tacoma 4X4
    A small tip that I just thought of. You can get some Allen set screws the same thread as the bolts. You can plug up the hole but not have the bolt head protruding above the sheet metal.

    set screw.jpg
     
  18. Apr 18, 2021 at 3:33 AM
    super_white

    super_white Well-Known Member

    Joined:
    Feb 6, 2012
    Member:
    #72230
    Messages:
    8,333
    Gender:
    Male
    First Name:
    Harry
    Connecticut
    Vehicle:
    2012 Tacoma 4X4
    That thing's going to be street legal?
     
  19. Apr 18, 2021 at 3:45 AM
    super_white

    super_white Well-Known Member

    Joined:
    Feb 6, 2012
    Member:
    #72230
    Messages:
    8,333
    Gender:
    Male
    First Name:
    Harry
    Connecticut
    Vehicle:
    2012 Tacoma 4X4
    I was happy that my screw came right out without the need for a impact driver. I was dreading trying to remove that screw.
     
    essjay[QUOTED] likes this.
  20. Apr 18, 2021 at 4:26 AM
    Key-Rei

    Key-Rei Well-Known Member

    Joined:
    Jun 20, 2017
    Member:
    #221942
    Messages:
    7,863
    First Name:
    Key
    Florida
    Vehicle:
    2010 TRD Off-Road 6Spd 4x4 209BSM
    Locker anytime Fog Lights anytime Full LED light conversion TRD cat back Rear cat delete Exaust Y reroute away from actuator Alloy Clutch master 2000 4Runner "Dog Leg" shift leaver Marlin shift seats and bushing Rear seat delete Rear diff breather extension Chrome grille swap Debadge Rear seat delete Honda blower motor beefy plug and wire mod Anytime 12v and USB with volt gauge in bed Blue Sea fuse box Hella AND 70's Caddy horns Low profile recessed hex drain plug swaps Alluminum battery strap 7pin relocated Backup cam on anytime Various other creature comfort and personal taste mods.
    Long post and formatting was being weird so hopefully this all comes through okay.

    Nice good mod/maint weekend, cleared up a few long bothering me issues finally In preparation for an upcoming trip.

    Not pictured re-routing my rear camera wire in the cab and reinstalling the trim that's been rattling in the back for weeks.

    Pulled the bed bolts so I could left the bed, change out my fuel filler neck and clean the purge canister and lines hopefully this fixes my CEL issues, P2401 P2402 P2419 P043E P043F that have been popping up on occasion since I got the truck.

    Screenshot_20210418-064304~2.jpg


    Putting a new gas cap on fixed it for a while before but they usually come back when it's cold so taking a closer look at the mouth of the filler neck it seemed a little scared from hitting it with gas pumps and possibly a hair out of round from over tightening the gas cap as well as I had some concern about the vent that is contained in the plastic collar just below the mouth of the filler neck could have been plugged up from off-roading so I just changed it, may still need a new charcoal canister and purge valve pump/filter.

    Cleaned the lines with compressed air and reinstalled with super tacky bushings grease to hopefully help seal. I sprayed a few quick air bursts into the openings of the pump first and second time was like spraying into a blind hole, third time sounded like I got some movement out of the valve so maybe it was just stuck up, uninstalled it and the charcoal canister and sprayed them out with compressed air, used a little electronic sensor safe cleaner on the purge valve assembly and followed that with deoxit shield. Hopefully they lights stay off but will update.

    PXL_20210415_101017118.jpg

    PXL_20210415_101013652.jpg

    PXL_20210415_101007781.jpg

    Side note "cowboy's" as they're refered to by my ironworker buddy are great for removing those pesky two tape child tamper resistant safe evap and fuel lines. Screw the $85 sst! :luvya:


    PXL_20210415_100946822.jpg

    PXL_20210415_100955771.jpg


    Decided to make some 1/2 bed lift spacers as I had the stock lying around and since I did rhe cab mount inverted install the bed was noticeably lower than the cab, it's all even now.

    PXL_20210415_111352713.jpg

    PXL_20210415_111410892.jpg

    PXL_20210415_114341788.jpg

    Before:Screenshot_20210415-071308~3.jpg

    After
    Screenshot_20210415-105039~3.jpg
    But, my bed bolts were rusty and one of the frame nuts stripped out when attempting to toque with a torque wrench. Man I hate that righty tighty to rightly loosy feeling.

    So I drilled and tapped the bed nuts from m12 to 1/2 13. I'm not worried about losing 1mm of the frame nuts, if they ever strip out again though (I doubt it) I'm just going to get longer half inch bolts and put nylocks on the bottom.

    PXL_20210415_130933927.jpg

    PXL_20210417_085605022.jpg


    Put my camper shell back on for the first time in about 2 years, forgot how much it Impacts MPG POSITIVELY, that's nice, will probably leave it on until I get gears.

    That said the 3rd brake light wasn't working so I made my own, foil tape in the void, drill some holes, some 194 bulb bases, 194 LED red bulbs, wrap the surrounding area in foil to protect the paint and took some plexi rough cut it, taped it in place and used a heat gun and gloves to hand shape it to where I could trim it up and put some 3M trim tape on it.

    PXL_20210417_080634731.jpg

    It works!

    PXL_20210417_083509309.jpg

    Will find out sooner or later if it leaks.

    Drilled out and installed a 2 pin pass through for the cap taillight also so I didn't have a beat up gehtto pig tail sticking out of my left taillight gap it has a nice little weather cap for when I'm running topless. Which I mean who doesn't prefer going topless?

    PXL_20210417_085551488.jpg

    Installed the Total Chaos bed stiffeners beforehand but didn't get any pictures phone was overheated and shut off. Excellent idea if you wheel with a cap.

    PXL_20210417_085556227.jpg

    My cap window lock fell apart the last time I used it on a trip took it apart and realized the snap ring had broken and the play just let the rest of it work itself loose, lost a spacer of some kind so I replaced the snap ring and made a spacer now the lock and handle works great.

    PXL_20210417_092518602.jpg

    PXL_20210417_092833884.jpg


    Also cleaned the back cab windows and the cap windows as well as vacuumed the cap, it's amazing how filthy it was from just sitting.

    Adjusted my clutch pedal height a bit ago and was causing my cruise control to drop out at every pebble on the street so I did one of the things I hate the most; contorting myself up underneath the dash to fight small spaces, wires, being upsidedown, at an angle, one handed, surrounded by sharp lightly rusted stamped steel to adjust the cruise switch. Managed to fix that without too much swearing and blood and will be considerably grateful for it on the coming long drive.

    This little bastard way up there at the top, unplugged it with a bent and sharpened screw driver then through trial and error learned the jam nut for the plunger switch is a 14mm with no room for throw.

    PXL_20210417_094426583.jpg

    I got Husky mats used from another member on here for a steal shortly after I bought the truck, they were for a 2012-15 but they fit the floor the same the difference being the attachment spots. I just threw them in and never had any issue but they would shift some especially when offroading, again never a problem but dirt would get under them, sometimes they would move forward enough that the gas pedal couldn't be fully depressed but that was the only issues.

    Inspiration struck and I made a little bracket using a strip of stainless some nut-certs and stainless sidewalk bolts which were a perfect fit in the mat anchor points, covered it in 3M trim tape to keep it from wearing the cab floor and rusting it and to help it adhere in place. I placed the mat where I wanted it, marked the carpet with sharpie and then pulled it up put a board underneath for a drill stop then drilled through the carpet with a 1/2 bit which made a hole just barley big enough for the reversed nut-certs to fit through, you have to oversize some as drilling through carpet doesn't give a very clean hole.

    PXL_20210417_104052215.jpg


    Had to cut these down to about 3/8 to not go through the back of the nut-certs when tightened all the way.
    PXL_20210417_104305080.jpg

    That's pretty and works flawlessly, there's a lot of clamping force on it too I can't imagine it's going to move at all or waller out the carpet.
    PXL_20210417_110334044~2.jpg

    Lastly I got my SDHQ battery terminals on just now which is all I had really set out to do in the first place.

    PXL_20210417_123946325.jpg

    So side note SDHQ sells an additional ground strap as you're supposed to cut off your OEM terminal. I bought the strap as I wasn't sure if I needed it or not to be on the save side as I hate making and crimping my own cables, (I need to just buy a large lug crimper and stop using the bench vice) but turns out instead of cutting off the terminal you can just cut up the factory terminal and make it work just fine, I had already done that when I replaced my abused loose OE terminals with cheap "24k" ones, the "gold" ones with the rusty hardware. They were pretty crap and with adding a winch I really did need terminals with a good solid convenient hook ups. I decided to still use the SDHQ ground wire and ran it back to my blue sea accessories mount plate and fender bolt and back to the neg battery terminal side lug.

    Maybe it's placebo effect but truck started stronger with the new terminals it seemed if nothing else.

    Didn't have time to mess with the "big 3/4" though.

    She's needs a bath so she can get dirty.

    PXL_20210417_170742724.jpg
     
    Last edited: Apr 18, 2021

Products Discussed in

To Top