

-
Welcome to Tacoma World!
You are currently viewing as a guest! To get full-access, you need to register for a FREE account.
As a registered member, you’ll be able to:- Participate in all Tacoma discussion topics
- Communicate privately with other Tacoma owners from around the world
- Post your own photos in our Members Gallery
- Access all special features of the site
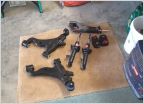 5-Lug Fat Bob's Lift Install
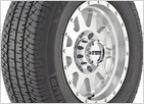 What Tires & COLOR rims should I get?
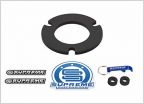 5 -lug Leveling strut
 Ultimate 5-Lug NO LT lift.. I think...
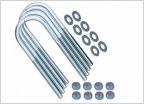 Aftermarket leaf springs U-bolts.
Height and Ride Adjustable Front Shocks
Discussion in '5 Lug' started by Rola2010, Apr 19, 2021.
Page 1 of 2
Page 1 of 2


